|
Let's begin.
1.
File: Open a new transparent image 995 x 625 pixels
2.
Material Properties: In the foreground open your gradient dégradé
''Deux_tons_vert_eclatant'' linear and configured like this
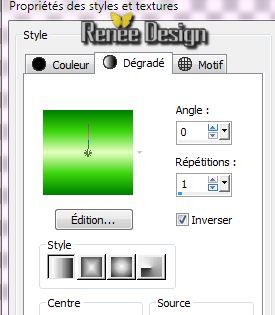
3.
Flood Fill Tool :Fill the layer with the gradient
4.
Layers - New raster Layer
5. Effects -Plugins Unlimited
Factory gallery B - Fluttering flag default
6.
Layers - New raster Layer
7.
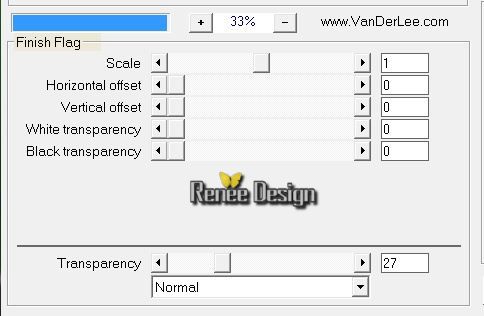
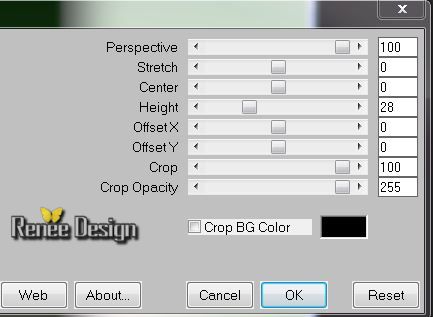
Effects -Plugins - Vanderlee -Unplugged X /Finish
Flag
8.
With your magic wand select the (Mode ad shift -Tolerance 15) dark rectangles
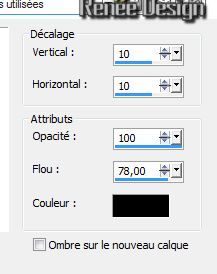
9.
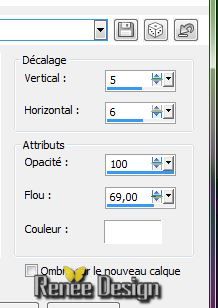
Effects - 3D Effects - Drop Shadow / black
10.Selections - Deselect all
11.
Effects - Plugins - Mura's Meister / Perpsective
Tilling
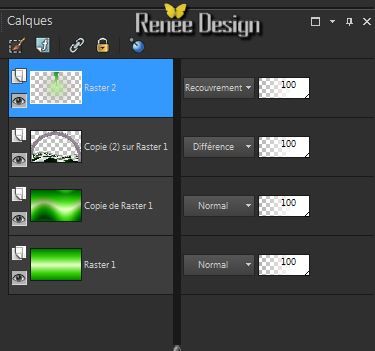
12.
Layer-Palette: Change the Blend Mode to "Difference"
13.
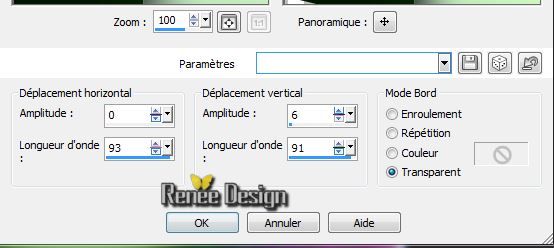
Effects- Distortion Effects- Wave
14.
Effects - Plugins - EyeCandy 5 Impact - Extrude
-Preset- ''1er_avril_extrude''
15.
Selections- Select All - Selection Float
16.
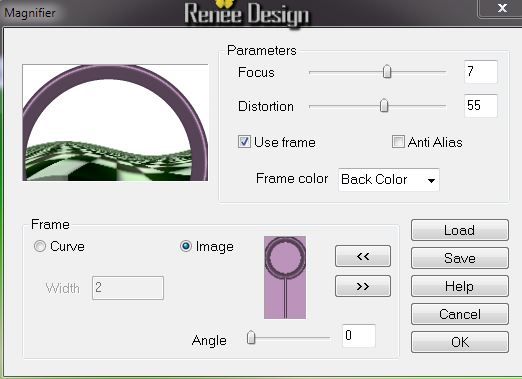
Effects -Plugins- Vizros /Magnifier
17.Selections - Deselect all
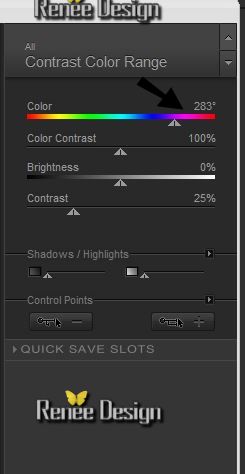
18.
Effects- Plugins - Transparency / Eliminate
White
Leave this layer to Difference mode
19.
Effects - 3D Effects - Drop Shadow / white
20.Layers-New raster layer
21.
Selections - load/save selection- load selection from disk and select my file ''1avril_1'' / Flood Fill Tool :Fill the selection with the gradient
22.Selections - Deselect all
23.
Effects - Plugins -VM Toolbox - Zoom blur
170/129
24.
Effects - Edge Effects-Enhance More
25. Layer-Palette: Change the Blend Mode to "Overlay"
Your work look like this now
26.
Activate the tube
''Kryssurealisme-20-03-2014-137.pspimage''
-activate raster 3 of the tube /Edit/copy Edit - Paste as new layer on your working area and place
24.
Effects - 3D Effects - Drop Shadow / 30/ -70 / 50 /30 black
28.
Activate the tube
''Kryssurealisme-20-03-2014-137.pspimage'' activate raster 1 of the tube /Edit/copy Edit - Paste as new layer on your working area
and place
29.
Activate the tube
"
poisson_verre_eau_tuberparMimi4528.pspimage''
-activate raster 'tube poisson verre '' / Image -Mirror-
Edit/copy Edit - Paste as new layer on your working area and place to the left
30.
Effects - 3D Effects - Drop Shadow /39/ - 29/ 25/22 black
31.
Activate the tube
"
poisson_verre_eau_tuberparMimi4528.pspimage''
-
activate raster ''bulles'' -
Edit/copy Edit - Paste as new layer on your working area and move
32.
Activate the tube''
tuyauSaempunk.pspimage''/ Edit/copy Edit - Paste as new layer and place to the right side
33.
Layer-Palette: Change the Blend Mode to "Luminance"
34.
Activate the tube '' PA_crochet''/ Edit/copy Edit - Paste as new layer on your working area and place
35.
Activate the tube ''poisson_avril .png'' Edit/copy Edit - Paste as new layer on your working area and place
36.
Activate the tube ''PA_spot'' -Edit/copy Edit - Paste as new layer on your working area and place
Make sure everything is in place
37.
Layers - Merge - Merge all layers (flatten)
38.
Effects -Plugins - Nick Color Effex Pro 3
39.
Image - Add Borders - Symmetric checked: 2 pixels black
40. Image - Add Borders - Symmetric checked: 20 pixels color #5cd109
41.
Image - Add Borders - Symmetric checked: 2 pixels black
42.
Image - Add Borders - Symmetric checked: 35 pixels white
43.
Image - Add Borders - Symmetric checked: 2 pixels black
44.
With your magic wand select the border of 20 pixels
45.
Effects - 3D Effects - Drop Shadow / 10/10/50/25
black
46.
Repeat: Effects - 3D Effects - Drop Shadow / -10/-10
-
Selections-Select none
47.
Aktivate the tube Text: Edit/copy Edit - Paste as new layer on your working area. Or write your own text
48.
Image Resize 950 Pixels Width
I hope you enjoyed this lesson
Renée
This lesson was written by Renée 20/03/2014
Created
the 1 april 2014
*
Any resemblance with an existing lesson is merely a coincidence
*
Don't forget to thank the people who work for us and with us. I named the tubeurs - Testers and the translators.
Thank you Renée | 
 Translations