|
Let's start the lesson.
1. Open the Background image: ''
fond_1Septembre_2014''/ Promote Background to Layer= raster 1
2. Selections- Select All- Selections- Modify-Contract 15 pixels
3. Selections- Promote selections to Layer
4. Effects - 3D Effects - Drop shadow -Default settings
-Repeat- 3D Effects - Drop shadow
negative -10/-10
Selections-Deselect All
5. Effects- Plugins -Unlimited 2.0-
&<BKg Designer sf10 I> -Cuncher set at 50/50
6.
Layers- Duplicate
7.
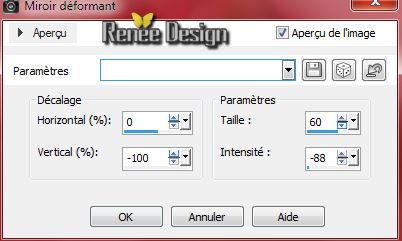
Effects- Distortion Effects- Warp use settings below
8.
Effects- Plugins -&<BKg Kaleidoscope >/
Kaleidoscope 3 setting 255 and 76
9.
Layer Palette -double click on this Layer and set the Blend Mode to " Saturation-Legacy "
10.
Effects- Plugins -&<BKg Kaleidoscope >/Swirl Away
set at 255
10.
Effects- Edge Effects- Enhance
11.
Activate the tube '' sol_renee_rentree2014''/ Edit - Copy -Edit - Paste as new layer on your working area and move
12.
Layers-Arrange- Move Down.
With your move tool:move to the bottom of your work
-
Layer Palette -double click on this Layer and set the Blend Mode to "Difference "
13.
Activate the bottom of the layer-Palette (Raster 1)
14.
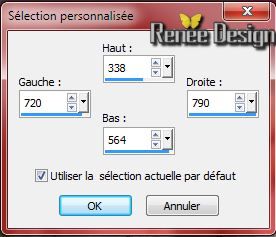
Selection Tool ( S ) Custom selection use settings below
15.
Selections- Promote selections to Layer
Selections- Deselect All
16.
Layers- Arrange-Bring to Top
17.
Effects- Plugins - Eye Candy 5 -Impact- Extrude-in the settings tab, choose my preset click on the Preset
''rentree2014''
18.
Layers- Duplicate- Image Resize 80% (Resize all the layers not checked)
19.
Layers- Duplicate- Image Resize 80% (Resize all the layers not checked)
-
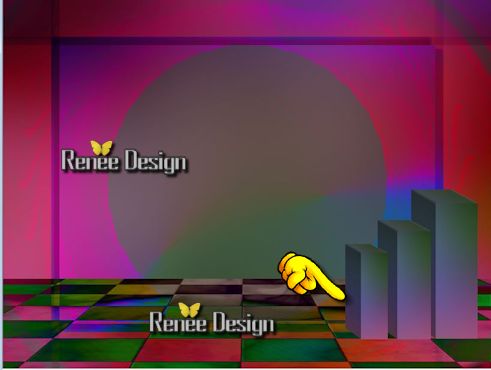
Place as shown in the example
20.
Activate the tube '' School_Moonstar''/ Edit - Copy -Edit - Paste as new layer on your working area and move
21.
Layers- Arrange- Move Down
22.
Activate the top of the layer-Palette
23.
Activate the tube '' BOOKS-1.pspimage'' / Edit - Copy -Edit - Paste as new layer on your working area and move
24.
Activate the tube '' by_stirner_escolinha.pspimage''/Image
Resize 60%
-
Edit - Copy -Edit - Paste as new layer on your working area and move
25.
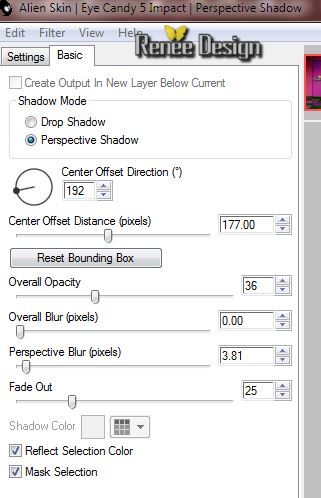
Effects- Plugins - EyeCandy 5 Impact -
Perspective shadow use settings below
26.
Activate the tube " GD-SdB-Pennant2.pspimage''
Edit - Copy -Edit - Paste as new layer on your working area and move to the left
27.
Effects- Plugins - L and K's - Elvida-set at 208
28.
Layers- Duplicate/Image Resize 60%
(Resize all the layers not checked)
29.
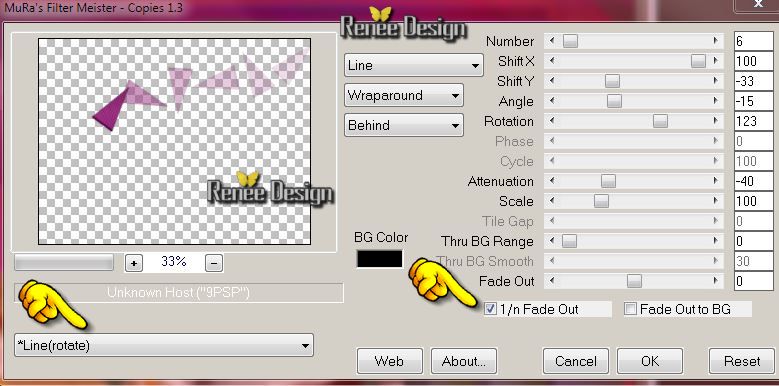
Effects- Plugins - Mura's Meister - Copies use settings below
30.
Revenir sur le calque du dessous (Raster 6)
-
- Layer Palette -double click on this Layer and set the Blend Mode to "Screen" .Reduce the opacity of this layer to:30
31.Activer le tube '' rentree2014_calcul"/ Edit - Copy -Edit - Paste as new layer on your working area and move to the left
32.
Layers- Merge- Merge Visible
33.Image - Add borders-Symmetric checked: 1 pixels color black
34.Image - Add borders-Symmetric checked: 50 pixels color white
35.
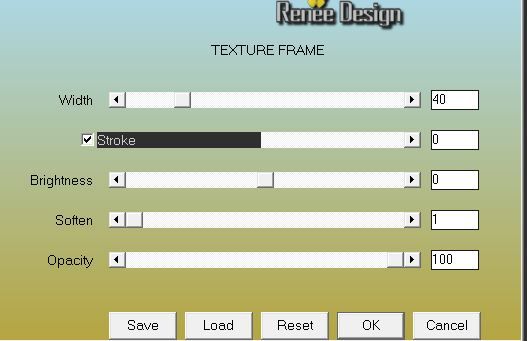
Effects- Plugins - AAA Frame -Texture
Frame
36.
With your magic wand, selected the little narrow edge
37.
Effects- Plugins -EyeCandy 5 - Imapct - Extrude
-in the settings tab, choose my preset click on the Preset "rentree2014_extrude''
Selections-Deselect All
38.
Activate the tube'' rentree2014._deco'' -Edit - Copy -Edit - Paste as new layer on your working area
-Move to the top of your work
39.
Effects - 3D Effects - Drop shadow with these settings: 0/0/100/5 Black
40.
Open the tube text. Edit-Copy-Edit Paste as a new layer and move ( If you want to write a text- font is included into the zip file)
41.
Layers- Merge-Merge All.
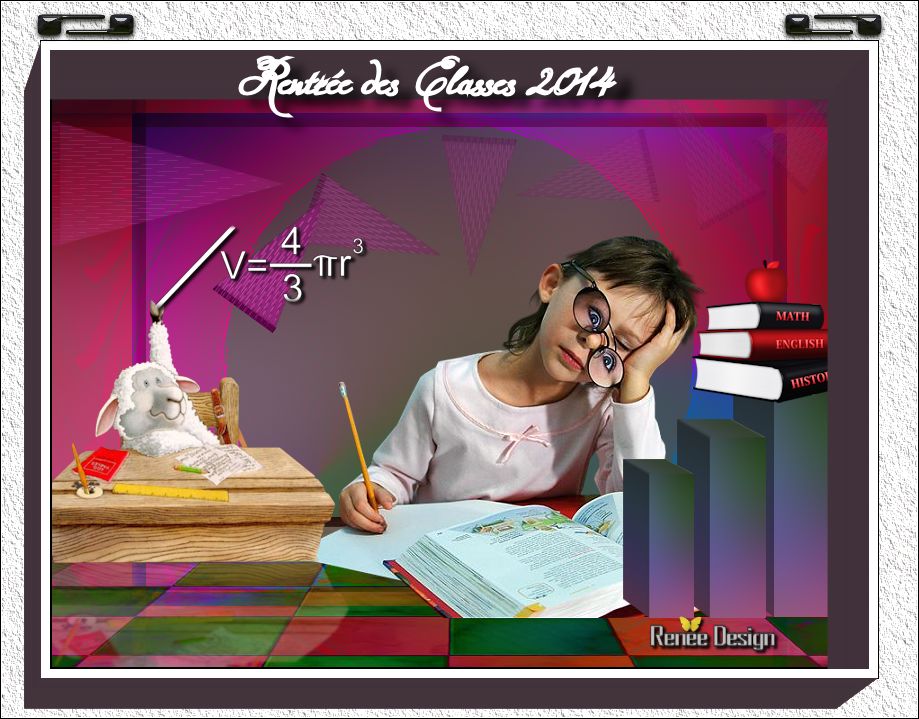
Save as JPG
I hope you enjoyed this lesson
Renée
This lesson was written by Renée 20/08/2014
Created the
01/09/2014
*
Any resemblance with an existing lesson is merely a coincidence
* Don't forget to thank the people who work for us and with us. I named the tubeurs - Testers and the translators.
Thanks Renée.
|
 Transalations


 All rights reserved