|
New
Translation here
*
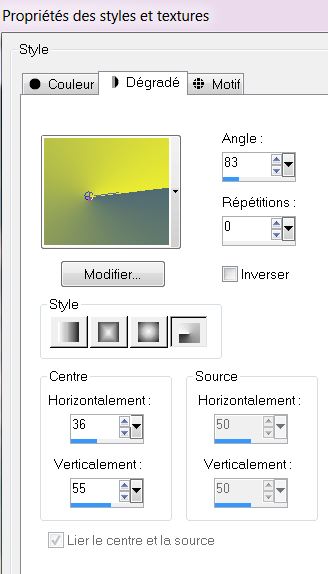
On commence 1. Open the image fond'' steampunk-2032'' promote to background layer 2.Color palette : Foreground color: #4f6a74 Background color #ebec32 3. In Background - set a radial gradient like this with these colors
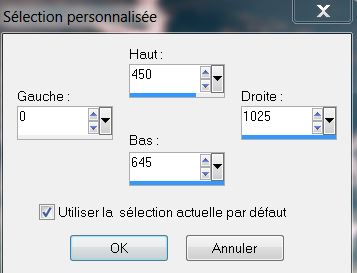
4. Layers - new raster layer 5. Selections-Custom selection with these settings
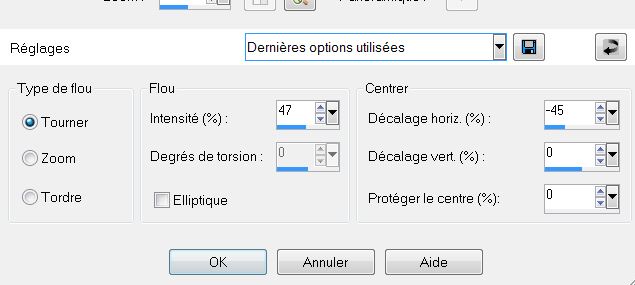
6. Fill the selection with the gradient 7.Selections - select none 8.Adjust-Blur-Radial Blur
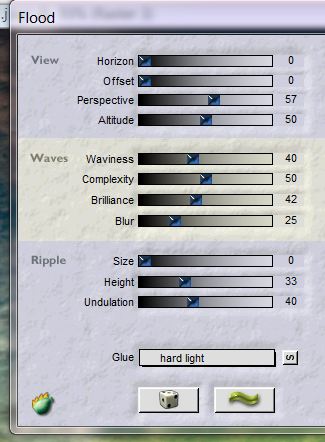
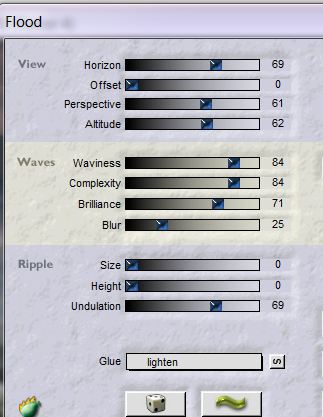
9. Layers - new raster layer 10. Selections - Load Selection ''renee_2031_1'' Fill the layer with the gradient 11. Adjust - Blur - Gaussian Blur 10 12. Selections - Select none 13. Effects – Plugins - Flaming Pear - Flood -attention: looking at GLUE=hard light
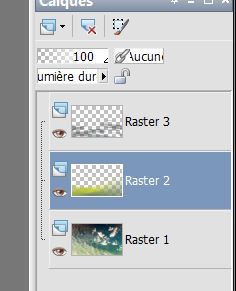
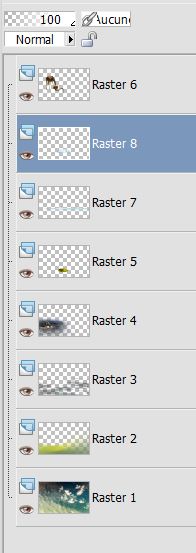
14. Put (for me raster 2) Blend mode to "Hard Light" 15. This is your layer palette"
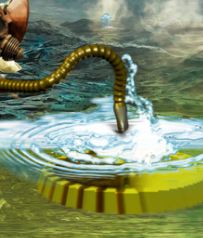
16.Activate the top layer in the Layers palette 17. Open the tube ''renee_2032_image_1'' edit/copy-edit/and Paste as a new layer
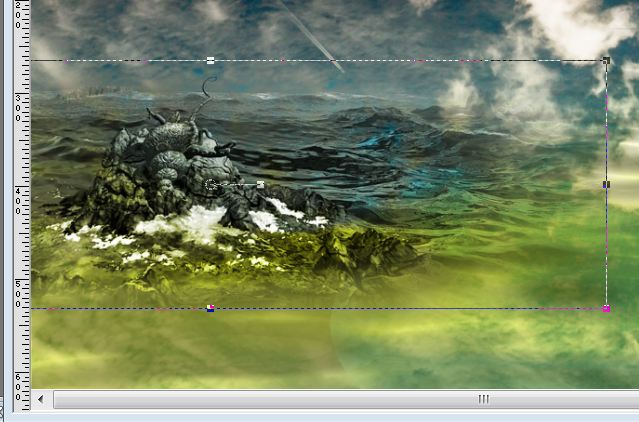
18. Repeat: Effects-Plugins Flaming Pear Flood- attention: looking at Glue=lighten
19. Blend Mode of this layer: "Luminance Legacy" 20. Layers - new raster layer 21. Selections - load selection from disk ''renee_2032_2'' 22.Flood Fill tool: Fill the selection with color #cbcc10 Keep the selection 23.Layers - new raster layer 24.Open tube tube ''SD SM GUTS2 ''edit/ copy - edit/ paste into selection 25 Blend mode to "Hard Light" / Layers-Merge-Merge Down 26. Airbrush tool with these settings
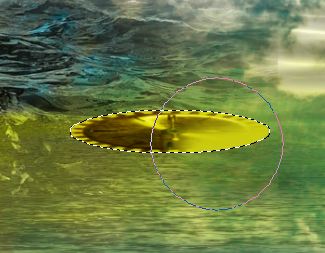
27. Layers - new raster layer 28. Make 2 small circles with this color #cbcc10 see Example
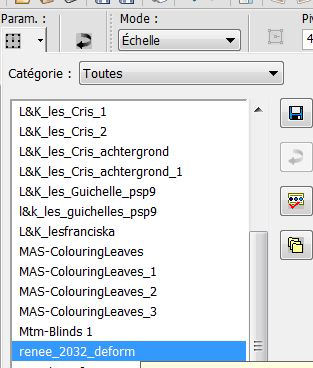
29. Selections - select none 30. Layers-Merge-Merge Down 31. Effects- Plugins Eye Candy 5 – Extrude/Preset ''renee_2032_extrude'' 32.Activate your (K) -Looking at the toolspreset my preset''renee_2032_deform'' that you have placed in your folder of PSP presets, see example below
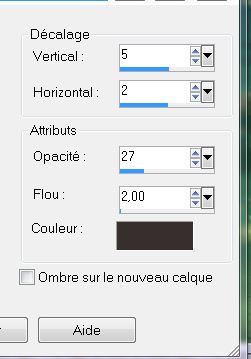
- Click to edit the preset 33. Effects - 3D effects - drop shadow with this color #372f2e
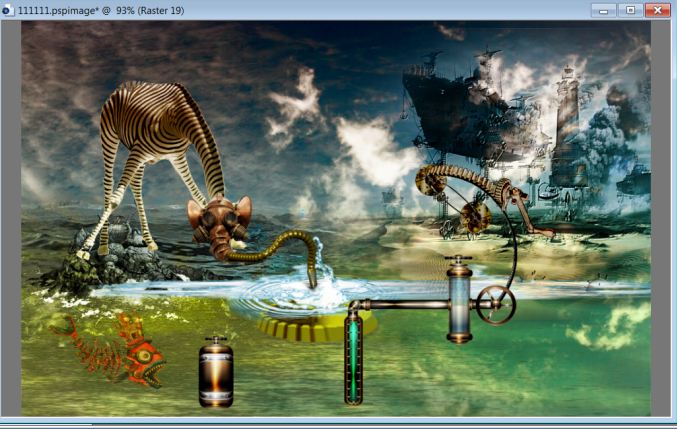
34. Open tube ''girafe_steampunk_renee'' This tube I can get Logane tube Logane and the tube''loganne_steampunk3_02decembre2012'' Thank you for this wonderful Logane tube you have created for the lesson 35.The tube girafe Image - resize 65%/ all layers not checked - edit/copy-edit /paste as a new layer 36. Layers - new raster layer 37.Selections - load selection from disk''renee_2032_3'' 38. Open tube ''renee_2302_image_2'' edit/ copy - edit/ paste into selection 39.Selections - select none 40.Layers-Arrange-Move Down - Stay on this layer - Open tube ''renee_2032_image_3 ''edit/ copy - edit/paste as a new layer .see Example
- This is your layer palette
42. Activate your top layer in your layer palette 43.Open tube ''renee_2032_usine 'Image Resize to 90% edit/ copy - edit/paste as a new layer 44.Blend mode to "Hard Light" and activate your Eraser tool, with these settings
- Carefully: Clear the small vertical line from bottom to top of your Eraser tool
45. Open tube ''baby_divers17'' Image flip / Image Resize to 35% edit/ copy - edit/paste as a new layer 46. Blend Mode of this layer "Hard Light" and the opacity to: 88% 47. Open tube ''renee_2032_construction arrivée eau All components are already reduces to 55% *Take all the parts to build the incoming water* *Note: make sure that all components nicely together* 48.Open tube ''renee_2032_image_4 ''edit/ copy - edit/paste as a new layer *you have this construction
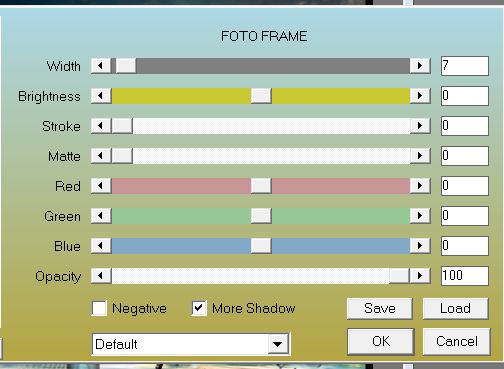
49. Layer - Arrange-move down twice 50. Activate the top of the Layers palette 51. Open tube ''renee_2032_image_5''/edit/copy- edit/paste as a new layer and place 52. Layers-Merge-Merge visible 53.Effects - Plugins -AAA Frame - Foto Frame
54. Layers - new raster layer 55. Effects- Artisticeffects-Balls and Bubbles /Take my preset ''renee_preset_2032_bulles'' and click OK ( Preset is in the zip folder and enter the settings for your PSP)
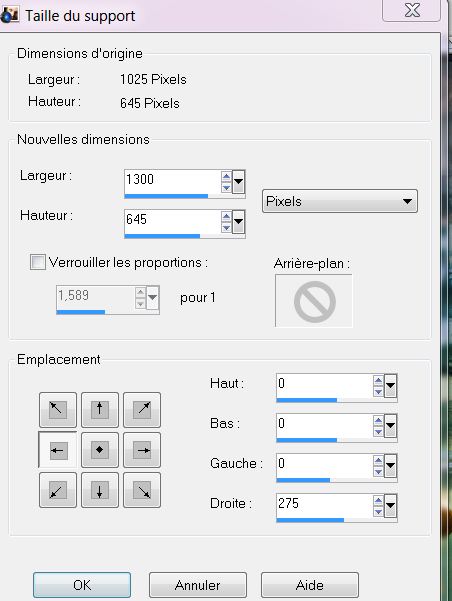
56. Selections - Load selection from disk ''renee_2032_4'' 57. Delete 58. Selections - select none 59.Layers-Merge-Merge all layers 60. Image-Canvas size with these settings
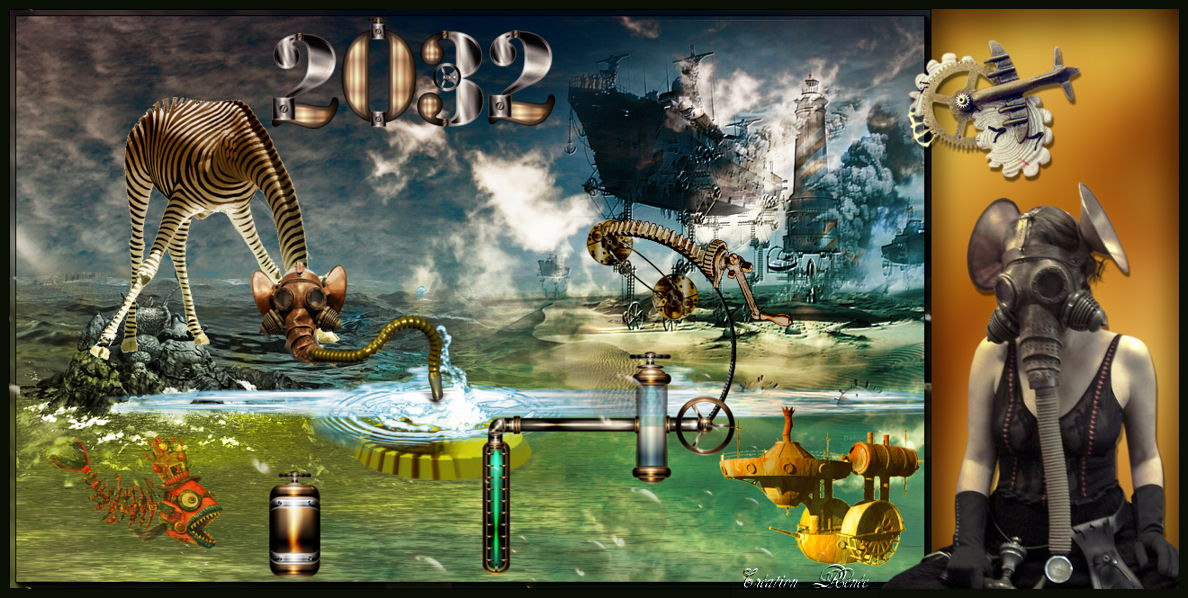
61.Tools-Selection: select the 275 pixels to the right of the rectangle selection(S) 62. Layers - new raster layer 63.Open tube ''renee_couleur '' edit/ copy - edit/ paste into selection 64. Selections - select none 65. Open tube ''ecklace°by_asunder_thafs'' Image Resize to 50% /Image flip-edit/ copy - edit/paste as a new layer 66. Effects - 3D Effects - Drop Shadow 5/2/50/2 black 67.Open tube ''logane_steampunk1-02decembre 2012''Image Resize to 75% edit/ copy - edit/paste as a new layer *Repeat the drop shadow 68. Image ajouter des bordures de 10 pixels black 69.Open tube titre edit/ copy - edit/paste as a new layer 70. Layers-Merge-Merge all layers 71.Image Resize to 90% Lesson over Thanks Renée This lesson was written by Renée Created the 20/01/2013 *
Any resemblance with an existing lesson is merely a coincidence * Don't forget to thank the people who work for us and with us. I named the tubeurs - Testers and the translators Thank you
|
 Translation