|
Let's start the lesson.
-
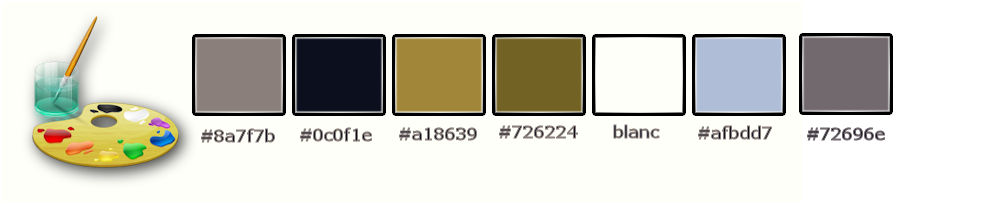
Color-Palette : Set your foreground color to color #8a7f7b
Set your background color to color #0c0f1e
-
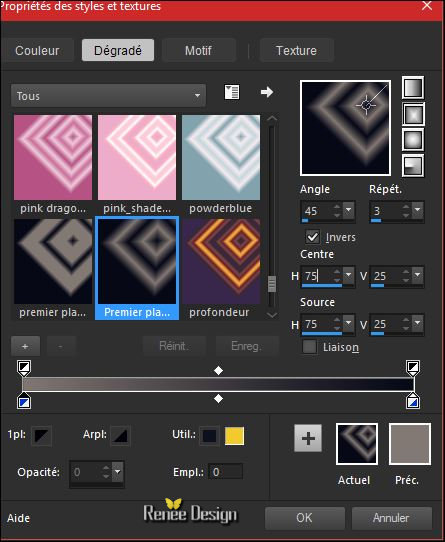
Color Palette: Set your Foregroundcolor to Foreground/Background Gradient -Style-Rectangular with these settings
1.
File: Open a new transparent image of 1005 x 655
Pixels
2.
Activate Flood Fill Tool and fill the layer with the gradient
3.
Adjust- Blur- Gaussian Blur : Radius: 65
4.
Effects –Plugins- Unlimited ICNET FILTERS -Lens Effects-Vertical
Slices 255
5.
Effects –Plugins- Unlimited ICNET FILTERS -Lens Effects-
Horizontal Slices 255
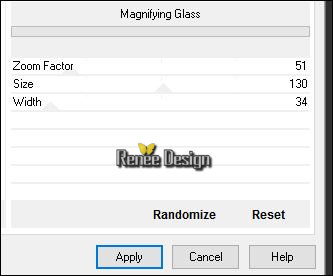
6.
Effects –Plugins- Unlimited ICNET FILTERS -Lens Effects-
Magnifying Glass
7.
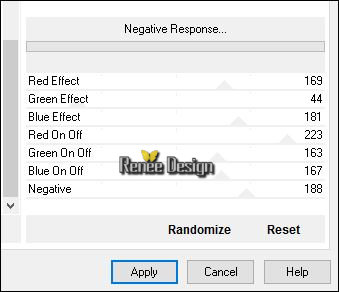
Effets –Plugins- Unlimited - Lumières, Ambiances - Negative
Response..use settings below
8.
Effects –Plugins-Unlimited - It@lian Editors Effect- Effetto
Fantasma 121 / 97
9. Effects- Edge Effects- Enhance
10.
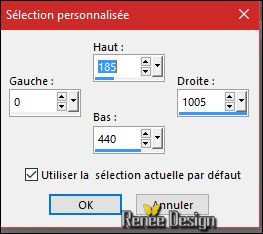
Activate Selection Tool -Custom Selection (S) -Rectangle with these settings
-
Selections- Promote Selection to Layer
11. Adjust- Blur- Gaussian Blur: Radius: 65
12.
Effects –Plugins- Unlimited - Plugins AB 06- Rearranging The
Paintings..use settings below

Selections- Deselect All
13.
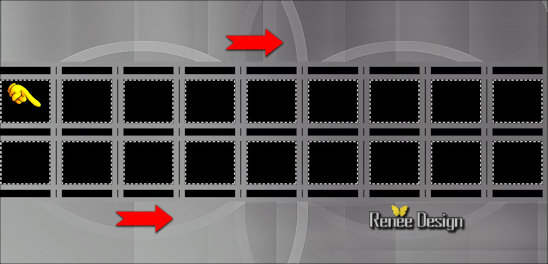
Activate the Magic Wand with these settings

-
Select the squares like this
14.
Selections - Modify - Contract 6 pixels
Press the Delete button on your key board
- Color-Palette : Set your foreground color to color
#a18639
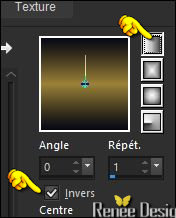
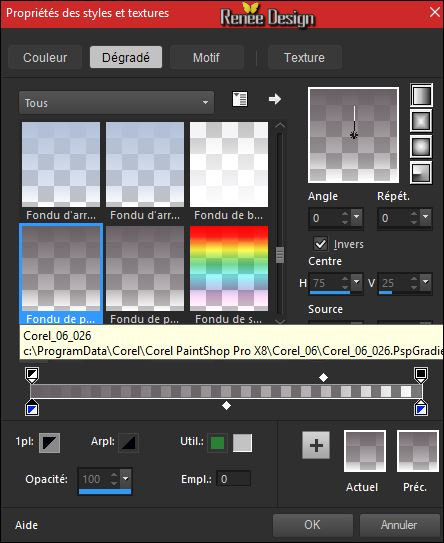
- Set your foreground to gradient 'Foreground-background' - Prepare a linear gradient configured like this.
15. Layers- New Raster Layer
16. Activate Flood Fill Tool "Match mode None" and fill the selection with the gradient
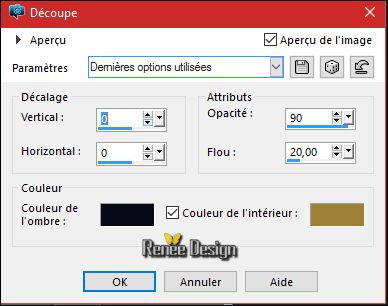
17. Effects- 3 D Effects- Cutout with these settings /Color:-#000000 and
#a18639
Selections- Deselect All
18. Layer Palette -double click on this layer and set the Blendmode to "Multiplikation "
- Layer Palette look like this now-You should have this result
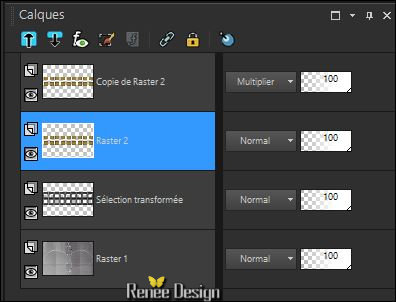
- Activate the Layer underneath = Raster 2
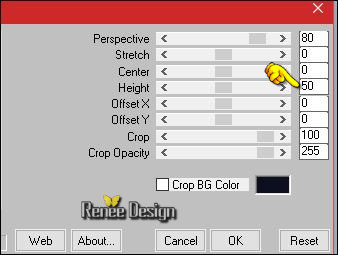
19. Effects
–Plugins –Mura’s meister –Perspective
Tilling use settings below
- Activate the Layer underneath (Promoted Selection )
20.
Effets –Plugins ( not in) Unlimited – Transparency
Eliminate black
21. Effects- Edge Effects- Enhance More
- Stay on this layer
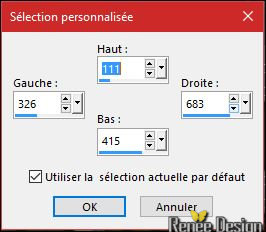
22.
Activate Selection Tool -Custom Selection (S) -Rectangle with these settings 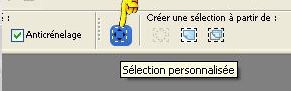
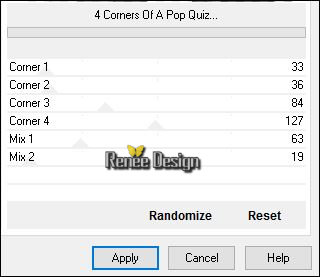
23.
Effects –Plugins- Unlimited - Plugins AB 09- 4 Corners Of A Pop
Quiz..use settings below
-
Selections- Promote Selection to Layer
Selections- Deselect All
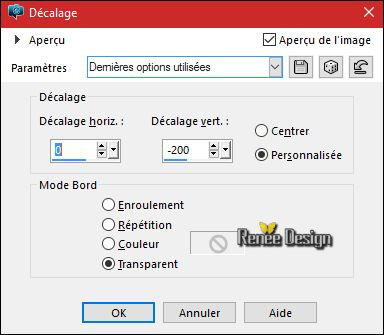
24. Effects- Image Effects- Offset with these settings
25. Layer Palette -double click on this layer and set the Blendmode to "Hard Light "
-In the Layer-Palette- Make Raster 2 active
26. Layers- Duplicate
27. Effects
–Plugins- Unlimited - Plugins AB 09- Cut Back Diagonal..using the default settings
28. Layer Palette -double click on this layer and set the Blendmode to "Overlay"
29. Effects- Edge Effects- Enhance More
- Activate the top of the Layer Palette
30. Open the tube ‘’ Renee_tube_46315.pspimage’’
- Edit/ Copy-Edit - Paste as new layer on your working image
31. Effects- Image Effects- Offset with these settings H = 0 and V = 160
32. Layers- Arrange- Move 2x Down
33. Layer Palette -double click on this layer and set the Blendmode to "Screen "
- In the Layer-Palette-Make ‘’Promoted Selection 1’’active
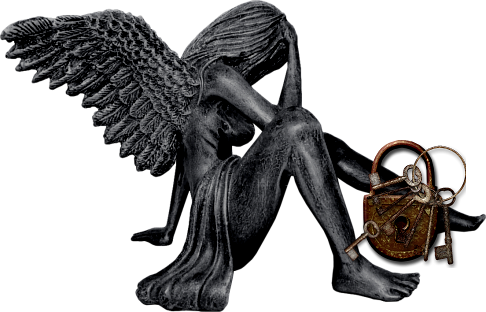
34. Open the tube ‘’ Gothique_20_image_1’’
- Edit/ Copy-Edit - Paste as new layer on your working image
- Layer Palette -double click on this layer and set the Blendmode to "Overlay " and set the layer opacity of this layer to 75%
- Activate the top of the Layer Palette
35. Open the tube ‘’ Gothique_20_image_2.pspimage’’
- Edit/ Copy-Edit - Paste as new layer on your working image
- Do not move, it is in the right place
- Layer Palette -double click on this layer and set the Blendmode to "Hard Light '
36. Activer
le tube ‘’ Renee_tube_gothique’’
- Image
Resize to 68%
- Edit/ Copy-Edit - Paste as new layer on your working image
-
Activate Move Tool (M) move to the right
37. Layers- Duplicate
38. Layer Palette -double click on this layer and set the Blendmode to "Hard Light "
39. Layers- Merge- Merge Down
40. Open the tube ‘’Gothique_20_image_lampadaires’’
- Edit/ Copy-Edit - Paste as new layer on your working image
41. Effects- Image Effects- Offset with these settings H = 0 and V = 100
42. Layers- Arrange- Move Down
- Activate the top of the Layer Palette
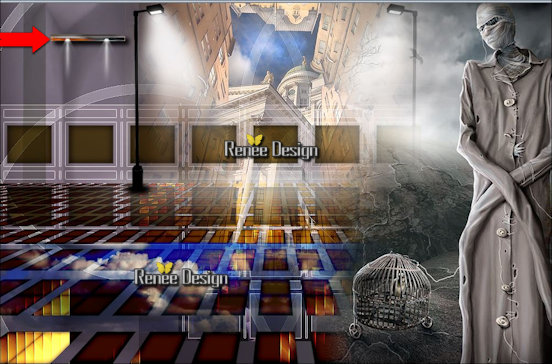
43. Open the tube ‘’ Gothique_20_image_3.pspimage’’
- Edit/ Copy-Edit - Paste as new layer on your working image
-
With the Move Tool, move it in the right place as shown in the example below - Your work look like this now-You should have this result
- Color-Palette : Set your foreground color to color
#726224
44. Open your Pen Tool (V) select the line style of your choice -Draw 2 lines like this 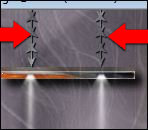
Width 2- I used ''Corel_13_007"


- Convert to Raster Layer
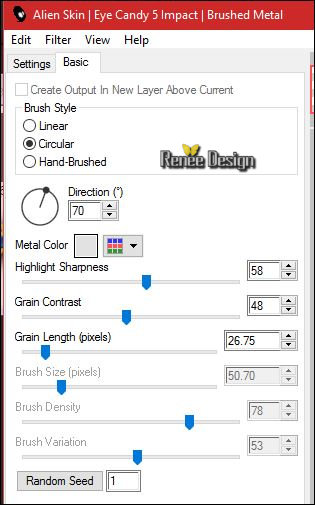
45.
Effects -Plugins – Eyecandy 5 Impact – Brusched
Metal with these settings
-Layers- Arrange- Move Down
- Activate the top of the Layer Palette
46. Open the tube ‘’ Renee_tube_X_5.pspimage’’(Do not close we need it later)
- Activate Raster 1 of the tube
- Image
-Resize to 55 %
- Image
Mirror(CTRL+B)
- Edit/ Copy-Edit - Paste as new layer on your working image
47.Back on the tube ‘’ Renee_tube_X_5.pspimage’’ Activate the Rasters 2 / 3 and 4 (Keys ) of the same tube
- Edit/ Copy-Edit - Paste as new layer on your working image
- Layers- Arrange- Move Down -And Repeat (The Keys are one single layer)
48. On the layer with the keys : Effects
–3D Effects – Drop Shadow with these settings: 1/1/100/1 #fffffff
49.
Open the Brush image ‘’Renee_pinceau_Gothique_20’’ in your Psp
- File- Export Custom Brush
- Give it a name ‘’Renee_pinceau_Gothique_20’’
50. Layers- New Raster Layer
51. Activate Brush Tool (B)and select my file in the list ‘’ Renee_pinceau_Gothique_20’’ with these settings

Color-Palett: Set your foreground color to color #ffffff -Stamp your brush at the right place by using your foreground color white
52. Layers- Merge- Merge Visible
53. Open the tube
“White and black”
-Select a bird -I chose ‘’chauve-souris’’
- Edit/ Copy-Edit - Paste as new layer on your working image
- Move it in the right place
54.. Layers-New Raster Layer
55. Activate Flood Fill Tool and fill the layer with the foreground color white
-
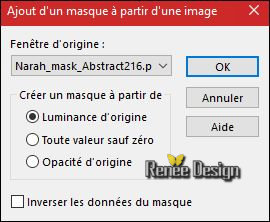
Open the Mask « Narah_mask_Abstract216.pspimage » in your
Psp
56. Layers - New Mask Layer - From Image:
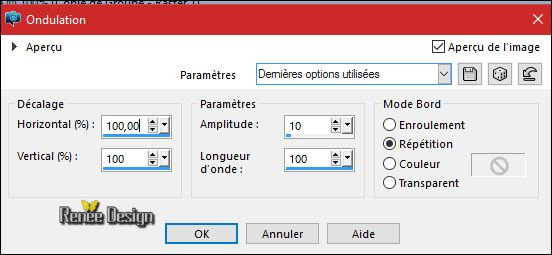
- Layers-Merge- Merge Group.
57. Effects- Distortion Effects-Ripple use settings below
- Layer Palette -double click on this layer and set the Blendmode to "Soft Light"
58. Layers- Duplicate
59. Effects- Distortion Effects-Twirl use settings below

60. Open the tube ‘’ element33_ks.pspimage’’
- Edit/ Copy-Edit - Paste as new layer on your working image
61. Open the tube ‘’ Gothique_20_image_4.pspimage’’
- Edit/ Copy-Edit - Paste as new layer on your working image
- Move tool / place your tube on the left side of your image
62. Image - Add borders-Symmetric checked: 1 pixel #ffffff
- Image - Add borders-Symmetric checked: 1
pixel #afbdd7
- Image - Add borders-Symmetric checked: 50
pixels #ffffff
- Image - Add borders-Symmetric checked: 1
pixel #afbdd7
- Color-Palette : Set your foreground color to color
#72696e -Set your background color to color #afbdd7
- Change foreground material into a "fading foreground" linear gradient with these settings
63. Activate the Magic Wand and select the white border of 50 pixels
64. Layers- New Raster Layer Activate Flood Fill Tool and fill the selection with the gradient
65.
Effects –Plugins- Unlimited - Kiwis Oelfilter-Videowand
130/0/0
- Repeat this filter: / Kiwis Oelfilter-Videowand
130/0/0
66.
Effects – Plugins -Unlimited - It@lian Editors Effect- Effetto
Fantasma 20/20
67. Effects
– Edge Effects- Enhance More
68. Image Flip( CTRL+I)
Selections- Deselect All
69. Image - Add borders-Symmetric checked: 1 pixel #afbdd7
- Image - Add borders-Symmetric checked: 10 pixels #ffffff
70. Open the tube ‘’ Gothique_20_image_5.pspimage’’
- Edit/ Copy-Edit - Paste as new layer on your working image
- Move
71. Open the tube " texte"- Ore write your own text (different letters are in the tube folder )
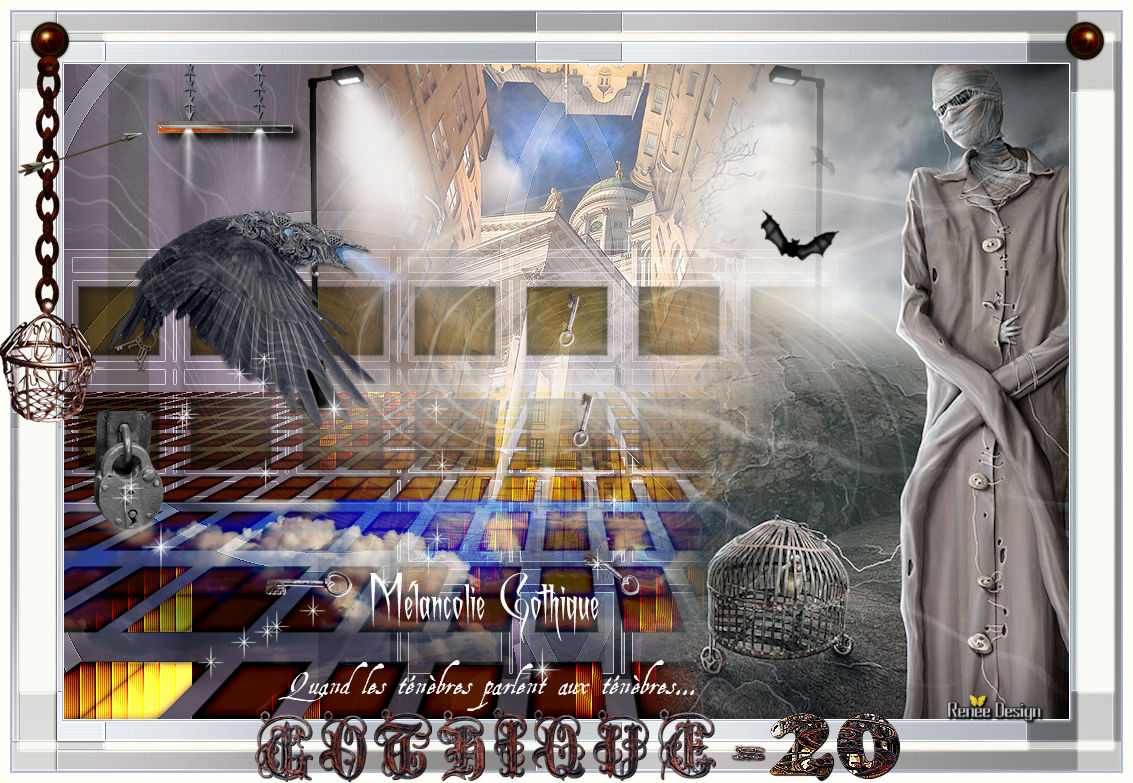
Save as JPG
I hope you enjoyed this lesson
Renée
This lesson was written by Renée 20/06/2016
Edited and Update
2016
*
Any resemblance with an existing lesson is a coincidence
* Do not forget to thank the people who work with us and for us I have appointed the tubeurs and translators
Thanks Renée
*
| 
 Translations


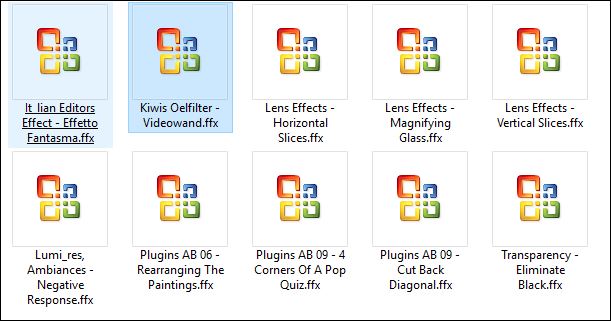


 When you see this logo the filter is imported in Unlimited

 All rights reserved