|
 
. Let's start the lesson.Open color card
- Material Properties-Set your foreground to #ffffff -Set your background color to #505701

1. Open the image « fond_absinthe’’ – Window - Duplicate (or shift+D) - Close the original and proceed on the copy -Promote Background Layer =Raster 1
2. Adjust-Blur-Gaussian Blur: Radius 55
3. Layers-New raster layer
4.
Selections –load/save selection –load selection from disc and choose:
‘’’absinthe_1’’
5. Activate Flood Fill Tool and fill the selection with the foreground color #ffffff
DO NOT DESELECT
6.
Effects –Plugins- Unlimited – Distorsion Filters – Cracked a
64
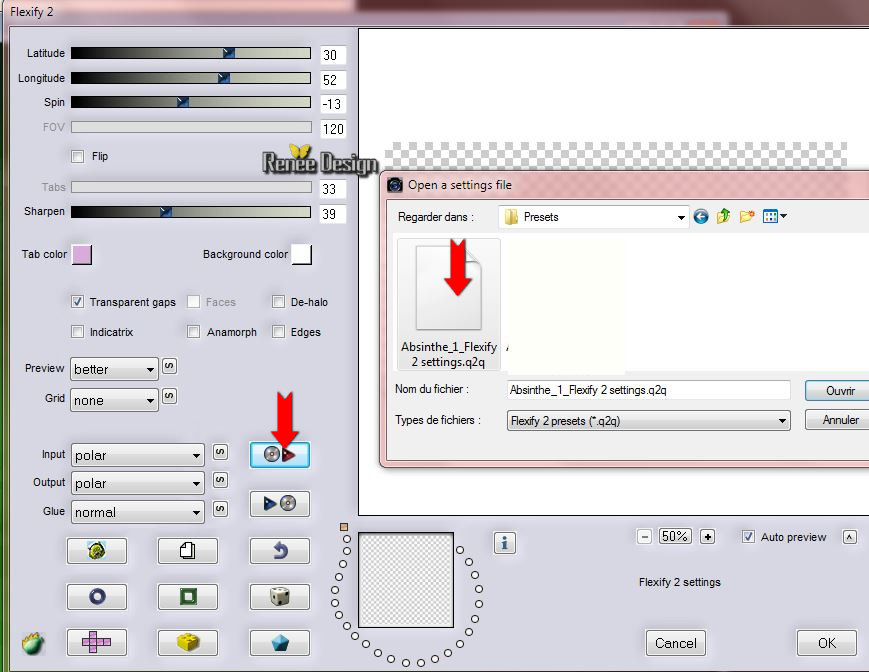
7. Effects-Plugins – Flaming Pear – Flexify 2-
select my file-Preset’’ Absinthe_1_Flexify 2
settings.q2q’’
Or manual settings as shown in the example below
8. Effects-Edge Effects-Enhance More
Selections-Deselect All
9. Layers- Duplicate
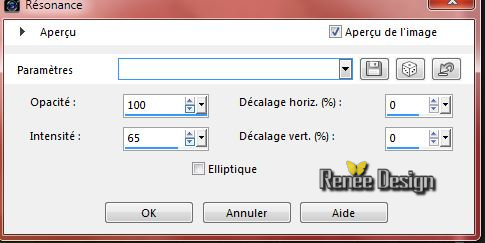
10. Effects-Reflection Effects-feedback with these settings
11. Effects- User Defined Filter- Emboss 3 /using the default settings
-
Layer palette – Make raster 2 active
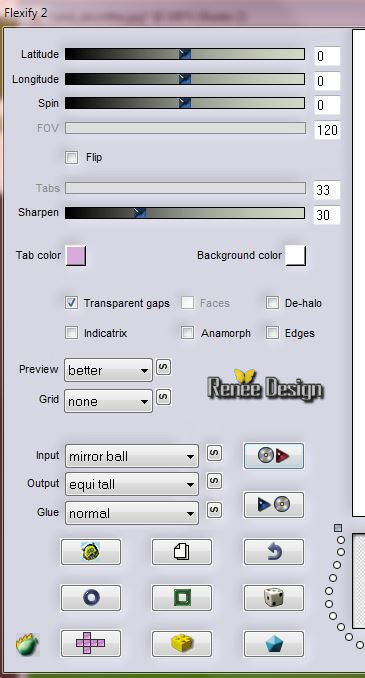
12.Effects-Plugins – Flaming Pear Flexify 2 –select my file -Presets
’’ Absinthe_2_Flexify 2 settings.q2q’
Or manual settings as shown in the example below
13. Layer Palette - Double click on this Layer and set the Blend Mode to "Overlay"
14.Layer palette – Make copy of raster 2 active- Layer Palette - Double click on this Layer and set the Blend Mode to "Hard Light "
- Material Properties-Set your foreground to #d63b0c- Set your background color to #cfdf03
- Activate the top layer in the Layer palette
15.
Layers-New raster layer
16. Activate Flood Fill Tool and fill the layer with the foreground color #d63b0c
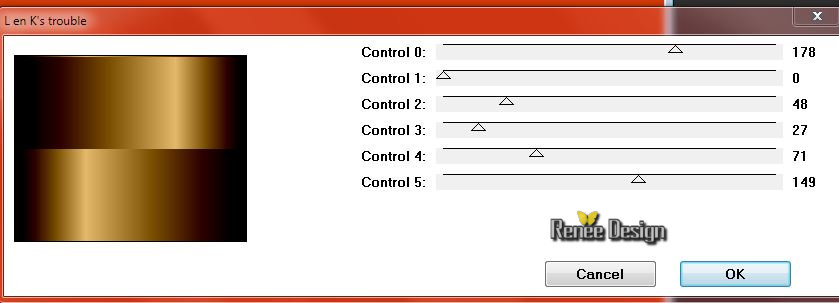
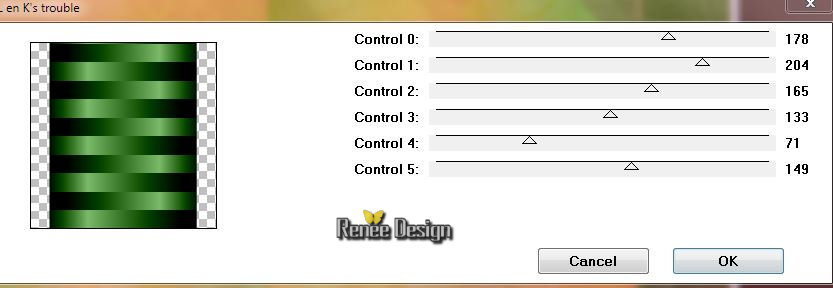
17.Effects-Plugins – L & K’s – Trouble with these settings
18. Double click on this layer and set the Blendmode to "Lighten"
19. Layers- Duplicate
20. Image
Free Rotate 90 ° to the right
21. Effects-Plugins – L & K’s – Trouble with these settings
22. Layers-Merge- Merge Down
23. Layers- Duplicate
24. Image -
Resize a 80 % resize all layers not checked
25. Layers-Merge- Merge Down
26. Layers- Duplicate
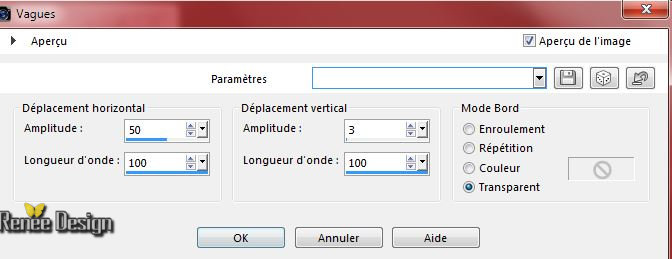
27. Effects-Distortion Effects-Wave with these settings
-Set the layer opacity of this layer to 79%
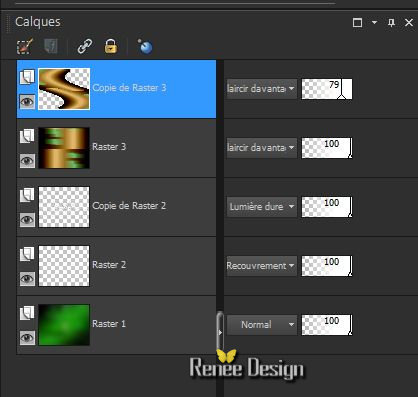
Layer palette look like this now
28. Layers-New raster layer
29. Activate Flood fill tool and fill the layer with the background color
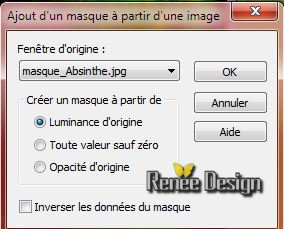
30. Layers- New Mask layer from Image and select Mask’’masque_Absinthe’’
- Delete maske 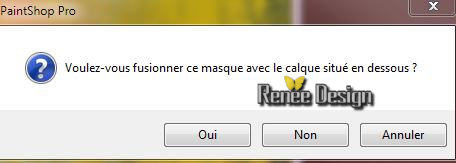 -oui -oui
-
Layers-Merge- Merge- Group
31. Layer Palette - Double click on this Layer and set the Blend Mode to "Soft Light "
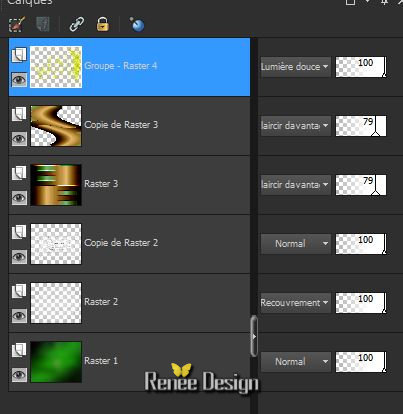
Layer palette look like this now
32. Activate the tube ‘’ Renee_tube_Street_corner.pspimage’’
- Edit/copy- Edit/ paste as new layer on your working image
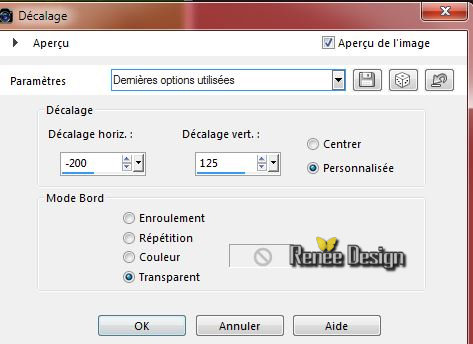
33. Effects-Image Effects-Offset with these settings
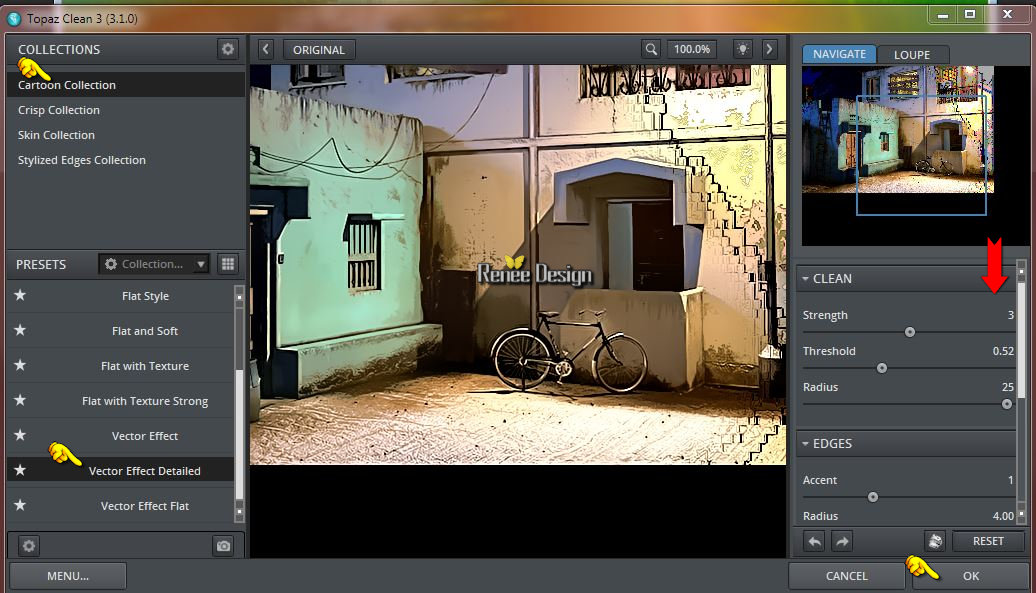
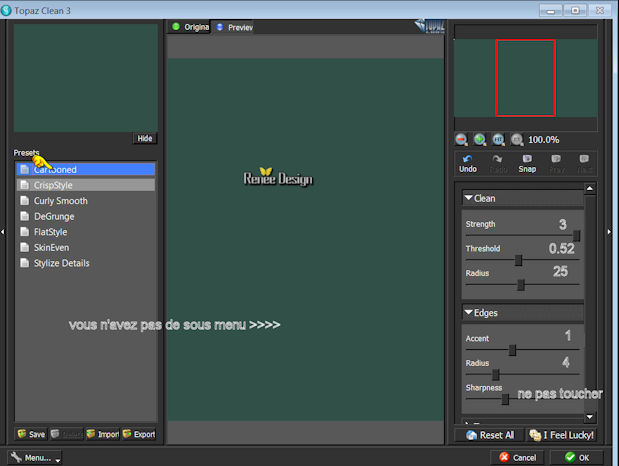
34. Effects-Plugins –Topaz – Clean 3 with these settings
-
Set the layer opacity of this layer to 81%
35. Effects- 3D Effects-Drop Shadow with these settings : 2/7/100/16 / Background color #cfdf03
36. Layers-New raster layer
- Properties Foreground -Set your foreground color to
#505701
37.
Selections –load/save selection –load selection from disc and choose:
‘’ absinthe_2 »
38. Activate Flood Fill Tool and fill the the selections with the foreground color #505701
Selections-Deselect All
39. Activate the tube ‘’ Absinthe_LOGO1.png »
- Edit/copy- Edit/ paste as new layer on your working image
40. Effects-Image Effects-Offset with these settings : H = -270 and V = 215
41. Layer Palette - Double click on this Layer and set the Blend Mode to "Difference"
42.
Activate the tube ‘’
Renee_tube_opium_and_absinthe.pspimage’’
- Image
Resize a 60%
- Edit/copy- Edit/ paste as new layer on your working image
- Activate the Pick Tool (K) place it to the bottom left side
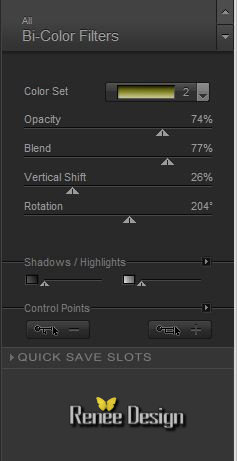
43. Effects-Plugins – Nick Color effex –Bi color Effex- Set
Brown 2
44. Activate the tube ‘’ deco_absinthe_Renee.pspimage’’
You may minimize your tube for a moment, but do not close, we will need it again soon
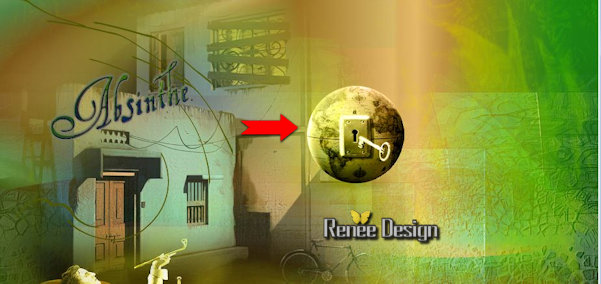
- On this tube -Make layer ‘’terre ‘ active
- Edit/copy- Edit/ paste as new layer on your working image
- Move tool / place your tube as shown in the example below (Blend Mode Luminance Legacy )
45. Effects-Plugins – Graphic Plus – Cross shadow using the default settings
- On the same tube
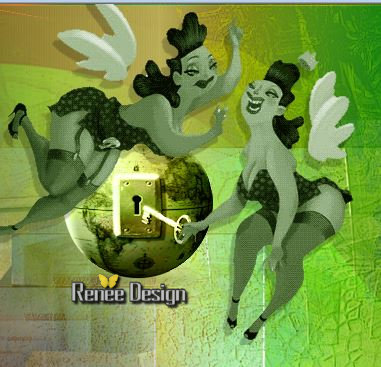
46. Make layer ‘’femmes ‘active
- Edit/copy- Edit/ paste as new layer on your working image
Move tool / place your tube as shown in the example below
- Material Properties-Set your foreground to #6b8da1 Set your background color to #f02a00
47.
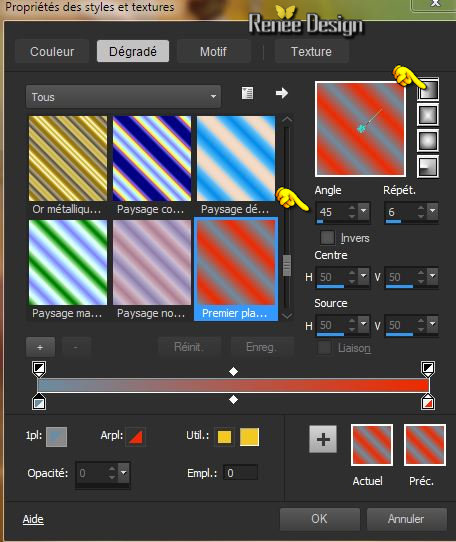
Set your foreground to gradient 'Foreground-background' - Linear -with these settings
48.
Layers-New raster layer
49.
Selections –load/save selection –load selection from disc and choose:’’
absinthe_3 »
50. -Activate Flood Fill Tool and fill the selection with the gradient
51.
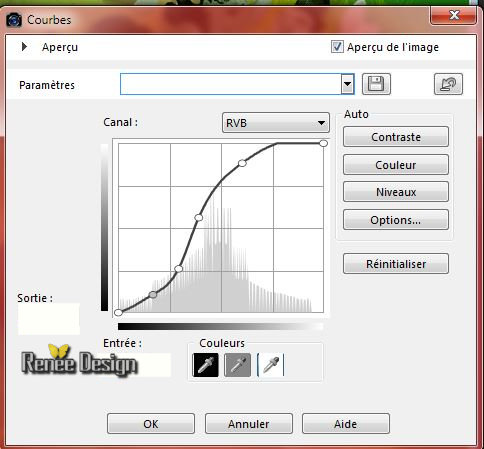
Adjust-Brightness and Contrast-Curves with thes settings
Selections-Deselect All
52. Layers-New raster layer
53. Selections –load/save selection –load selection from disc and choose:
‘’absinthe_4’’
- Material Properties-Set your foreground to #ffffff-Set your background color to
#cfdf03
54. -Activate Flood Fill Tool and fill the selection with the foreground color white
Selections-Deselect All
55. Activate Brush Tool (B) and select-Round 05
with these settings

-
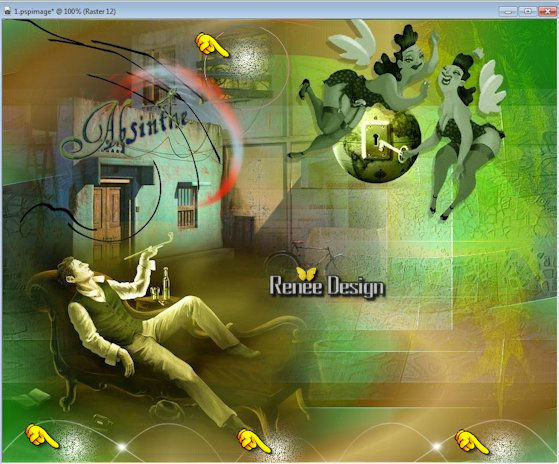
Stamp your brush in the right place by using your foreground color white (see screenshot)
56.
Set the layer opacity of this layer to 81%
-
Activate the bottom of the layer palette =Raster 1
57.
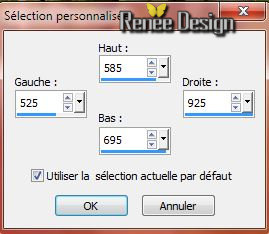
Selection Tool ( S ) Custom selection with these settings
58.
Selections-Promote selection to layer
59. Layers-Arrange-Bring to Top
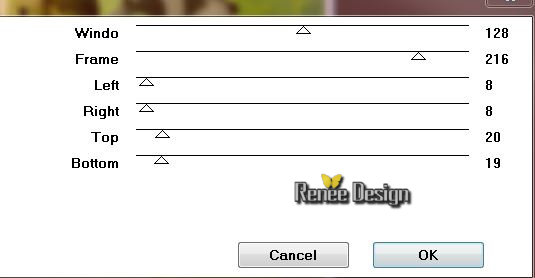
60. Effects-Plugins – Mock – Windo with these settings
61. Effects-Plugins – AAA Frame - Foto Frame with these settings

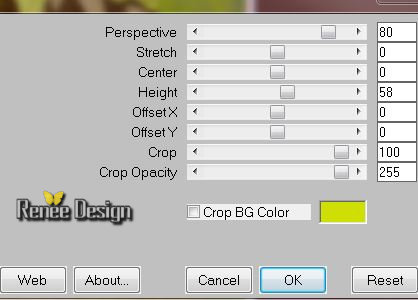
62. Effects-Plugins - Mura’s Meister – Perspective Tilling-
with these settings-Background color
Selections-Deselect All
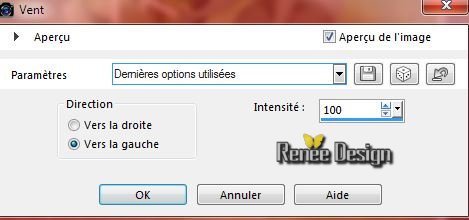
63.Effects-Distortion Effects-Wind-Winddirection From Left -Wind strength 100
64. Activate the tube ‘’ Renee_tube_Victor_tuto-Absinthe’’
- Image
Mirror
- Image
Resize a 75 %
- Edit/copy- Edit/ paste as new layer on your working image
- With your move tool move to the right side ( see screen)
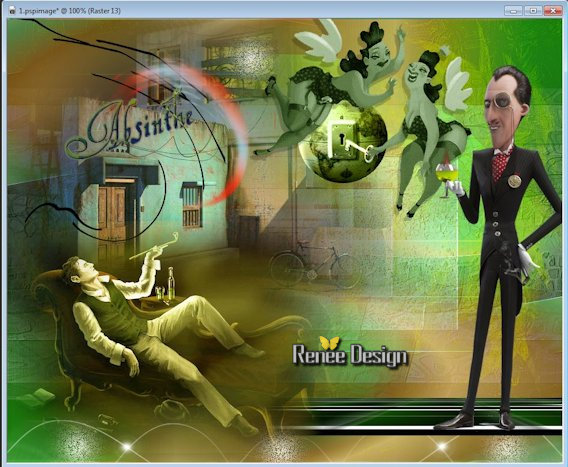
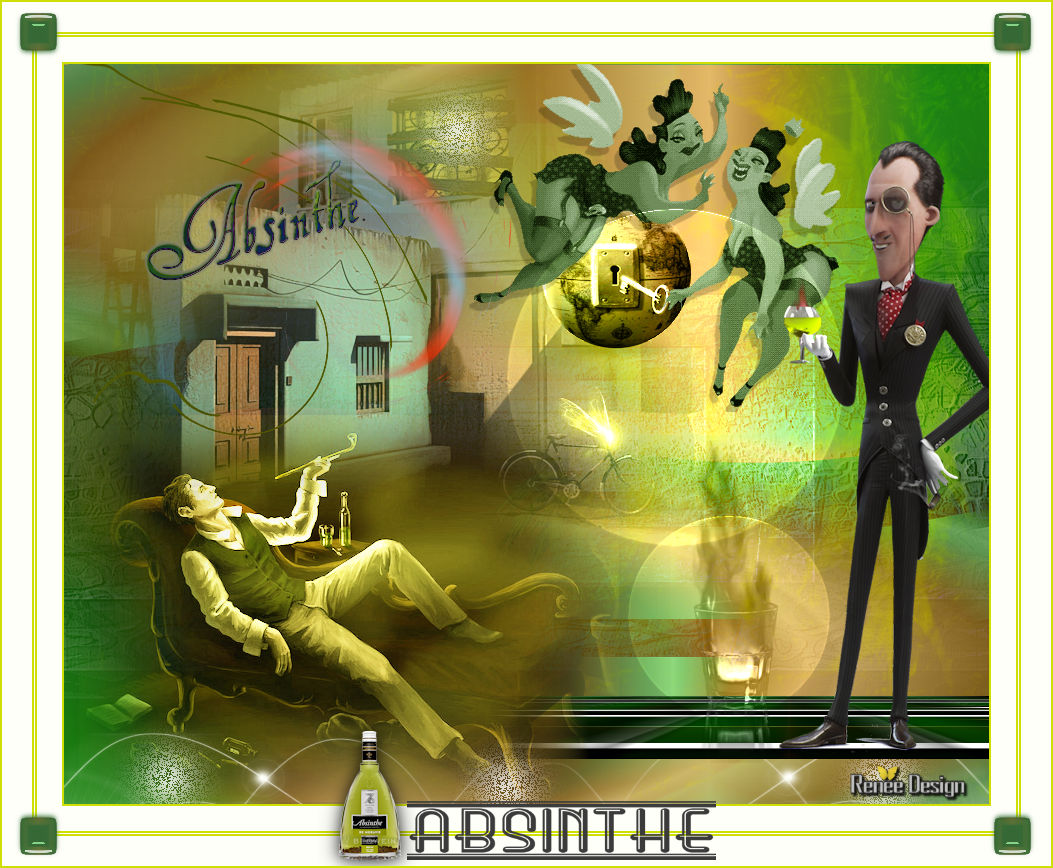
Your work look like this now /Replace your tubes if necessary
65. Activate the tube’’ deco_absinthe_Renee.pspimage’’
- make layer ‘’verre_absinthe’’active
66. Edit/copy- Edit/ paste as new layer on your working image
- Move ( see finished image)
67. Layer Palette -Double click on this layer and set the Blendmode to "Luminace Legacy"
68. On the same tube - make layer ‘’absinthe_effet’’ active
- Edit/copy- Edit/ paste as new layer on your working image
- Move ( see finished image)
69. Layer Palette -Double click on this layer and set the Blendmode to "Screen"
70. Layers- Merge- Merge- Visible
71. Layers-New raster layer
72.
Activate selection Tool (S) – Selection type-Circle
- Draw a circle on your work of your choice( see finished image)
73. Effects-Plugins – EyeCandy 5 Impact – Glass with these settings
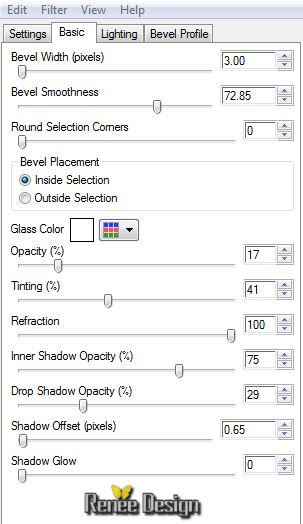
Selections-Deselect All
74. Layer Palette - Double click on this Layer and set the Blend Mode to "Dodge"
75. Layers- Duplicate
76. Image
Resize a 60 % resize all layers not checked
- Is all in place?
77. Image - Add borders-Symmetric checked: 2 pixels #cfdf03
78. Image - Add borders-Symmetric checked: 25 pixels #ffffff
79. Image - Add borders-Symmetric checked: 2 pixels #cfdf03
80. Image - Add borders-Symmetric checked: 1 pixels #fffff
81. Image - Add borders-Symmetric checked: 2 pixels #cfdf03
82. Image - Add borders-Symmetric checked: 30 pixels #ffffff
83. Image - Add borders-Symmetric checked: 2 pixels #cfdf03
84. Activate the tube ‘’ Renee_tube_absinthe-deco.pspimage’’
- Edit - Copy -Edit - Paste as new layer on your working area.
-With your move tool move to top ( see finished image)
85. Layers- Duplicate
86. Image
Flip
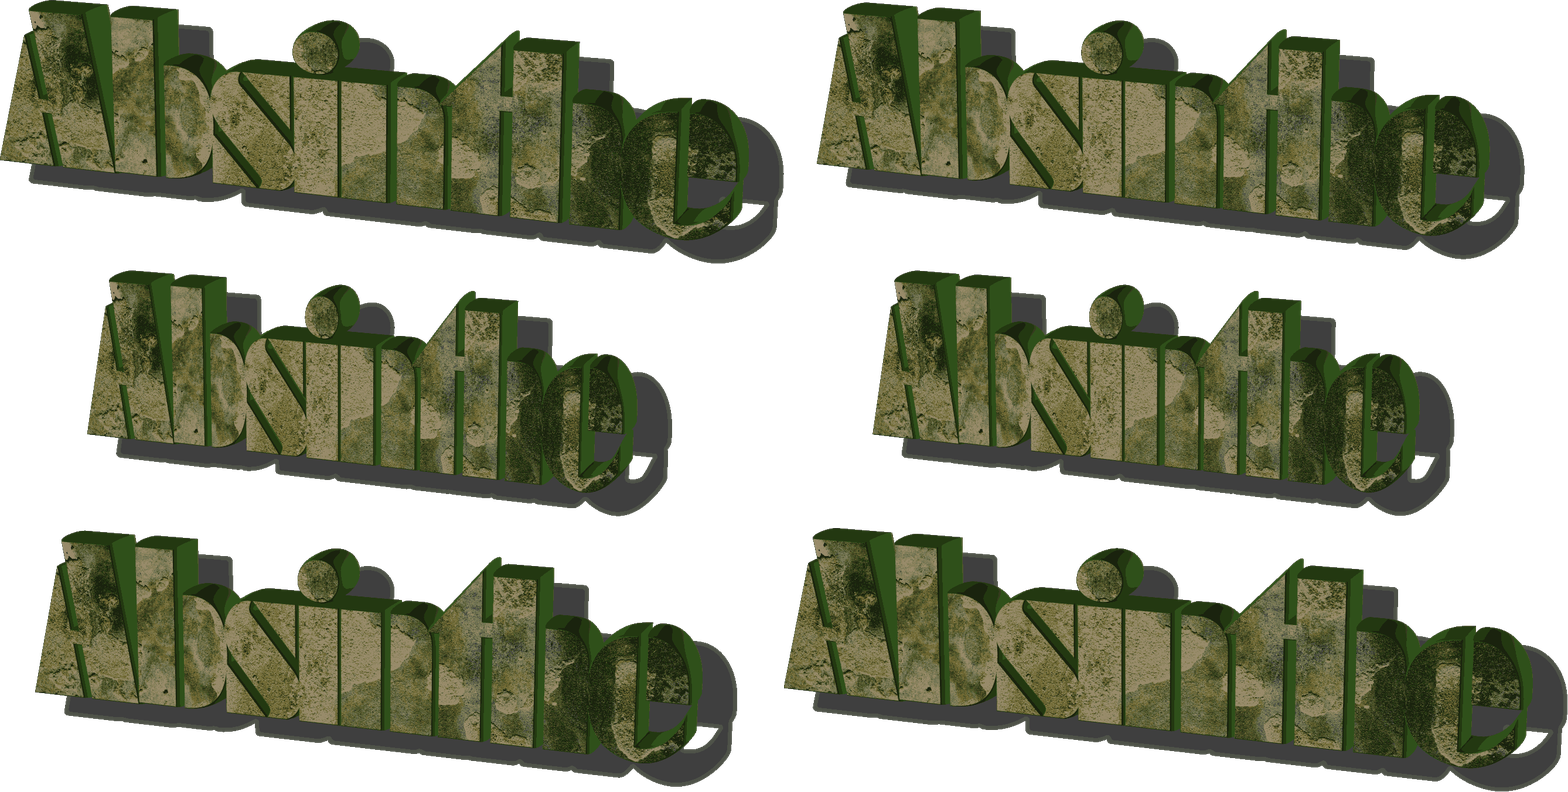
87. Activate the tube ‘’absinthe_titre.png’’ou titre 2 of your choice -Edit - Copy -Edit - Paste as new layer on your working image and move
88. Layers- Merge- Merge-All.
Save as JPG
I hope you enjoyed this tutorial .
Renée
This lesson was written by Renée 19/06/2015
edited and update
July 2015
*
Any resemblance with an existing lesson is merely a coincidence *
* Don't forget to thank the people who work for us and with us. I named the tubeurs - Testers and the translators.
Thanks Renée.
*
| 
 Translations


 When you see this logo the filter is imported in Unlimited


 -oui
-oui


 All rights reserved