|
Let's start the lesson.
Alice in the land of madness
- Preparation
- Material Properties: Set your foreground color to color # ffffff -Set your background color to color Black
1. Open the Backgroundimage‘’Fond_Alice_au_pays_folie’’-
Window - Duplicate (or shift+D) - Close the original and proceed on the copy -Promote Background Layer =Raster 1
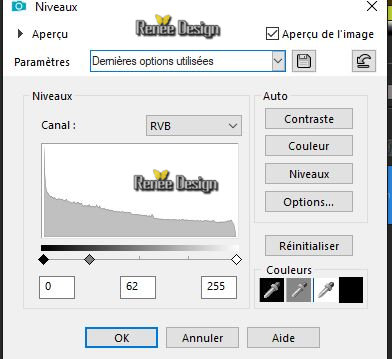
2. Brightness and Contrast-Levels use the settings below
3. Layers- Duplicate
4. Effects- Image Effects-Seamless Tiling using the default settings
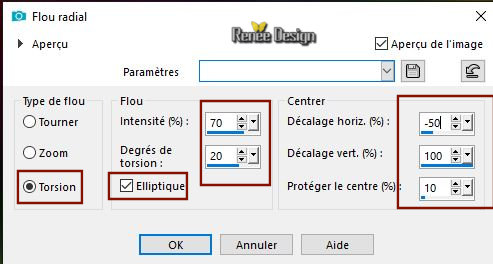
5. Adjust- Blur- Radial Blur use the settings below
6. Effects –Plugins -
Unlimited 2.0- ICNETFILTERS _ Lens Effects- Refractor 1
7. Effects –
Edge Effects- Enhance
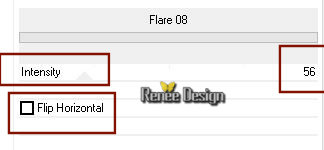
8. Effects -Plugins -
Unlimited 2.0- ICNETFILTERS - Lens Flares – Flare 08
9. Open the tube ‘’ Alice_folie_image 1.pspimage’’
- Edit - Copy- Activate your work -Edit - Paste as a new layer
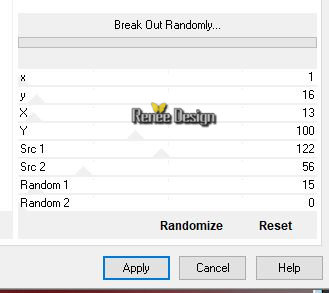
10. Effects –Plugins-
Unlimited 2.0 - Plugins AB 07- Break Out Randomly..use the settings below.
11. Effects –Plugins-
Unlimited 2.0 - &<Bkg Kaleidoscope> - Flip SidesRsf
12. Layers-Properties-Set the Blend Mode to " Overlay "
- Activate the bottom layer =raster 1
13.
Selections –load/save selection –load selection from disc and select my selection: ‘’alice_1’’
14. Selections- Promote selection to layer
15. Layers- Arrange- Bring to Top
16. Effects –Plugins-
Unlimited 2.0 - Neology - Digital Weaver with these settings : 15/15
Selections- Deselect All
17. Layers-Properties-Set the Blend Mode to " Soft Light "– Lower the Opacity of the layer to 28%
18. Effects –Edge Effects-Enhance More
19. Effects –3 D-Effects- Drop Shadow with these settings:
-8/4/34/17 Color Black
20. Layers- New Raster Layer
21.
Selections –load/save selection –load selection from disc and select my selection: ‘’alice_2’’
22. Activate Flood Fill Tool-Flood Fill the selection with #ffffff
23. Layers-Properties-Set the Blend Mode to " Sreen "
Selections- Deselect All
24. Open the tube ‘’ Alice_folie_escalier 1’’
- Edit - Copy- Activate your work -Edit - Paste as a new layer
- Objects
-Align -Bottom
(if you do not have this function, place against the bottom edge of the image )
25. Layers- New Raster Layer
26.
Selections –load/save selection –load selection from disc and select my selection: ‘’alice3’’
27. Flood Fill Tool – Opacity 50 % -Flood Fill the selection with #ffffff
Selections- Deselect All
28. Activate Text Tool-Font ‘’ BN YEAR 2000’’

- Write: alice
- Swap your materials, so the white color is on the bottom and write ‘’pays de folie’’
- Convert to Raster Layer
- Move Tool(M) place it in the right place as shown in the example below
- Layers- Merge-Merge Down
- You should have this result

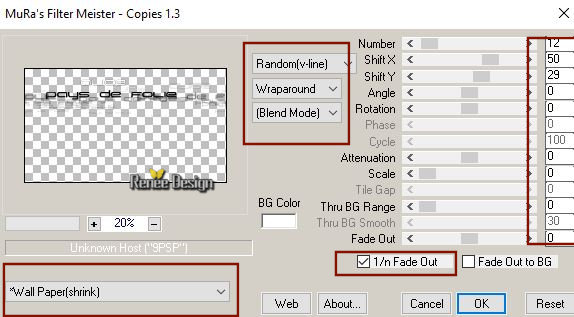
29. Effects –
Plugins – Mura’s meister – Copies use the settings below
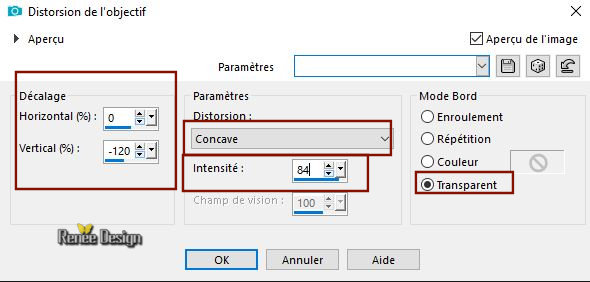
30. Effects
–Distortion Effects-Lens Distortion-Barrel
- Activate the bottom layer in the layerpalette = raster 1
31. Layers- Arrange- Bring to Top
32. Effects –Plugins-
Unlimited 2.0 – L & K’s – Pia : 34
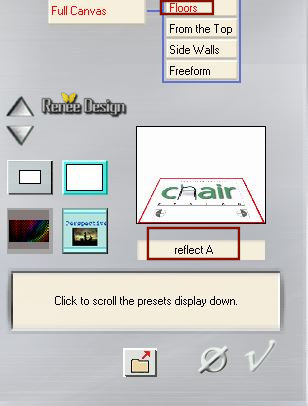
33. Effects –Plugins – Andromeda Perspective –
Floors-reflectA
(Repeat 3 times)
34. Effects –Image Effects- Offset with these settings
H = 0 and V = 55
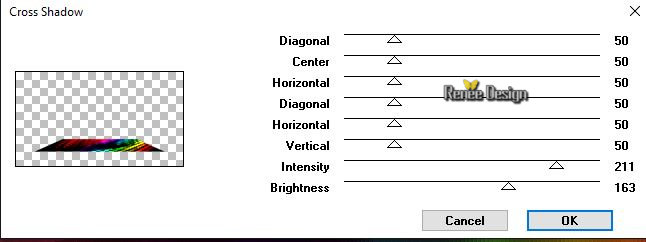
35. Effects –
Plugins – Graphic plus – Cross shadow use the settings below
Stay on this Layer
36. Open the
tube ‘’ Alice_folie_image porte’’
- Edit - Copy- Activate your work -Edit - Paste as a new layer
37. Layers-Properties-Set the Blend Mode to " Overlay "– Lower the Opacity of the layer to 77%
38. Effects –Plugins-
Unlimited 2.0 - Two Moon -VenitianBuilder... using the default settings 9/7/115/10
39. Open the
tube ‘’ Abandod House 2 - misted tube of A PSP
Devil.pspimage’’
- Edit - Copy- Activate your work -Edit - Paste as a new layer
40.
Selections –load/save selection –load selection from disc and select my selection: ‘’alice4’’
DELETE
Selections- Deselect All
41. Layers-Properties-Set the Blend Mode to " Luminance Legacy "– Lower the Opacity of the layer to 63%
To replace the top of the layer-palette
42. OPen the tube ‘’ Alice_folie_image 2.pspimage’’
- Edit - Copy- Activate your work -Edit - Paste as a new layer
- With your move tool :move to the right side
43. Layers-Properties-Set the Blend Mode to " Overlay "-Lower the Opacity of the layer to 83%
44. Open the
tube ‘’ Alice_folie_image ailes’’
- Edit - Copy- Activate your work -Edit - Paste as a new layer ( do not move it is in the right place )
45. Effects –
Distortion Effects – Twirl- Degrees 450
46. Effects -
Plugins – Andromeda perspective (with the same settings ) Repeat twice
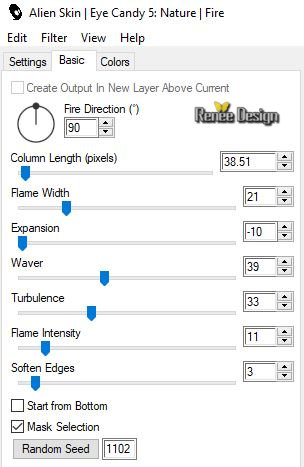
47. Effects –
Plugins –EyeCandy5 - Nature –Fire -Tab-Settings-User Settings and select -Preset’’Alice-fire’’
48. Open the tube ‘’Alice_folie_tubes du tuto.pspimage’’
In the folder named’’ reserve’’ I added tubes if you want for your work
- Activate the 4 layers of the tube. Edit - Copy- Activate your work -Edit - Paste as a new layer and move into the right place
49. On these tubes –Effects- 3D-Effects – Drop Shadow with these settings : 24/17/57/18 Color Black
- Layers- Merge - Merge Visible
50. Selections- Select All
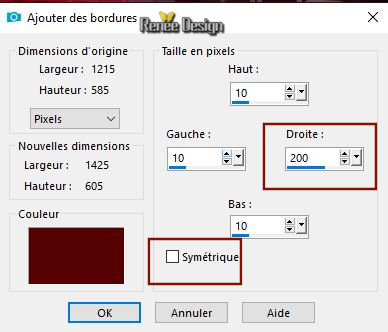
51. Image - Add borders-Symmetric NOT checked use the settings below- Color #550105
52. Effects- 3D-Effects – Drop Shadow with these settings 24/17/57/18 Color Black
53. Selections
- Invert
54. Effects –
Plugins - L & K – Paris

55. Effects –
Edge Effects - Enhance More
Selections -Deselect All
56. Image - Add borders-Symmetric checked 1 Pixel Color Black
57. Open the
tube ‘’ Alice_folie_image 3 cadres’’
- Edit - Copy- Activate your work -Edit - Paste as a new layer
- With your move tool :move to the right side
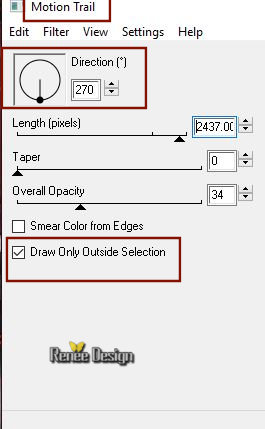
58. Layers- Duplicate
59. Effects –Plugins– EyeCandy 4000 – Motion trail use the settings below
60. Layers-Properties-Set the Blend Mode to " Sreen "
61. Open the
tube ‘’ Alice_folie_ 3 petites-image .pspimage’’
Edit - Copy- Activate your work -Edit - Paste as a new layer- With the move tool, move to the right side
62. Layers- New Raster Layer
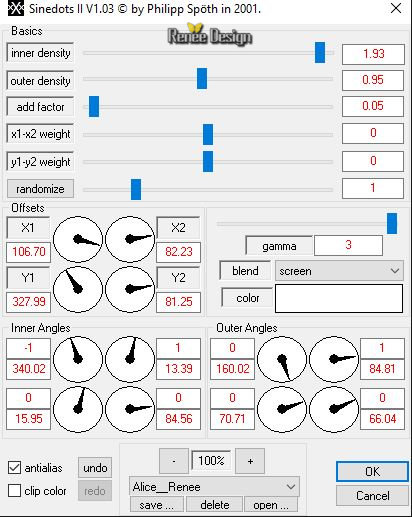
63. Effects –
Plugins - Dragon fly – Sinedots II (Do you have problems with this- image is into the zipfile and paste as a new layer on your working area and move)
64. Layers-Properties-Set the Blend Mode to " Soft Light"
65. Layers- Merge-Merge All
66. Image -
Resize to 1050 pixels Width
Save as JPG
I hope you enjoyed this lesson
Renée
This lesson was written by Renée 10/11/2018
Edited and Update
2018
*
Any resemblance with an existing lesson is a coincidence
* Do not forget to thank the people who work with us and for us I have appointed the tubeurs and translators
Thanks
*
|

 Translation


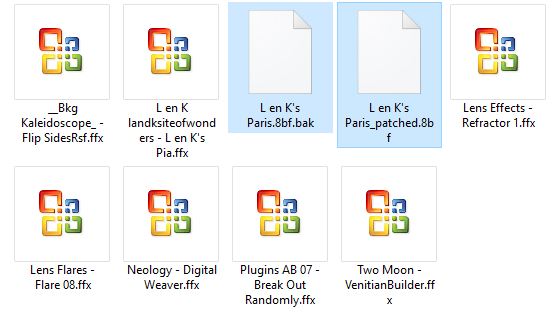


 If a plugin supplied appears with this icon it must necessarily be imported into Unlimited