|
Let's start the lesson.
-
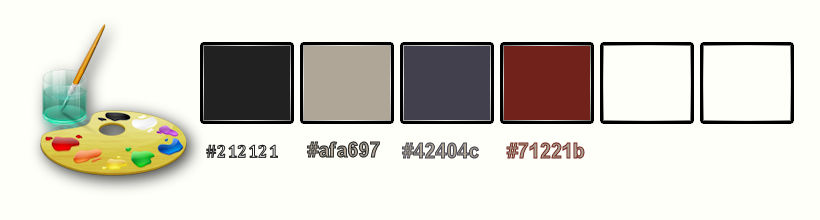
Color-Palette : Set your foreground color to color #212121 -Set your background color to color #afa697
1.
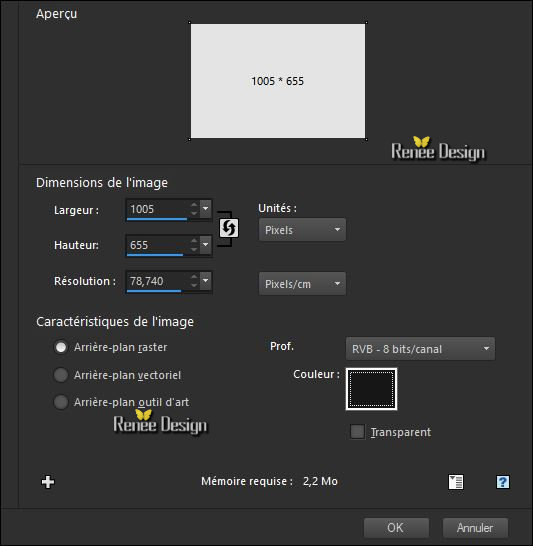
File - New - New Image 1005 x 655 Pixels- Click left in the color and choose the foreground color /Promote Background Layer = Raster 1
We start as follows (see print screen)
2.
Layers- New Raster Layer
3.
Activate Flood Fill Tool and fill the background color
- Open the Mask ‘’155_msk_por_silvina_vanesa_orsi’’ and minimize in your Psp
4.
Layers - New Mask Layer - From Image and and choose my file :
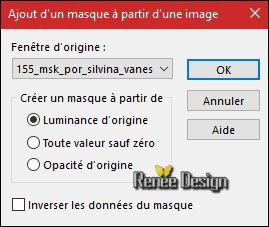
-
Layers-Merge- Merge Group.
5.
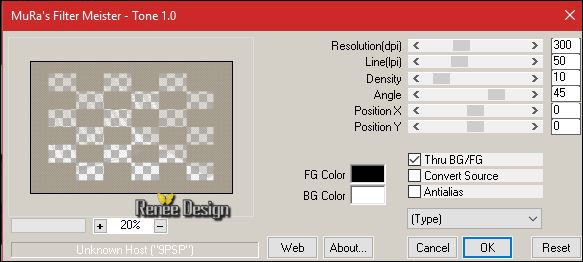
Effects- Plugins –Mura’s Meister –Tone
with these settings-Color #212121 and #ffffff
6.
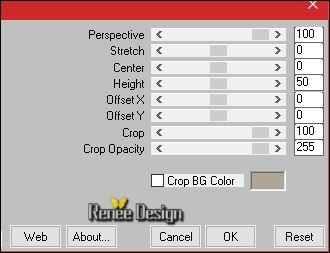
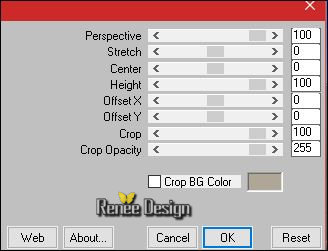
Effects- Plugins – Mura’s Meister- Perspective
Tilling use settings below -Color #afa697
7.
Effects –Plugins - Unlimted – Shapes- Rotocube..use settings below .
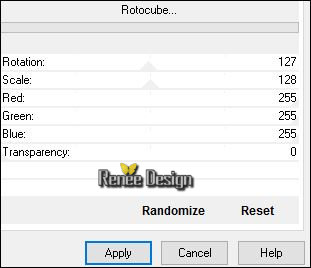
Layers- Merge -Merge Down
-
Properties Foreground; Set your Foreground color to color #42404c
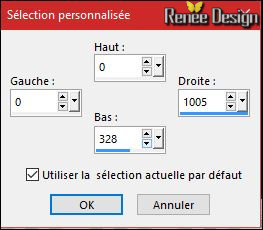
8.
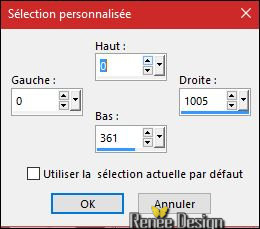
Activate Selection Tool -Custom Selection (S) -Rectangle with these settings
9.
Layers- New Raster Layer
10.
Activate Flood Fill Tool and fill the selection with the foreground color
11.
Effects- Plugins – Dynasty Plugin –
Orbit
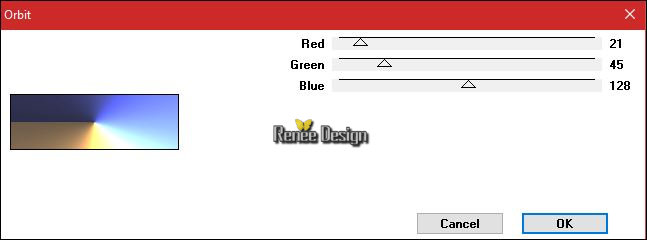
Keep Selected
-Properties Foreground; Set your Foreground color to #71221b
12.
Layers- New Raster Layer
13.
Activate Flood Fill Tool and fill the selection with the foreground color
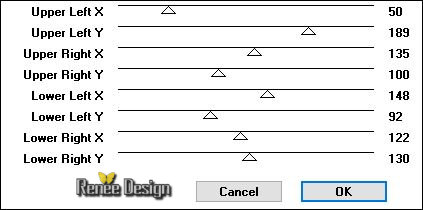
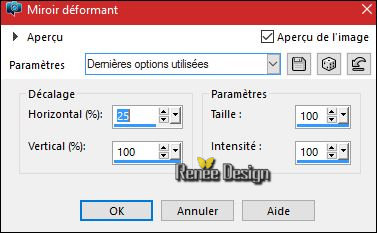
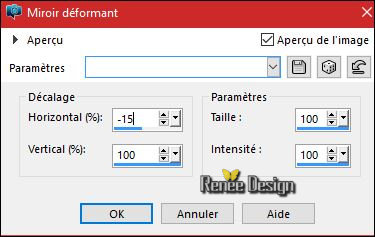
14. Effects- Plugins – Deformation
( filter without S )- Perspecular use settings below
-
Layer Palette - Double click on this Layer and set the Blend Mode to "Overlay " and set the layer Opacity of this layer to 67%
15.
Layers- Merge- Merge Down
16. Adjust- Blur- Gaussian Blur- Radius 43
Selections- Deselect All
17.
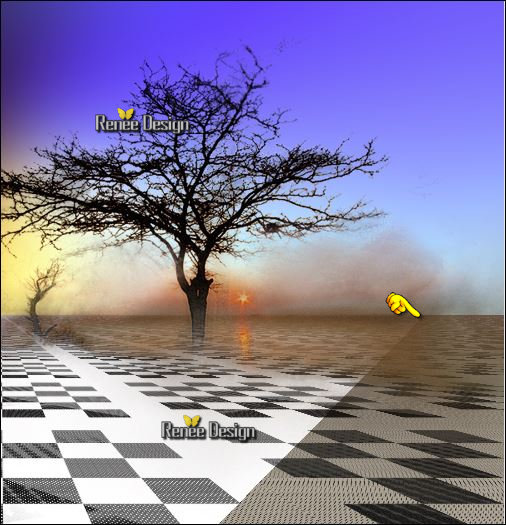
Open the tube ‘’
pspcybertubesblogspotcom-lands.pspimage
- Edit/ Copy-Edit - Paste as new layer on your working image
-
Move Tool / place your tube as shown in the example below
18.
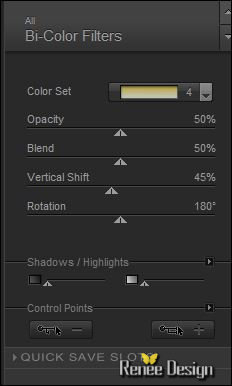
Effects- Plugins - Nick Software Color Effex pro /Bi
Color / set Green_Brown’’_4-
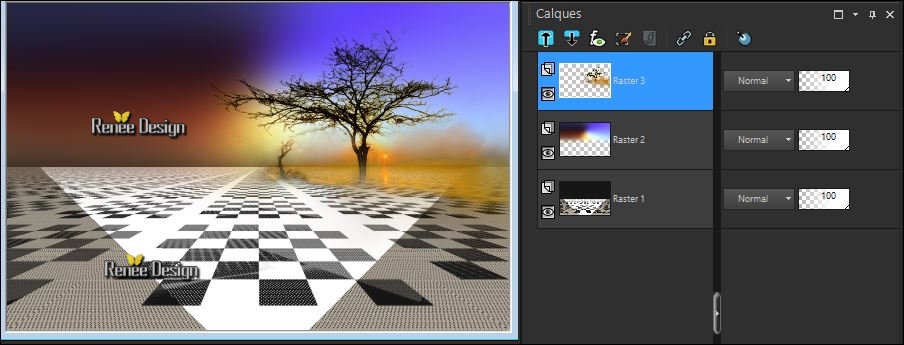
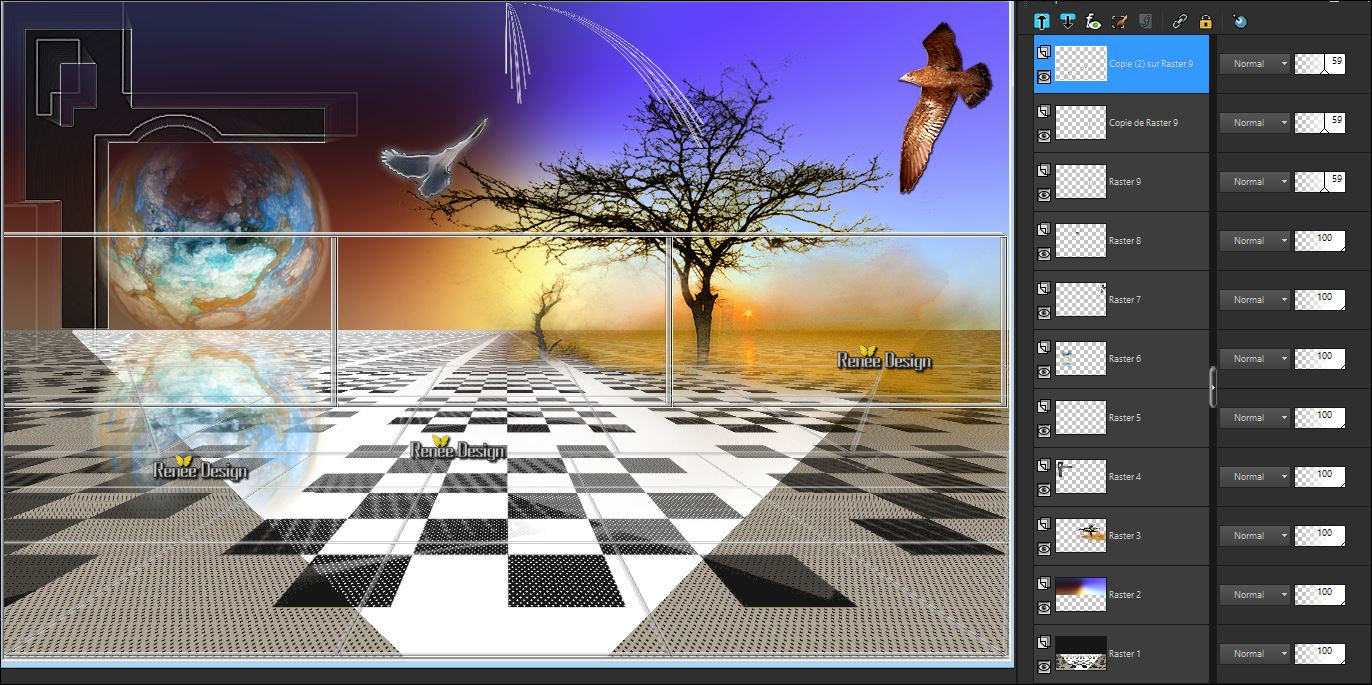
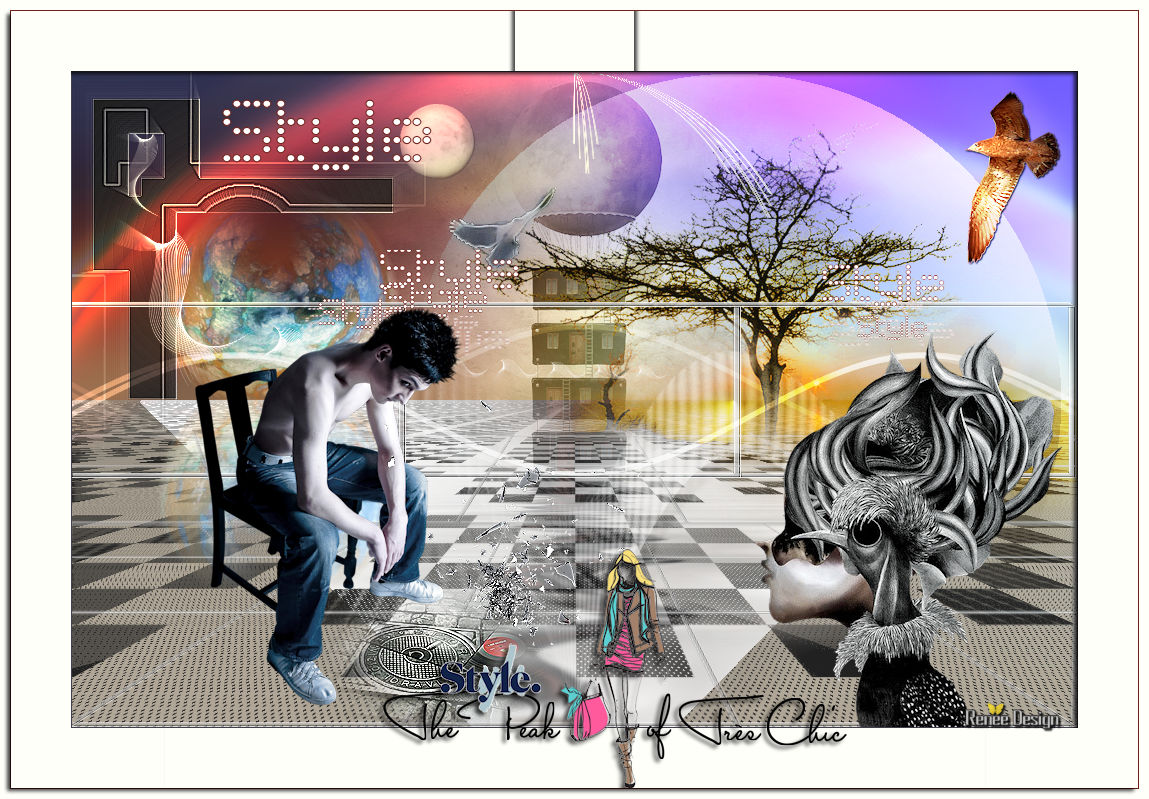
Your work and Layer Palette look like this now-You should have this result
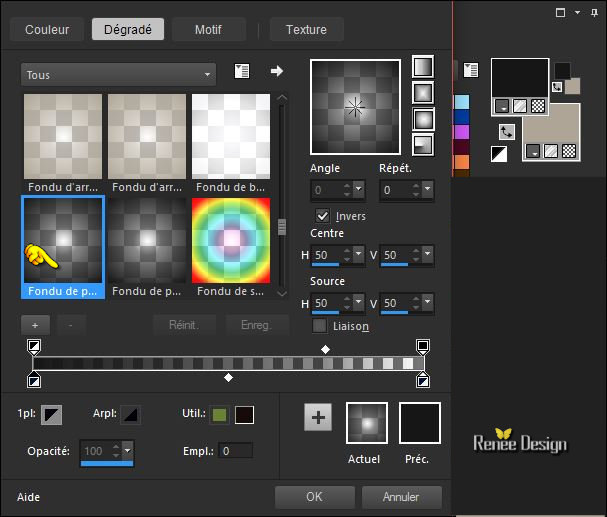
- Color-Palette: Set the foreground color to color #212121
19.
Change foreground material into a "fading foreground" sunburst gradient with these settings
20. Layers- New Raster Layer
21.
Selections –load/save selection –load selection from disc and select my selection: ‘’ avec_style’’
22. Activate Flood Fill Tool and fill the selection with the gradient
Selections- Deselect All
23.
Effects- Plugins – EyeCandy 5 Imapct – BackLight
-tab Settings/User settings choose my Preset ‘’avec_style’’

24. Effects- Edge Effects- Enhance More
25. Layers- New Raster Layer
26
Selections –load/save selection –load selection from disc and select my selection: ‘’ avec_style_1’’
27. Activate Flood Fill Tool and fill the selection with the gradient
Selections- Deselect All
28.
Image - Negative Image
29. Effects- Geometric Effects –Circle /Transparent
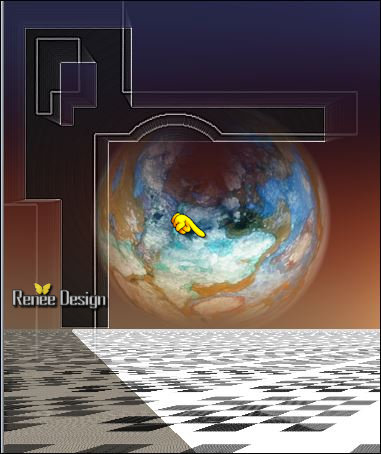
30. Open the tube ‘’ avec_style_image_1.png’’
-
Edit/ Copy-Edit - Paste as new layer on your working image
- Move Tool / place your tube as shown in the example below
31.
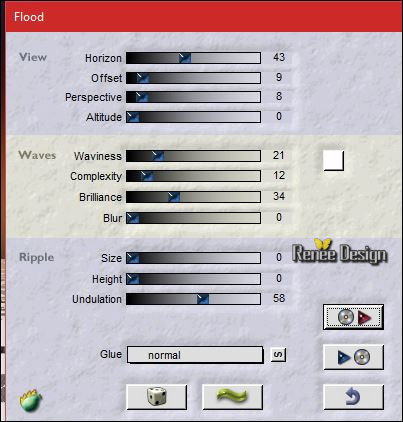
Effects- Plugins – Flaming Pear – Flood/Preset
Click on the Red Arrow
 ‘select my file preset ‘’ avec _style.q8r’’ - can be used in any folder of your choice by clicking it. ‘select my file preset ‘’ avec _style.q8r’’ - can be used in any folder of your choice by clicking it. 
-Open it will be OK in your filter
32. Open the tube ‘’2 oiseaux” (Two Birds)
- Edit/ Copy-Edit - Paste as new layer on your working image and place them to your taste
33. Layers- New Raster Layer
34.
Selections –load/save selection –load selection from disc and select my selection: ‘’
avec_style_2 »
- Color-Palette: Set the foreground color to color #ffffff
35. Activate Flood Fill Tool and fill the selection with the foreground color #ffffff (Zoom In )
Selections- Deselect All
36. Effects- Plugins – EyeCandy 5 Impact – Extrude-tab Settings/User settings choose my Preset ‘’
avec_style_extrude »
37. Effects- Edge Effects- Enhance
-
Set the layer Opacity of this layer to 59%
38. Layers- Duplicate
39. Effects- Plugins – Mura’s Meister – Perspective Tilling use settings below
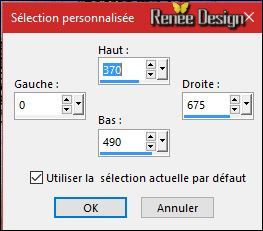
40.
Activate Selection Tool -Custom Selection (S) -Rectangle with these settings
DELETE

Selections- Deselect All
41. Effects
–Plugins –Mura’s Meister –Perspective Tilling use settings below
42.
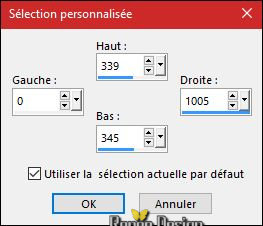
Activate Selection Tool -Custom Selection (S) -Rectangle with these settings
DELETE
Selections- Deselect All
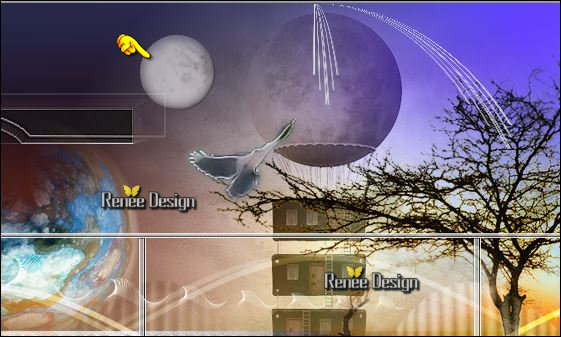
Your work and Layer Palette look like this now-You should have this result
43. Layers- Merge- Merge Down
Set the layer Opacity of this layer to 100%
44.
Layers- New Raster Layer
45.
Activate Selection Tool -Custom Selection (S) -Rectangle with these settings
46. Activate Flood Fill Tool and fill the selection with the foreground color #ffffff
Selections- Deselect All
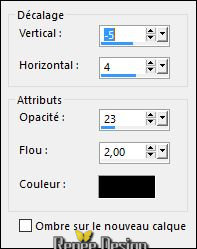
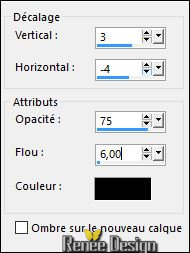
47.Effects- 3 D Effects- Drop Shadow use settings below
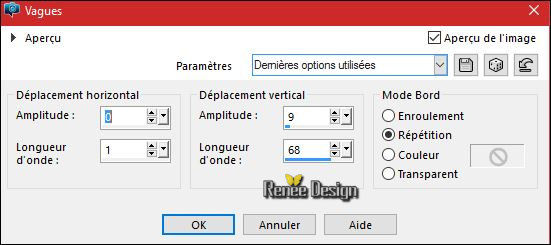
48. Effects- Distortion Effects- Wave use settings below-Repeat checked
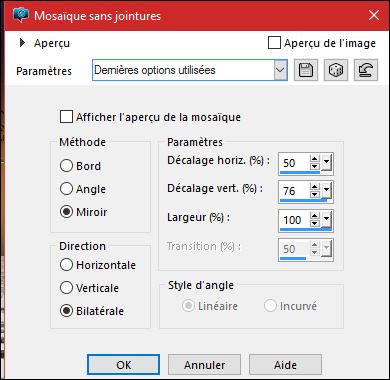
49. Effects
– Image Effects- Seamless Tiling use settings below
50. Layer Palette - Double click on this Layer and set the Blend Mode to "Overlay " and set the layer Opacity of this layer to 85%
- Layer palette – Make RASTER 2 active
51. Open the tube ‘’ Renee_tube_241.pspimage ‘’
- Image
Resize to 65%
- Edit/ Copy-Edit - Paste as new layer on your working image
52. Effects- Image Effects- Offset with these settings: H = 9 and V = 106
-
Set the layer Opacity of this layer to 59%
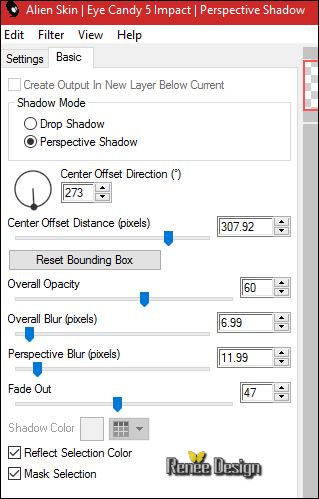
53. Effects- Plugins – Alien Skin EyeCandy 5 Impact - Perpsective
shadow use settings below
- To replace the top of the layers palette
54. Layers- New Raster Layer
- Activate Flood Fill Tool and fill the layer with the foreground color #ffffff
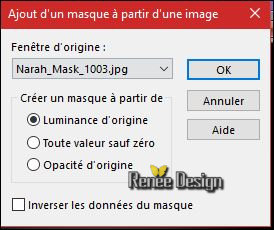
- Open the Mask ‘’ ’ Narah_Mask_1003.jpg ‘’ and minimize in your
Psp
55. Layers - New Mask Layer - From Image and choose my file : ‘’
Narah_Mask_1003.jpg ‘’
- Layers- Merge- Merge Group
56. Effects- Geometric Effects – Circle /Transparent
Layer Palette -double click on this layer and set the Blendmode to "Soft Light "
- Effects- 3 D Effects- Drop Shadow using the default settings
57. Open the tube ‘’Renee_tube_femmeetoiseau’’
- Image
Resize to 65%
- Edit/ Copy-Edit - Paste as new layer on your working image
-Move Tool (M) place your tube on the right bottom of your image
58. Layers- New Raster Layer
59.
Selections –load/save selection –load selection from disc and select my selection: ‘’
avec_style_3’’
- Activate Flood Fill Tool and fill the layer with the foreground color #ffffff
Selections- Deselect All
60.Layer Palette -double click on this layer and set the Blendmode to " Screen "
61. Open the tube ‘’Lune’’
-
Edit/ Copy-Edit - Paste as new layer on your working image
- Move Tool / place your tube as shown in the example below
-
Set the layer Opacity of this layer to 59%
- Layer Palette - Make Layer with the tube ''Renee_tube_241.pspimage
''active
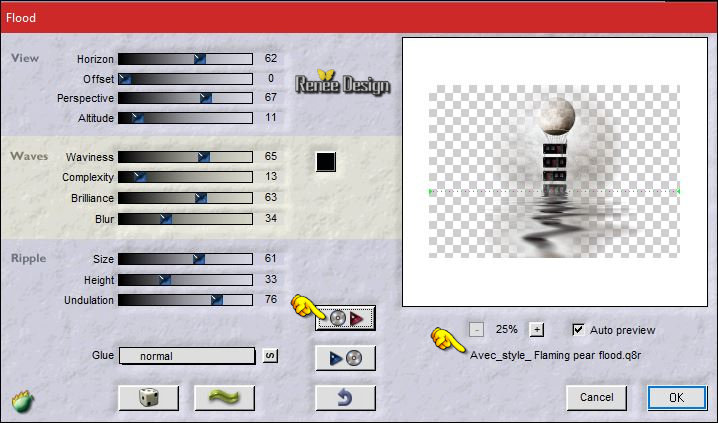
62.
Effects- Plugins – Flaming Pear – Flood/Presets
“Avec_style_ Flaming pear flood.q8q”
Click on the Red Arrow
select my file preset ‘’"Avec_style_Flamingpear flood.q8q" can be used in any folder of your choice by clicking it. Open it will be OK in your filter
- To replace the top of the layers palette
63. Layers- New Raster Layer
64.
Activate Selection Tool -Custom Selection (S) -Rectangle with these settings
Color -Palette:
Set your foreground to gradient and select ‘’ bkgr65’’ -Prepare a Radial gradient configured like this.
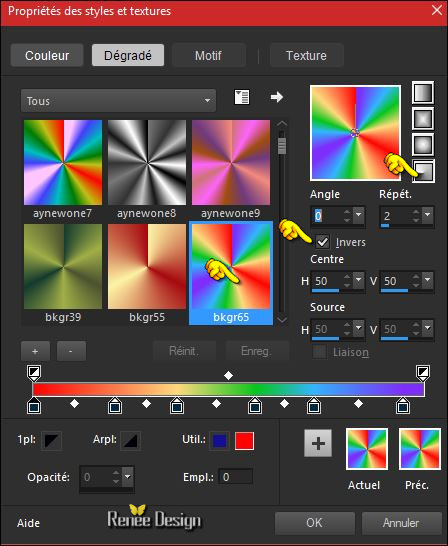
65. Activate Flood Fill Tool and fill the selection with the gradient
Selections- Deselect All
66.
Adjust- Blur- Gaussian Blur: Radius: 25
67.
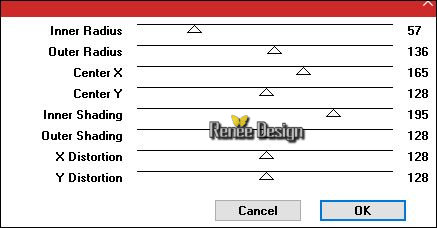
Effects –Plugins- Unlimited – Déformation- Stars with these settings 255
/61
68. Effects- Distortion Effects- Warp use settings below
- Layer Palette - Double click on this Layer and set the Blend Mode to "Dodge " and set the layer Opacity of this layer to 75%
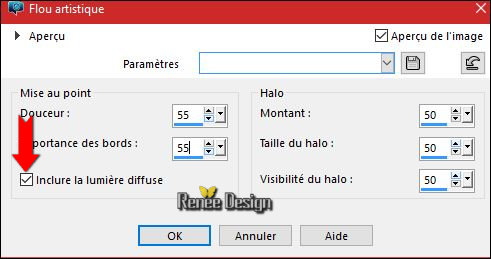
69.
Adjust-Softness- Soft Focus use settings below
70.
Selections –load/save selection –load selection from disc and select my selection:’’ avec_style_4’’
DELETE
Selections- Deselect All
- Material Properties: Set your Foreground color to color #71221b -Set your background color to color #ffffff
71. Activate Text Tool (T) Font « Bascdots –with these settings - Size
72
Write ‘’STYLE’’

-
Convert to Raster Layer
- Move Tool / place your tube as shown in the example below

72. Layers- Duplicate
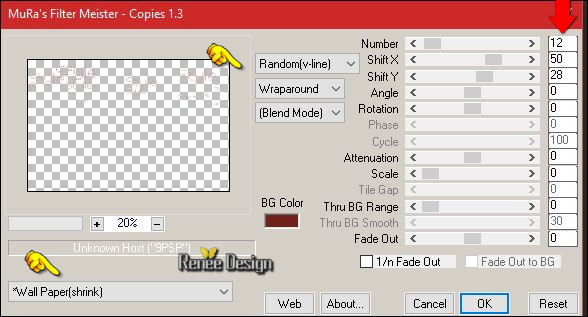
73. Effects
–Plugins –Mura’s Meister – Copies
(
The appearance of your text can be changed with the filter. Use
the eraser tool to adjust your text as to size. )
- If you are unable to get the correct results using the filter
and eraser you can use my text that is in the file.
- Open the tube ‘’ effet_Muras
Copies.png’’ -Edit/ Copy-Edit - Paste as new layer on your working image and remove your duplicate layer( point 72)
-With the Move tool, move it in the right place
74.Layer Palette -double click on this layer and set the Blendmode to " Screen "
- Layers- Merge- Merge Down - Set the Blendmode to "Normal"
75.
Effects- Plugins – EyeCandy 5 Impact –Perpsective
shadows –tab Settings/User settings choose my Preset ‘’
Avec_style_Perspective_shadow”

76. Layers- New Raster Layer
77.
Selections –load/save selection –load selection from disc and choose my selection: ’avec_style_5’’
78. Activate Flood Fill Tool and fill the selection with the background color #ffffff
Selections- Deselect All
79.Adjust-Blur- Gaussian Blur: Radius : 10
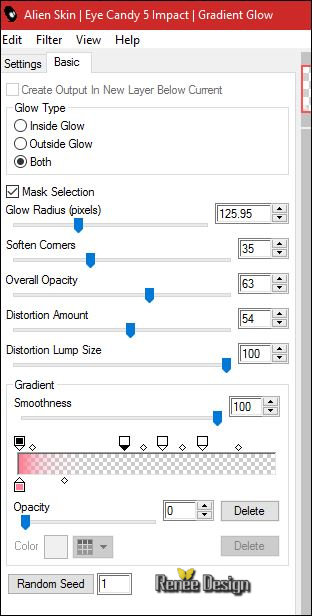
80. Effects- Plugins – Eye Candy 5 Impact – Gradient
Glow-tab Settings/User settings choose my Preset « Avec_style_Gradient_glow »
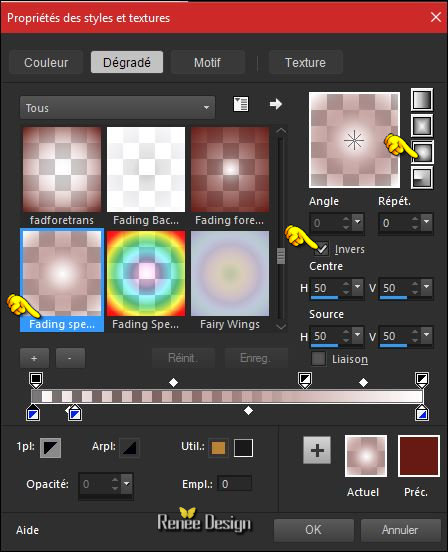
- Color -Palette:
Set your foreground to gradient and select ‘’ Fading
special’’ -Prepare a sunburst gradient configured like this.
81. Layers- New Raster Layer
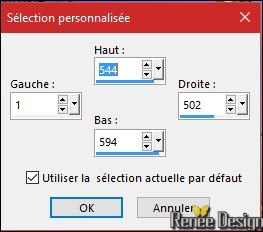
82.
Activate Selection Tool -Custom Selection (S) -Rectangle with these settings
83. Activate Flood Fill Tool and fill the selection with the gradient
Selections- Deselect All
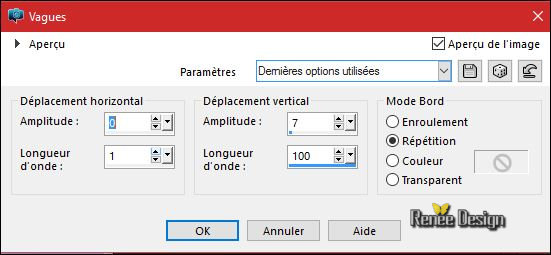
84. Effects- Deformation Effects- Wave use settings below-Repeat checked
85.
Adjust-Blur-Gaussian Blur: Radius: 10
86. Layers- Merge- Merge Down
87. Effects- Plugins – Eye Candy 5 Impact – Gradient
Glow-tab Settings/User settings choose my Preset ‘’Avec_Style _gradient_Glow 2’’
88. Effects- Distortion Effects- Warp use settings below
89. Image
Mirror (CTRL+B)
- Layer Palette - Double click on this Layer and set the Blend Mode to "Overlay " and set the layer Opacity of this layer to 91%
90. Effects
–Plugins Unlimited – VM Natural – Bubble
Planet use settings below
91. Open the tube ‘’ logane_plaquegout_30juin2013’’
- Activate ‘’tube1’’of the tube
- Image
Resize to 50 %
-
Edit/ Copy-Edit - Paste as new layer on your working image
Move Tool / place your tube as shown in the example below 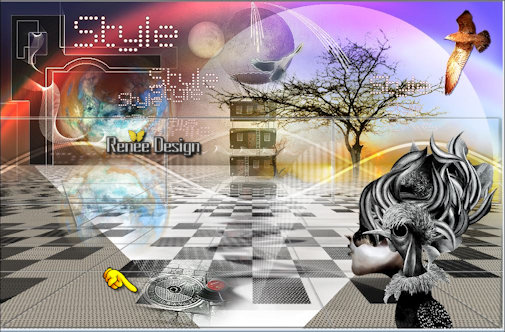
92. Effects- Edge Effects- Enhance
93. Open the tube ‘’ Anny_01082011_Nathan_Blue.pspimage’’
- Image
Mirror (CTRL+B)
-
Resize to 50%
- Edit/ Copy-Edit - Paste as new layer on your working image
-
Move Tool / place your tube on the bottom left side of your image
94. Open the tube ‘’ Renee_avec_style_tube_debris’’
-
Edit/ Copy-Edit - Paste as new layer on your working image
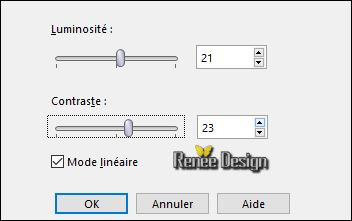
95.
Adjust- Brightness and Contrast-Brightness/Contrast with these settings
96. Image - Add borders-Symmetric checked: 1 pixel #42404c
97. Image - Add borders-Symmetric checked: 60 pixels #ffffff
98. Image - Add borders-Symmetric checked: 1 pixel #71221b
99. Image - Add borders-Symmetric checked: 10 pixels #ffffff
100.
With the Magic Wand Tool-select the border of 60 pixels
101. Selections- Promote selection to Layer
102. Effects- 3 D Effects-Drop Shadow use settings below
103. Effects- Plugins – Simple – Blintz
Selections- Deselect All
104.
Activate the tube Text /Ore write your own text /Font are in the tube folder .
Save as JPG
I hope you enjoyed this lesson
Renée
This lesson was written by Renée 08/07/2016
Edited and Update
2016
*
Any resemblance with an existing lesson is a coincidence
* Do not forget to thank the people who work with us and for us I have appointed the tubeurs and translators
Thanks Renée
*
| 
 Translations


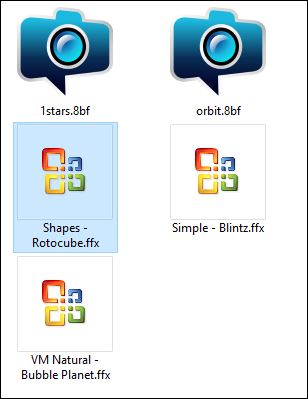


 When you see this logo the filter is imported in Unlimited

 All rights reserved