|
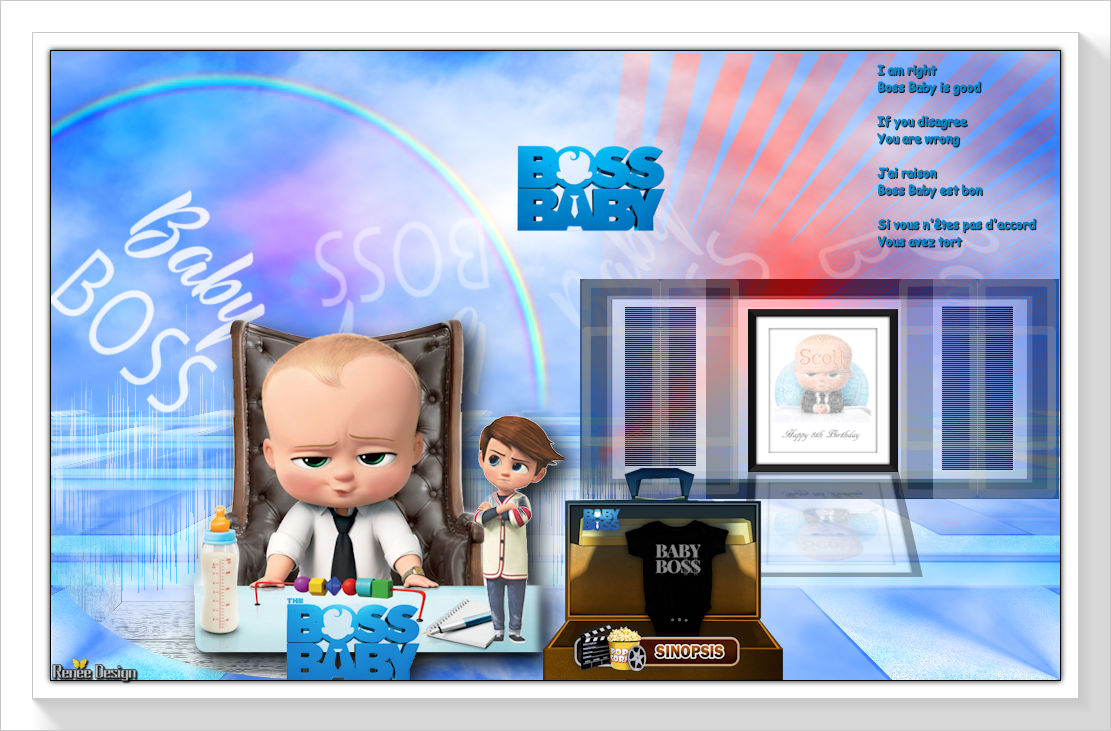
Let's start the lesson.
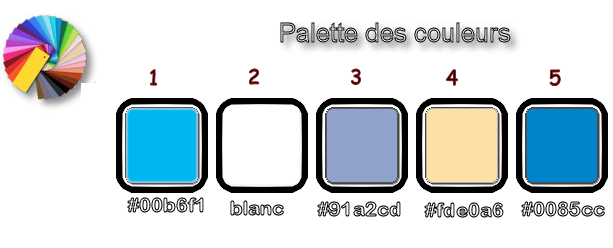
- Preparation/ Material Properties: Set your foreground color to #00b6f1= Nr1 - Set your background color to # ffffff =Nr 2
-
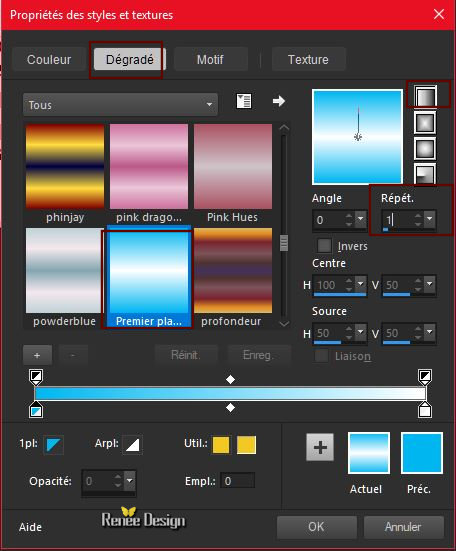
Prepare a foreground linear gradient use the settings below
1. File: Open a new transparent image: 1009 x 629 Pixels
2. Activate the Flood Fill Tool  Fill the Layer with the gradient
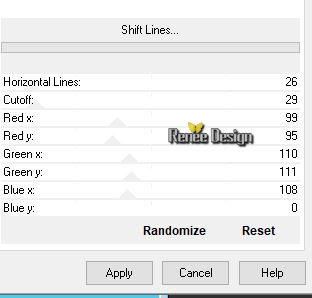
3. Effects –Plugins -Unlimited - Sapphire Filters 1c - Shift
Lines..use the settings below.
4. Effects - User Defined Filter – Emboss 4 using the default settings
5. Effects – Edge Effects- Enhance More
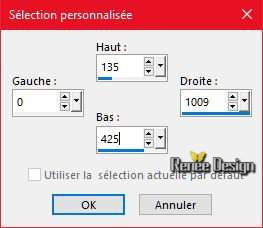
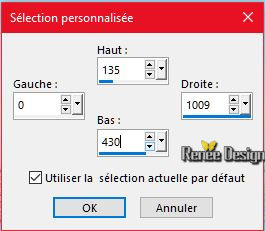
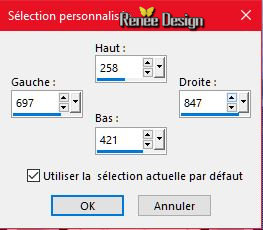
6. Activate Selection Tool -Custom Selection (S) -Rectangle with these settings

7. Selections-Promote Selection to Layer
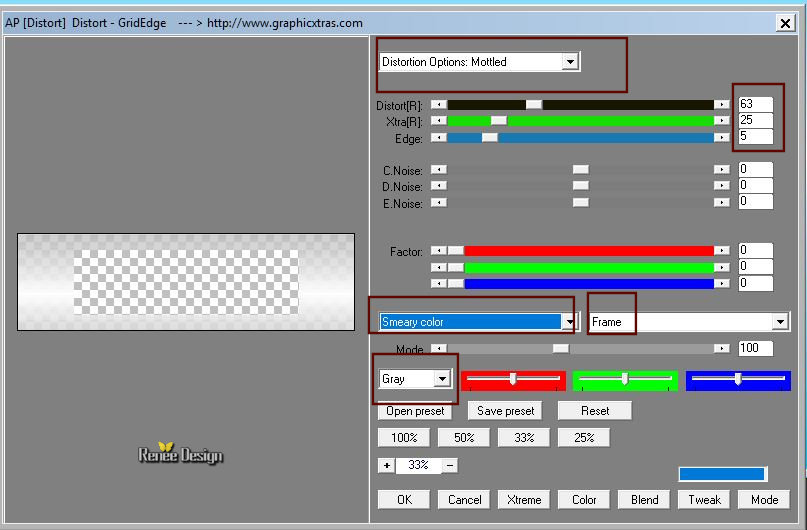
8. Effects –Plugins –AP[Distort] GridEdge use the settings below
Do you have problems with this Filter ?-Image -Effet-Ap Distort is into the zipfile . Take a New Raster Layer and Paste into Selection. Activate the Layer underneath ( Promoted Selection) and Delete
Selections- Deselect All
9. Effects –3 D Effects -Drop Shadow with these settings: 0/0/100/9 Black
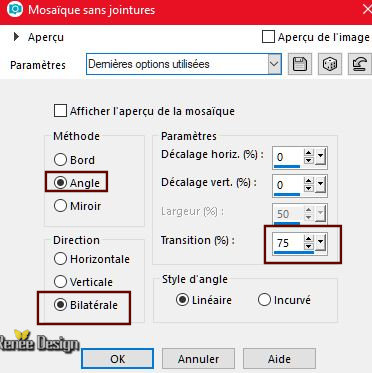
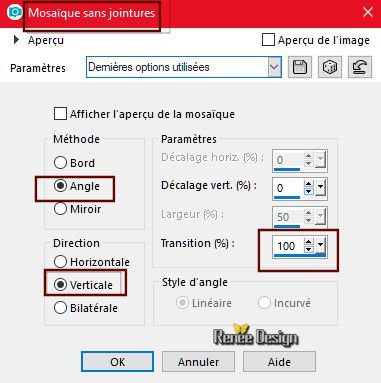
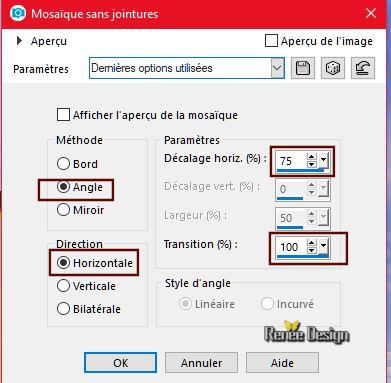
10.Effects- Image Effects- Seamless Tiling use the settings below
11. Activate Selection Tool -Custom Selection (S) -Rectangle with these settings
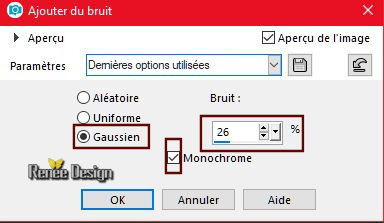
12. Adjust-Add/Remove Noise-Add Noise use the settings below
Selections- Deselect All
13.Effects- Image Effects- Seamless Tiling use the settings below
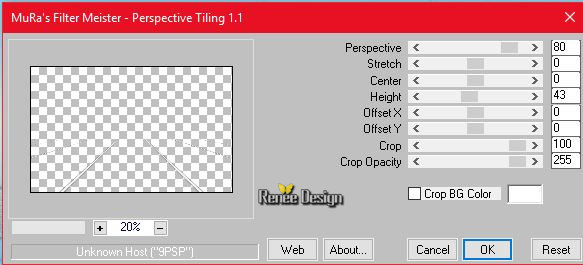
14. Effects – Plugins – Mura’s Meister –
Perspective Tilling use the settings below
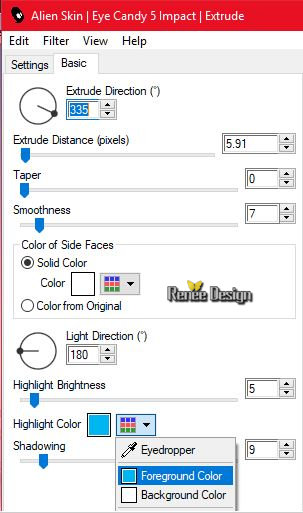
15. Effects - Plugins – EyeCandy 5 Impact –
Extrude-use the settings below /Foreground/Background color
16.Layers-Properties-Set the Blend Mode to " Overlay "
-Layer Palette – Make Raster 1 active
17 . Effects –Plugins- Unlimited –ICNETFILTERS – Render- Clouds
(white/blue) with these settings : 62/128
18. Effects –Plugins- Unlimited –ICNETFILTERS -Special Effects 2
– Rainbow with these settings: 17/92/128/128
19. Layers- New Raster Layer
20.
Activate Brush Tool and select my file : ‘’
Pinceau_baby_boss ‘’– with these settings/ Opacity 45% and Rotation 45

-Stamp your brush in the left side by using your background color #ffffff
(If the brush does not work .Open the Brush ‘’’ Pinceau_baby_boss jpg ‘’ in your psp .File- Export Custom Brush
Give it a name)
21. Layers- Duplicate
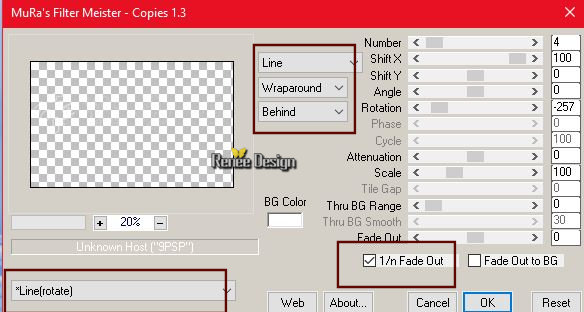
22. Effects –Plugins – Mura’s Meister – Copies use the settings below
23. Layers-Properties-Set the Blend Mode to" Screen "
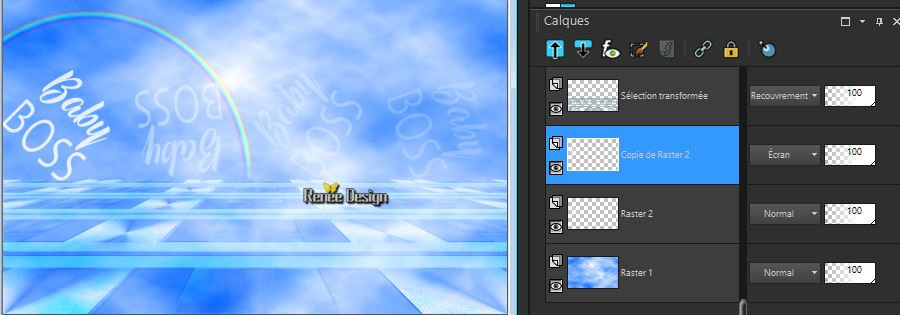
- Your work and Layer Palette look like this now-You should have this result
- To replace the top of the layer-palette
24. Layers- New Raster Layer
25. Selections –load/save selection –load selection from disc and select my selection: ‘’ Boss_Baby_selection_1’’
26.
Activate Flood Fill Tool Flood Fill the selections with #ffffff
Selections- Deselect All
27. Layers-Properties-Set the Blend Mode to " Hue "
-Preparation/ Material Properties: Set your foreground color to #91a2cd= Nr3 - Set your background color to # fde0a6 =Nr
4
-
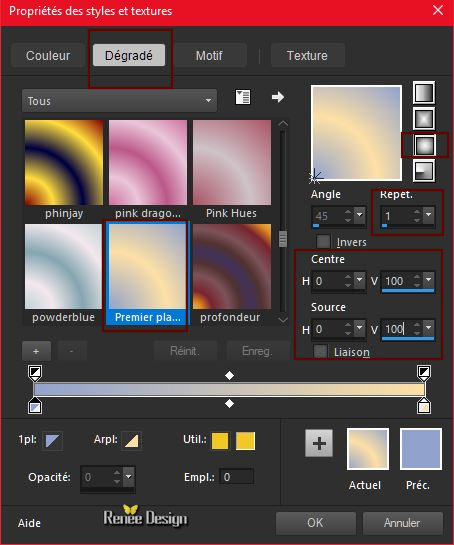
Prepare a foreground sunburst gradient use the settings below
28. Layers- New Raster Layer
29. Activate the Flood Fill Tool Fill the Layer with the gradient
30.
Effects – Plugins-Unlimited - Andrew's Filters 1 – Boxed…with these settings: 236/232/223/53
31. Images – Resize to 35 % - Resize all Layers not checked
32. Effects- Image Effects- Seamless Tiling use the settings below
33. Effects- Image Effects- Offset with these settings: H = 327 and V –
23
34. Layers-Properties-Set the Blend Mode to " Luminance-Legacy "
35. Selections –load/save selection –load selection from disc and select my selection: ‘’ Boss_Baby_selection_2’’
36.
Selections- Promote Selection to Layer
37. Effects –Plugins - Unlimited - Kohan's Filters -
Autointerlace v1.0 : 2/ 88
38. Layers-Properties-Set the Blend Mode to " Difference "
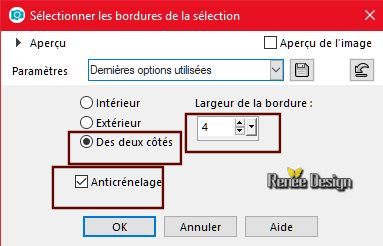
39. Selections- Modify- Select Selection Borders
40.
Layers- New Raster Layer–Activate Flood Fill Tool- Flood fill the selection with the gradient
Selections- Deselect All
41. Effects –Plugins- Toadies -What are you
20/20
42. Lower the Opacity of the Layer to 67%
43. Layers- New Raster Layer
44. Activate Selection Tool -Custom Selection (S) -Rectangle with these settings
45 Activate the tube ‘’ Boss_Baby-Image1.pspimage’’
-
Edit- Copy-Activate your work- Edit Paste Into Selection
Selections- Deselect All
46. Effects –Plugins – Eyecandy 5 Impact –
perpective shadow-Tab- Settings- User Settings and choose my Preset Boss_baby_shadow.f
47. Activate Text Tool -With the font (of your choice) and color of your choice ( For me Nr 5 ) Write this text
I am right
Boss Baby is good
If you disagree
You are wrong
J’ai raison
Boss Baby est bon
Si vous n'êtes pas d'accord
Vous avez tort
48. Effects- 3 D Effects- Drop Shadow with these settings : 1/1/100/1 Black
-
Preparation/ Material Properties: Set your foreground color to #91a2cd= Nr3 - Set your background color to # ffffff =Nr
2
49. Layers- New Raster Layer
50.
Selections –load/save selection –load selection from disc and select my selection: ‘’ Boss_Baby_selection_3’’
51.
Activate Flood Fill Tool Flood fill the selection 1 x foreground color and 1 x background color
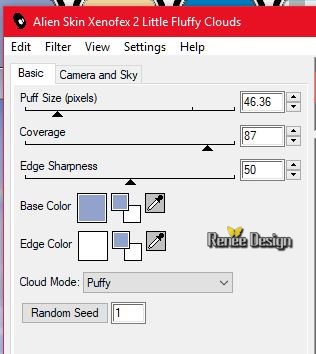
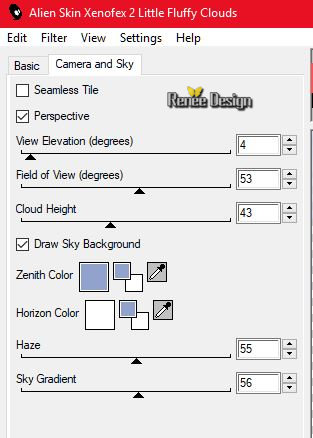
52. Effects –Plugins – Alien skin- Xenofex - -
Little Fluffy Clouds use the settings below /Foreground color and Background color
Selections- Deselect All
53.Layers-Properties-Set the Blend Mode to " Overlay " Lower the opacity of the layer to 63%
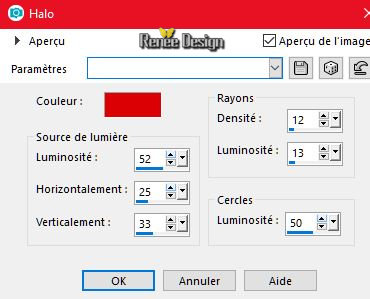
54. Effects- Illumination Effects- Sunburst with these settings- Color
#da0206
55.Layers- Duplicate -Image - Mirror - Mirror vertical ( Image - Flip in older versions of PSP)
56. Effects –Plugins- Unlimited –ICNETFILTERS - Pattern
Generators - Audio Wave: 188
57. Layers-Properties-Set the Blend Mode to "Hard Light " Lower the Opacity of the layer to 72%
58.Layers- New Raster Layer
59. Selections –load/save selection –load selection from disc and select my selection: ‘’ Boss_Baby_selection_4’’
60.
Activate Flood Fill Tool Flood Fill the selections with #ffffff
Selections- Deselect All
61. Effects –Plugins- Unlimited – ICNETFILTERS - Frames, Wood -
Wood Patchwork 02 using the default settings
62. Effects- Edge Effects- Find All
63. Activate the tube ‘’ Renee_TUBES_Boss_baby
et frere.pspimage’’
-
Edit - Copy- Activate your work -Edit - Paste as a new layer
64. Effects- Image Effects- Offset with these settings: H = - 178
and V = -128
65. Effects -Plugins – Eye Candy 5 impact –
Drop shadow blurry using the default settings
66. Activate the tube ‘’
Renee_TUBES_Valise_Boss_Baby.pspimage’’
Close the Background Layer of the tube - Activate the Layer above. Layers Merge- Merge Visibe (Do not merged this tube if you want to change the elements of the bag )
67.
Image- Resize to 50%
-
Edit - Copy- Activate your work -Edit - Paste as a new layer
-
Activate your Move Tool (M) place the tube at the bottom ( see finished image)
68. Activate the tube ‘’ The_Boss_Baby_logo.png’’
-
Edit - Copy- Activate your work -Edit - Paste as a new layer
-Activate your Move Tool (M) move it in the right place
69. Image - Add borders-Symmetric checked 1 pixel Black
70. Selections- Select All
71. Effects- 3 D Effects- Drop Shadow with these settings: 1/1/100/9 Black
72. Image - Add borders-Symmetric checked 50 Pixels #ffffff
73.
Selections- Invert
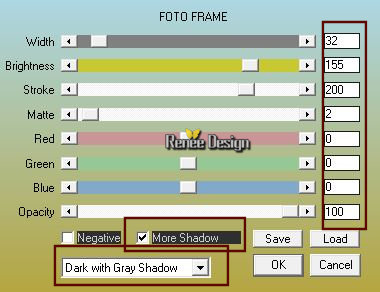
74. Effects – Plugins –AAA Frame –Foto
frame use the settings below
Selections- Deselect All
Save as JPG
I hope you enjoyed this lesson
Renée
This lesson was written by Renée 12 April 2018
Edited and Update
2018
*
Any resemblance with an existing lesson is a coincidence
* Do not forget to thank the people who work with us and for us I have appointed the tubeurs and translators
Thanks
*
| 

 Translations


 If a plugin supplied appears with this icon it must necessarily be imported into Unlimited *