|
 2018 2018
Let's start the lesson.
-
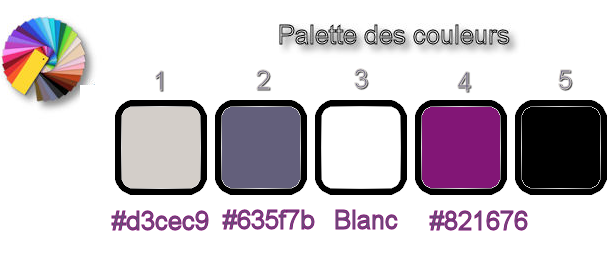
Preparation/ - Color Palette: Set your foreground color to #d3cec9- Set your background color to #635f7b
1.
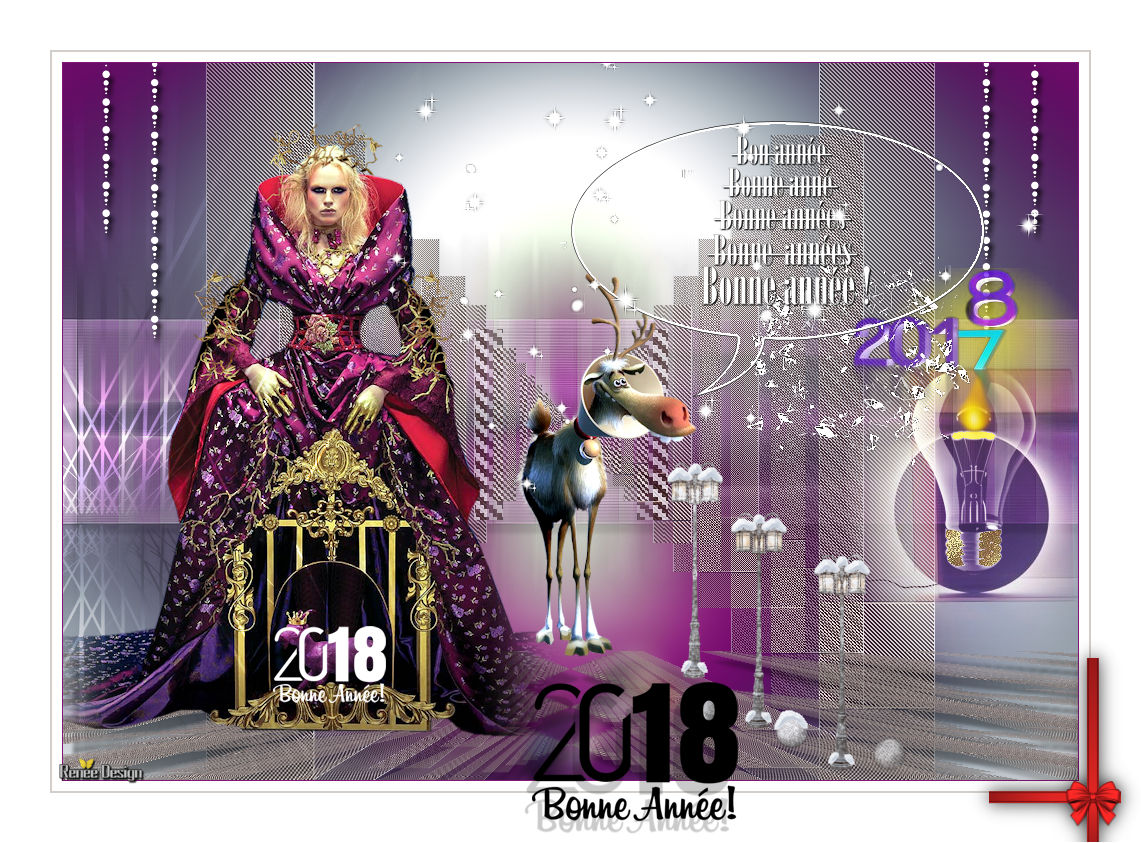
Open Image ’’Bonne_année_2018’’/ Window - Duplicate (or shift+D) - Close the original and proceed on the copy -Promote Background Layer =Raster 1
2.
Effects –Plugins – Adjust variation – Lighter ( 2 click )
3.
Layers- Duplicate
4.
Image –Free Rotate 90° right
5.
Image – Resize to 58% (all layers not checked)
6.
Adjust-Blur- Gaussian Blur: Radius 25
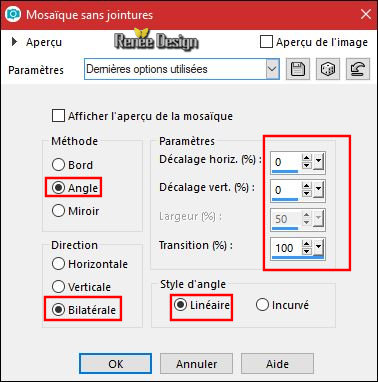
7.
Effects – Image Effects - Seamless Tiling use the settings below
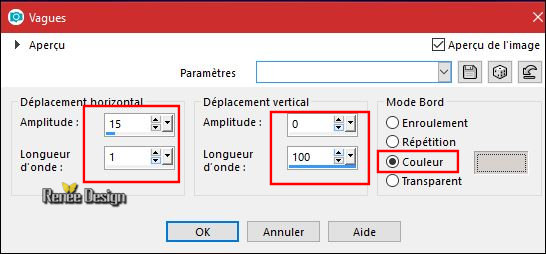
8.
Effects –Distortion Effects – Wave use the settings below-Color #d3cec9

9.
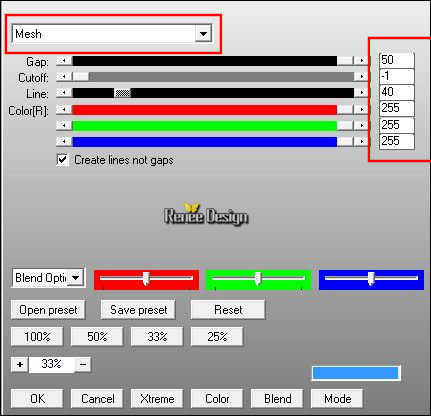
Effects – Plugins –AP[Lines
Silverling]use the settings below
10.
Effects –Distortion Effects – Wave use the settings below

11.
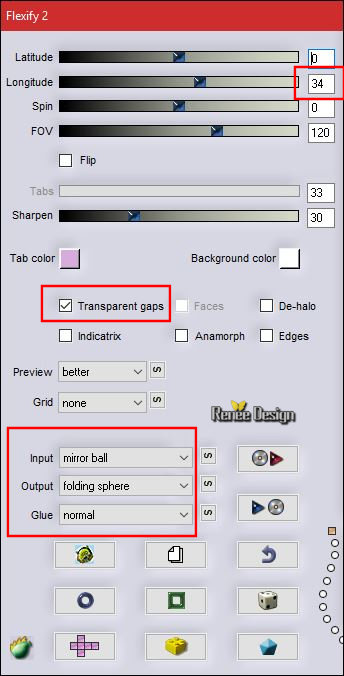
Effects – Plugins – Flaming pear – Flexify
2
12.
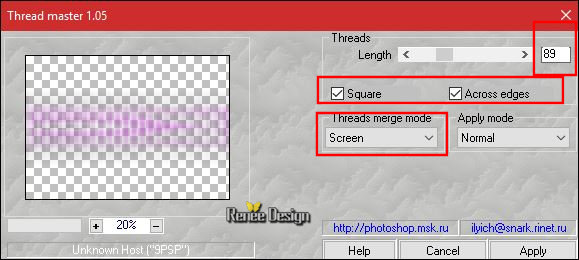
Effects – Plugins – Amphisoft – Thread
master
13.
Effects- Edge Effects- Enhance
14. Effects
–3 D Effects – Drop Shadow using the default settings
15. Open the tube ‘’BA_image1''
- Edit - Copy- Activate your work -Edit - Paste as a new layer (do not move it is the right place )
16. Effects
–Plugins –Penta Com – Jeans 64/4
17. Effects- Edge Effects- Enhance More
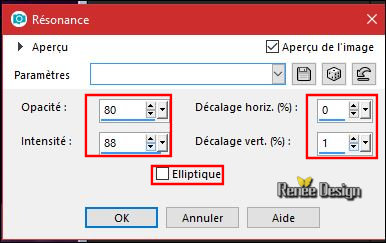
18. Effects- Reflection Effects- Feedback use the settings below
19. Layers- Duplicate
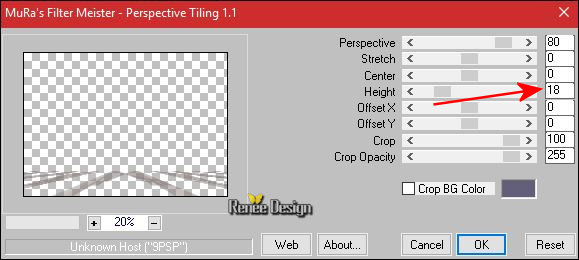
20. Effects
–Plugins – Mura’s Meister – Perspective
Tilling
21. Layers- Duplicate
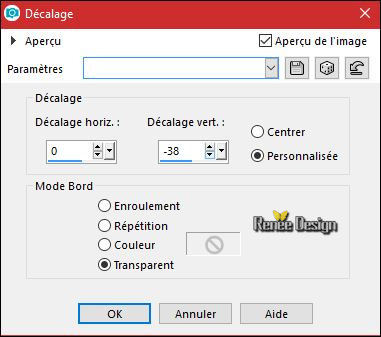
22. Effects- Image Effects- Offset with these settings
23. Layers- Duplicate
24. Effects- Image Effects- Offset with the same settings
25. Layers-Merge- Merge Down and repeat 1x
26. Effects –3 D Effects – Drop Shadow using the default settings
- Layer Palette - Click on the Bottom Layer =Raster 1
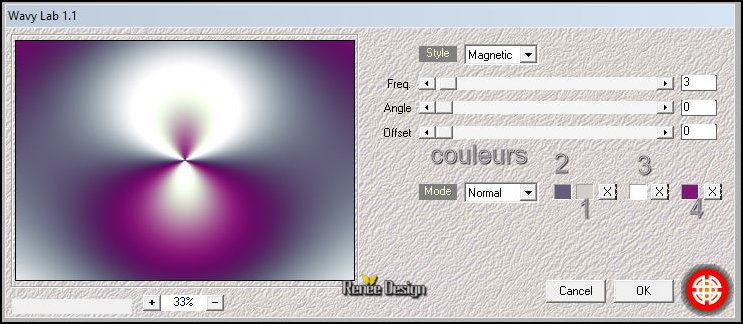
27. Effects
– Plugins – Medhi – Wavy Lab 1.1
- To replace the top of the layers palette
28. Open the tube ‘’ Renee_TUBES_BA_2018.pspimage’’
- Image
Resize to 75%
- Edit - Copy- Activate your work -Edit - Paste as a new layer
29. Effects- Image Effects- Offset with these settings H = - 267
and V = - 46
- Color Palette: Set your foreground color to #ffffff
30. Layers- New Raster Layer
31. Selections –load/save selection –load selection from disc and select my selection: ‘’ BA_2018_sel1’’
32. Activate Flood Fill Tool and fill the selection with the foreground color #ffffff
Selections- Deselect All
33. Effects –3 D Effects – Drop Shadow with these settings 7/3/100/8 black
34. Layers- New Raster Layer
35.Selections –load/save selection –load selection from disc and select my selection: ‘’ BA_2018_sel2’’
36. Activate Flood Fill Tool and fill the selection with the foreground color #ffffff
Selections- Deselect All
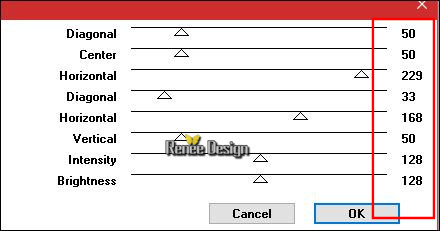
37. Effects
– Plugins – Graphic plus – Cross shadow use the settings below
38.
Layers-Properties-Set the Blend Mode to "Overlay "
39. Open the tube ‘’ Renee_TUBES_BA_2018_lampe’’
- Edit - Copy- Activate your work -Edit - Paste as a new layer
40. Image Effects- Offset with these settings H = 412 and V = -52
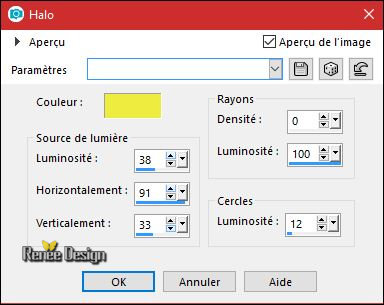
41. Effects
– Illumination Effects – Sunburst use the settings below / Color #edeb35
42. Open the tube ‘’ Renee_Tubes_Rodolphe.pspimage’’
- Image
Resize to 55%
- Edit - Copy- Activate your work -Edit - Paste as a new layer
- Move Tool (M) move it the right place (see finished image)
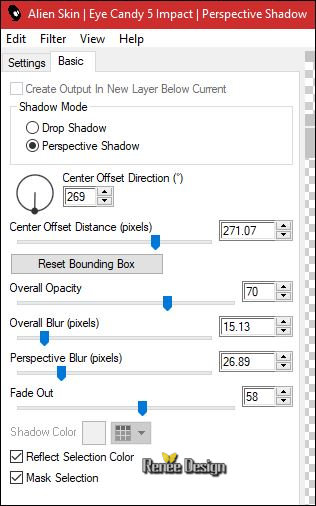
43. Effects
–Plugins – EyeCandy 5 Impact – Perspective
shadow use the settings below
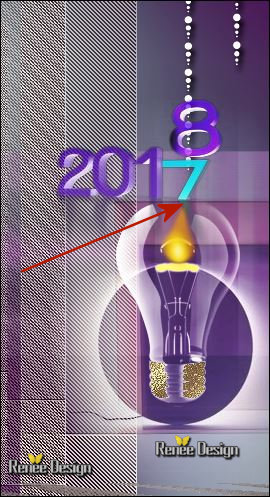
44. Open the tube ‘’ Renee_TUBES_BA_date’’
- Edit - Copy- Activate your work -Edit - Paste as a new layer
- Place the 7 on top of the flame as shown in the example below
45. Layers- New Raster Layer
46. Selections –load/save selection –load selection from disc and select my selection: ‘’ BA_2018_sel3’’
47. Activate Flood Fill Tool and fill the selection with the foreground color #ffffff ( 2 clics)
Selections- Deselect All
48. Effects- Edge Effects- Enhance More
49. Layers- Duplicate
50.Layers- Merge- Merge Down
51. Activate Preset Shape Tool (P)
- Draw a "Speech Bubble" (‘’Bulles ‘’) set to desired size
- If you want it to be empty like mine
- Activate your Magic Wand- Select the inside
- Selections – Modify - Contract with 2 pixels
- DELETE 
52. Open the tube ‘’Texte_BA_Rodolphe ‘’
- Move Tool (M) move it the right place (see finished image) (Or write your own text )
53. Layers- New Raster Layer
54. Selections –load/save selection –load selection from disc and select my selection: ‘’ BA_2018_sel4’’
55. Activate Flood Fill Tool and fill the selection with the foreground color #ffffff
Selections- Deselect All
56. Effects- Edge Effects- Enhance
57. Open the tube ‘’ Renee_TUBES_Reverbere_BA’’
- Edit - Copy- Activate your work -Edit - Paste as a new layer
- Move Tool (M) move it the right place (see finished image)
58.
Duplicate twice and and move
59. Layers- Merge 2 times Down
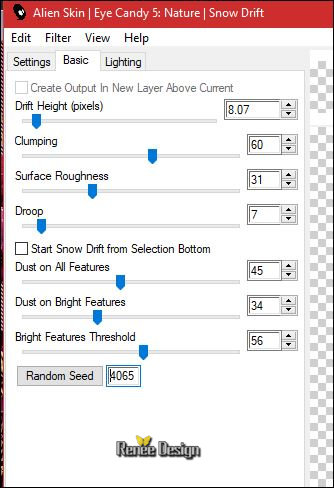
60.
Effects – Plugins – EyeCandy 5 Nature –Snow
Drift-tab SETTINGS/USER SETTINGS and choose my Preset ‘’ BA_Snow.f1s’’
61. Open the tube ‘’ BA_ ronds’’
- Edit - Copy- Activate your work -Edit - Paste as a new layer
- Move Tool (M) move it the right place (see finished image)
62.
Effects –Plugins - EyeCandy 5 Nature –Snow
Drift tab SETTINGS/USER SETTINGS and choose my Preset ‘’ BA_Snow.f1s’’
63. Image - Add borders-Symmetric checked 1 Pixel ( color no 4)
64. Image - Add borders-Symmetric checked 10 Pixels #ffffff
65. Image - Add borders-Symmetric checked 2 Pixels ( color no 1)
66. Image - Add borders-Symmetric checked 50 Pixels #ffffff
67.
Open the tube ( nœud and 2 textes) to decorate or take yours.
Save as JPG
Thank you for your loyalty to my work ... I see you soon
2018
Best wishes

I hope you enjoyed this lesson
Renée
This lesson was written by Renée 02/11/2017
Edited and Update
2017
*
Any resemblance with an existing lesson is a coincidence
* Do not forget to thank the people who work with us and for us I have appointed the tubeurs and translators
Thanks
*
| 
 Translations


 If a plugin supplied appears with this icon it must necessarily be imported into Unlimited *