|
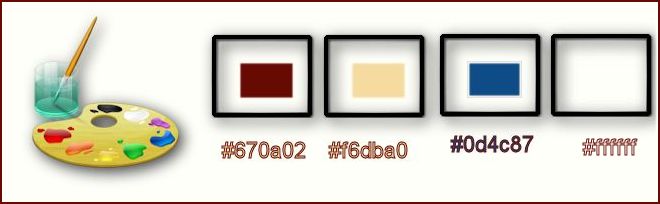
Let's start the lesson. Open the Color-Palette

-
Material Properties:Foreground color to #670a02 -Background color to #f6dba0
1.
File - New - Transparent - New Image: 925 x 625 pixels
2.
Effects- Plugins – Medhi – Wavy lab
3.
Layers- Duplicate
4.
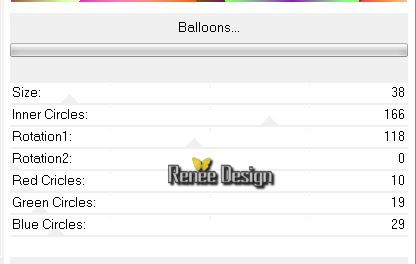
Effects- Plugins–Unlimited 2.0 - &BkgDesigners sf10.1-
Balloons
5.
Double click on this layer and set the Blendmode to Overlay and set the layer opacity of this layer to
44%
6.
Layers- Merge- Merge Visible
7.
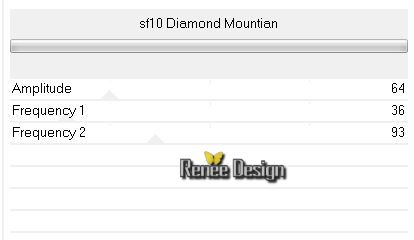
Effects- Plugins- Unlimited 2.0 - &<Background Designers
IV>- sf10 Diamond Mountian
-Change background material into a "fading background" linear gradient with these settings
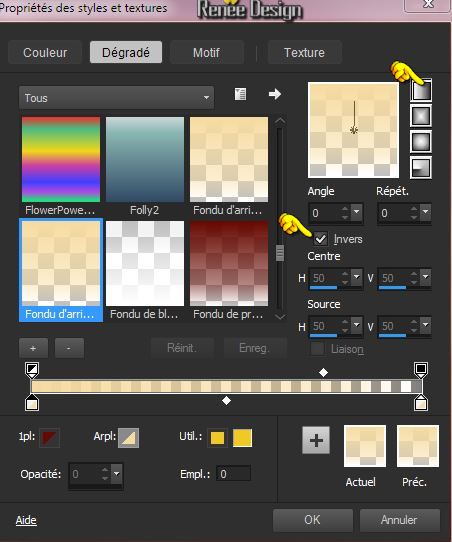
8.
Layers - New raster layer
-Activate Flood Fill Tool and fill the layer with the gradient
9.
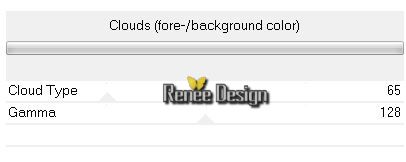
Effects Plugins –Unlimited 2.0 – Render – Clouds (fore-/background
color)
10. Layers- Merge- Merge Visible
11. Layers- Duplicate
12. Effects- Plugins –Unlimited 2.0-&<Bkg Designer sf10 III>Radial Split
05 to 149
13. Effects- User Defined Filter- Emboss 3 / using the default settings
14.
Selection Tool ( S ) Custom selection use settings below
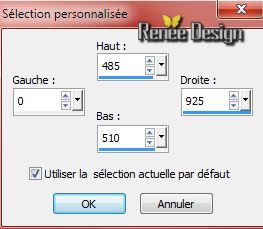
15.
Selections- Promote selection to layer
Keep Selected
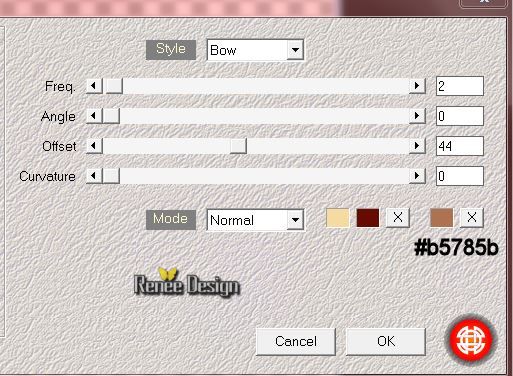
16. Effects- Distortion Effects- Wave with these settings

Selections- Deselect All
17.Layers- Arrange- Move Down
- Activate the top of the layer-Palette (Copy merged )
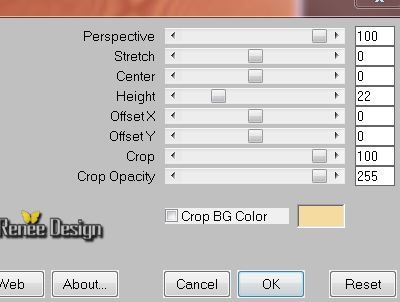
18. Effects- Plugins- Mura’s Meister – Perspective
Tilling
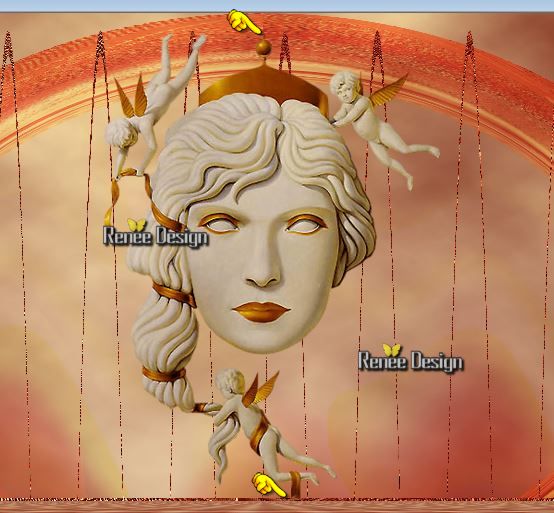
19. Layers- Duplicate
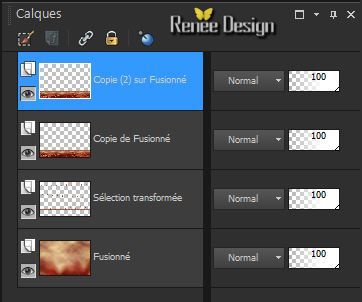
Layer Palette look like this now-You should have this result
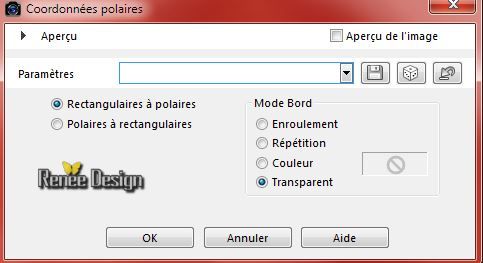
20. Effects- Distortions Effects-Polar Coordinates-Rectangular to Polar
21.Layers- Arrange- Move Down (2 x above merged layer)
22.Double click on this layer and set the Blendmode to Hard Light and set the layer opacity of this layer to 73%
- Activate the top of the layer-Palette
23. Activate the tube ‘’masque_blanc’’
-Edit /copy
-Edit -paste as new layer on your working area and move in the middle
24. Layers - New raster layer
25.
Selections - load/save selection - load selection from disk and select my file:‘’
carnaval2015_1’’
- Activate Flood Fill Tool and fill the selection with the fading-background gradient (click 2 a 3
times in the selection)
Selections- Deselect All
26. Layers - New raster layer
27.
Selections - load/save selection - load selection from disk and select my file:‘’ carnaval2015_2’’- Activate Flood Fill Tool and fill the selection with the foregroundcolor
Selections- Deselect All
28.
Effects- Plugins –Toadies What are you
setting 20/20
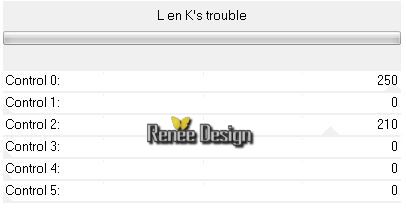
29. Effects- Plugins – L en K’s – Trouble
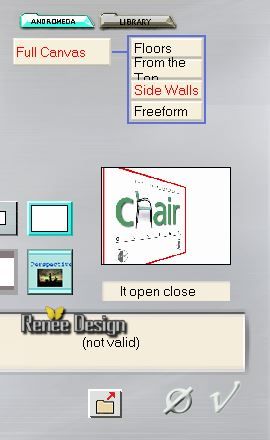
30.
Effects- Plugins – Andromeda – Perspective- Side Walls
– It open close
31. Layers- Duplicate –Image Mirror (use the script)
32. Layers- Merge- Merge Down
33. Double click on this layer and set the Blendmode to Overlay
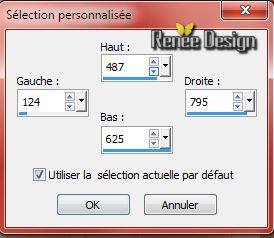
34.
Selection Tool ( S ) Custom selection use settings below
35. Edit-Cut
36. Edit Paste as a new layer (Do not move it is in the right place )
37. Double click on this layer and set the Blendmode to Difference
Selections- Deselect All
38. Activate the tube ‘’ HarleyQuinn~chukw~Sassydeb.png’’
- Image
Resize with 65%
- Edit - Copy -Edit - Paste as new layer on your working area
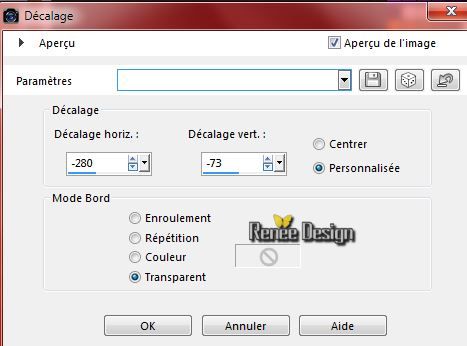
39. Effects- Image Effects- Offset with these settings
40. Activate the tube ‘’ renee_carnaval_2015.png’’
Edit /Copy -Edit - Paste as new layer on your working area
-Move to the left
41. Layers - New raster layer
- Material of the Background: BG-Color to #0d4c87-Change background material into a "fading background" linear gradient with these settings
Like this 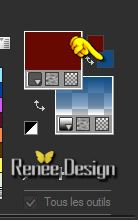
42.
Selections - load/save selection - load selection from disk and select my file:« Carnaval2015_3’’
43. Activate Flood Fill Tool and fill the selection with the fading background gradient ( 3
clicks)
Selections- Deselect All
44. Double click on this layer and set the Blendmode to Overlay
45. Layers- Duplicate
46. Layers- Merge- Merge Down
-Material of the Background: Put the background color to this color #ffffff
47.Layers - New raster layer
48.
Selections - load/save selection - load selection from disk and select my file:‘’
Carnaval2015_4’’
Fill the selection with color white (zoom in !! if this is not working for you -pspimage'' =effects selection4 into the zipfile and paste as a new layer on your working area)
Selections- Deselect All
49. Activate the tube ‘’ Gabry-coppia 607.png’’
- Image
Resize with 72%
- Image
Mirror
- Edit/copy-Edit paste as a new layer on your working aera and move to the bottom right side
50.Layers- Arrange- Move Down
51. Image - Add borders-Symmetric checked: 1 pixel color black
52. Image - Add borders-Symmetric checked: 50 pixels color white
53. Image - Add borders-Symmetric checked: 1 pixel color black
54. Image - Add borders-Symmetric checked: 10 pixels color white
55. Activate the tube ‘’ renee_carnaval_2015_titre.png’’
- Edit/copy-Edit paste as a new layer on your working aera and move to the bottom
56. Activate the tube ‘’carnaval2015_deco’’
Edit/copy-Edit paste as a new layer on your working aera and move to the left side
Image
Resize with 965 pixels Width
Save as JPG
I hope you enjoyed this lesson
Renée
This lesson was written by Renée 17/01/2015
Placing
2015
*
Any resemblance with an existing lesson is merely a coincidence *
* Don't forget to thank the people who work for us and with us.
I named the tubeurs - Testers and the translators.
Thanks Renée.
*
| 

 Translations


 When you see this logo the filter is imported in Unlimited *

 All rights reserved
