|
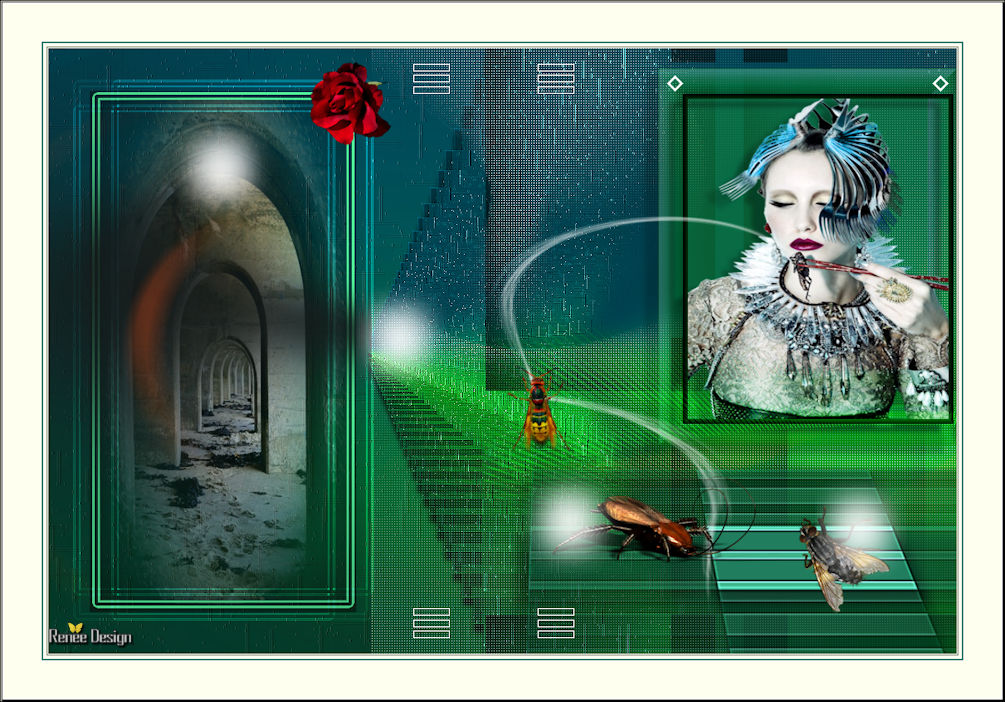
Let's start the lesson

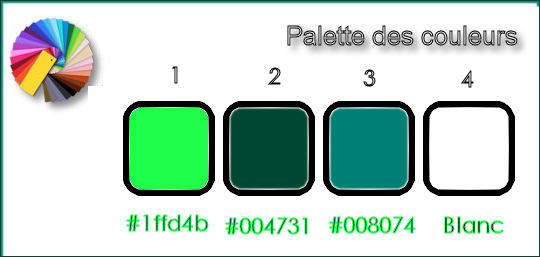
Material palette:Set your foreground color to #ffffff - Set your background color to #004731
1.
Open the image ‘’fond_Cassandra’’- Window - Duplicate (or shift+D) - Close the original and proceed on the copy -Promote Background Layer =Raster 1
2.
Effects - Texture Effects –Straw Wall – Color #ffffff
3.
Layers- New Raster Layer
4.
Activate Flood Fill Tool and fill the layer with the foreground color #ffffff 
5.
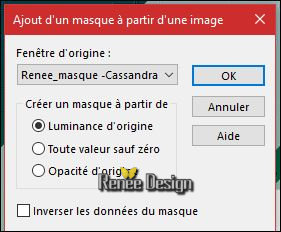
Open Mask ‘’Renee_masque _Cassandra’’ and minimize it.
-Layers - New Mask Layer - From Image and select
Mask ‘’Renee_masque _Cassandra’’
-
Layers- Merge- Merge Group
6.
Effects-Plugins – Namesuppressed
–Softener with these settings (patched filter -included in the zip )
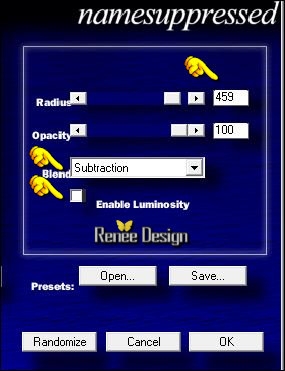
Filter requires time
7.
Layers- Duplicate
8.
Layers- Merge- Merge Down
9.
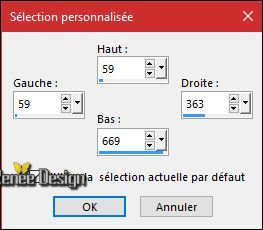
Activate Selection Tool -Custom Selection (S) -Rectangle with these settings
10.
Layers- New Raster Layer
11.
Activate the tube
‘’Renee_tube_cassandra_image1’’
-
Edit - Copy- Activate your work -Edit - Paste into selection
12.
Selections-Modify-Select Selection Borders with these settings-Out Side
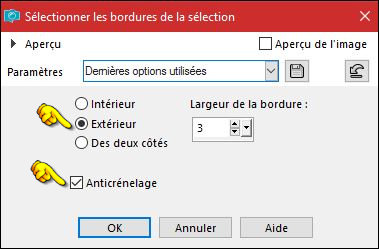
-
Repeat
-
Selections-Modify-Select Selection Borders with these settings-Out Side
13.
Layers- New Raster Layer
14.
Activate Flood Fill Tool and fill the selection with the foreground color #ffffff
Selections- Deselect All
15.
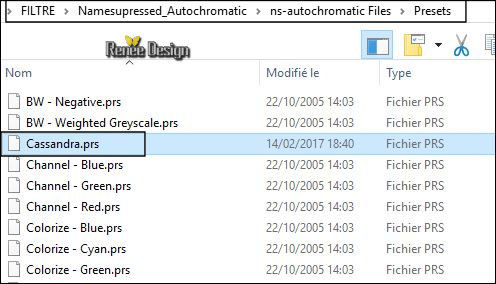
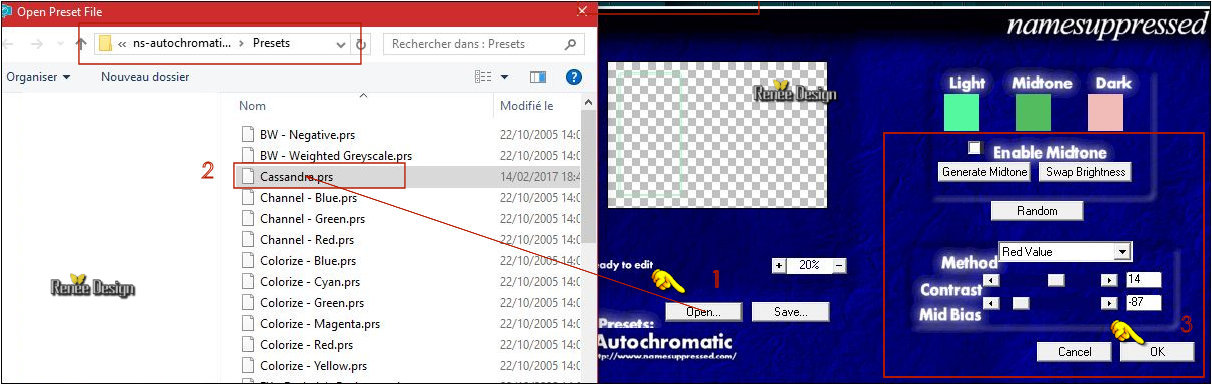
Effects –Plugins – Namesuppressed- Autochromatic
select my ‘’preset ‘’Cassandra.prs)
Attention - THE PRESET FILTER THIS IS NOT A PRESET CLICKABLE
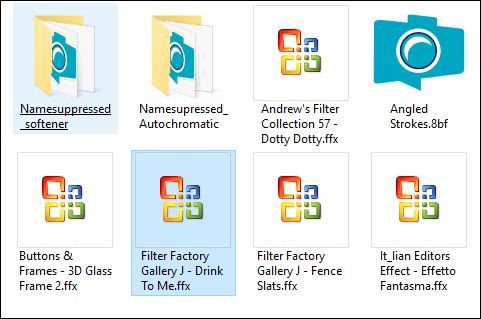
It should be placed in the filter setting file like this
Open the folder in your filter (me it is this way) and set the preset in the case concerned here
Open your PSP –Open the Filter- Click Open >>select my preset ‘’cassandra’’
and OK
16.
Layers- Duplicate
17.
Effects -Plugins –Unlimited - It@lian Editors Effect- Effetto Fantasma
11/11
18.
Layers-Properties-Set the Blend Mode to " Dodge "
19.
Effects- Edge Effects- Enhance More
20.
Activate the tube ‘’
Renee_tube_cassandra_image2’’
-
Edit - Copy- Activate your work -Edit - Paste as a new layer
-
Activate Move Tool (M) move it the right place at the top of your image
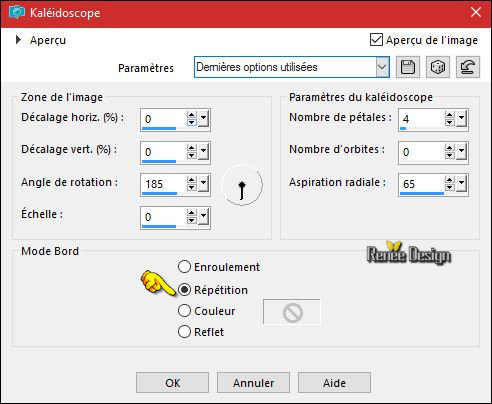
21.
Effects – Reflection Effects -
Kaleidoscope
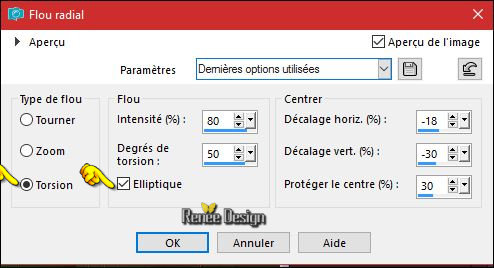
22.Adjust- Blur- Radial Blur use settings below
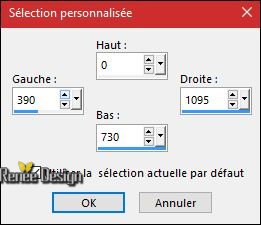
23.
Activate Selection Tool -Custom Selection (S) -Rectangle with these settings
24.
Edit-Cut !!!!-Edit- Paste as a new Layer
Selections- Deselect All
25.
Effects-Image Effects- Offset with these settings: H = 195 and V =
0
26.
Effects- Edge Effects Enhance
27.
Layers-Properties-Set the Blend Mode to " Screen "
28.
Layers- Duplicate
29.
Layers- Merge- Merge Down
30.
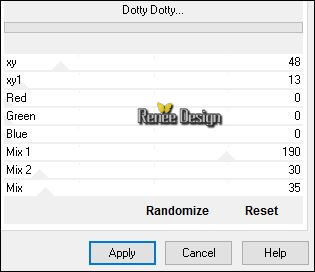
Effects -Plugins –Unlimited - Andrew's Filter Collection 57 - Dotty
Dotty...
- Activate the bottom layer in the layer palette= Raster 1
31.
Selections –load/save selection –load selection from disc and select my selection: ‘’ Cassandra_1’’
32.
Selections- Promote selection to Layer
Selections- Deselect All
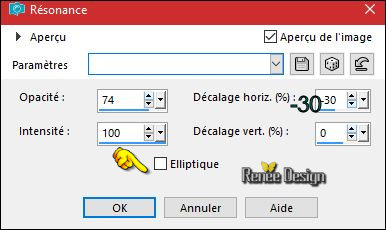
33. Effects
– Reflection Effects -Feedback use settings below
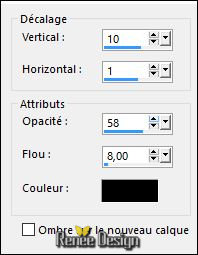
34. Effects- 3 D Effects- Drop Shadow with these settings
35. Effects- Edge Effects-Enhance
36. Layers- Duplicate
37. Adjust- Blur- Gaussian Blur: Radius : 15
38. Effects-Image Effects- Offset with these settings:H = 250 and V = 0
39.
Layers- Merge- Merge Down
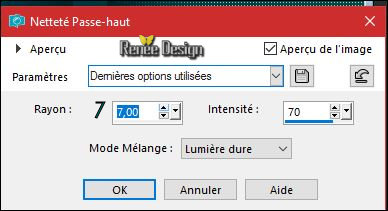
40. Adjust- Sharpness - High pass Sharpen
-Activate the top layer in the layer palette
41. Activate the tube ‘’cassandra_rose’’
- Edit - Copy- Activate your work -Edit - Paste as a new layer
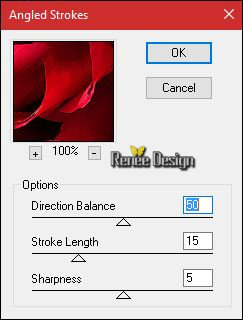
42.
Effects –Plugins – Brusches Stroke /Angle
stroke
43. Effects-Edge Effects-Erode
44. Image
Resize to 25% -all layers not checked
- With your Pick Tool (K) place it in the right place as shown in the example below
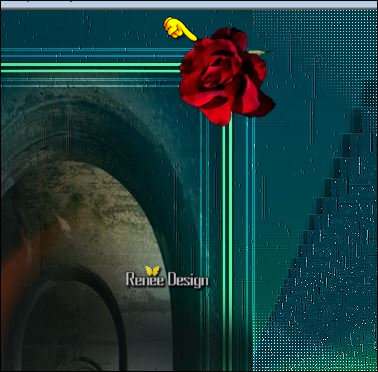
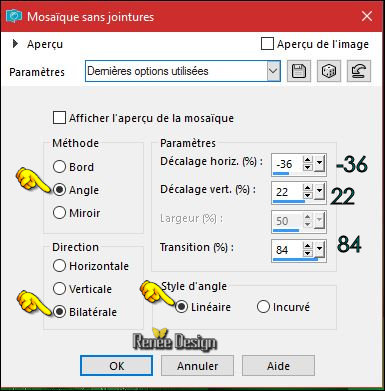
45.
Effects- Image Effects- Seamless Tiling
- Color Palette- Set your foreground color to
#1ffd4b
46. Layers- New Raster Layer
47.
Activate Selection Tool -Custom Selection (S) -Rectangle with these settings
48. Pot of Paint:settings of your paint pot to 30%
- Activate Flood Fill Tool and fill the selection with the foreground color #1ffd4b
49. Effects
-Plugins- Unlimited /ICNET FILTERS - Buttons & Frames- 3D Glass
Frame 2 setting at 50/128
50.
Layers- New Raster Layer
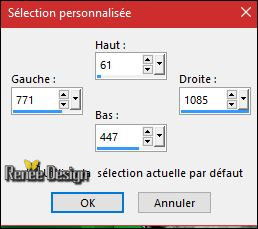
51.
Activate Selection Tool -Custom Selection (S) -Rectangle with these settings
52. Activate the tube ‘’ Renee_tube_femme _Cassandra ‘’
- Image
Resize to 50%
- Edit - Copy- Activate your work -Edit - Paste into selection
Keep Selected !!
- Layer-Palette: activate the Layer underneath = (Raster 7)
53. Effects
–3 D Effects – Chisel / Color black
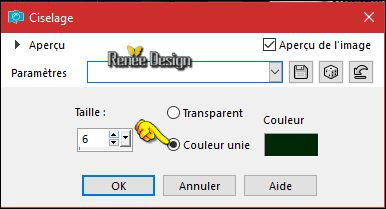
Selections- Deselect All
54.Layer-Palette: activate the layer above
Layers- Merge- Merge Down
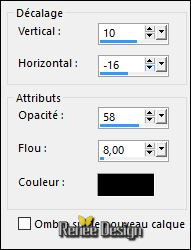
55. Effects- 3 D Effects- Drop Shadow with these settings
56. Activate the tube ‘’ Renee_cassandra_modules’’
- Edit - Copy- Activate your work -Edit - Paste as a new layer
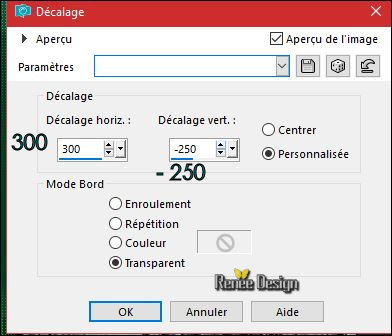
57. Effects-Image Effects- Offset with these settings
58. Layers- New Raster Layer
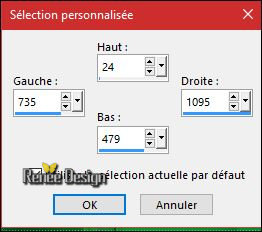
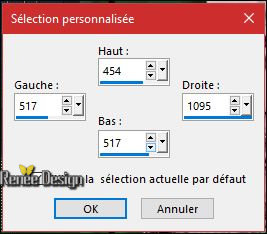
59.
Activate Selection Tool -Custom Selection (S) -Rectangle with these settings
- Material palette:Set your foreground color to #1ffd4b -Set your foreground color to #008074
60. Pot of Paint:settings of your paint pot to 100% -Activate Flood Fill Tool and fill the selection with the foreground color #1ffd4b
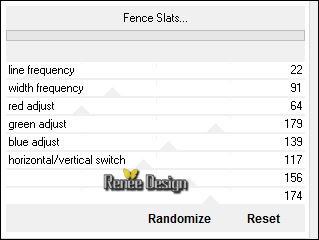
61.
Effects –Plugins-Unlimited - Filter Factory Gallery J- Fence
Slats..
Selections- Deselect All
62.
Effects –Plugins-Unlimited - Filter Factory Gallery J- Drink To Me.../
Overdose at 15
63.
Effects –Plugins – Andromeda –perspective /Floors-
Center wide

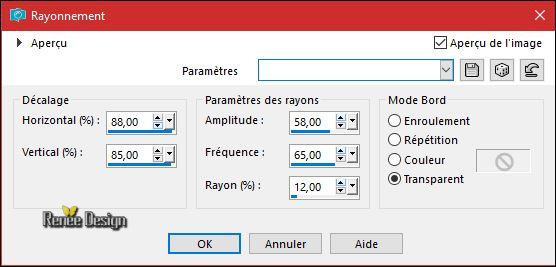
64. Effects
– Distorsion Effects – Spiky Halo use settings below
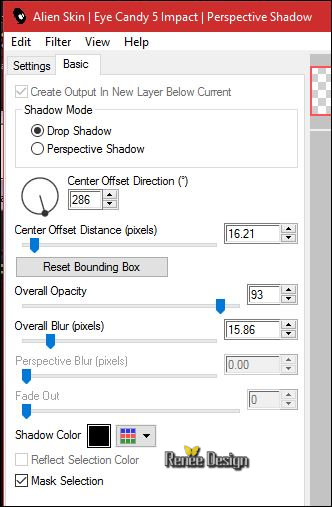
65. Effects
–Plugins –Eye Candy 5 Impact -Perspective shadows-tab Settings/User settings choose my Preset
‘’cassandra_shadow’’
66.
Layers-Properties-Set the Blend Mode to " Soft Light "
- Set your foreground color to #ffffff
67. Layers- New Raster Layer
68.
Selections –load/save selection –load selection from disc and select my selection: ‘’ Cassandra_2’’
69. Activate Flood Fill Tool and fill the selection with the foreground color #ffffff ( 2 clicks )
Selections- Deselect All
70. Activate the tube ‘’Renee_tube_Cassandra_Insectes’’
Activate the 3
layers of the 3 insects - Paste as new layer and put in the right place
71.
Merge the layers of the 3 insects into a single layer
72. Effects- 3 D Effects- Drop Shadow using the default settings
73. Layers- Merge- Merge- Visible
74. Activate the tube ‘’ Renee_tube_cassandra_image3.pspimage’’
- Edit - Copy- Activate your work -Edit - Paste as a new layer
-
Activate your Move Tool (M) place it in the right place
75. Layers- New Raster Layer
76.
Selections –load/save selection –load selection from disc and select my selection: ‘’
Cassandra_3’’
77. Activate Flood Fill Tool and fill the selection with the foreground color #ffffff
Selections- Deselect All
78. Image - Add borders-Symmetric checked: 1 pixel #ffffff
79. Image - Add borders-Symmetric checked: 2 pixels #004731
80. Image - Add borders-Symmetric checked: 4 pixels #ffffff
81. Image - Add borders-Symmetric checked: 2 pixels #008074
82. Image - Add borders-Symmetric checked: 50 pixels #ffffff
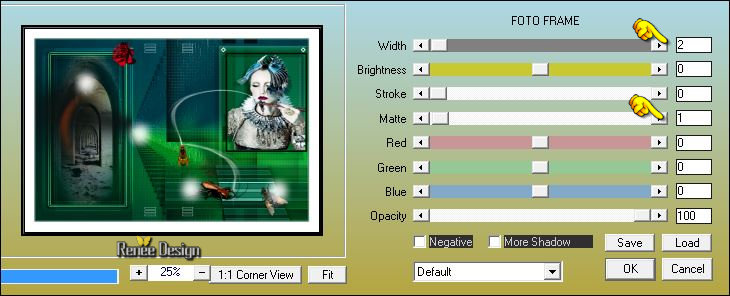
83. Effects
–Plugins – AAA Frame – Foto frame
84. Image
Resize to 1005 pixels Width. Save as JPG
I hope you enjoyed this lesson
Renée
This lesson was written by Renée 16/02/2017
Edited and Update
2017
*
Any resemblance with an existing lesson is a coincidence
* Do not forget to thank the people who work with us and for us I have appointed the tubeurs and translators
Thanks Renée
*
| 
 Translations


 If a plugin supplied appears with this icon it must necessarily be imported into Unlimited *

 All rights reserved