Let's begin
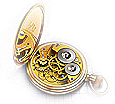
1: Open the background tube "chimere_d'automne" -
promote to raster layer
2: Layers - duplicate - Adjust - Blur - Gaussian Blur 35
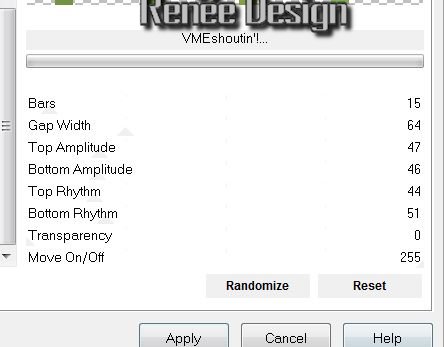
3: Effects - Filters unlimited2.0 - & <Bkg Designer
sf10III - VME shoutin '
4:
Effects - 3D effects - drop shadow
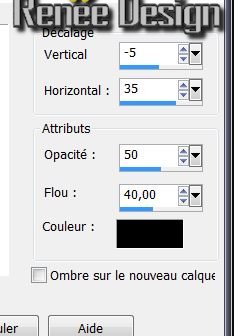
4: Effects - 3D effects - drop shadow
5: Filters Unlimited 2.0 - & <Bkg Designer sf10III - V M
T Instant Tile 77/31
6: Filters Unlimited 2.0 - & <Bkg Designer sf10III -
turbine mirror 226
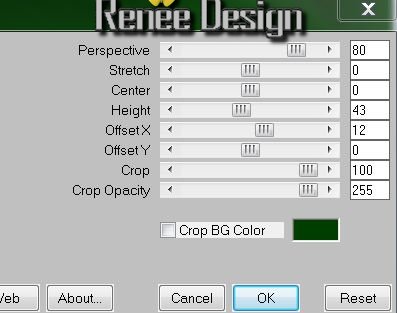
7: Effects - Mura's meister - perspective tiling color
#003e00
8: Effects - Image effects - offset
9: Effects - Distortion effects - Twirl 62
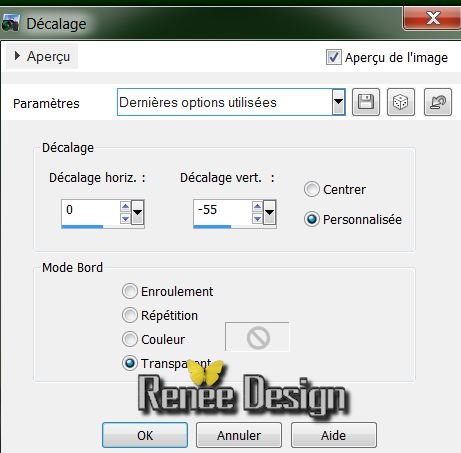
10: Effects - Image effects - offset H = 0 and V = min55
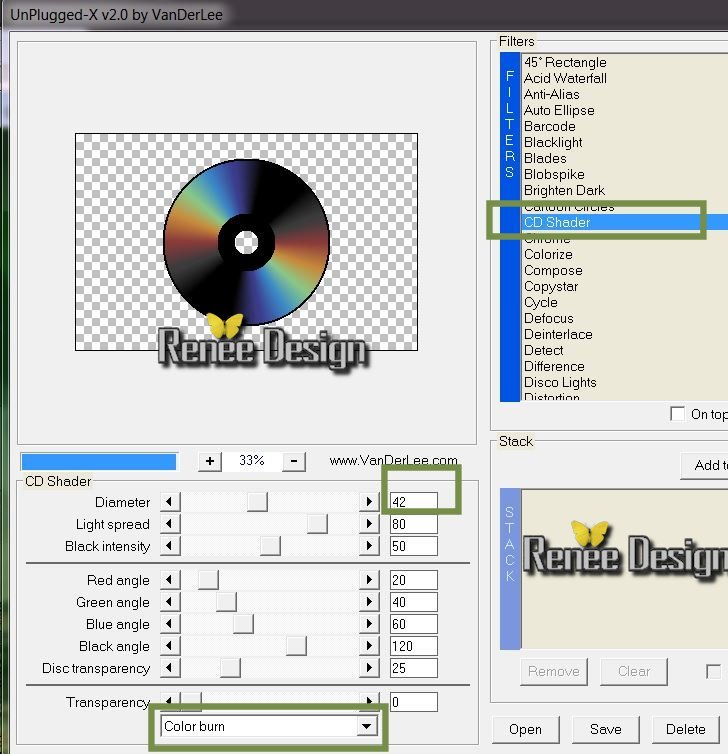
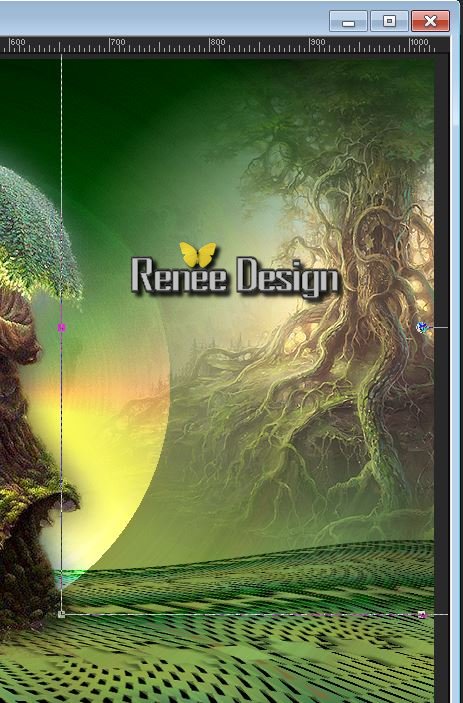
11: Layers - new raster layer - fill with color #003e00
12: Layers - new mask layer from image/
"www_tvn_hu_a385"
Effects - User defined filter - Emboss3/ Default -
Layers - merge group
13: Image - mirror
14: Effects - Andromeda - Perspective - sidewalls - it
wronqside
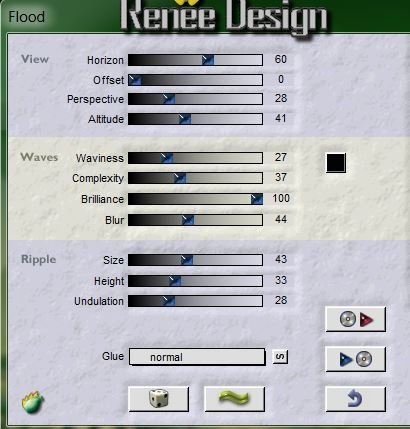
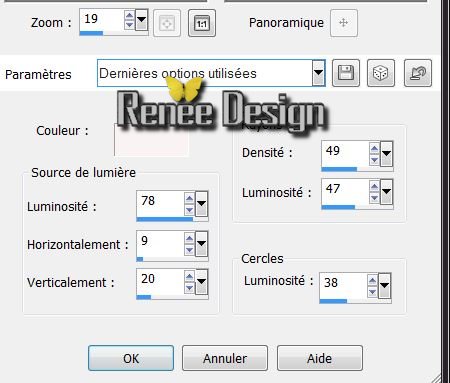
15: Effects - Flaming Pear - Flood
16: Effects - Image effects - offset H = -202 and V =
0
17: Layers - new raster layer
18: Effects - VanDerLee - UnpluggedX/ CD shader
19: Change the layer blend mode to Lighten
20: Open the tube "13186825981_feerique_nikita" - paste
as a new layer - no need to move
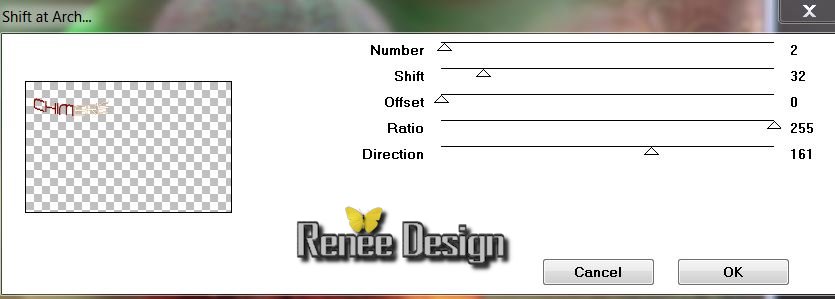
21: Effects - 3D effects - drop shadow -5/-45/50/40
black
22: Open the tube "00_aaabibichearbrekanza 001.png"/ and
place like this
23: Effects - Edge effects - enhance
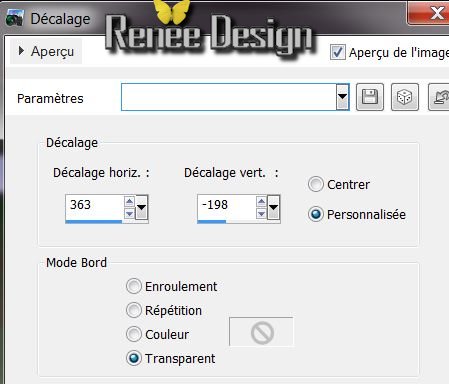
24: Open the tube
"karine_dreams_misted_halloween_1973_septembre_2011" -
copy the selected area and paste as a new layer 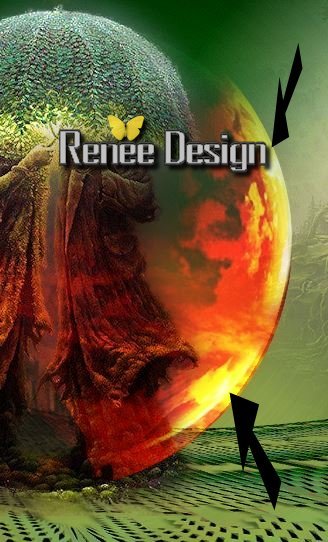
25: Change the layer mode to Hard Light and lower the
Opacity to 73
26: Color palette - make the foreground and background
black
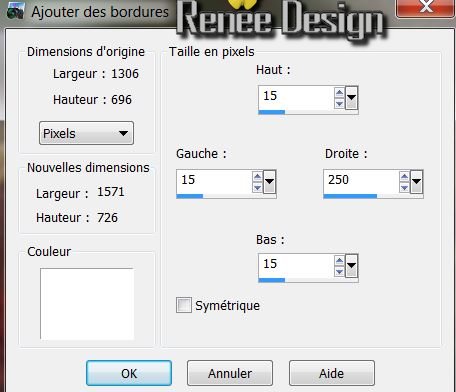
27: Layers - new raster layer
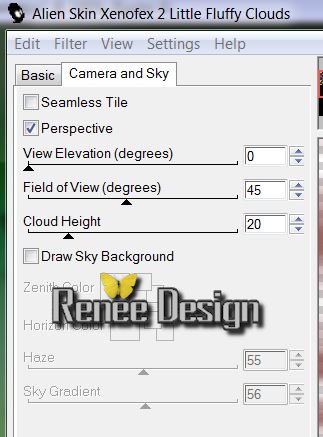
28: Effects - Alien skin - Xenofex2 - little fuffy
clouds
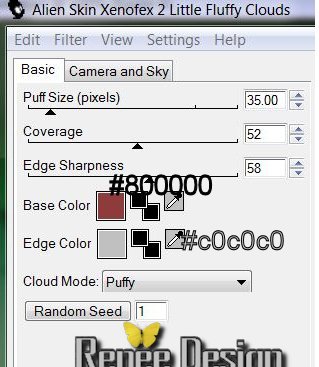 
28: Lower the opacity to 46
29: On the same layer - color #f8f2f3 - Effects -
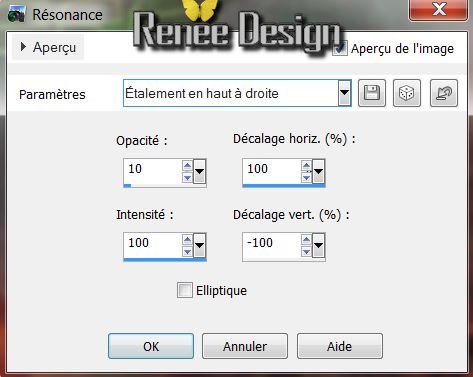
Illumination effects - sunburst
30: Repeat this effect with the same parameters
31: Color palette - change the foreground color to
#800000 and background to white
32: With your font "zero hour for me" - size 72 - write
"Chimera"
With your magic wand select the first four letters -
fill with foreground color
33: Selections - select none
34: Layers - Duplicate
35: Effects - Mura's seamless - shift at arch
36: Change this layer mode to Overlay
37: Open the tube "yoka_misted_umbrella_18092013" -
paste as a new layer - place well - move this layer
below raster2
This is your pallet now
38: Click to activate the top layer
39: Open the tube "1220639695_divers" - paste as a new
layer
40: Effects - Image effects - offset
41: Layers - Merge visible layers
42: Image - add borders 2 pixels #800000
43: Image - add border 3 pixels white
44: Image - add borders 2 pixels # 800000
45: File - copy
46: Image - add borders asymmetrical
47: Promote background to raster layer
48: Layers - new raster layer
49: Selections - select all - Edit - paste into
selection the image you previously copied
50: Selections - select none
51: Effects - Reflection effects - Feedback
52: Layers - Arrange - Move Down
53 Back on the top layer/ raster1
54: With your magic wand select the white part - delete
55: Selections - select none
56: Back on the bottom layer (raster2)
57: Effects - Flaming Pear - Flood

58: Open the tube "trizia_chimaera" - Select raster1 -
copy and paste as a new layer
59: Effects - 3D effects - Drop Shadow Default
60: Image - add borders symmetric 2 pixels #800000
61: Image - add borders symmetric 10 pixels white
62: Write with the same font and parameters "d'automne"
- Using the background color #ffffdb
63: Effects - 3D effects - Drop shadow default
64: Layers - Merge all layers
65: Image - Resize to 1195 pixels wide

Lesson over
Thanks Sally
le 18 /09/2013
|