|
Let's start the lesson.Open the Color Palette
-
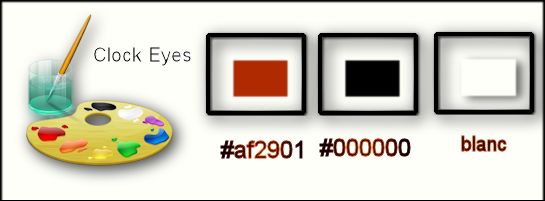
Material Properties: Foreground color to #af2901 Background color to color black
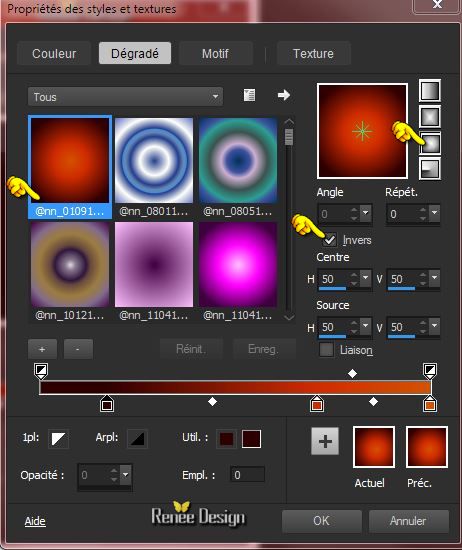
Material of the foreground - select my file in the list "@nn_010914_GR_Autumn_tdstudio''-Prepare a sunburst gradient configured like this.
1.
File - New - New Transparent Image:1015 x 645 pixels
2.
Activate Flood Fill Tool and fill the layer with the gradient
3.
Layers- New raster layer
4.
Selections - load/save selection - load selection from disk and choose my selection:
"clock_dream_1"
-
Activate Flood Fill Tool and fill the selection with the background color black
Selections- Deselect All
5.
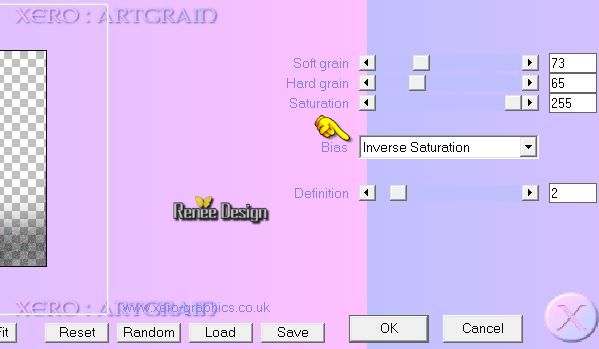
Effects- Plugins -Xero XL-
ArtGrain with these settings
6.
Layers- New raster layer
7.
Selections - load/save selection - load selection from disk and choose my selection:
''clock_dream_2''
-
Activate Flood Fill Tool and fill the selection with the gradient
8.
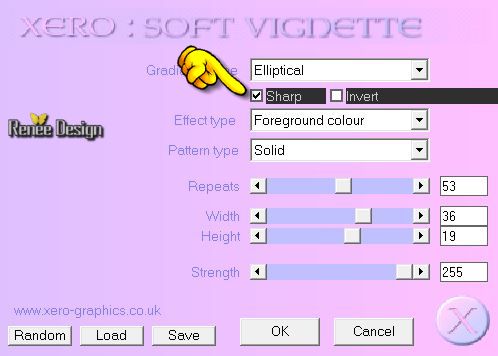
Effects- Plugins -Xero XL -Soft
Vignette with these settings
9.
Effects- Edge Effects- Enhance
Selections- Deselect All
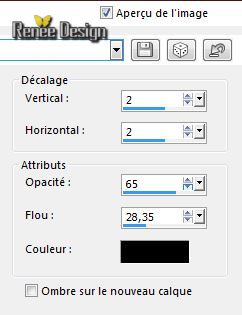
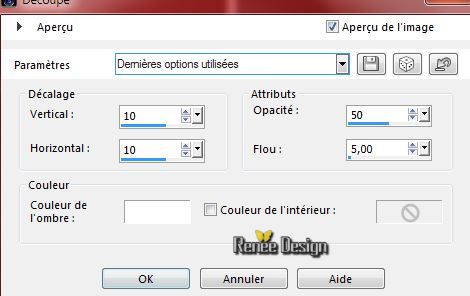
10. Effects - 3D Effects - Drop shadow with these settings
11.
Layers- New raster layer
-
Activate the Brush tube ''
renee_clock_eyes_pinceau1''in your psp
12.
File- Export Custom Brush (Give it a name) '' renee_clock_eyes_pinceau1''
13. Activate the brush tool and choose the brush''
renee_clock_eyes_pinceau1'' Size 236

Background color black /Stamp as shown on the print screen below
14.
Layers-Duplicate - Image Flip
15.
Layers- Merge- Merge- Down
16.
Effects - 3D Effects - Drop shadow with these settings 3/6/60/14 black
17.
Selections - load/save selection - load selection from disk and choose my selection:
''clock_dream_3''
18.
Activate the tube ''Renee_tube_13Oclock''- Edit - Copy-Edit - Paste as new layer on your working area
With your move tool move to the right side
19.
Selections- Invert
20.
Adjust- Blur- Gaussian Blur: Radius: 45%
Selections- Deselect All
21.
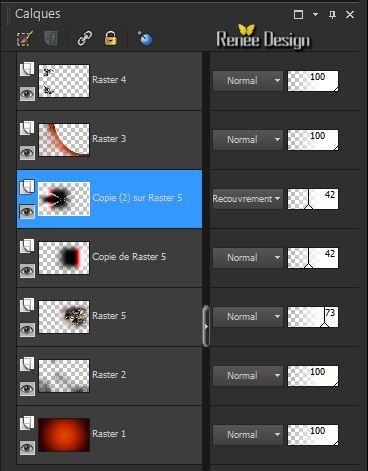
Layers- Arrange- Move 2x Down ( under Raster
3)
22.
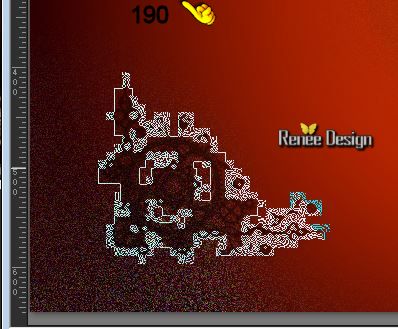
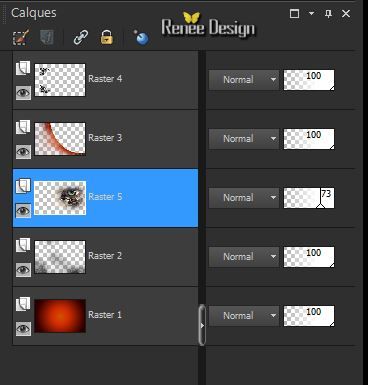
Set the layer opacity of this layer to 73%
-Your work look like this now:
23.
Effects- Plugins -Simple - Offset By
3
24.
Layers-Duplicate
25.
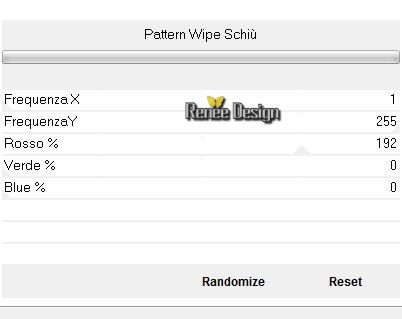
Effects- Plugins -Unlimited 2.0 - Italian Editors Generatore- Pattern
Wipe Schiù
-
Set the layer opacity of this layer to 42%
26. Layers-Duplicate - Image Mirror (Use the script)
27.
Effects- Plugins - Unlimited 2.0 - Factory Gallery D- BurnUp /
245
28. Double click on this layer and set the Blendmode to Overlay and set the layer opacity of this layer to 42%
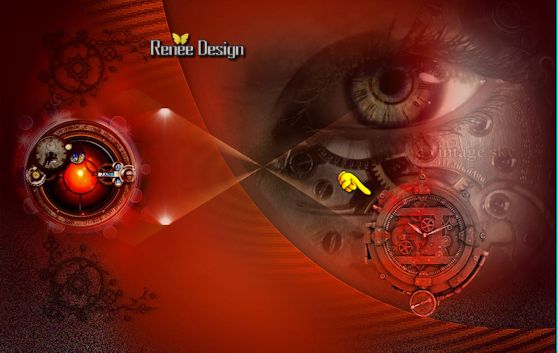
Your work look like this now:
- Activate the top of the layer Palette
29. Activate the tube ''clock_dream_image1''
-
Edit/copy- Edit/ paste as new layer on your working area
With your move tool move to the left side
Double click on this layer and set the Blendmode to Hard Light
30. Activate the tube ''clock_dream_lumiere''
Edit/copy- Edit/ paste as new layer on your working area
-Double click on this layer and set the Blendmode to Screen and set the layer opacity of this layer to 75%
31.
Activate the tube ''Clock_eyes_tube35''
Edit/copy-Edit paste as a new layer on your working area
Place like this
-Double click on this layer and set the Blendmode to Luminance Legacy and set the layer opacity of this layer to 81
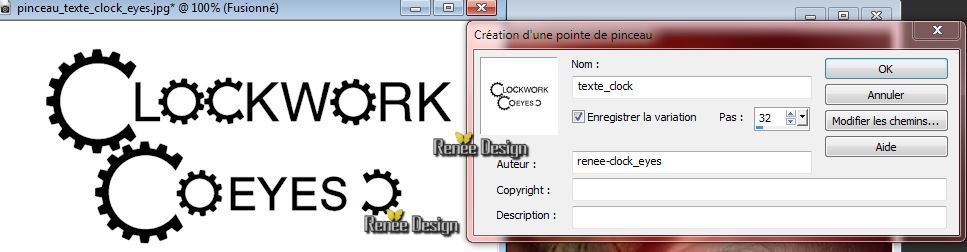
32. Open the Brush "pinceau_texte_clock_eyes" in your Psp -File- Export Custom Brush (Give it a name) "pinceau_texte_clock_eyes"
33. Activate the brush tool and choose the brush"pinceau_texte_clock_eyes" Size 250

Properties Foreground:foreground color #ffffff
35. Layers- New raster layer
Stamp with the foreground see example
-Double click on this layer and set the Blendmode to Overlay
The result
36. Activate the tube ''effet-clockeyes''
- Edit/copy-Edit paste as a new layer on your working area
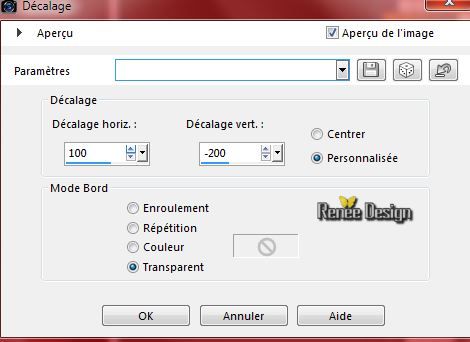
37. Effects- Image Effects- Offsett with these settings

38. Layers-Duplicate
39. Image
Mirror -Image Flip
40.
Activate Selection Tool (S) - Custom Selection with these settings
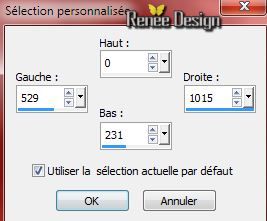
Hit the Delete Key of your Keyboard

Selections- Deselect All
41. Double click on this layer and set the Blendmode to Soft Light and set the layer opacity of this layer to 57%
42. Activate the tube ''clock_eyes_rouages''
- Edit/copy-Edit paste as a new layer on your working area and move
- Double click on this layer and set the Blendmode to Soft Light
43. Activate the tube ''Clock_eyes_Lumiere.pspimage''
-
Edit/copy- Edit/ paste as new layer on your working area
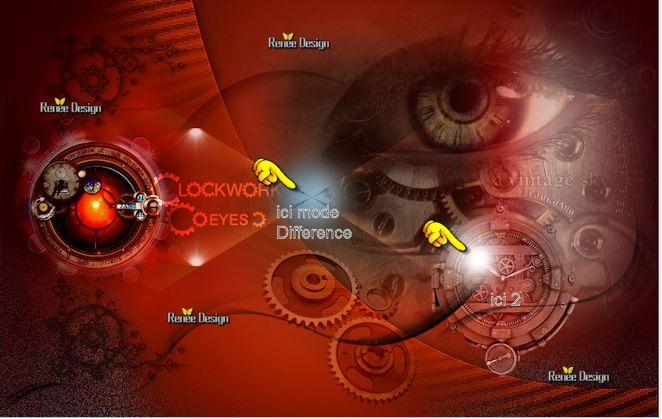
- Double click on this layer and set the Blendmode to Difference and set the layer opacity of this layer to 79%
44. Layers-Duplicate
- Move like this (number 2) Double click on this layer and set the Blendmode to Overlay and set the layer opacity of this layer to 79%
The result
45. Layers- New raster layer
46.
Selections - load/save selection - load selection from disk and choose my selection: '' clock_dream_4''
- Activate Flood Fill Tool and fill the selection with color white
Selections- Deselect All
if you do not get the same effect with the selection/ The effect is included with the material
''effet_selection 4" Paste it as a new layer on your working area/With your Move Tool -move to the left side
47. Activate the tube '' clock_eyes4barres''
Edit/copy-Edit paste as a new layer on your working area
48. Effects- Image Effects- Offsett with these settings
49.
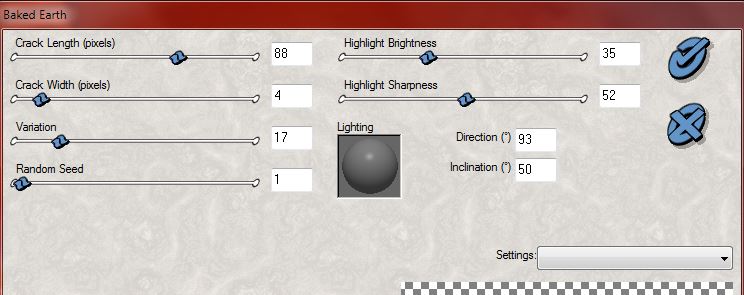
Effects- Plugins - Xenofex 1.1- Baked
earth
If you want to use your filter and it appears this
 Just click OK and the filter window will open and you can use the filter Just click OK and the filter window will open and you can use the filter
50.
Set the layer opacity of this layer to 32%
51. Activate the tube '' Alies 1-2VR190-woman-20122014.pspimage''
- Image
Resize with 85%
- Edit/copy-Edit paste as a new layer on your working area
-
With your move tool move to the top
52. Layers- New raster layer
53.
Selections - load/save selection - load selection from disk and choose my selection: '' clock_dream_5''
-Activate Flood Fill Tool and fill the selection with color white
Selections- Deselect All
54. Layers- New raster layer
55.
Selections - load/save selection - load selection from disk and choose my selection: " clock_dream_6''
56. Effects- 3 D Effects-Cutout with these settings
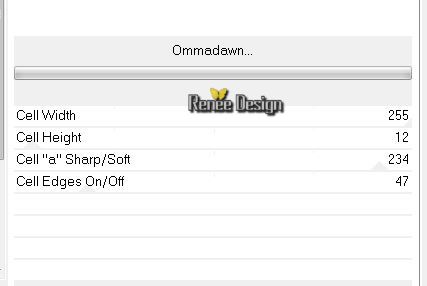
57. Effects- Plugins
-Unlimited 2.0 -Toadies - Ommadawn
Selections- Deselect All
58. Image - Add borders-Symmetric checked:1 pixel Black
59. Image - Add borders-Symmetric checked:60 pixels White
60. Activate the tube ''clock_eyes_cadre"
-
Edit/copy- Edit/ paste as new layer (do not move it is in the right place)
61. Image - Add borders-Symmetric checked:1 pixel Black
62. Open the text/ Edit/copy-Edit paste as a new layer on your working area .Ore write your own text
63. Image - Add borders-Symmetric checked:20 pixels White
64. Image - Add borders-Symmetric checked:1 pixel Black
65. Image
Resize with 965 pixels
66.
Adjust-Brightness and Contrast-Highlight/Midtone/Schadow with these settings
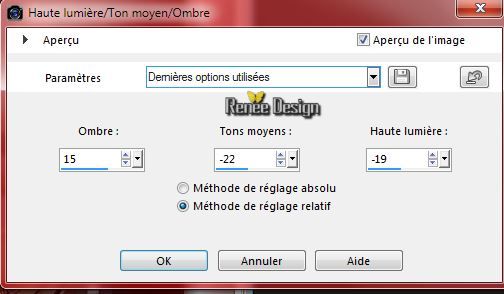
Save as JPG
I hope you enjoyed this lesson
Renée
This lesson was written by Renée 04/01/2015
Created
2015
*
Any resemblance with an existing lesson is merely a coincidence *
* Don't forget to thank the people who work for us and with us. I named the tubeurs - Testers and the translators.
Thanks Renée.
*
| 
 Translations


 When you see this logo the filter is imported in Unlimited *


 All rights reserved
