|
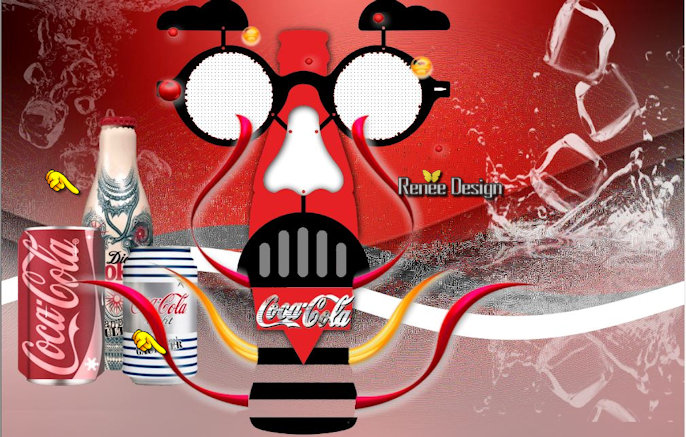
Let's start the lesson.
1.
Open the image ‘’Fond_Diet_Coke_gauthier’’- Window - Duplicate (or shift+D) - Close the original and proceed on the copy -Promote Background Layer =Raster 1
2.
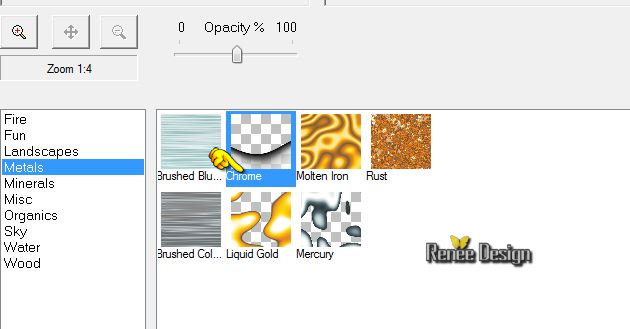
Effects-Plugins - XE Xtras-Elemental- Metal -
Chrome
3.
Layers- Duplicate
4.
Effects-Image Effects-Offset with these settings H = 0 and V = 40
5.
I have lowered the opacity of that layer to 57%
6.
Layers-Merge-Merge Down
7.
Layers- Duplicate
8.
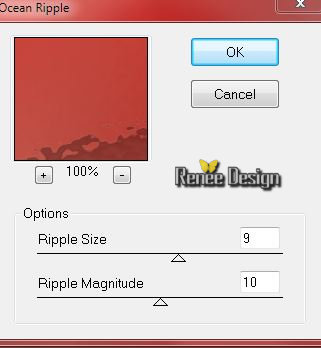
Effects-Plugins – Distort-Ocean
Ripple
9.
Effects-Edge Effects-Enhance
10.
Layer Palette - Double click on this Layer and set the Blend Mode to "Hard Light" Set the layer opacity of this layer to
67%
11.
Layers-Load/Save Mask-Load mask from Disk and select 20/20with these settings
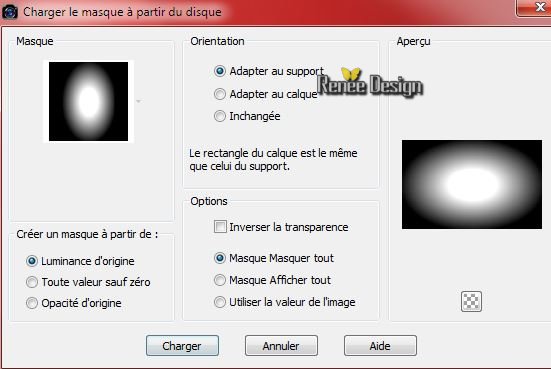
-
Layers- Duplicate
-
Layers- Merge-Merge Group
12.
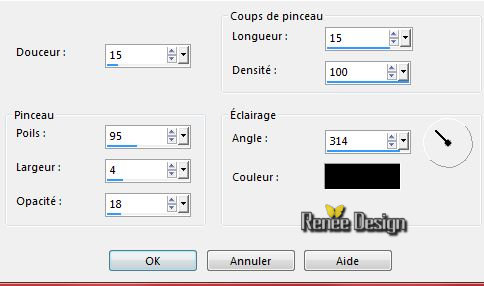
Effects-Media Effects-Brush Strokes with these settings
13.
Effects-Edge Effects-Enhance More
14.
Repeat - Effects-Edge Effects-Enhance More
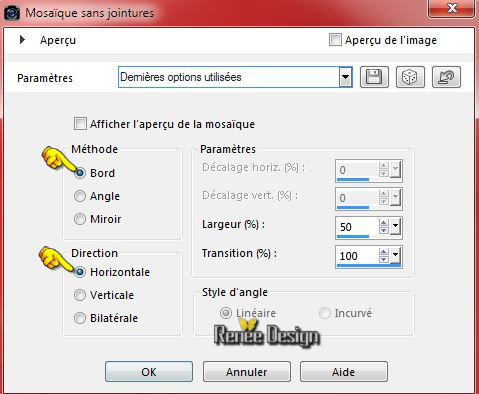
15. Effects-Image Effects-Seamless Tiling with these settings
16. Layers-New raster layer
17.
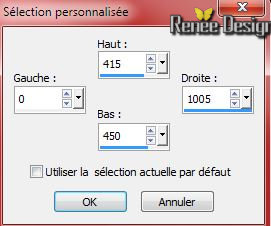
Selection Tool ( S ) Custom selection with these settings
18.
Material palette - foreground color =white -Activate Flood Fill Tool and fill the the selections with the foreground color
Selections-Deselect All
19.
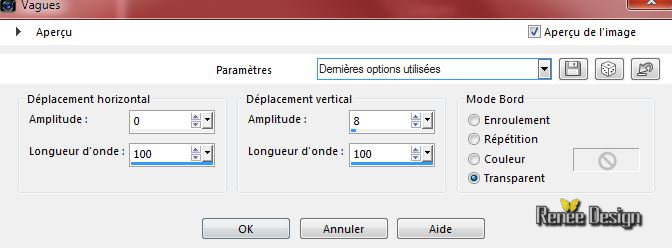
Effects-Distortion Effects-Wave with these settings
20.
Layers- Duplicate
21.
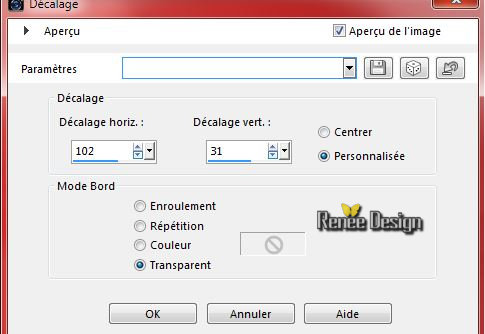
Effects-Image Effects-Offset with these settings
22.
Layer Palette - Double click on this Layer and set the Blend Mode to "Color-Legacy "
23. Activate the tube ’’Deco-
Diet-Coke_gauthier’’
-
Activate layer ‘’glaçons_2’’of the tube
-
Image Resize a 50%
-
Edit/copy- Edit/ paste as new layer on your working image
-
With your move tool place it to the top left corner
-
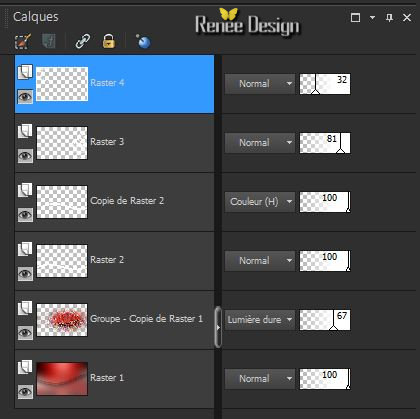
I have lowered the opacity of that layer to 32%
24.
Activate layer ‘’glaçons’’of the tube
-
Edit/copy- Edit/ paste as new layer on your working image
-
With your move tool place it to the top right corner
-
I have lowered the opacity of that layer to 81%
Layer Palette look like this now-You should have this result
You may minimize your tube for a moment, but do not close, we will need it again soon
-
Material Properties:Set your foreground color to #e41e2b- Set your background color to #000000
25.
Layers-New raster layer
26.
Selections –load/save selection –load selection from disc and choose:
« coca_Diet_Gauthier_1 »
27.
-Activate Flood Fill Tool and fill the selection with the background color
Selections-Deselect All
-
Material palette - Set the background color to #ffffff
28.
Layers-New raster layer
29.
Selections –load/save selection –load selection from disc and choose: ‘’coca_Diet_Gauthier_2’’
30.
Activate Flood Fill Tool and fill the selection with the background color #ffffff
Selections-Deselect All
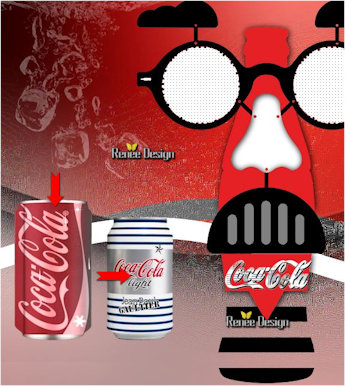
31.
Activate your Magic wand -Add shift-RGB Value -select the two white glasses as shown in the example below
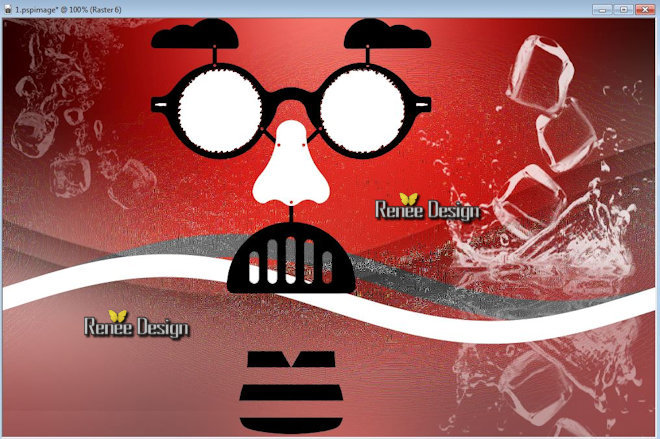
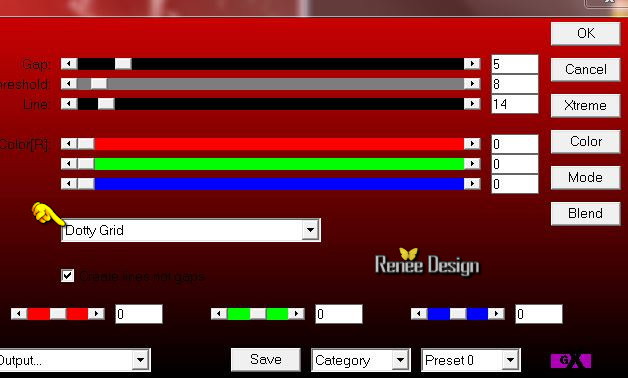
32.
Effects-Plugins – AP01 - Lines Silverling with these settings
33. Effects-Edge Effects-Enhance More
Selections-Deselect All
34. Layers-New raster layer
35.
Selections –load/save selection –load selection from disc and choose:
‘’coca_Diet_Gauthier_3’’
36.
Activate Flood Fill Tool and fill the selection with the foreground color #e41e2b
37. Effects - 3D-effect/ Drop shadow with these settings 1/1/10015 black
Selections-Deselect All
38.Layers-New raster layer
39.
Selections –load/save selection –load selection from disc and choose: «
coca_Diet_Gauthier_4 »
40.Material palette - Set the foreground color to #808080-Activate Flood Fill Tool and fill the selection with the foreground color #808080
Selections-Deselect All
41. Activate the tube
’’Deco- Diet-Coke_gauthier’’
-
activate ‘’logo2’’
-Image
Resize a 40%
-
Edit/copy- Edit/ paste as new layer on your working image
-Place on the bottle
You may minimize your tube for a moment, but do not close, we will need it again soon
42.
Activate the tube ‘’
Diet-Coke_gauthier_effet_bouteille’’
-
Edit/copy- Edit/ paste as new layer on your working image
43.
Effects-Image Effects-Offset with these settings H = -58
and V = 0
-Put the image aside for now, we will need it later.
************************
The creation of the can
-
Material Properties:Set your foreground color to #e41e2b- Set your background color to black
44.
Open a transparent image of 700 x 700 pixels
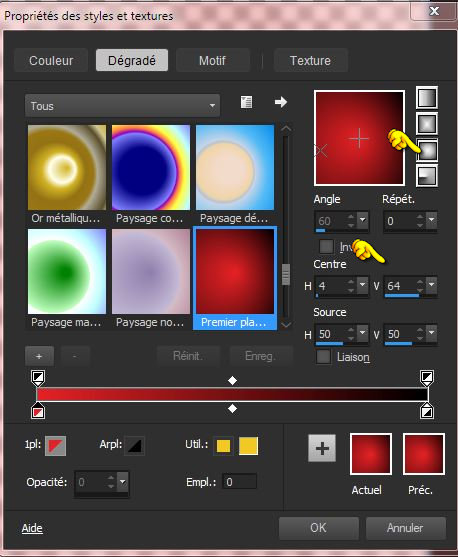
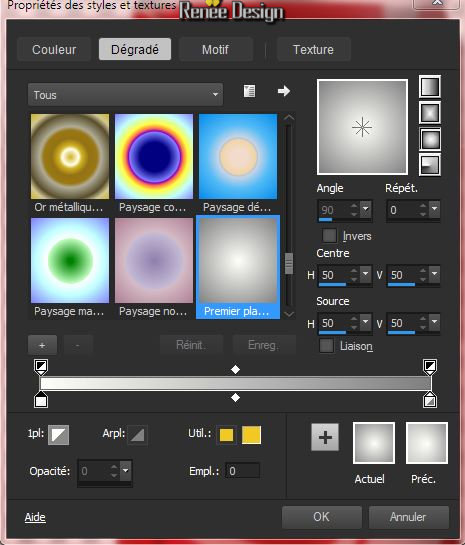
-
Prepare a Sunburst Gradient as configured like this.
45.
Selections –load/save selection –load selection from disc and choose: ‘’
coca_Diet_Gauthier_canette’’
46.
Activate Flood Fill Tool and fill the selection with the gradient
Keep selected
47.
Layers- New Raster layer
-
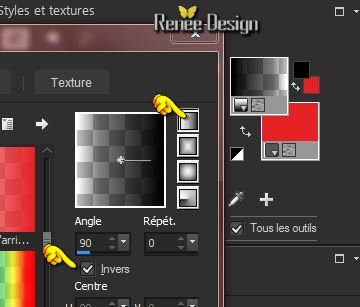
Color Palette: Set your foreground to gradient-Set to "Fading foreground linear" gradient with these settings

48.
Activate Flood Fill Tool and fill the selection with the gradient
49.
Double click on this Layer and set the Blend Mode to "Hard Light "-I have lowered the opacity of that layer to
59%
50. Layers-New raster layer
-
Swap your materials, so the red color is on the bottom as shown below- Set your foreground to gradient-Set to "Fading foreground linear" gradient with these settings
51.
Activate Flood Fill Tool and fill the selection with the gradient
52.
Double click on this Layer and set the Blend Mode to "Burn "-I have lowered the opacity of that layer to 34%
53.
Layers-New raster layer
54.
Activate image’’ image_base coca’’(Feel free to choose any logo for this label. Please pay attention to the dimensions if you take a different image)
-
Edit/Copy-Edit-Paste into selection
55.
Double click on this Layer and set the Blend Mode to "Luminance Legacy "-I have lowered the opacity of that layer to 75%
Selections-Deselect All
-
Set your foreground color to #000000
56. Layers-New raster layer
57. Selections –load/save selection –load selection from disc and choose:‘’
coca_Diet_Gauthier_canette_2
58. Activate Flood Fill Tool and fill the selection with the foreground color black
59.
I have lowered the opacity of that layer to 81%
Selections-Deselect All
58. Layers-New raster layer
59. Selections –load/save selection –load selection from disc and choose: ‘’coca_Diet_Gauthier_canette_3
60.
Activate Flood Fill Tool and fill the selection with the foreground color black
61.
Double click on this Layer and set the Blend Mode to "Overlay "-I have lowered the opacity of that layer to 51%
Selections-Deselect All
62.
Activate the tube ‘’ bord_canette’’
-
Edit/copy- Edit/ paste as new layer on your working image
-
and place
to create the border colors of the can I took this gradient (as an example if you want to change the color)
63.
Layers-Duplicate
64.
Layer Palette - Double click on this Layer and set the Blend Mode to "Hard Light "
-Layer-Palette-Make
raster 1 active
65.
Layers-New raster layer
66.
Selections –load/save selection –load selection from disc and choose:‘’coca_Diet_Gauthier_canette’’
67.
Activate the tube ‘’ renee_texture_Diet_coke_gauthier.jpg’’ –
Edit/Copy-Edit-Paste into selection
Selections-Deselect All
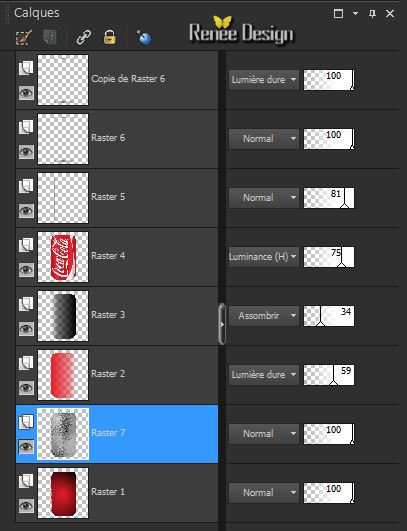
Layer Palette look like this now-You should have this result
68.Layers-Merge-Merge Visible
69.
Image Resize a 61 %
70.Layers-New raster layer
71.
Selections –load/save selection –load selection from disc and choose:‘’ coca_Diet_Gauthier_canette_3’’
72.
Set your foreground color to #ffffff -Activate Flood Fill Tool and fill the selection with the foreground color white
73.
Layer Palette - Double click on this Layer and set the Blend Mode to "Hard Light "
74.
Layers-Merge-Merge Down
Selections-Deselect All
75.
Image Resize a 61%
76.
Edit-Copy!!!!
Now activate the image from step 43
77.
-Edit paste as a new layer on your working image(your can)
-
With your move tool place it to the left
( you can choose bottle or cans to your taste of the tube '' Diet-DECO Coke_gauthier '' I have opted for this creation
78. Activate the tube ’’Deco-
Diet-Coke_gauthier’’
-
Activate layer ‘’
canette_gauthier2’ of the tube
-
Image Resize a 68%
-
Edit-Copy- Edit paste as a new layer on your working image
-
Place on the right side of the can
79.
Activate layer ‘’
bouteille_gauthier2’ of the tube
-
Edit-Copy-Edit paste as a new layer on your working image
-
Layers-Arrange-Move 2x Down
-
Everything is in the right place ?
80.
Layer-Palette-Make Raster 10 active (
Diet-Coke_gauthier_effect_bouteille)
–
Layers-Arrange-Bring to Top- Your work look like this now
81.
Activate the tube" déco "
-
Activate layer ‘’pinceau’ of the tube
-
Edit/copy- Edit/ paste as new layer on your working image
82.
Image –Negativ Image
83.
Layer Palette -Double click on this Layer and set the Blend Mode to "Screen " . Reduce the opacity of this layer to
51%.
84.
Activate layer ‘’ tache_arc en ciel ‘of the tube
-
-Edit/copy- Edit/ paste as new layer on your working image
-
Move to the left side as shown in the example below
85.
Double click on this Layer and set the Blend Mode to "Hard Light "-I have lowered the opacity of that layer to
89%
Your work look like this now-Replace your tubes if necessary
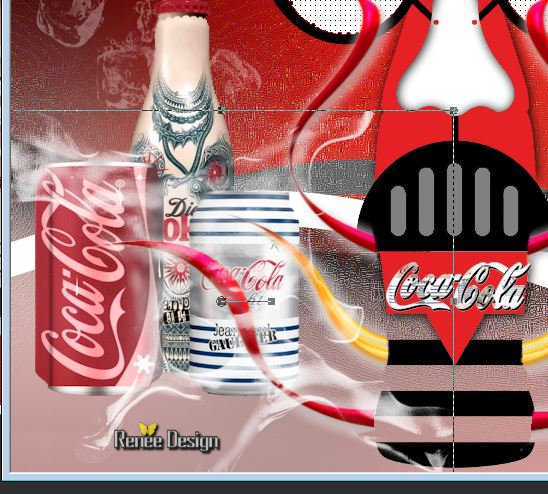
86.
Activate the tube ‘’ diet-coke-jean-paul-gaultier-3
bouteilles’’
-
Edit-Copy –Edit paste as a new layer on your working area
-
With the move tool, move it in the upper right corner
87.
Double click on this Layer and set the Blend Mode to "Hard Light "-I have lowered the opacity of that layer to
81%
88.
Layers-Merge-Merge Visible
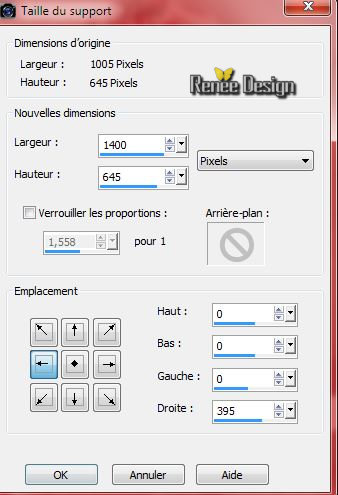
89.
Image -Canvas Size with these settings
90.
Activate the magic wand: Select the transparent part
91.
Layers-New raster layer
-
Choose a picture folder ‘’image_montage_final’’of your choise
92.
Edit/Copy-Edit-Paste into selection
Selections-Deselect All
93.Image - Add borders-Symmetric checked: 2 pixels black
94.
Image Resize a 1005 pixels width
95.Image - Add borders-Symmetric checked: 5 pixels white
96.Image - Add borders-Symmetric checked: 40 pixels black
97.
With the magic wand -select the black border of 40 pixels
98.
Layers-New raster layer
99.
Activate the tube ‘’
cadre_Diet_coke_Gauthier »
-
Edit/Copy-Edit-Paste into selection
Selections-Deselect All
100.
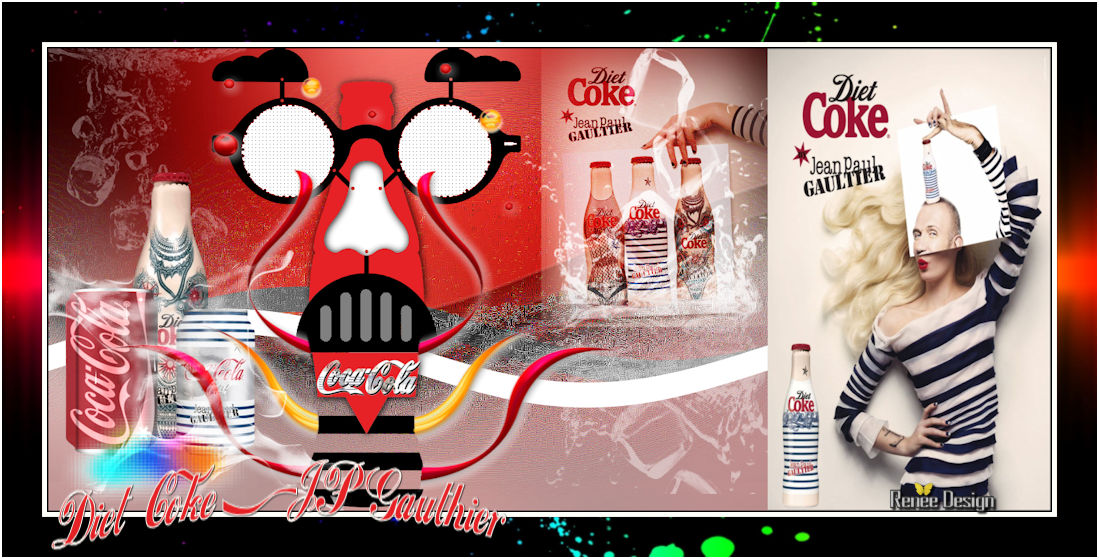
Layers-Merge- Merge All
101.
Activate the tube text -Edit paste as a new layer on your working area and move -Ore write your own text (Font is into the zipfile)
102. Image - Add borders-Symmetric checked: 1 pixel white
Save as JPG
I hope you enjoyed this tutorial .
Renée
This lesson was written by Renée 08/07/2015
edited and update
2015
*
Any resemblance with an existing lesson is merely a coincidence *
* Don't forget to thank the people who work for us and with us. I named the tubeurs - Testers and the translators.
Thanks Renée.
| 
 Translations


 When you see this logo the filter is imported in Unlimited

 All rights reserved