|
Let's start the lesson.
Du livre au rêve/From book to dream
- Preparation
- Material Properties: Set your foreground color to color #0f2138= 1 – Set your background color to color #307dab = 2

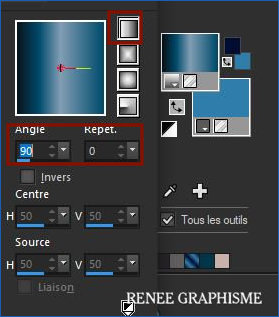
- Replace your Foreground color with a Foreground Linear Gradient and choose ‘’ES Ocean Breeze
030’’- use the settings below
– Material palette looks like this
1.File - New-Transparent Image : 1150 x 647 Pixels
2.
Flood Fill Tool  -
fill the layer with the foreground gradient -
fill the layer with the foreground gradient
3. Adjust-Blur- Motion Blur use the settings below

4. Layers- Duplicate
5.
Image - Mirror - Mirror Horizontal (Image - Mirror in older versions of PSP)
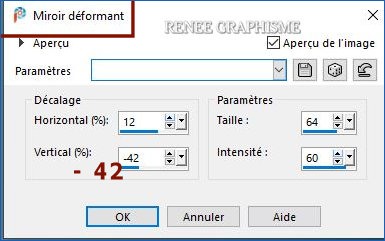
6. Effects -Distortion Effects– Warp use the settings below
7. Effects – Edge Effects – Enhance More
8. Effects –Edge Effects – Enhance
9. Layers-Properties-Change the Blend Mode to "Hard Light "
10. Open the tube ‘’
livre-au-reve-image 1’’ -Edit - Copy- Activate your work -Edit - Paste as a new layer
Do not move , it is in the right place
11. Effects –Plugins-
Unlimited 2.0 - Sapphire Filters 07-
SapphirePlugin_0619... using the default settings
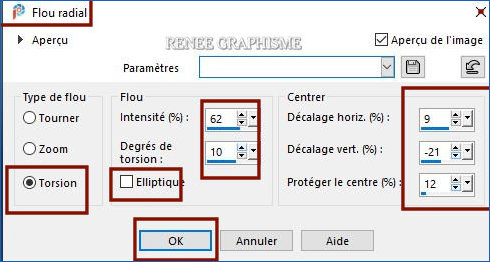
12. Adjust-Blur-Radial Blur use the settings below
13. Layers-Properties-Change the Blend Mode to "Hard Light " – Lower the Opacity to 79
14. Effects –Plugins-
Unlimited 2.0 - UnPlugged Tools – Lomo : 85/ 189
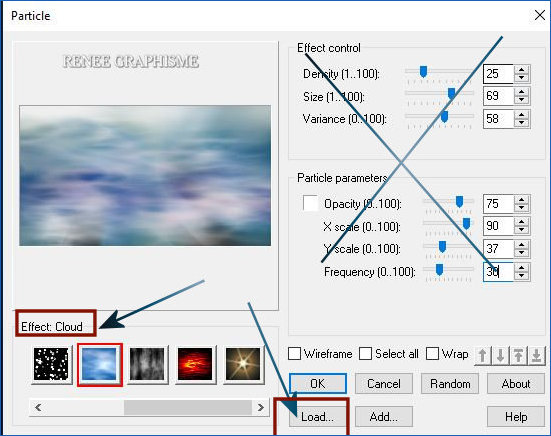
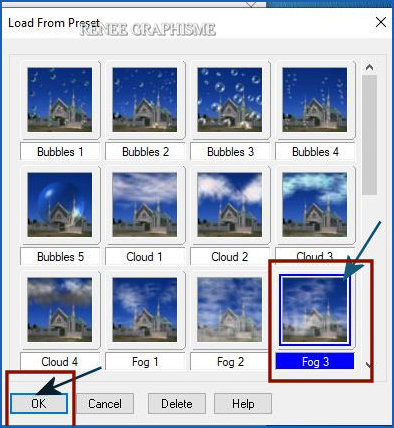
15. Effects – Plugins– Ulead Effects - Particle
1. Click "Effect
Cloud" (Don't pay attention to the settings )
2. Click
"Load" (The Preset Panel will open)
3. Choose Fog 3 >
Ok
Ok
16. Layers- New Raster Layer
17. Selections –load/save selection –load selection from disc and select my selection: ‘’Du livre au rêve-1’’
18. Materials: Set your Foreground color to color #ffffff=5
Flood Fill Tool
–
Fill the selection with the Foreground color #ffffff = 5 (2 clicks)
Selections- Deselect All
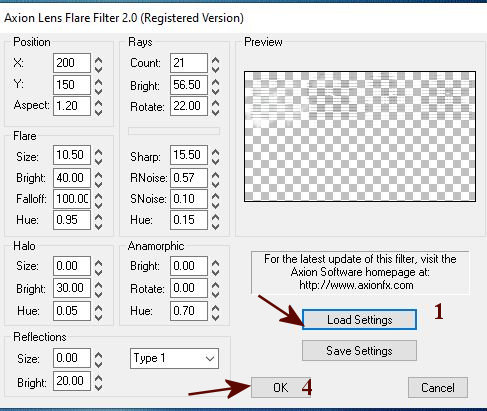
19. Effects –Plugins- Axion Lens Flare
1. Click "Load
Settings"
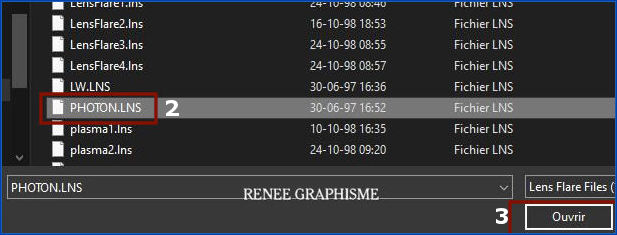
2. Click on the preset ‘PHOTON.LNS> click on open
3. Ok
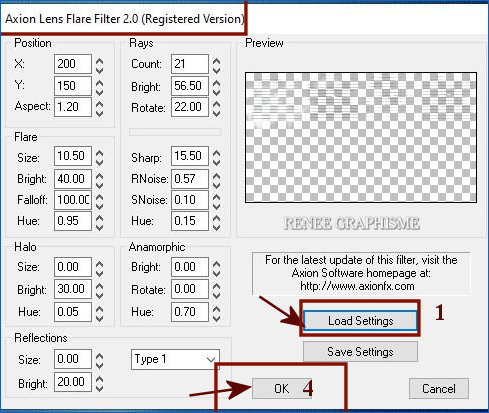
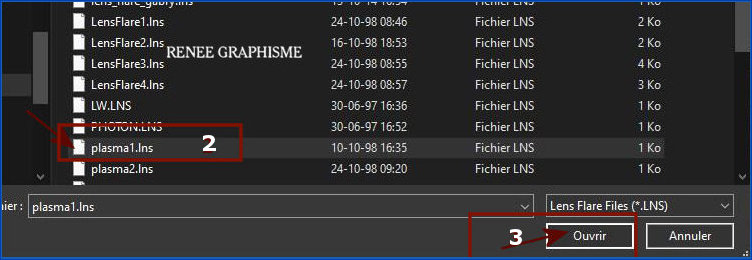
- Repeat the Axion Lens Flare filter and take Plasma 1
2. If you don't see the preset for Plasma 1, do the following
Click again "Load Settings " Go to the Filter Axion Flare and now you will see "Plasma 1".
Click on the
preset ‘’plasma 1>click on open
3. Ok
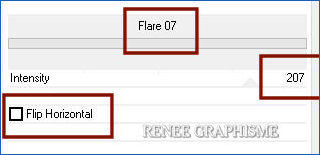
20. Effects –Plugins-
Unlimited – ICNET-Filters - Lens Flares- Flare 07 Intensity 207
21. Open the tube ‘’
livre-au-reve-image 2’’ -Edit - Copy- Activate your work -Edit - Paste as a new layer
22. Pick Tool: (K) on your keyboard -Enter these parameters on the toolbar
 568/45 568/45
-Press ( M ) to close the Pick Tool
Layers- arrange- Move Down
23. Layers-New- Raster Layer
24. Selections –load/save selection –load selection from disc and select my selection: ‘’Du livre au rêve-2’’
25. Flood Fill Tool
–
Fill the selection with the Foreground color #ffffff = 5 (2 clics)
Selections- Deselect All
-In the Layer Palette -Activate Raster 4
26. Open the tube ‘’
livre-au-reve-image 3’’ -Edit - Copy- Activate your work -Edit - Paste as a new layer
27. Pick Tool: (K) on your keyboard -Enter these parameters on the toolbar
 775
/296 775
/296
-Press ( M ) to close the Pick Tool
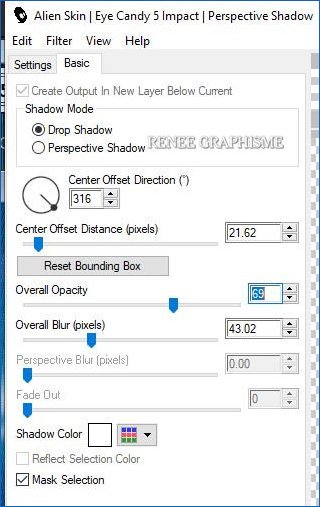
28. Effects – Plugins – Alien Skin EyeCandy 5
Impact – Perspective Shadow use the settings below-Color White
- To replace the top of the layer palette
29. Layers-New- Raster Layer
30. Selections –load/save selection –load selection from disc and select my selection: ‘’Du livre au rêve-3’’
31. Flood Fill Tool
–
Fill the selection with the Foreground color #ffffff = 5 (5 clicks)
Selections- Deselect All
32.Activate Selection Tool -Custom Selection (S) -Rectangle with these settings


DELETE

Selections- Deselect All
Your work and Layer Palette look like this now-You should have this result

33. Layers-New- Raster Layer
34. Selections –load/save selection –load selection from disc and select my selection: ‘’Du livre au rêve-4’’
35. Flood Fill Tool
–
Fill the selection with the Foreground color #ffffff = 5 (4 or 5 clicks)
Selections- Deselect All
36.Activate Selection Tool -Custom Selection (S) -Rectangle with these settings
DELETE
Selections- Deselect All
37. Layers-Properties-Change the Blend Mode to "Hard Light " – Lower the Opacity to 87%
38. Layers-New- Raster Layer
39. Selections –load/save selection –load selection from disc and select my selection: ‘’Du livre au rêve-5’’
40. Flood Fill Tool
–
Fill the selection with the Foreground color #ffffff = 5
Selections- Deselect All
41. Effects –Plugins-
Unlimited 2.0- Andrew's Filters 54 - Printing
Mistake...using the default settings
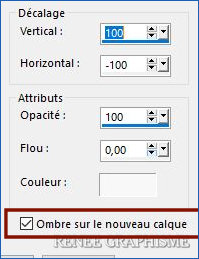
42. Effects –3D-Effects – Drop Shadow with these settings: Color White- Shadow on New Layer !!!!
- On the Shadow Layer
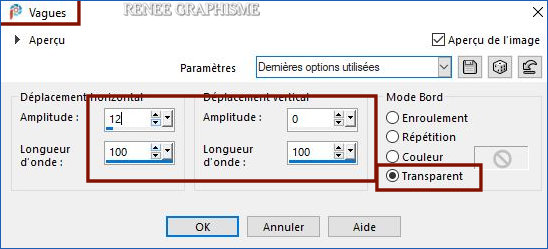
43. Effects – Distortion Effects – Wave use the settings below
- In the Layer Palette-Activate Raster 4
44. Open the tube ‘’
livre-au-reve-image 4’’ -Edit - Copy- Activate your work -Edit - Paste as a new layer
45. Objects – Align– Bottom
46. Effects – User Defined Filter– Emboss 3 using the default settings
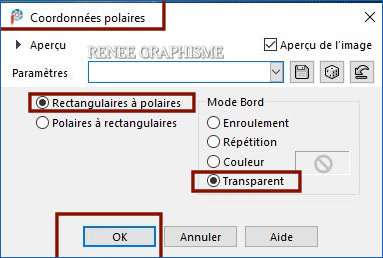
47. Effects – Distortion Effects– Polar-Coordinates- Rectangular to Polar -Transparent
- In the Layer Palette-Activate Raster 2
48. Open the tube ‘’
livre-au-reve-image 5’’ -Edit - Copy- Activate your work -Edit - Paste as a new layer
49. Pick Tool: (K) on your keyboard -Enter these parameters on the Toolbar
 107 / 280
-Press ( M ) to close the Pick Tool
50. Effects – Texture effects – Weave use the settings below -Color White

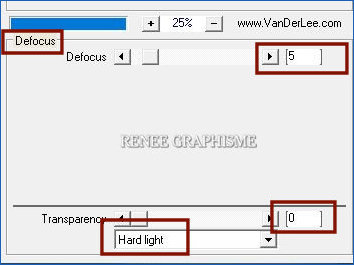
51. Effects – Plugins– Vanderlee- Unplugged X –
Defocus use the settings below
- Activate the top of the layer palette
52. Open the tube ‘’
livre-au-reve-image 6’’ -Edit - Copy- Activate your work -Edit - Paste as a new layer
-Move Tool- Place the tube in the right place
53. Effects – Plugins – Alien skin EyeCandy 5
Impact – Perspective shadow-Tab Settings/User settings select my file Preset :
Du livre au rêve-shadow
54.Image - Add borders-Asymmetric!!!! with these settings -Color White

55. Open the tube ‘’ livre-au-reve-image 7- eco-finale’’ -Edit - Copy- Activate your work -Edit - Paste as a new layer
56. Objects - Align – Right
57. Image - Add borders-Symmetric checked: 4
Pixels Color # 1b5fb5= 4
Add my watermark on new layer
58. Layers- Merge- Merge All ( flatten)
Image - Resize 86 % Resize all layers checked.
Save as JPG
I hope you enjoyed this lesson
Renée
This lesson was written by Renée
06-01-2021
Edited and Update
in 2021
*
Any resemblance with an existing lesson is a coincidence
* Do not forget to thank the people who work with us and for us
I have appointed the tubeurs and translators
Thanks
*
|


 Translations


