|
Let's start the lesson
Emless
Time
- Material Properties: Set the foreground color to color# 1-Set the background color to color number # 2

1. File-Open a new transparent image in this size : 1100
x 700 Pixels
2. Flood Fill Tool
 -
Flood fill the layer with the foreground color #1 -
Flood fill the layer with the foreground color #1
- Selections-Select All
3. Open the tube ‘’ Emless-Time- Image1.’’ - Edit - Copy - Activate your work - Edit - Paste into selection

4. Effects- Image Effects- Seamless Tiling -using the default settings
5. Adjust-Blur-Radial Blur use the settings below
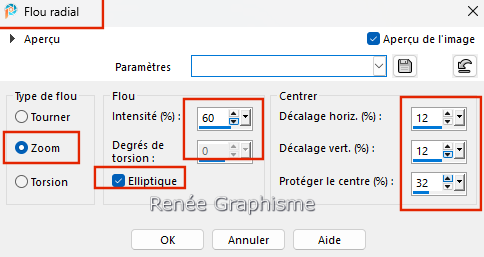
6. Adjust- One Step Photo Fix ( if your tube is dark)
7. Adjust- Blur-Gaussian Blur-Radius 15
8. Effects – Plugins – Medhi – Sorting Tiles use the settings below
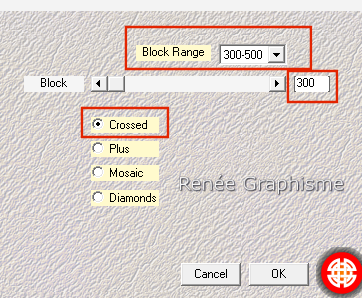
9. Effects – Plugins – Medhi – Weaver with these settings
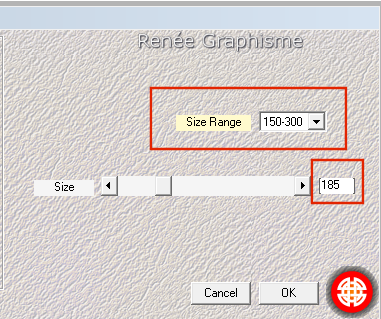
10. Effects-Edge Effects-Enhance
11.Layers-Duplicate
12. Layers - Load/save a mask - Load the mask from disk-select mask ‘’120/20" (included in the materials)
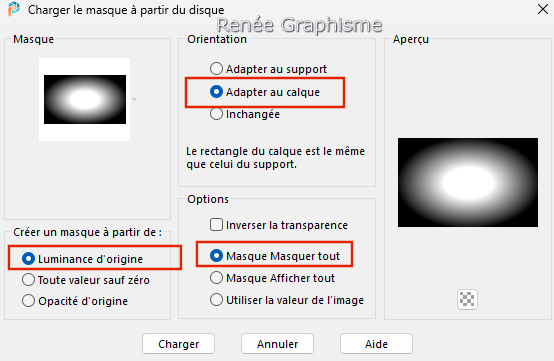
- Layers-Merge-Merge Group
12. Selections-Select All - Selections Float-Defloat
13. Layers-New Raster Layer
14. Effects – Plugins – Vanderlee – Unplugged X – Raster -use the settings bleow -Color white
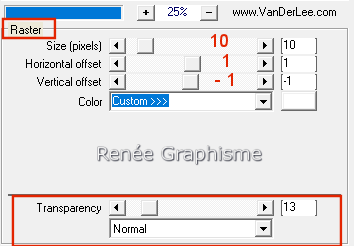

15. Effects-Distortion Effects-Wave use the settings below
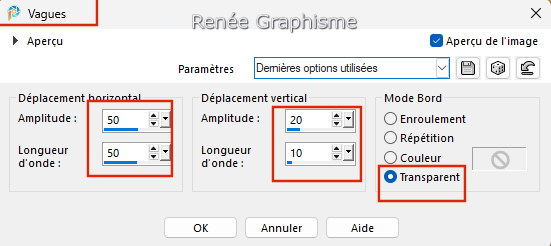
16. Layers-Properties-Change the blend mode of this layer to Screen
17. Effects – Plugins – FM Tile Tools – Saturation Emboss using the default settings
18. Layers-New Raster Layer
19. Effects - Plugins – Medhi – Wavy Lab1 use the settings below
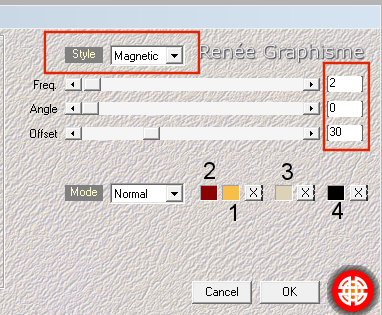
20. Effects – Plugins – Simple – Quick Tile
21. Adjust-Blur-Gaussian Blur-Radius
50
22. Effects - Plugins - Filters Unlimited 2.0 – Factory M ou VM
Colorise – Biohazard use the settings below
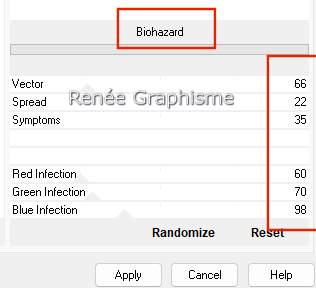
23. Layers-Properties-Change the blend mode of this layer to Overlay
24. Effects-Texture Effects-Blinds use the settings below-Color #4
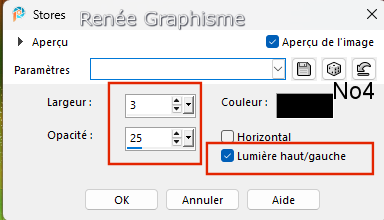
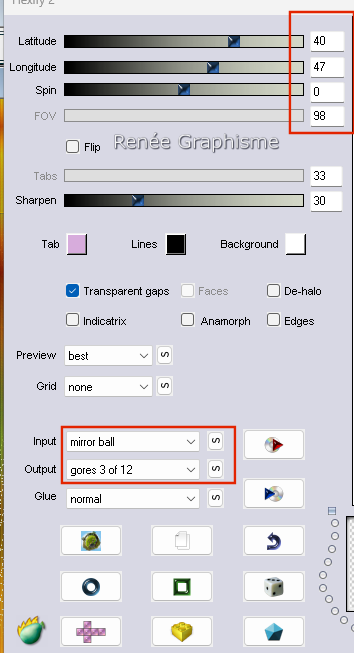
25. Effects – Plugins – Flaming Pear – Flexify 2 use the settings below
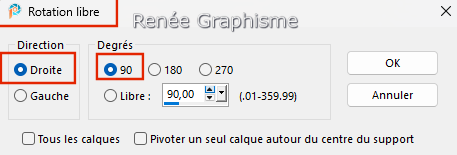
26. Image – Free rotate-Direction Right-Degrees 90
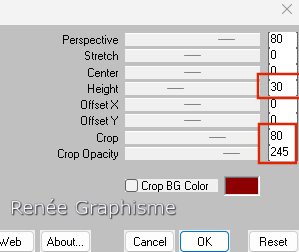
27. Effects – Plugins – Mura’s Meister – Perspective Tiling with these settings
28. Effects-3D-Effects-Drop Shadow with these settings: 5/ 1 /100 /22 Color black
29. Layers-Duplicate
30. Layers-Properties-Set the Blend Mode to Hard Light -Reduce the opacity of this layer to 53%
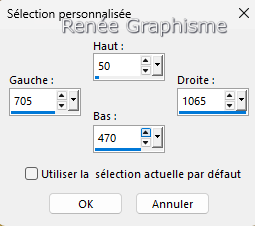
- Activate Raster 1 in the layer palette
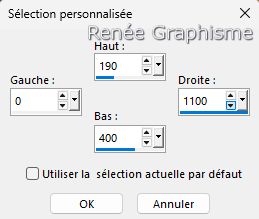
31. Activate Selection Tool -Custom Selection (S) -Rectangle with these settings

32. Selections-Promote selection to layer
33. Layers-Arrange-Bring to Top
34. Effects-Edge Effects-Enhance More
35. Effects-3D-Effects-Drop Shadow with these settings: 0/0/72/22 Color black
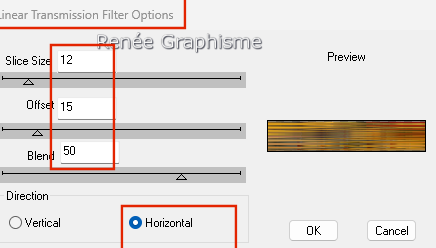
36. Effects – Plugins – DSB Flux – Linear Transmission use the settings below

37. Layers-Properties-Change the blend mode of this layer to Overlay – Reduce the opacity of this layer to 77%
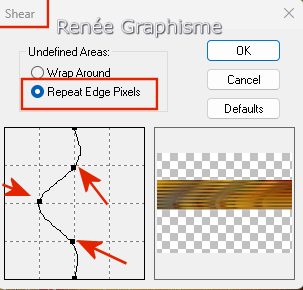
38. Effects – Plugins – Distort – Shear use the settings below
- Activate in the layer palette–
Groupe – Copy of Raster 1
39. Layers-New Raster Layer
40. Activate Flood Fill Tool
 –
Flood fill the layer with color white –
Flood fill the layer with color white
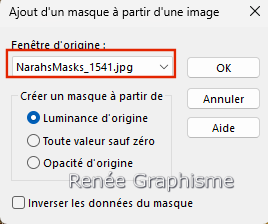
41. Layers-New mask layer-From image and select mask: ‘’
NarahsMasks_1541’’
- Layers-Merge-Merge Group
42. Layers-Properties-Change the blend mode of this layer to Overlay – Reduce the opacity of this layer to 83%
- Activate the top of the layer palette
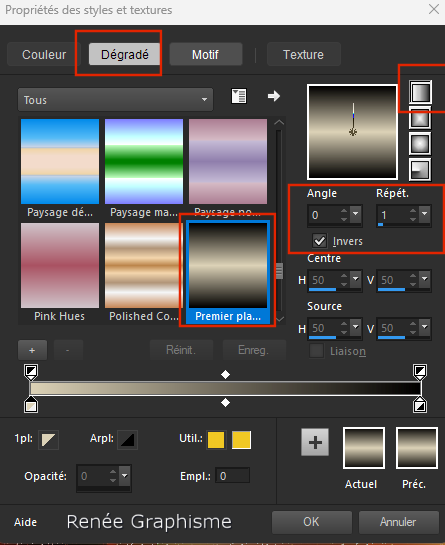
- Material Properties: Set the foreground color to color # 3-Set the background color to color # 4
- Put your foreground on the linear gradient with settings below
43. Layers-New Raster Layer
44. Activate Selection Tool -Custom Selection (S) -Rectangle with these settings
45. Activate Flood Fill Tool
 –
Flood fill the selection with the gradient –
Flood fill the selection with the gradient
46. Effects - Plugins - Filters Unlimited 2.0 – Toadies - Bitches
Crystal... using the default settings
47. Selections -Modify-Contract 25 Pixels
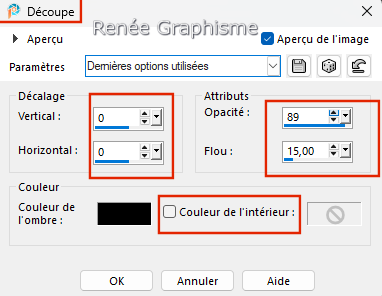
48. Effects –3D-Effects –Cutout use the settings below - Color black
49. Layers-New Raster Layer
50. Activate masque
‘’maskcameron297’’
- Edit - Copy - Activate your work - Edit - Paste into selection
51. Layers-Properties-Set the Blend Mode to Luminance -Reduce the opacity of this layer to 69%
52. Effects – Plugins – Adjust Variation – click 3 times on lighter

53. Activate the tube
‘’Emless-Time- Image2’’
- Image - Resize to 50% and then to 75%
- Edit - Copy- Activate your work -Edit - Paste as new layer
- Place in the frame
54. Effects-3D-Effects-Drop Shadow with the same settings
55. Layers-Merge - Merge down and repeat once more
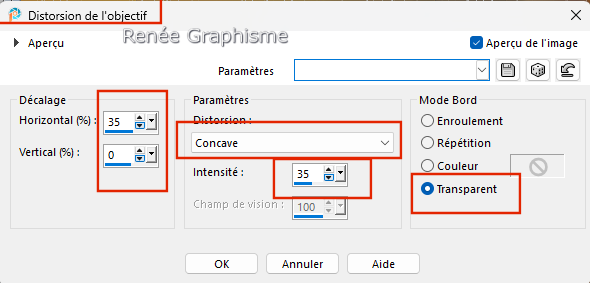
56. Effects – Distortion Effects-Lens Distortion use the settings below
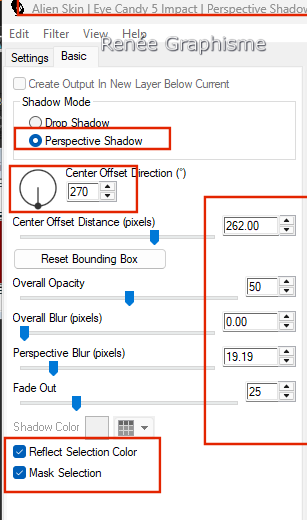
57. Effects - Plugins - Alien Skin EyeCandy 5 – Impact – Perspective
Shadow –Tab-Settings-User Settings-select my file- Preset : ‘’Emless-time-shadow’’
58. Activate the tube ‘’
Emless-Time-Deco1’’
- Edit - Copy- Activate your work -Edit - Paste as new layer
59. Pick Tool: (K) on your keyboard -Enter these parameters on the toolbar
 -1
/0 -1
/0
- Press the ( M ) button to close the tool.
60. Activate the tube ‘’ ’Emless-Time- Image4’’ - Edit - Copy- Activate your work -Edit - Paste as new layer
- Move the tube in the right place ( see finished image)
61. Activate the tube ‘’
Emless-Time- Image6.’’- Image -Resize 50 %
62. Edit - Copy- Activate your work -Edit - Paste as new layer
63. Pick Tool: (K) on your keyboard -Enter these parameters on the toolbar
 74
/ 22 74
/ 22
64. Effects - Plugins - Alien Skin EyeCandy 5 – Impact- Perspective
Shadow-Tab-Settings-Preset- Drop shadow Blury
65. Layers-New Raster Layer
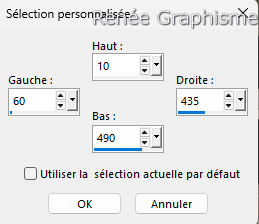
66. Activate Selection Tool -Custom Selection (S) -Rectangle with these settings
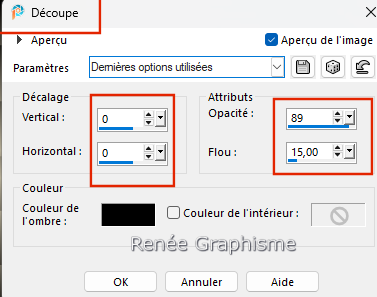
67. Effects-3D -Effects-Cutout with the same settings

68. Activate your Text tool-Write the text ‘’
Emless Time ‘’ colors of your choice - Font size
72 Pixels (Included in the material)
69. Effects-3D-Effects-Drop Shadow with these settings: 1/1/100/2 Color black
70.Activate the tube ‘’ Emless-Time-Deco2’’ - Edit - Copy- Activate your work -Edit - Paste as new layer
- Place at the bottom of the work (refocus your title if necessary)
71. Image - Add Borders-Symmetric checked: 3 Pixels-Color white
Edit - Copy !
72. Open the cadre/frame
‘’Cadre-Sealess-time’’
73. Activate - Magic wand - Select inside the frame - Selections - Modify - Expand by 2 pixels
-
Edit - Paste into selection
74. Add the author's watermark and your own watermark
75. Layers- Merge- Merge All ( flatten)
76. Image - Resize - to 95% - Resize all layers- Checked
Save as JPG
***********************
I hope you enjoyed this lesson
Renée
This lesson was written by Renée 01/03/2025
Edited and Update
in 2025
***
Any resemblance with an existing lesson is a coincidence
* Do not forget to thank the people who work with us and for us -I have appointed the tubeurs and translators
Thanks
*
|


