|
Let's begin
1. Open a transparent image of 985 x 645 pixels
2. Colour palette: foreground to: #930000 and the background color to black
3.Flood Fill Tool: Fill the layer with black
4.Effects - Plugins L an K's /
Zitah /repeat 1x 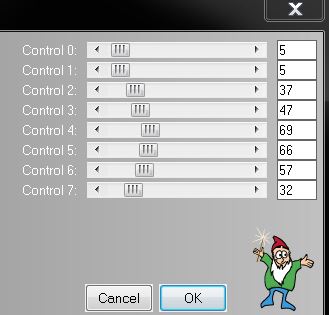
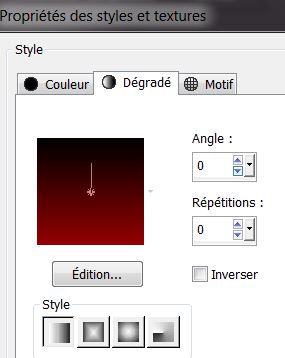
5. Layers - New raster layer
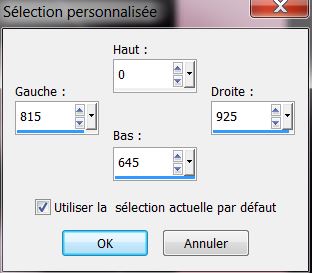
6. Selections-Custom selection with this setting

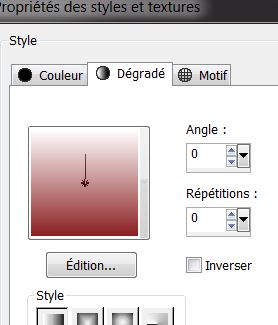
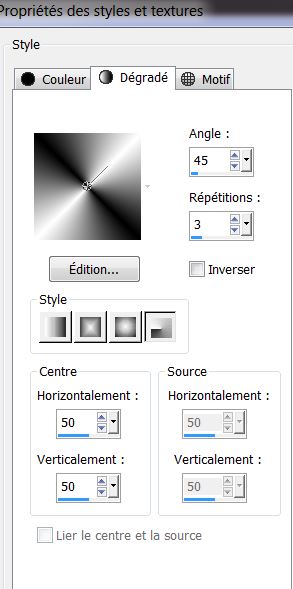
7. With your colors starting to prepare a linear / gradient configured like this
8. Flood Fill Tool: Fill the selection with your gradient
9. Effects- Plugins L
and K's / zitah /with the same settings but controle 0 is 4 (make only one time)
10. Selections-Modify-Contract- Select-Selection Borders
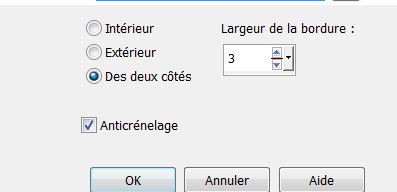
11. On the same layer fill black and the gradient
Selections -Select none
12. Effects -
3D Effects -Drop Shadow 10/10/50/5 color white and / repeat
-10/-10
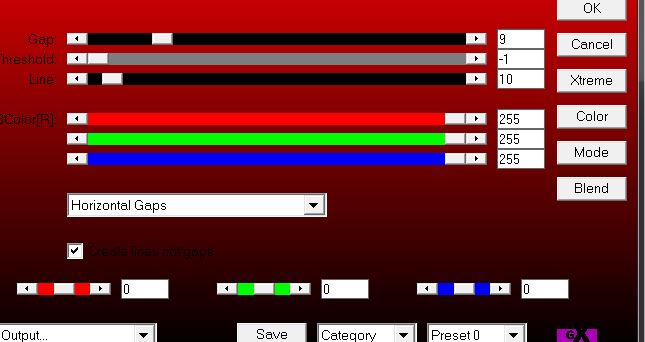
13. Effects - Plugins Simple -
Diamonds
14. Open the tube
""132_femme_cheveux_blanc_animabelle'' colelr. Edit/Copy-Edit/paste as a new Layer
Effects - Image Effects-
Offset H= -300 et V = -3
15. Adjust-Blur-Gaussian Blur: Radius 38
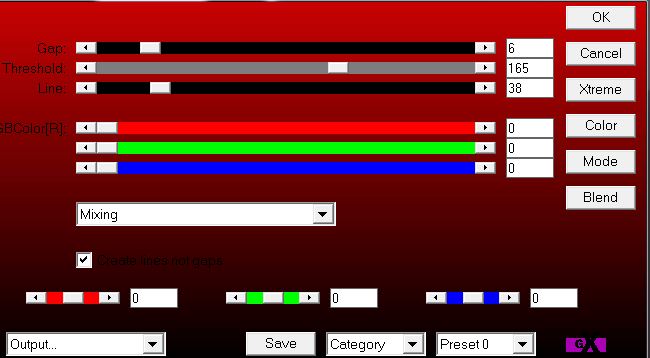
16. Effects-Plugins
Ap01(Innovation ) Lines Silverling
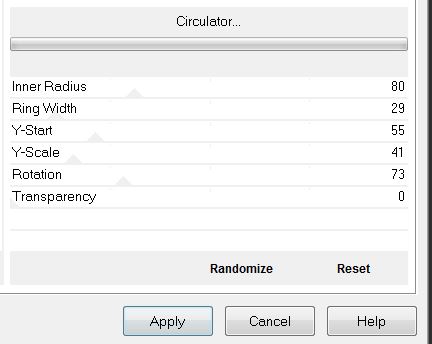
17. Effects- Plugins VM
Distorsion- Circulator
18. Layers-Duplicate/Image-Mirror
19. Layers-Merge-Merge Down
Effects-Plugins Eye Candy 5 -Blacklight
-Preset''levitation_light''
20. Image
-Resize 80% Resize all layers -> NOT CHECKED
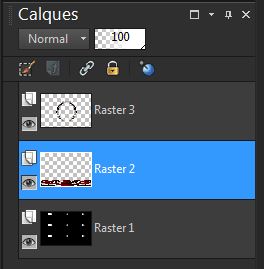
21. Be placed on the
layer Raster 2
22. Effects - Plugins Mura's
Meister -Perspective Tilling default
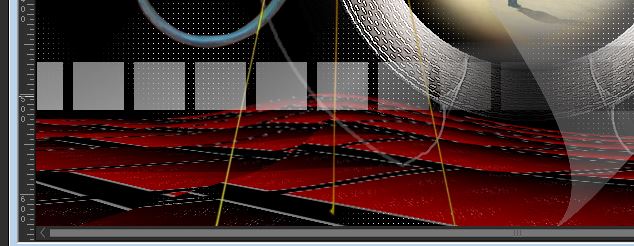
23. With the Select Tool (K) Move Down as follows 525 pixels high
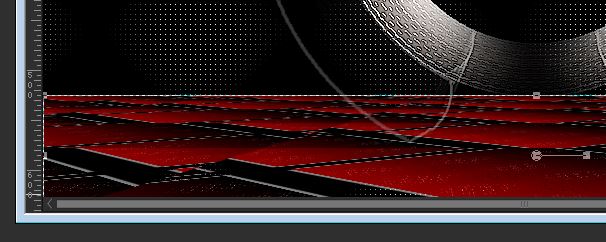
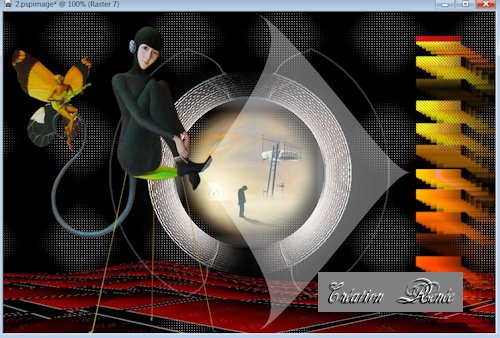
24. On this layer -
Distortsion Effects -Twirl/ Degrees 135
You should have this result
25. Activate your Top layer
26. Layers-New raster layer
27. Selections –load/save selection –load selection from disc and choose ''levitation_1''
28. Open the tube
''13_baroque_animabelle'' Edit/Copy-Edith/Paste into selection
29. Layers - new raster layer
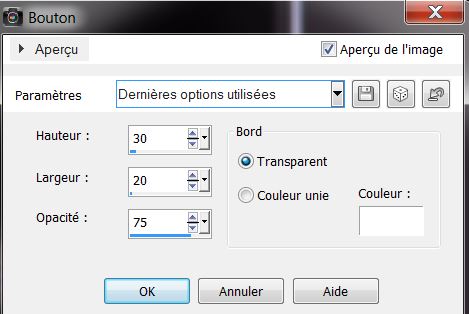
30. Effects- 3D Effects-Butonnize
31. Selections
-Select none
32. Layers-Merge-Merge Down
33. Open the tube
''Krysfantasqique15 exclusif Renée '' Edit/Copy-Edit/paste as a new Layer and place
34. Layers - New raster layer
35. Colour Palette: change your backgroundcolor white/the same linear gradient 0/0
36.Selections-Custom selection with this setting
37. Floot Fill Tool: Fill the selection with the gradient
38. Effects - Plugins AP01
(innovation)/ Line silverling
39. DO NOT
DESELECT
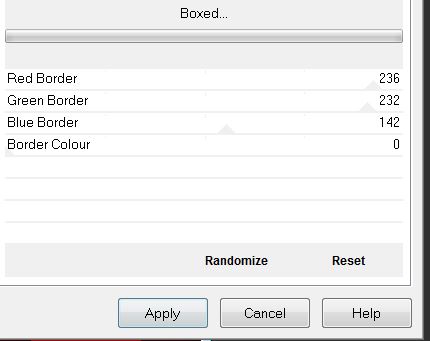
40. Effects-Plugins Unlimited
2.0 / Andews 1/Boxed
41. Selections -
Select none
42. Selections –load/save selection –load selection from disc and choose ''levitation
_2''
Selections /
Delete
43. Selections -
Select none
44. Effects -Plugins ICNET
Unlimited / Color Filters - Sunshine 220/101
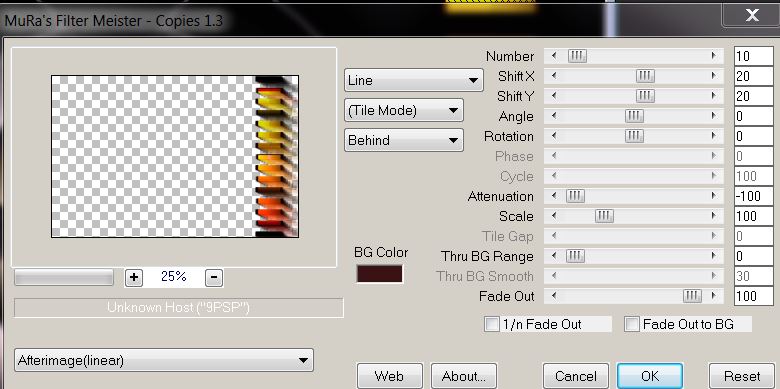
45. Effects-Plugins Mura's
Meister - Copies
46. Colour Palette-Forground color white
47. Layers-New raster layer
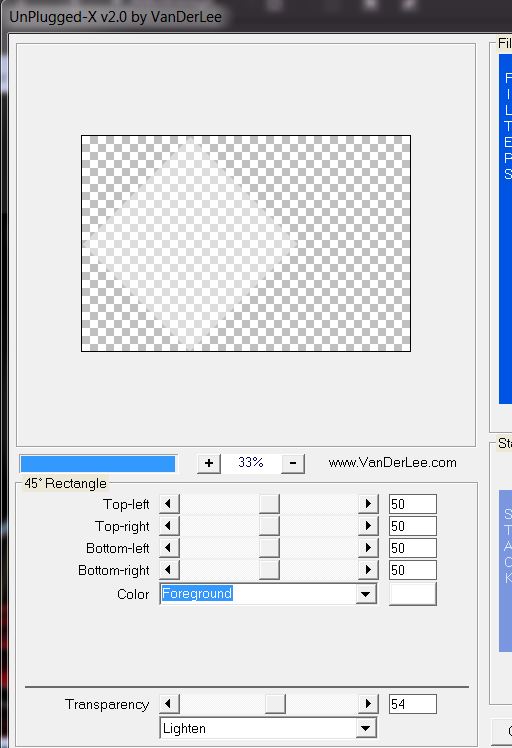
48. Effects -Plugins Vanderlee -Unplugged X
/45°rectangle
49. Effects- Geometric Effects / Circle -
transparent
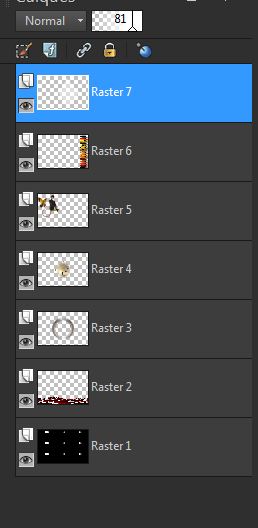
50. Image mirror/ Opacity
71%
You are there in your layers palette
51. Effects -Plugins L and K's -
Trouble
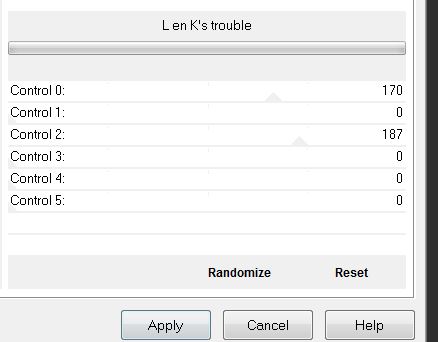
52. Colour palette: foreground to white and the background color to black
Prepare a radial gradient configured like this
53 Layers - new raster layer
54. Open the ''pinceau _squares_15
001.jpg'' - File-Export-and Custum Brush give a name -''pinceau _squares_15 001''
Paint Brush Tool with this setting

Place it with your gradient colour on your image as in the example
55. Effects -Plugins Eye Candy
5- Blacklight /Preset ''levittaion_light_2''
56. Effects - Image Effects-Enhance
57. Effects -Plugins Graphic plus - Horizontal
Mirror
"If you have problems there is a pspimage in the materials folder - paste as a new layer"
58. Open the
tube''fille_levitation'' Edit/ copy- Edit/ paste as new layer
move to a good place like this
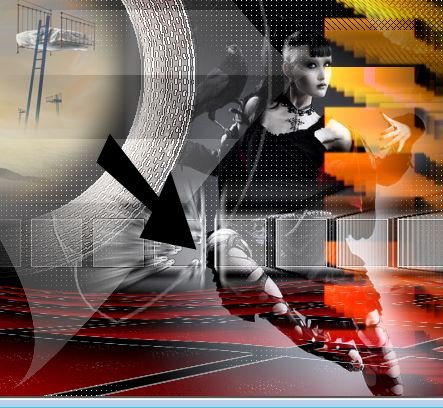
59. Blend Mode of this layer "Screen"
60. Image - Add Borders - Symmetric checked 2
pixels and color: #930000
61. Image - Add Borders - Symmetric checked 45 pixels white
62. Open your tube
''coin_levitation ''Edit/ copy- Edit/ paste as new layer. Place to the left
63. Effects-3D Effects-Drop Shadow 0/0/100/50 black
64. Layers-Duplicate/Image-Mirror/Image-Flip
65. Image - Add Borders - Symmetric checked 2 pixels color
#930000
66. Image - Add Borders - Symmetric checked 2 pixels color
#ffffff
67. Image - Add Borders - Symmetric checked 2 pixels color
#930000
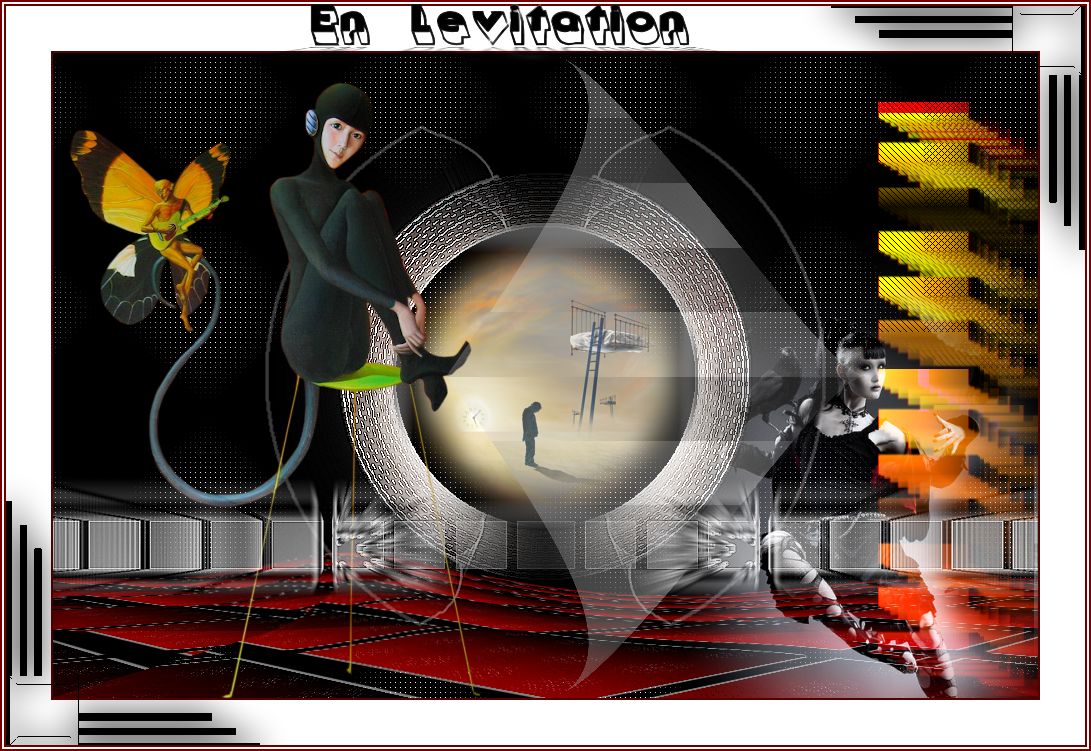
Open and Copy your titre past as a new Layer
- Open your Text Tool ''3 D Gothic''
and write your own text
That's it !! You've done it !
This lesson was written by Renée!
26/09/2013
| 

 Translation