|
Let's begin
1. Open your background "Ete purple-"
Window/ Duplicate/ we will work with this. Close
original.
2. Layers, new raster layer
3. In the color palette / Set foreground to color
#9296b3 and background to black #000000
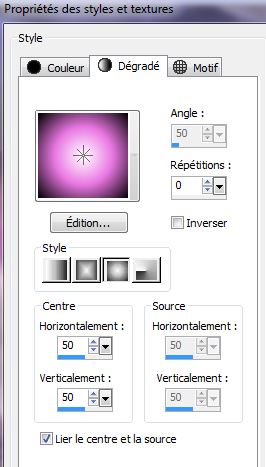
4. Prepare a sunburst gradient configured
like this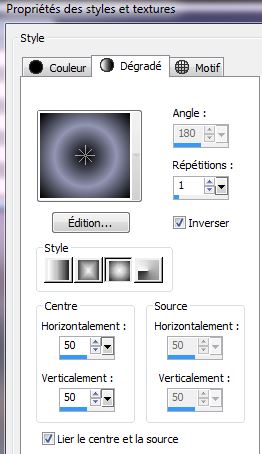
5. Fill the layer with the gradient
6. Effects - Filters Unlimited 2.0 - & <Bkg Designers
SF10 I>/ ALFs Border Bevel Mirror
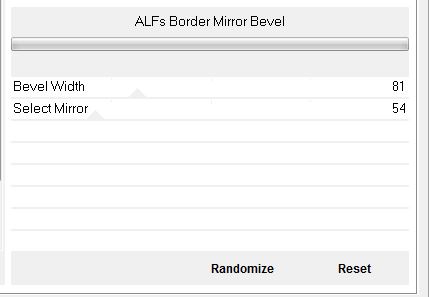
6. Effects - Filters Unlimited 2.0 - & <Bkg
Designers SF10 I>/ ALFs Border Bevel Mirror
6. Layers Palette - Set the layer to Hard Light and
opacity to 55
Do not add a new layer
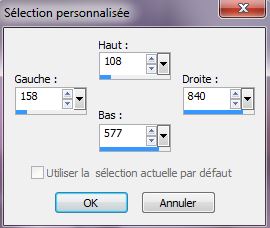
7. Selection tool - Custom selection
8. Open the tube "SVB Zee 4 Syl" Copy and
paste into selection
9. Selections - select none
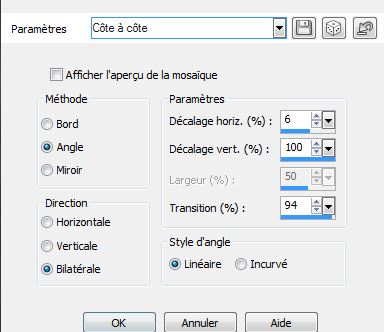
10. Effects - Image effects/ Seamless tiling
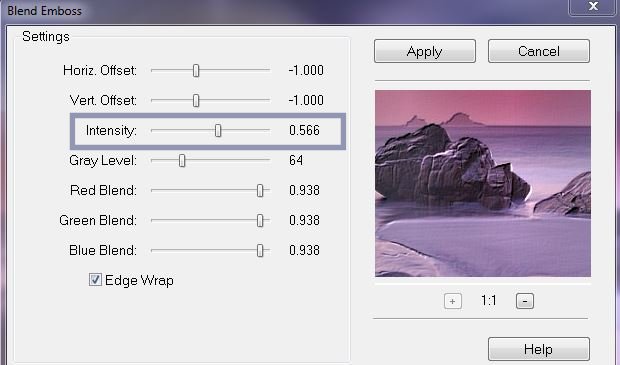
11. Effects - FMTile Tools/ Blend Emboss
with the following settings
12. Open the tube "image_ete_1" Copy and
paste as a new layer/ place like this
13. Open the tube
"Lexha_GameOfThrones_ByTW_May2013"/ Copy and paste as
shown
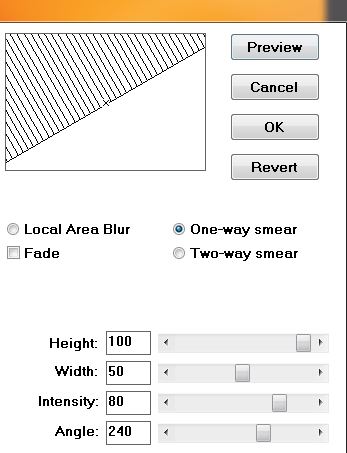
14. On the tube use your Smudge tool set
like this

15. Slightly stretch like this
16.Layers - new raster layer
17. Selections - load selection "ete_2"/ Open - Copy and
paste "image _5" in the selection
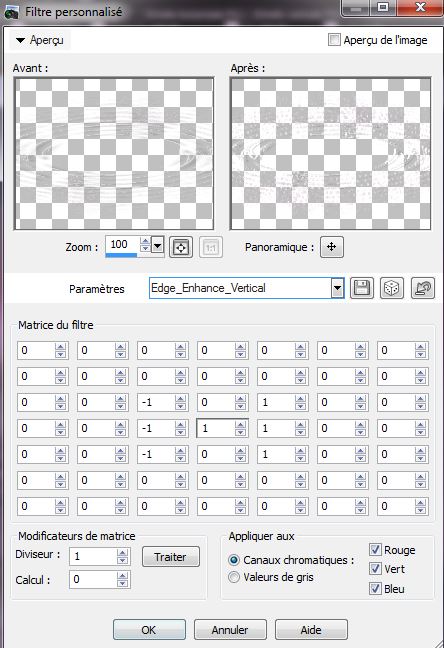
18. Selections - Select none
19. Layers - Arrange/ move down
20. Activate the top layer of the Layers palette
21. Layer - add a new layer
22. Selections - load the selection "ete_3" and paste
the tube "image_5" into the selection
23. Selections - Select none
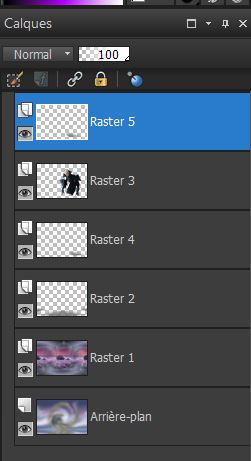
Your
layer palette should look like this now
24. Layers - New raster layer
25. Set your foreground color to #b378a9 and background
to white #ffffff and prepare a linear gradient
configured like this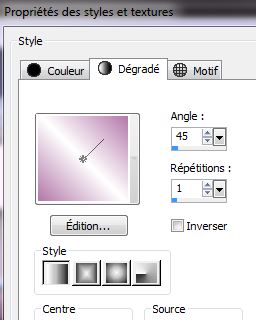
26. Selection tools - Custom selection

27. Fill the selection of the linear
gradient
28. Selections - Select none
29. Image resize to 50%/ all layers unchecked
30. Effects - Toadies/ What are you - Default 20/20
31. Effects - VM Distortion - Tumbler/ 83/128/128/128
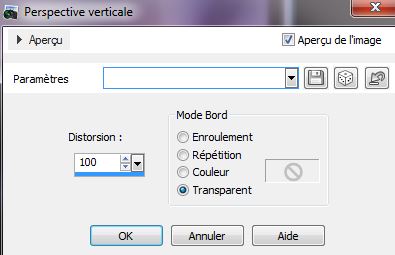
32. Effects - Geometric Effects - Circle/ transparent
33. Effects - 3D Drop Shadow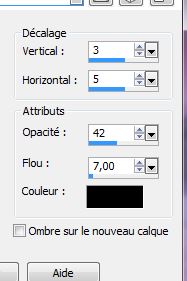
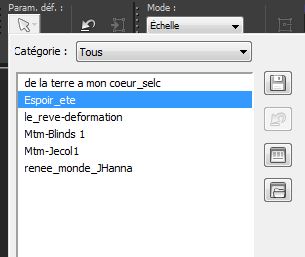
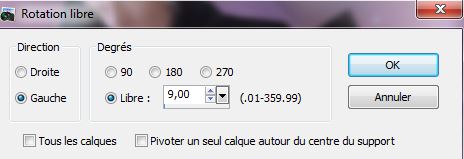
34. Click on your keyboard (K) - Select
tool - hoose the preset "espoir_ete" (you had copied to
your preset folder earlier)
Hit s to apply
35. Layers - Arrange down/ repeat
36. Effects - User Defined Filter/ preset edge_ enhance_
vertical (already in the presets folder)
37. Back on the top layer
38. Open the tube "image_1.png" and paste as a new layer
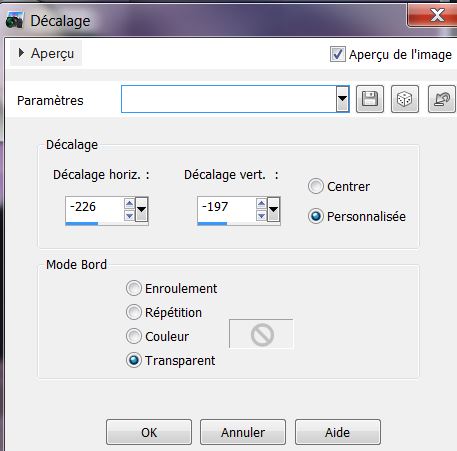
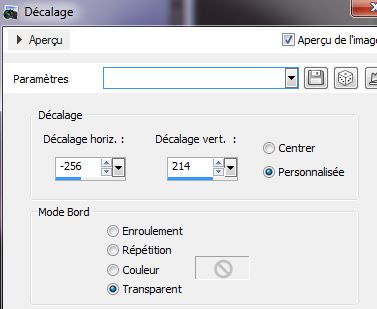
39. Effects - Image Effects/ Offset
40. Open the tube "image_2 Png" and paste as new layer
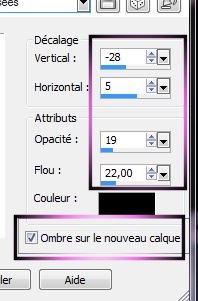
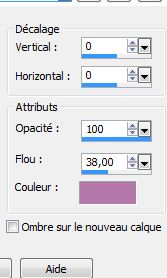
41. Mirror Image/ Image Flip
42. Effects - Andromeda/ Velocity
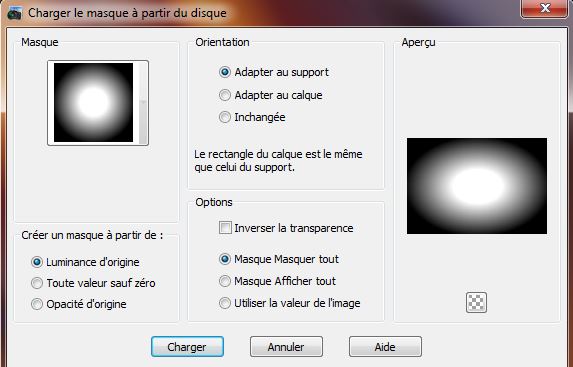
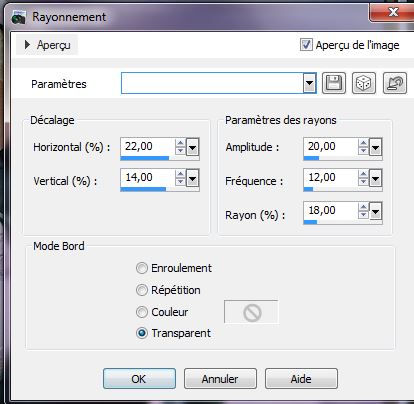
43. Layers -load save mask/ load from
disk / mask "20/20" Load
Layers - merge/ merge group
44. Effects - image effects/ offset
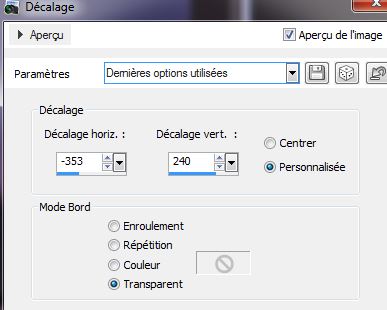
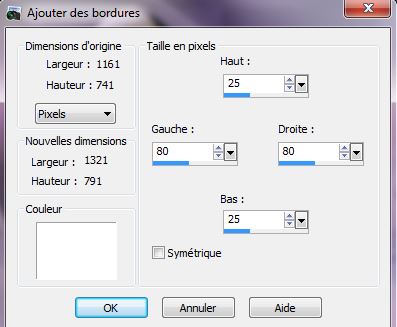
45. Layers - Arrange/ move down (3 times)
46. Set mode to Luminance Legacy
Your layer palette should look like this now
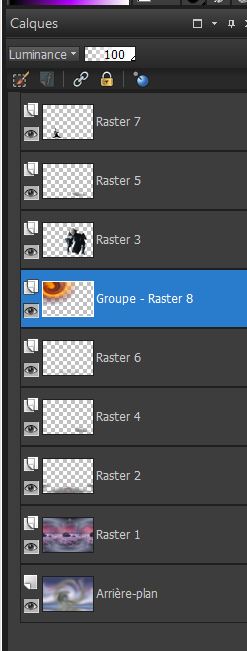
47. Activate the top layer of the Layers
palette
48. Open the tube "image_3.png" and paste. Do not move
49. Set mode to hard light and opacity to 67
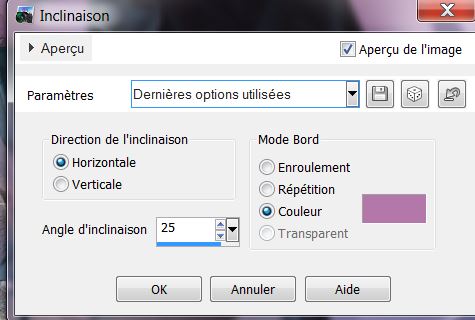
50. Activate the bottom layer (background)
51. Effects - Flaming Pear/ Flood
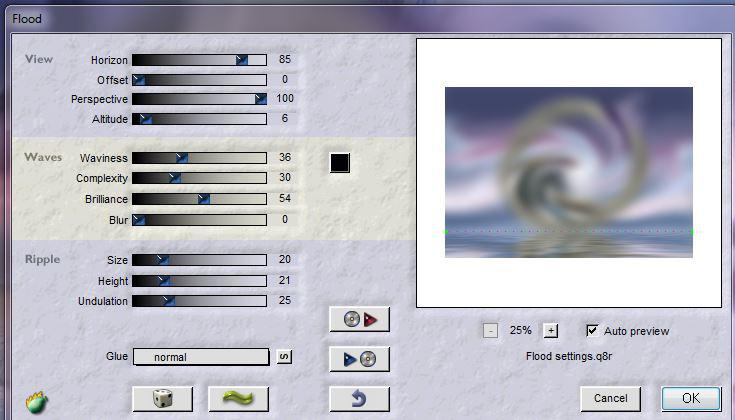
52. Go back to the layer on top of the
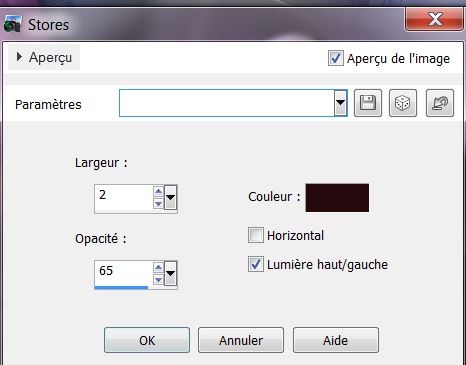
layers palette
53. Layers - add a new raster layer
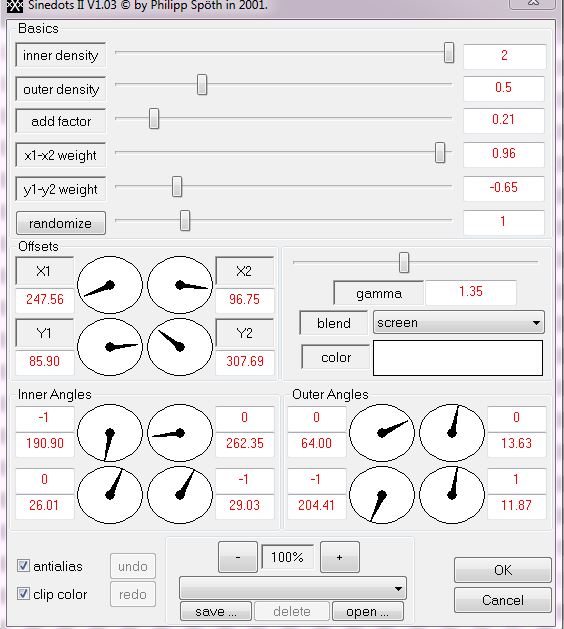
54. Effects -Dragonfly/ Sinedots II with the following
settings
55. Set the layer mode to Overlay
56. Layers - Duplicate
57. Effects - Geometric Effect / Perspective Vertical
58. Image - Free Rotate/ Left 9 degrees
59. Set the blend mode to hard light and
opacity to 75
60. Open the tube "image_4" and paste as new layer
61. Effects - Image effect/ Offset
62. Set your foreground Gradient "101"
configured like this
63. Layers - add a new raster layer
64. Selections - Load Selection "ete_1"/ fill with the
gradient
65. Selections - Modify / Contract by 25 pixels
66. Layers - new raster layer / fill the selection with
the gradient
67. Selection - deselect / merge layer down
68. Lower opacity of the layer down to 55
69. Effects - 3D-effect/ Drop Shadow
70. Stay on the layer "Raster 11 Shadow1''
71. Effects - Distortion effects/ Spiky Halot
72. Layers - Merge Visible
73. Edit - copy
74. Image - add borders 3 pixels black
75. Image - add borders asymmetrical white
76. Select the white border with your
magic wand
77. Edit - paste into selection (the image you just
copied)
78. Selections - Promote selection to layer
DO NOT DESELECT
79. Adjust - blur/ Gaussian Blur - 18
80 In the color palette set the foreground color to
#b378a9 and background black #000000
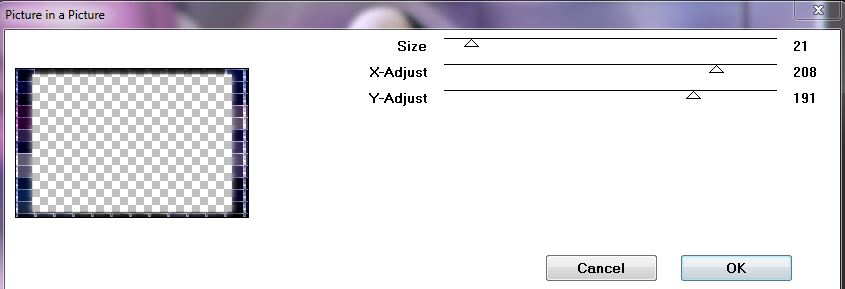
81. Effects - VM Extravanga/ Picture in a Picture
82. Effects - Geometric effect/ Skew -
color #b378a9
83.
Selections - Select none
84. With your wand - add (Shift)/ select the purple
edges like this (or use selection''ete_purple_selec_cadre'')
85. Effects -effect texture blinds /
black
86. Effects- 3-D effect/ Drop Shadow -
color #b378a9
87. Selection - Deselect
88. Image - add borders 5 pixels in white
89. With the Font/ "Swatch_it" - size 72 write your
title
90. Repeat the same 3D Drop shadow effect
That's it Thanks
Sally
le 29/05/2013

|

 Traduit