|
Let's start the lesson. Open the Color-Palette

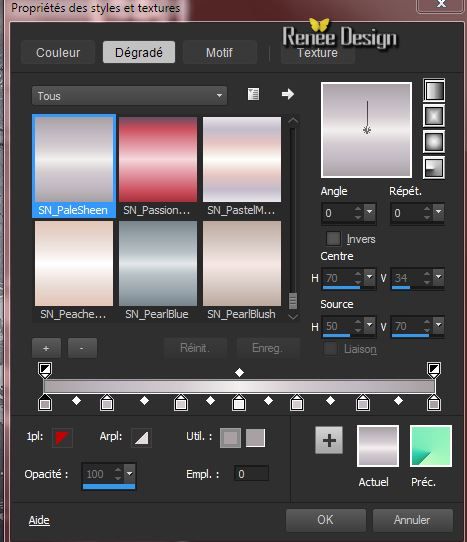
- Material of the foreground - select my file in the list "SN_PaleSheen''/ Prepare a linear gradient configured like this.
Background color to this color #dbd6d7
1. File - New - New Transparent Image: 995
x 625 pixels
- Food Fill Tool :fill the layer with the gradient
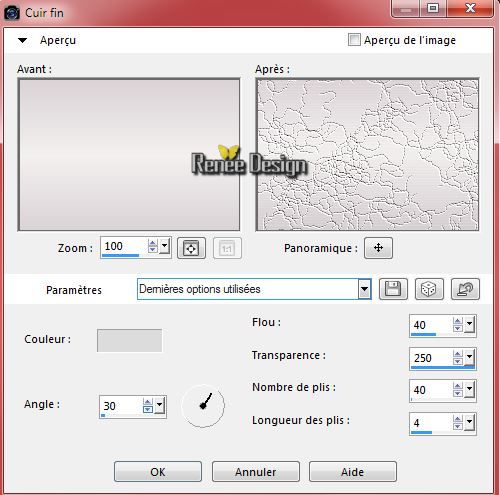
2. Effects- Texture Effects- Fine Leather with these settings
3. Layers- Duplicate
4. Effects- Plugins
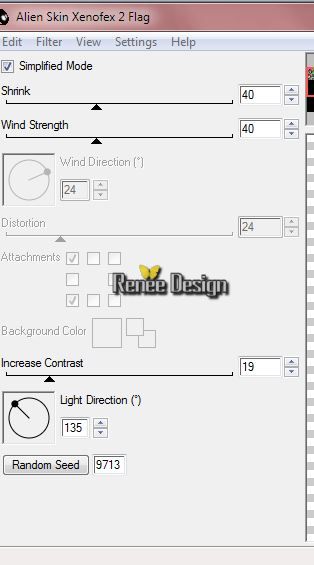
- Alien skin - Xenofex2.- Flag
5. Effects- Plugins
- Simple - 4 Way Average
6. Effects-Edge Effects- Enhance
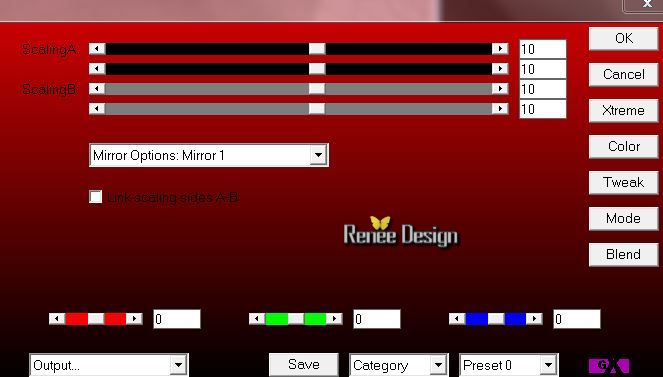
7. Effects- Plugins AP01- Mirror Reflections with these settings
8. Effects-Image Effects-Seamless Tiling use settings below
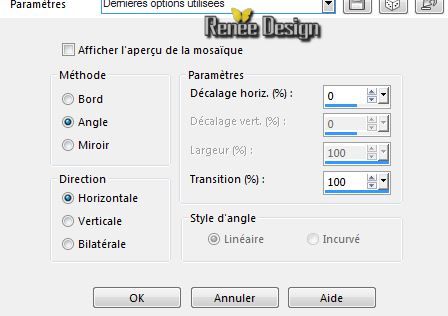
9.Effects- Plugins Graphic plus - Panel Stripes with these settings
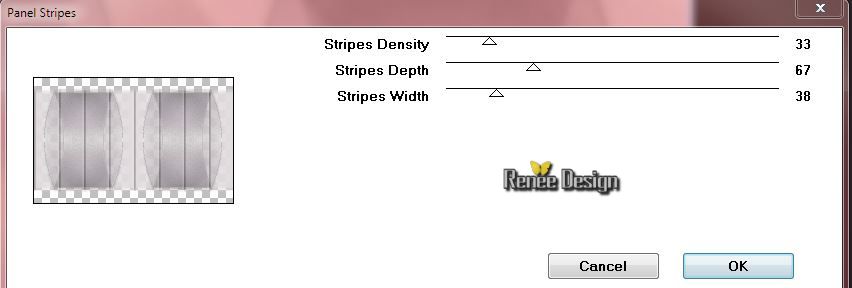
10. Effects - 3D Effects - Drop shadow using the default settings
-Material Properties: Foreground color to this color:#e2d97c -Background color to this color #5e443a
11. Prepare a linear gradient with these settings 90/0 Invert not checked
12. Layers- New raster layer
-Activate Flood fill tool and fill the layer with the gradient
13. Layers- New Mask Layer from Image and choose Mask: ''spirale''
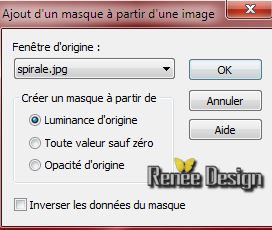
- Layers- Merge- Merge - Group
14. Effects- Plugins Graphics plus - Cross Shadow with these settings
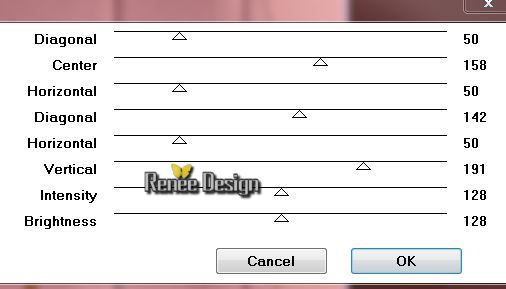
15.Material of the foreground - select my file in the list "SN_PaleSheen''/Prepare a linear gradient with these settings 90/0 Invert not checked
-Activate the bottom of the Layer Palette =Raster 1
16. Selections - load/save selection - load selection from disk and choose my selection: ''FO_1''
17. Selections- Promote selection to layer
18.Layers- Arrange-Bring to Top
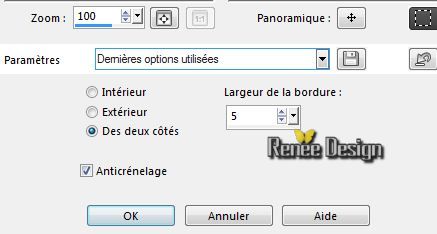
19. Selections-Modify-Select-Selection Borders with these settings
20. Layers- New raster layer
- Activate Flood fill tool and fill the selection with the gradient ( "SN_PaleSheen')Prepare a linear gradient with these settings

21. Effects - 3D Effects - Drop shadow with these settings -4/ 2 /40 / 18 black
Selections-Deselect All
22.Layers-Merge- Merge Down
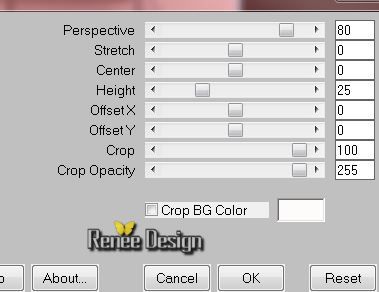
23. Effects- Plugins Mura's Meister -Perspective Tilling
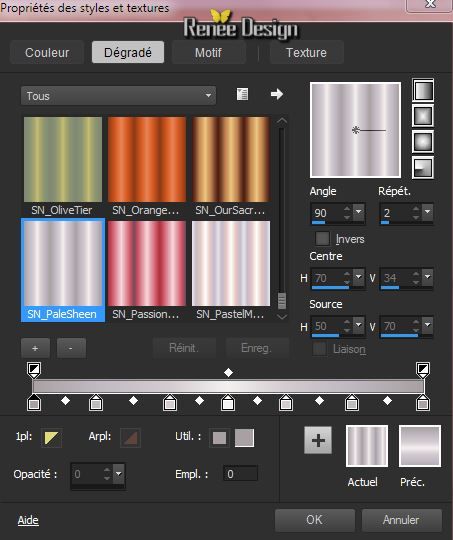
24. Material of the foreground - select my file in the list "SN_PaleSheen''- Prepare a linear gradient like this
25. Layers- New raster layer
26. Activate Flood Fill Tool and fill the layer with the gradient
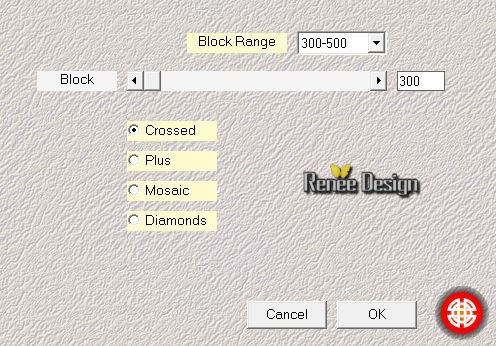
27. Effects- Plugins Medhi - Sorting Tiles with these settings
28. Selections - load/save selection - load selection from disk and choose my selection: ''FO_2''
29. Effects- Plugins -Unlimited 2.0 -
Andrew's Filters 33 -Textured Circles
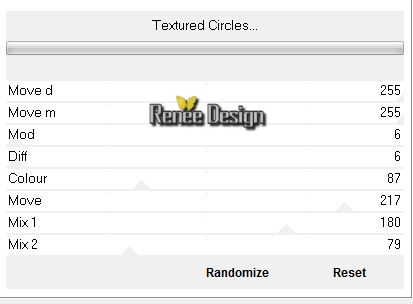
Selections-Deselect All
30. Effects- Plugins -Unlimited - VM
Extravanga - shoutin'!
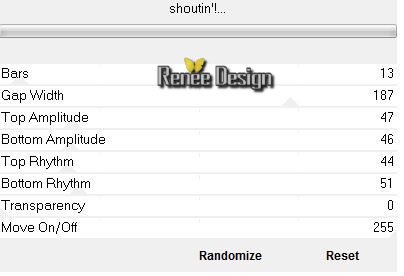
-
Layers- Arrange- Move Down and Repeat
31.
Layer Palette -Double click on this layer and set the Blendmode to Overlay -and set the layer opacity of this layer to
73%
Layer palette look like this now
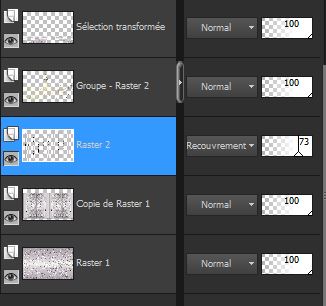
32.
Effects - 3D Effects - Drop shadow with these settings (Shadow on new layer checked !!)
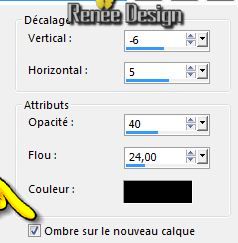
- Layer Palette: activate Raster 2 the Shadow layer
33. Effects- Plugins - Unlimited 2.0-
VM Distorsion- Distorsion by Saturation
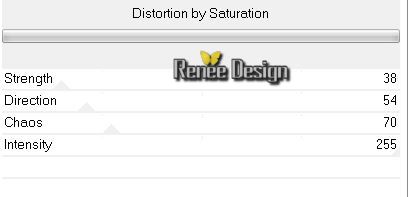
34.
Repeat : Plugins - Unlimited 2.0- VM Distorsion withe the same settings
-
Material Properties: Foreground color to this color:#dbd6d7 Background color to this color: #5d5959
- Activate the top of the layer Palette
35.
Layers- New raster layer
Food Fill:fill the layer with the foreground color
36.
Layers-Maske- Load/Save Mask -Load Mask From Disk and choose''
"Narah_mask_Abstract64"

-
Layers- Merge- Merge - Group
37.
Layer Palette -Double click on this layer and set the Blendmode to Overlay
38.
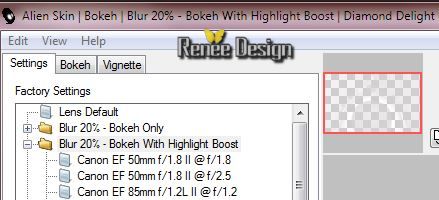
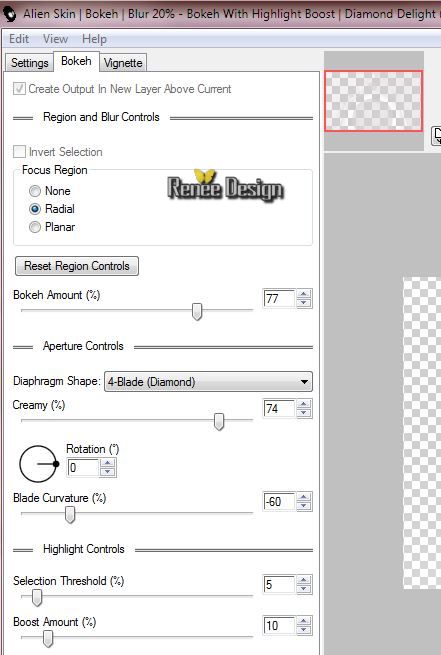
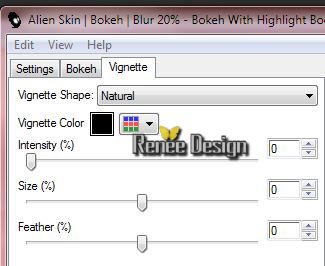
Effects- Plugins - Alien Skin Bokeh with these settings
If you have problems with this filter /Tube included in the zip and paste as a new layer
39.
Selections - load/save selection - load selection from disk and choose my selection: FO_3''
40.
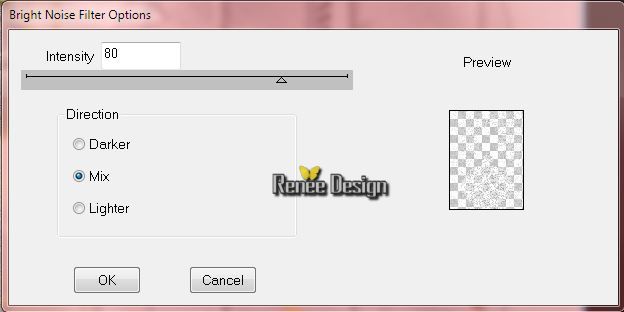
Effects- Plugins DBS Flux - Bright Noise
41.
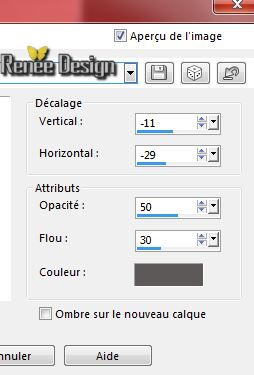
Effects - 3D Effects - Drop shadow with these settings- Background color (Attention uncheck shadow on the new layer)
Selections-Deselect All
42.
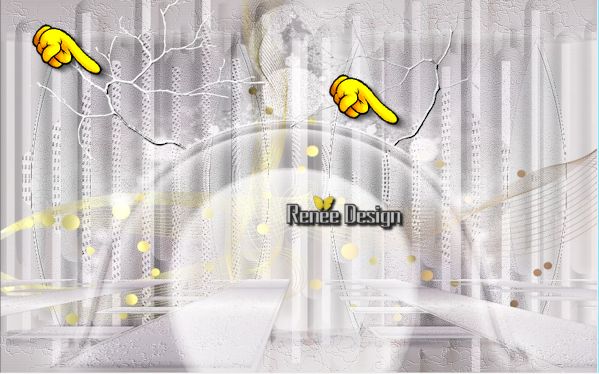
Activate the tube '' nicole-vase-2012''
-
Edit copy the selected parties vase
1 and vase 2 of the tube ''
-
Paste as a new layer on your working area
-
Aktivate Move Tool (M) place to the left and to the right side
43.
Layers- New raster layer
44.
Selections - load/save selection - load selection from disk and choose my selection: '' FO_4''
Activate Flood Fill Tool and fill the selection with the background color
Selections-Deselect All
45.
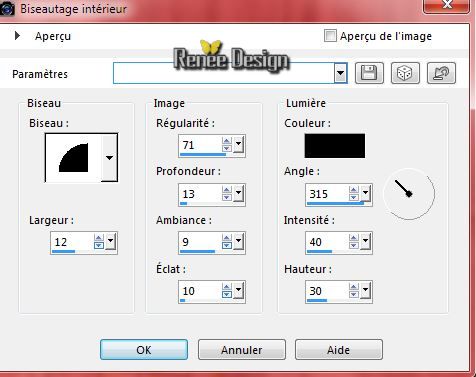
Effects- 3D Effects- Inner Bevel with these settings-Color Black
46.
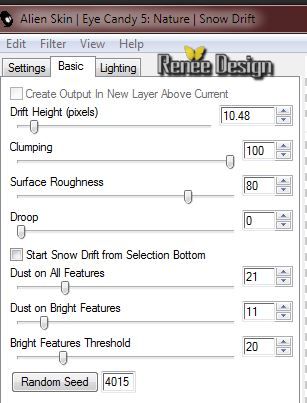
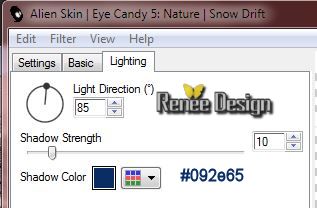
Effects- Plugins Eyecandy 5 Nature /Snow
Drift-
tab Settings/User settings choose my preset: "HO_hiveroublie_renee"/
47.
Activate the tube ''Froid_oublie_image1.pspimage'' Edit/copy-Edit paste as a new layer on your working area
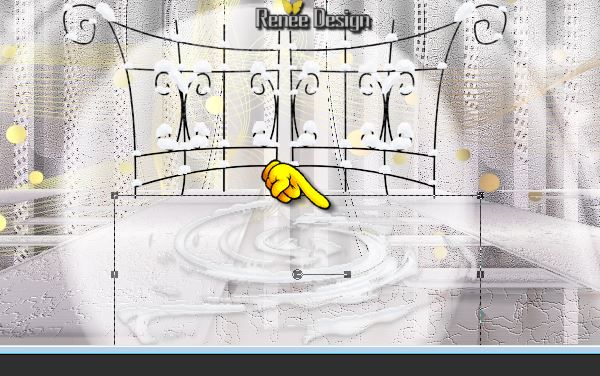
48
Activate Pick Tool- (K) Mode Scale and place like this
49.
Layers- New raster layer
50.
Selections - load/save selection - load selection from disk and choose my selection: "FO_5''
51.Activate Flood Fill Tool and fill the selection with the background color? Click two times in the selection
Selections-Deselect All
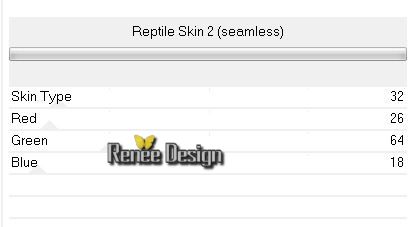
52. Effects- Plugins - Unlimited -ICNET
FILTER -Pattern Generators- Reptile Skin 2 (seamless)
53.
Activer le tube ''voiture.png'' - on your working area /With your move tool move to the bottom right side
54.
Effects- Plugins Eyecandy 5 Nature -Snow
Drift-
tab Settings/User settings choose my preset: "HO_hiveroublie_renee"/
55.
Effects - 3D Effects - Drop shadow with these settings: 6/14/50/30 black
56.
Activate the tube ''kkat47_DM_GiftedAngel"
-Edit-Copy-Edit-Paste as a new layer on your working area and move.
57.
Activate the tube''HO_image2'' - Edit-Copy-Edit-Paste as a new layer on your working area /With your move tool place it to the left side
47.
Image - Add borders-Symmetric checked: 1 pixel FG-Color
58.
Image - Add borders-Symmetric checked: 60 pixels white
59.
With the magic wand select the white border of 60
pixels
60.
Selections- Promote selection to layer
61.
Activate the tube ''cadre ''- Edit/copy-Edit-paste into selection
62.
Effects- User Defined Filter-Emboss 3 using the default settings
63.
Selections- Invert
64.
Effects - 3D Effects - Drop shadow using the default settings
Selections-Deselect All
65.
Activate the tube" etoile_Froid_oublie"" /Edit/copy-Edit paste as a new layer on your working area With your move tool place it to the top
66.
Activate the tube "text "/Edit/copy-Edit paste as a new layer on your working area / Ore write your own text ( Font ''igloo'' included into the zipfile)
67.
Image - Add borders-Symmetric checked: 1 pixel BG-Color
68.
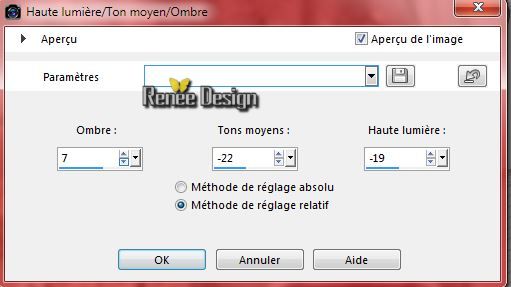
Adjust-Brightness and Contrast-Highlight/Midtone/Shadow with these settings
Save as JPG
I hope you enjoyed this lesson
Renée
This lesson was written by Renée 10/11/2014
Placing
12/2014
*
Any resemblance with an existing lesson is merely a coincidence *
* Don't forget to thank the people who work for us and with us. I named the tubeurs - Testers and the translators.
Thanks Renée.
*
|