|
Let's start the lesson.
Other Gothic tube
Here

-Preparation
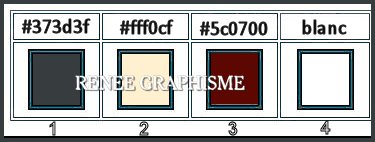
- Material Properties: Set your foreground color to color #373d3f = 1 – Set your background color to color #fff0cf= 2
1. Open the BG-Image
‘’Fond-Gothique-33’’ -Promote Background Layer = Raster 1
2. Layers- New Raster Layer
-.Selections- Select All
3.Open the tube ‘’
Renee_tubes-Gothique-33-larisa.png’’ -Edit - Copy- Activate your work -Edit - Paste Into Selection
Selections- Deselect All
4. Effects- Image Effects- Seamless Tiling using the default settings
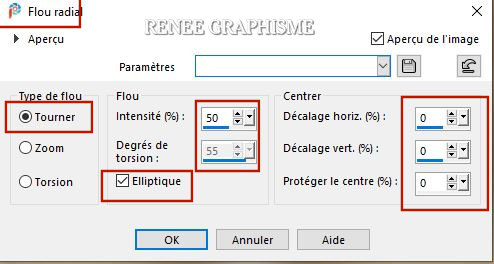
5. Adjust- Blur- Radial Blur with these settings
6. Effects – Distortion Effects –Twirl – Degrees : 185
7. Effects -Plugins-
Unlimited 2.0 – VM Extravaganza - Plastic
Surgery 176/67/46
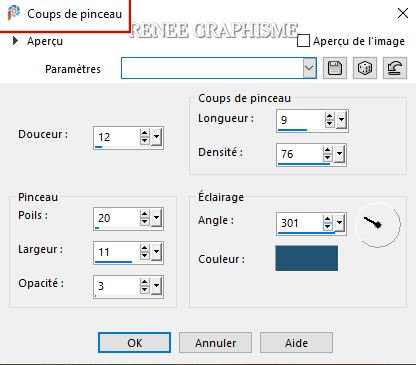
8. Effects - Art
Media Effects– Brush Strokes use the settings below –Color : #225472
9. Effects – Edge Effects- Enhance
10. Layers-Properties-Change the Blend Mode to " Overlay " and Lower the Opacity to 38
11. Layers- Merge- Merge Down
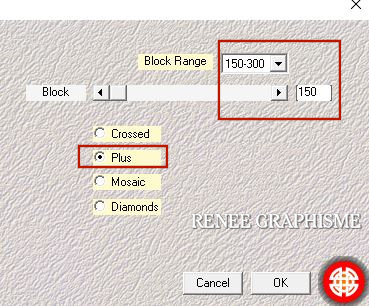
12. Effects- Plugins – Medhi- Sorting Tiles use the settings below
13. Effects –
Plugins -Unlimited 2.0 - &<Background Designers IV> - sf10
Diamond Flip using the default settings
14. Effects –Plugins-
Unlimited 2.0 - &<Background Designers IV- sf10 Shades
Of Shadow use the settings below
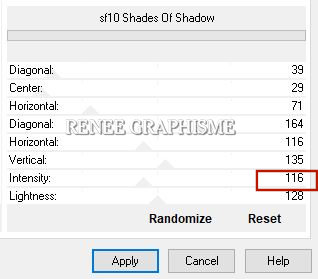
15.Adjust- Sharpeness- Sharpen More
16. Layers- New Raster Layer
17.Activate Flood Fill Tool
 –
Fill the Layer with the foreground color =1 –
Fill the Layer with the foreground color =1
18. Layers- New Mask Layer - From Image and select Mask ‘’
aditascreations_mask_48’’
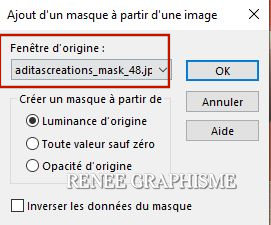
- Layers- Duplicate
- Layers- Merge- Merge Group
19. Effects –Plugins-
Unlimited 2.0 - &<Background Designers IV> - sf10
Diamond Flip using the default settings
20. Effects – Plugins – L&K’s – Zitah using the default settings
21. Effects – Edge Effects – Enhance
- Repeat:Effects – Edge Effects – Enhance
- Material Properties: Set your foreground color to color #5c0700 = 3 – Set your background color to color #fff0cf= 2
- Set your Foregroundcolor to foreground-background linear gradient configured like this
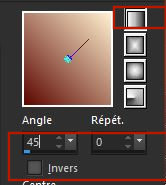
22. Layers- New Raster Layer
23. Activate Flood Fill Tool
 –
Fill the layer with the gradient –
Fill the layer with the gradient
24. Effects –Plugins -
Unlimited – ICNET-Filters - Tile & Mirror- XY Offset 50%
(positive)
25. Effects –Plugins-
Unlimited 2.0 – Simple - Blintz
26. Effects –Plugins-
Unlimited – ICNET-Filters - Tile & Mirror- Mirror
(vertical)
27. Layers- New Mask Layer - From Image and select Mask ‘’
Monaiekje mask 10’’
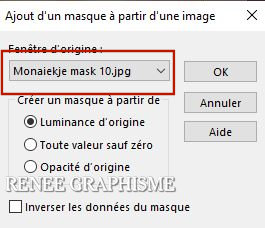
- Layers- Merge- Merge Group
28. Effects – 3D Effects –Drop Shadow with these settings: 3/3/68/32 Color Black
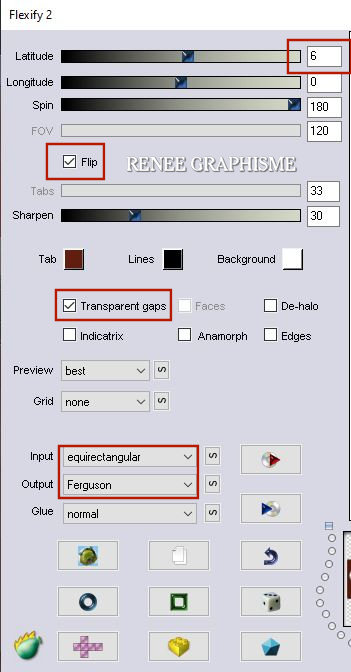
29. Effects– Plugins – Flaming Pear – Flexify 2
( If you are having difficulty, finding the correct one, on your keyboard,
Place the mouse on the second preset of the menu.
Type the first letter of the preset F here on your keyboard press F as long as you have the preset name (Ferguson)
Or if this is not working for you -Click on the red arrow select my file- Preset
 ''Ferguson
-Flexify 2 settings''Click on the preset and effect will apply (Included into the zip-file) ''Ferguson
-Flexify 2 settings''Click on the preset and effect will apply (Included into the zip-file)
30. Objects – Align
-Bottom
31. Layers- New Raster Layer
32. Selections –load/save selection –load selection from disc and select my selection: ‘’ Gothique-33-1’’
33. Activate Flood Fill Tool  – Opacity 50 – Fill the selection with the gradient
34. Effects – Plugins – Alien Skin EyeCandy 5- Nature – Smoke use the settings below
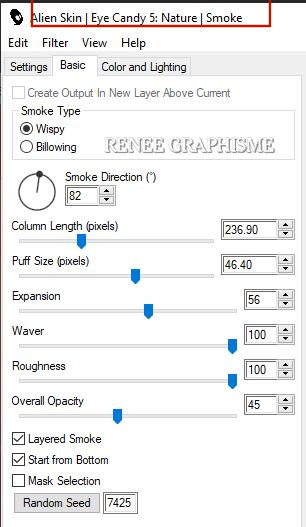
- Repeat: Effects – Plugins – Alien Skin EyeCandy 5- Nature – Smoke with the same settings
Selections- Deselect All
35. Open the tube ‘’
Renee_TUBES_ASEMENOV-3.pspimage’’ -Edit - Copy- Activate your work -Edit - Paste as a new layer
- Do not move !!
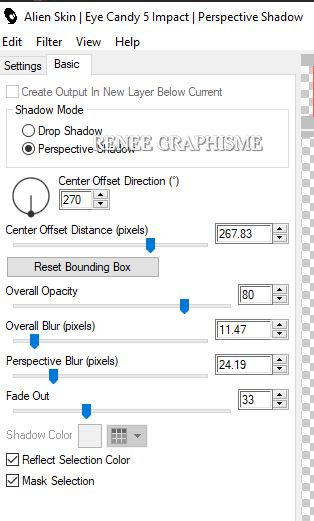
36. Effects – Plugins – Alien Skin EyeCandy 5- Impact- Perspective
Shadow-Tab- Settings- User/Settings and select my file - Preset : ‘’Gothique 33- Shadow’’
Or manual settings as shown in the example below
37. Open the tube
‘’ Renee_TUBES_ASEMENOV-12.pspimage’’
- Activate the layer ’’pour tuto gothique 33’ of the tube
- Edit - Copy- Activate your work -Edit - Paste as a new layer
38. Pick Tool: (K) on your keyboard -Enter these parameters for the X: -10,00 and Y: 344,00 positions on the Toolbar
 -10 / 344
- Press ( M ) to close the Pick Tool
39. Open the tube ‘’Gothique-33-Image
1.pspimage’’ -Edit - Copy- Activate your work -Edit - Paste as a new layer
40. Pick Tool: (K) on your keyboard -Enter these parameters for the X: 156,00 and Y: -81,00 positions on the Toolbar
 156
/ - 81 156
/ - 81
- Press ( M ) to close the Pick Tool
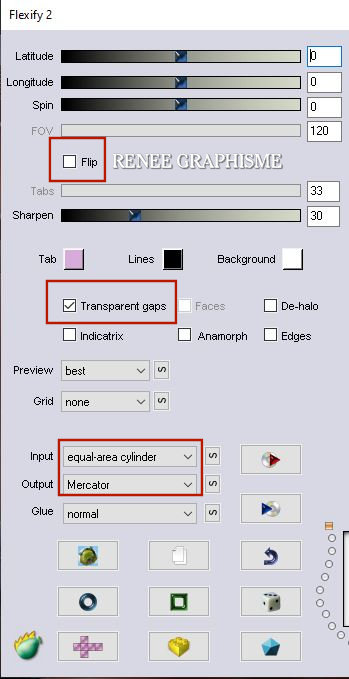
41. Effects – Plugins – Flaming Pear Flexify 2 use the settings below
42. Layers- New Raster Layer
43. Selections –load/save selection –load selection from disc and select my selection:’’ Gothique-33-2’’
44. Effects – 3 D Effects – Buttonize use the settings below
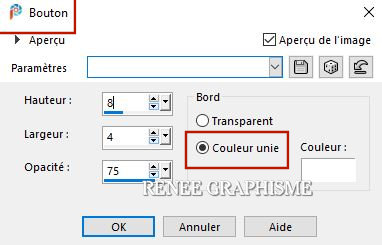
45. Effects – Plugins – EyeCandy 5 Impact – Glass –Tab- Settings- User/Settings and select my file Preset :
‘’Gothique-33- Glass’’
Selections- Deselect All
46. Open the tube
’’Renee-TUBES_Gothique33-personnages’’
- Edit - Copy- Activate your work -Edit - Paste as a new layer (the two characters)
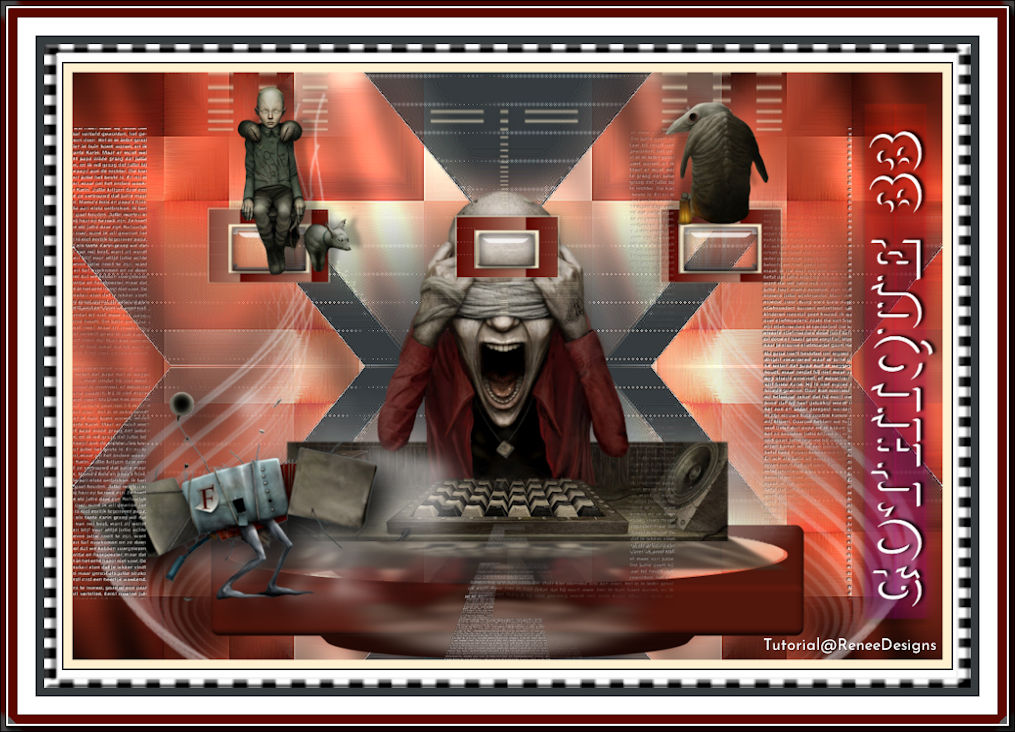
-Activate your Move Tool (M) place it in the right place (see finished image )
47. Effects -
Plugins- Alien Skin EyeCandy 5 Impact –
Perspective Shadow
On the right tube with these settings
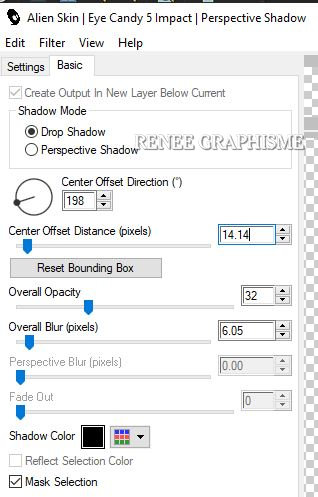
- On the left one just change the shadow direction setting
48. Open the tube ‘’Renee-TUBES_Gothique33- Texte’’ - Edit - Copy- Activate your work -Edit - Paste as a new layer
49. Pick Tool: (K) on your keyboard -Enter these parameters for the X: 0,00 and Y: 64,00 positions on the Toolbar
 0 / 64
-Press ( M ) to close the Pick Tool
50. Layers- New Raster Layer
51. Selections –load/save selection –load selection from disc and select my selection:Gothique-33-3’’
52.Flood Fill Tool  –
Opacity 50% – Fill the selection with #ffffff=4 –
Opacity 50% – Fill the selection with #ffffff=4
Selections- Deselect All
53. Effects –Plugins-
Unlimited 2.0 – Toadies- Living Sine (circular)
85/94/176/161
54. Effects – 3D Effects –Drop Shadow with these settings: 7/ -2 / 87 / 5 Color Black
55. Image – Rotate Right
56. Activate Text Tool - Renée choose font "CabbagetownStone "-Set the FG Color and BG-Color to color #ffffff

- Write
Gothique 33 - Convert to Raster Layer ( Activate your Move Tool (M) place it in the right place (see finished image )
- Drop shadow at your choose
57. Image - Rotate Left
- Activate the bottom layer in the Layer Palette=
Raster 1
58. Layers- New Raster Layer
59. Flood Fill Tool
– Opacity 50 - Fill the layer with the FG-Color #ffffff
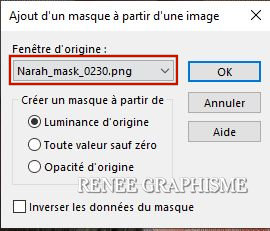
60. Layers- New Mask Layer- From Image and select Mask ‘’
Narah_mask_0230’’
- Layers- Duplicate
- Layers- Merge- Merge Group
61. Image - Add Borders - Symmetric checked: 10 Pixels Color #fff0cf=2
- Edit- Copy !!!!
62. Open the tube "Cadre Gothique 33 " -With your Magic Wand,(add shift) select the inside of that frame.
63. Edit- Paste Into Selection (Image is still in your PSP memory)
Selections- Deselect All
64. Layers- Merge- Merge All (flatten)
65. Image - Resize- Width 1015 Pixels
Save as JPG
I hope you enjoyed this lesson
Renée
This lesson was written by Renée 15/04/2020
Edited and Update
in 2020
*
Any resemblance with an existing lesson is a coincidence *
Do not forget to thank the people who work with us and for us
I have appointed the tubeurs and translators
Thanks
*
|
 Translations


