|
Let's start the lesson.
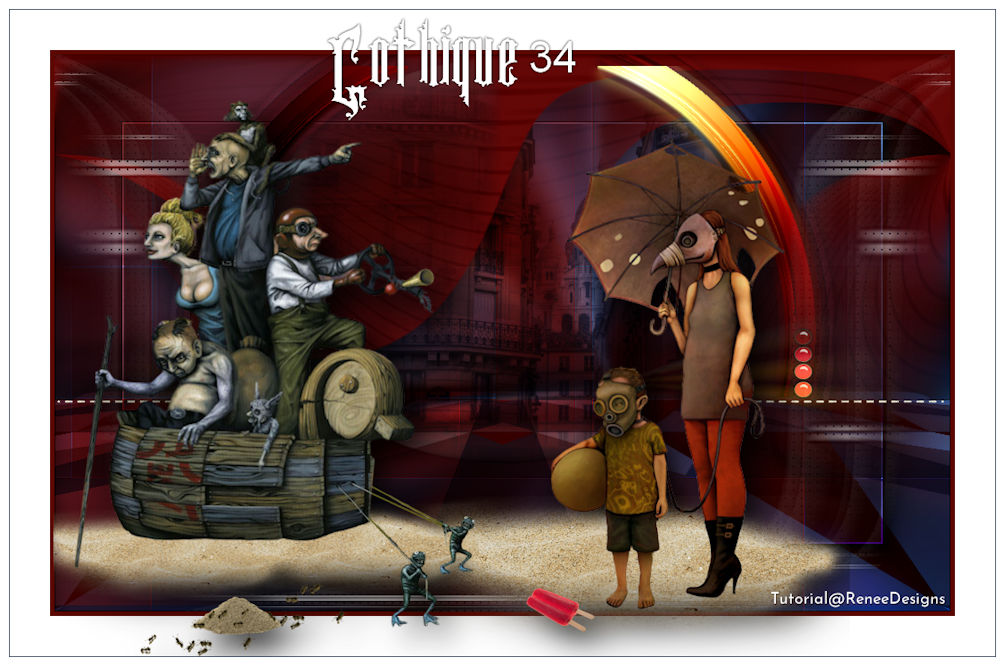
Gothique 34
-
Preparation
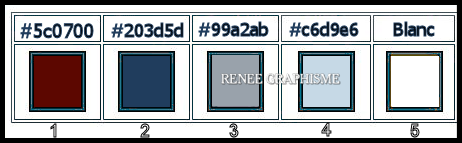
- Material Properties: Set your foreground color to color #5c0700= 1 – Set your background color to color #203d5d= 2
-
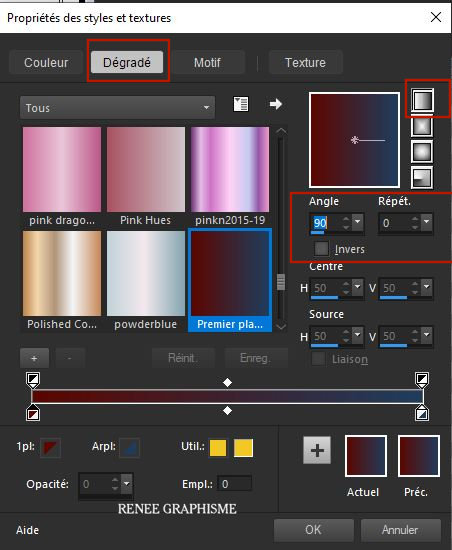
Set your Foregroundcolor to foreground-background linear gradient configured like this
1. File- Open a new transparent Image of 1005 x 625
2. Flood Fill Tool
 -
Fill the Layer with the gradient -
Fill the Layer with the gradient
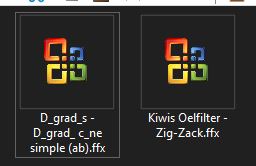
3. Effects – Plugins -Unlimited 2.0 - Kiwis Oelfilter - Zig-Zack with these settings:
98/139/128/129
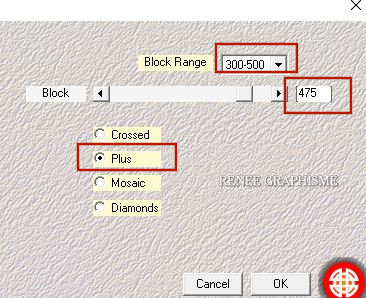
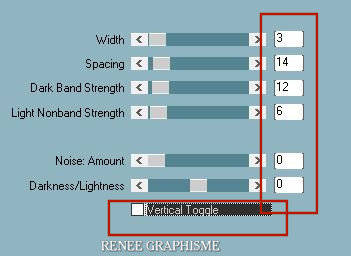
4. Effects – Plugins – Medhi- Sorting Tiles use the settings below
5. Effects- Edge Effects- Enhance More
6. Effects – Plugins– Toadies – What are you with these settings:
186/0
7. Layers- Duplicate
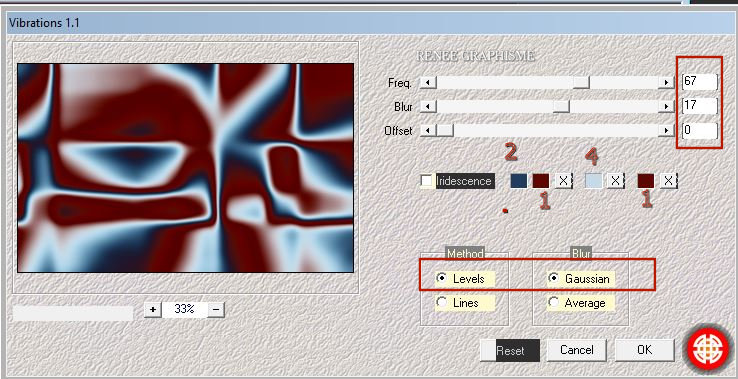
8. Effects – Plugins -Medhi Vibrations 1.1 use the settings below
9. Layers-Properties-Change the Blend Mode to "Overlay "
10. Adjust- Blur- Radial Blur use the settings below

11. Layers- Duplicate
12. Image - Mirror - Mirror Horizontal (Image - Mirror in older versions of PSP)
13. Effects – Plugins – Photoshopfun II –
Russel : 157 / 0
14. Selections –load/save selection –load selection from disc and select my selection:‘’Gothique-34-1’’
15. Selections- Promote Selection to Layer
16. Effects – Plugins – Photo Effex- Scanlines use the settings below
Selections- Deselect All
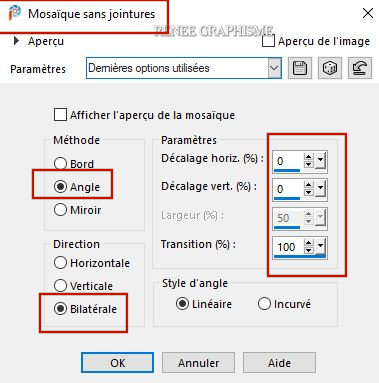
17. Effects- Image Effects- Seamless Tiling use the settings below
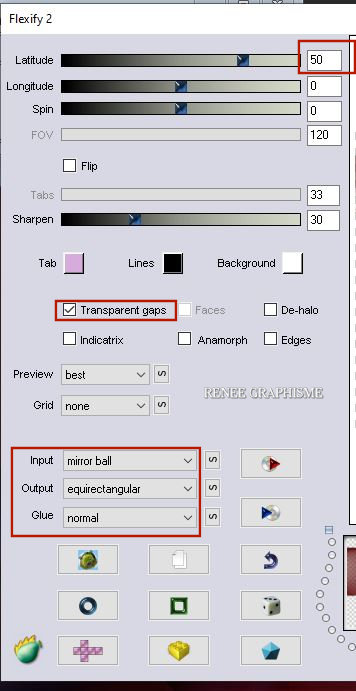
18. Effects – Plugins– Flaming Pear- Flexify 2 use the settings below
19. Objects – Align
- Top
20. Effects– 3d Effects - Drop Shadow with these settings: 0/0/100/50 Color Black
-Layer palette – Make Copy 2 of Raster 1 active
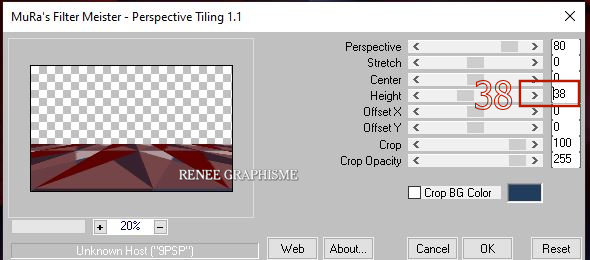
21. Effects – Plugins – Mura’s Meister – Perpsective Tiling use the settings below
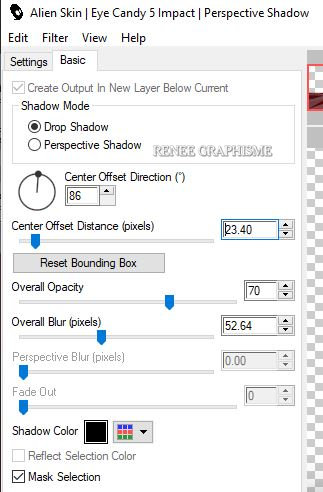
22. Effects - Plugins -
Alien skin EyeCandy 5 Impact –
Perspective Shadow use the settings below
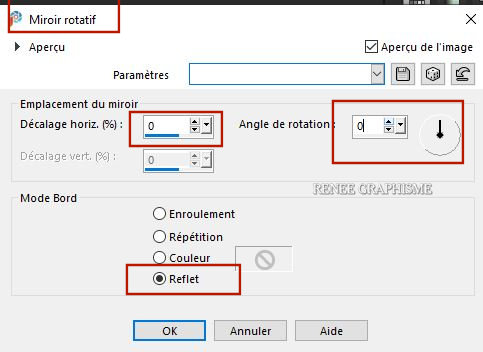
23. Effects – Reflection Effects – Rotating Mirror use the settings below
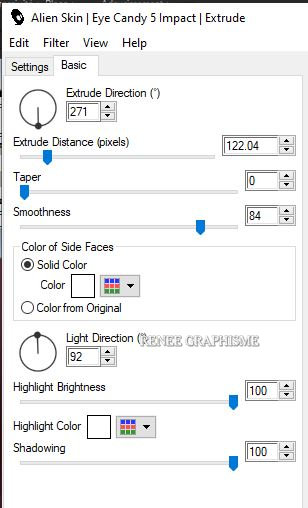
24. Effects - Plugins-
Alien skin EyeCandy 5 Impact- Extrude use the settings below
25. Layers- Duplicate
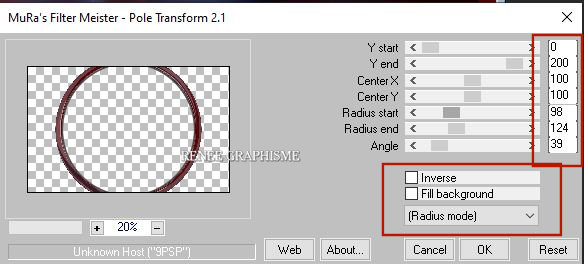
26. Effects – Plugins – Mura’s Meister – Pole
Transform use the settings below
27. Activate Selection Tool -Custom Selection (S) -Rectangle with these settings

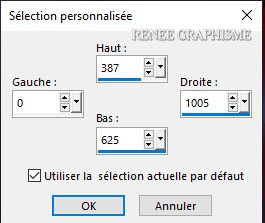
DELETE

Selections- Deselect All
28. Effects – Plugins- Alien skin EyeCandy 5
Impact – Glass –Tab- Settings- User Settings and select my file-Preset :
Gothique-34- Glass
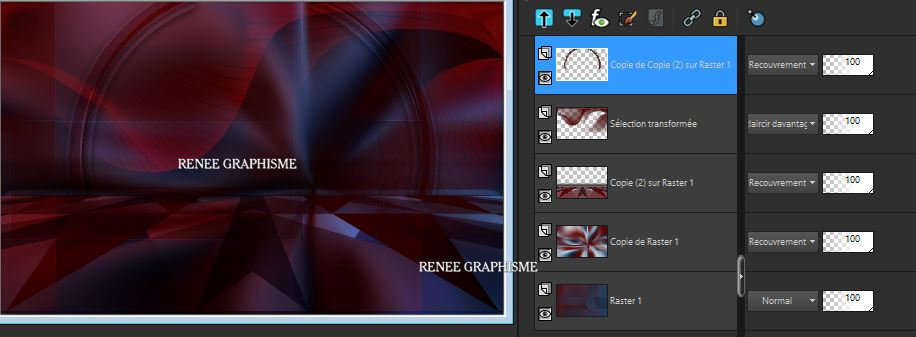
29. Layers- Arrange- Bring to Top
Your work and Layer Palette look like this now-You should have this result
30. Layers- Duplicate
31. Image – Resize 96 % - Resize all layers not checked
32. Effects –Plugins- Unlimited 2.0 – Dégradés -
Dégradé cône simple (ab) using the default settings:
80/209/130/68
33. Layers-Properties-Change the Blend Mode to " Normal "
- Activate the second layer of the bottom ( Copy of Raster 1)
34. Layers- New Raster Layer
35. Selections –load/save selection –load selection from disc and select my selection:‘’Gothique-34-2’’
36. Open the tube ‘’Renee_TUBES_Juillet-11’’ Edit - Copy -Activate your work, Edit - Paste into Selection
37. Layers-Properties-Change the Blend Mode to " Overlay "
38. Layers- New Raster Layer
39. Effects – 3 D Effects– Boutonize use the settings below

-Layers-Properties-Lower the Opacity to 59% (it will depend on the tube you choose - adapt according to opacity)
Selections- Deselect All
-
To replace the top of the Layer-Palette
40. Open the Tube-Gothique 34- Image 1 - Edit - Copy -Activate your work, Edit - Paste as new layer
41. Pick Tool: (K) on your keyboard -Enter these parameters for the X:152,00 and Y: 305 positions on the Toolbar
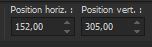 152/305
Press ( M ) to close the Pick Tool
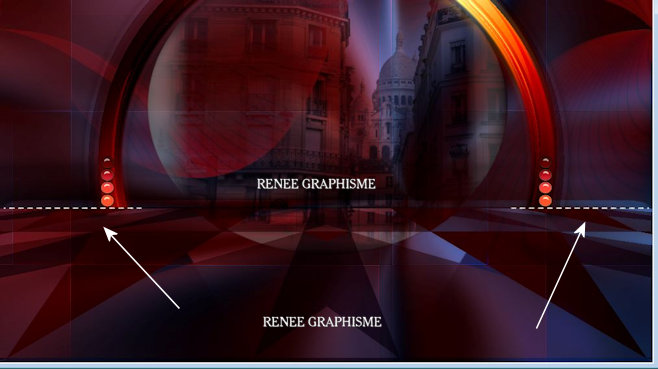
42. Set your Foreground color to color #ffffff=5
Aktivate your Pen Tool: - Line Style: ''Dash with Arrowhead End ’’ -Width 2 (into the zipfile) Place it in your line styles folder of PSP) -Holddown your Shift Key and draw with your Foreground color white two lines as shown in the example below
To achieve the same effect, I used the "Dash with Arrowhead End" line style and removed the arrow at the end of the stroke (at your work !!!)
43. Open the tube ''Tube-Gothique 34- Image
2.'' -Edit - Copy -Activate your work, Edit - Paste as new layer
44. Pick Tool: (K) on your keyboard -Enter these parameters for the X:200,00 and Y: 324positions on the Toolbar
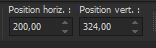 200 /324
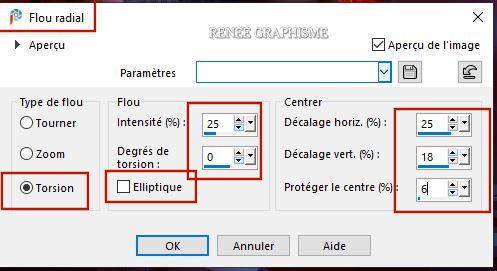
45. Adjust- Blur- Radial Blur use the settings below
46. Layers-Properties-Change the Blend Mode to "Screen "
47. Layers- New Raster Layer
48. Flood Fill Tool
–
Opacity 50% – Fill the Layer with color #ffffff=5
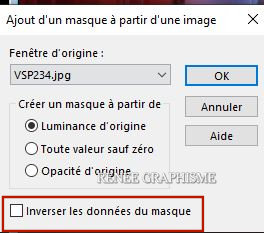
49. Layers- New Mask Layer-From Image and select Mask: ‘’VSP234.jpg’’
-
Layers- Merge- Merge Group
50. Effects – Distortion Effects– Punch – Strenght
= 100
-
Repeat- Effects – Distortion Effects– Punch with te same settings
51. Layers- Duplicate
52. Image - Mirror - Mirror Horizontal (Image - Mirror in older versions of PSP)
53. Layers-Merge- Merge- Down
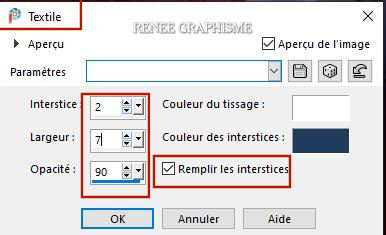
54. Effects – Texture Effects– Weave use the settings below – Color #ffffff= white and #203d5d =2
-
Activate the second layer of the bottom ( Copy of Raster 1)
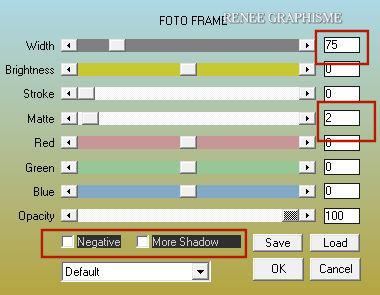
55. Effects – Plugins- AAA Frame – Foto Frame use the settings below
56. Image - Add borders-Symmetric checked: 5 pixels Color #5c0700= 1
57. Image - Add borders-Symmetric checked: 45 Pixels Color #ffffff=5
58. Image - Add borders-Symmetric checked: 1 Pixel Color # 203d5d =2
59. Image - Add borders-Symmetric checked: 10 Pixels Color #ffffff=5
60. Open the tube ‘’Tube- Gothique 34 – personnage’’ - Edit - Copy -Activate your work, Edit - Paste as new layer
61. Pick Tool: (K) on your keyboard -Enter these parameters for the X:60,00 and Y: 113 positions on the Toolbar
 60/ 113
Press ( M ) to close the Pick Tool
62.Open the tube "Text titre" -Edit - Copy -Activate your work, Edit - Paste as new layer and move
63. Layers- Merge- Merge All
64. Image -Resize to 1005 Pixels width.
Save as JPG file and you're done!
I hope you enjoyed this lesson
Renée
This lesson was written by Renée 28-06-2020
Edited and Update
2020
*
Any resemblance with an existing lesson is a coincidence
* Do not forget to thank the people who work with us and for us I have appointed the tubeurs and translators
Thanks
*
*
|

 Translations