|
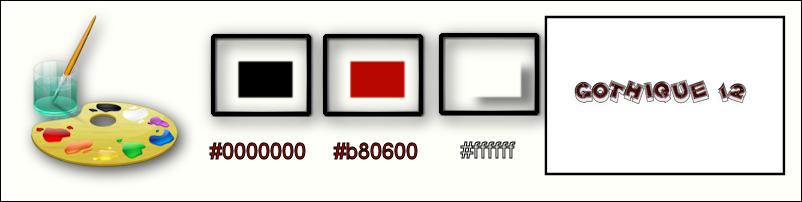
Let's start the lesson. Open the Color-Palette
1.
Open the Background image :''fond_gothique12'' -Window Duplicate -Promote Background Layer =Raster 1''
2.
Layers- Duplicate
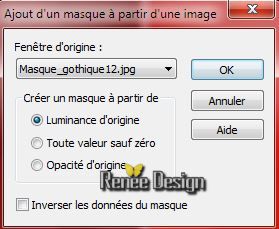
3.Layers- New Mask layer from Image and select Mask
''Masque_gothique12''
-
Layers- Merge- Merge Group
4.
Effects- Edge Effects- Enhance
5.
Effects-3D effects-Drop Shadow using the default settings
6.
Layers- Duplicate
7.
Layers- Merge- Merge Down
8.
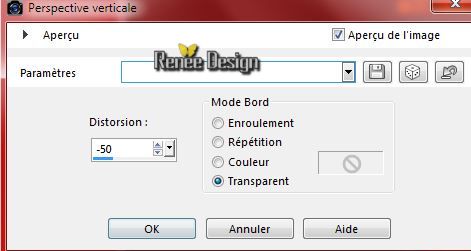
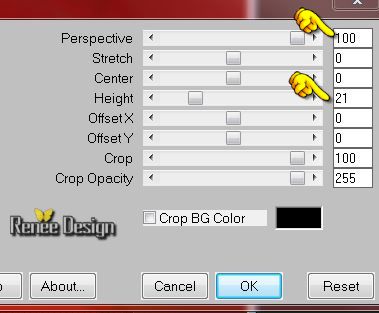
Effects- Geometric Effects - Perspective
vertical with these settings
9.
Effects- Geometric Effects - Skew with these settings

10.
Effects- Distortion Effects- Pinch-
100%
-
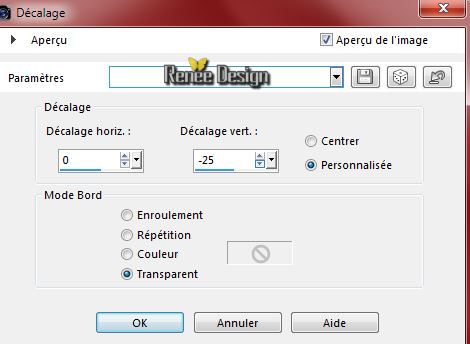
Material Properties: Foreground color to #b80600
Background color to color black
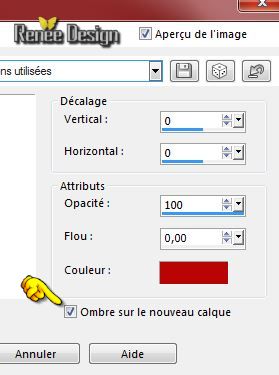
11.Effects-3D effects-Drop Shadow with these settings-unchecked shadow on new layer-FG-Color
12.
Activate the shadow layer
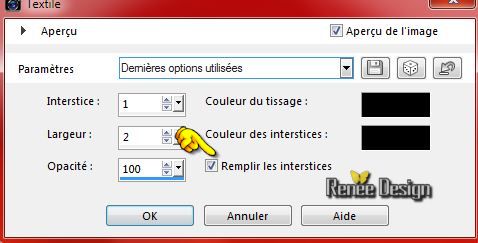
13.
Effects- Texture Effects- Weave with these settings
-
Activate the top of the layer-Palette
14.
Layers- Merge- Merge Down
15.
Layer Palette -Double click on this layer and set the Blendmode to Multiply and set the layer opacity of this layer to
89%
16.
Layers- Duplicate -Image Mirror ( use the script)
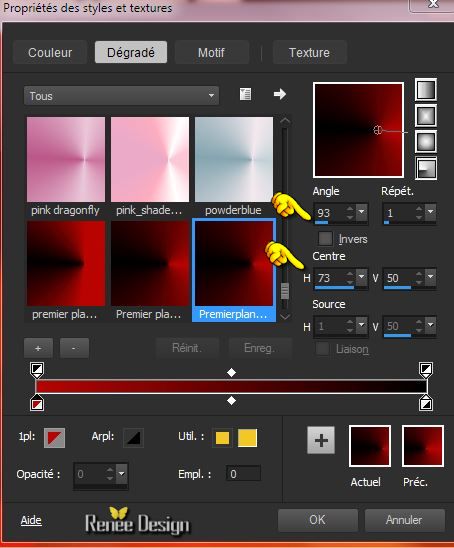
- Layer Palette -Double click on this layer and set the Blendmode to Exclusion and set the layer opacity of this layer to 89%
-Material Properties : Prepare a radial gradient configured like this.
17.
Layers - New raster layer
18.
Selections - load/save selection - load selection from disk and choose my selection: ''goth_12"-
Activate Flood Fill Tool and fill the selection with the gradient
-Selections-Deselect All
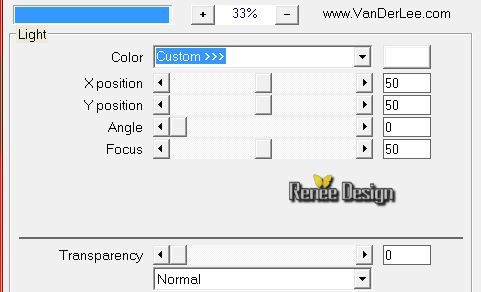
19.
Effects- Plugins - Vanderlee- Unppluged X-
Light
20.
Image -Flip (
The option Image - mirror/flip is no longer available in PSP versions newer than X3, please use the script )
21.
Effects- Plugins -Unlimited 2.0- VM Toolbox- Zoom Blur
39/60
22.
Layers- Duplicate
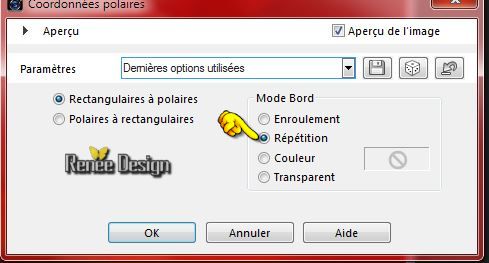
23.
Effects- Distortions Effects-Polar Coordinates-Rectangular to Polar
24.
Layers- Merge- Merge Down
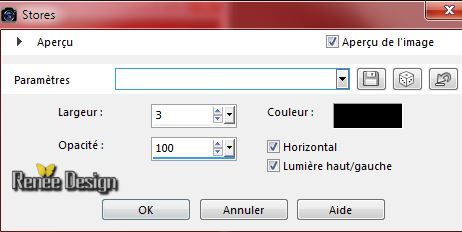
25.
Effects- Texture Effects- Blinds with these settings
26.
Activate the tube ''papier7_ksde kittys" Edit/copy-Edit paste as a new layer on your working area
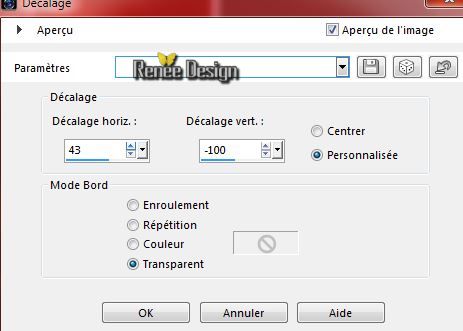
27. Effects- Image Effects Offset with these settings
28.
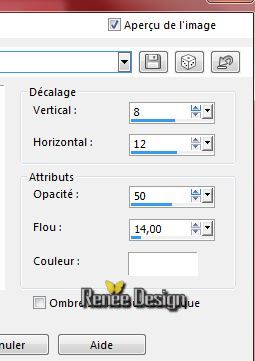
Effects-3D effects-Drop Shadow with these settings:
29.
Lower the layer opacity to 75%
30.
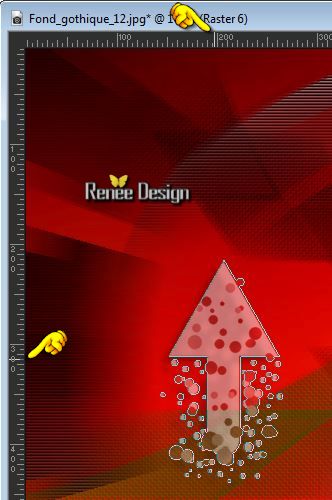
Layers - New raster layer
31.
Selections - load/save selection - load selection from disk and choose my selection:
''goth_12_1''
32.
Pot of Paint: Change the opacity of the color to 20% -Activate Flood Fill Tool and fill the selection with color black
-Selections-Deselect All
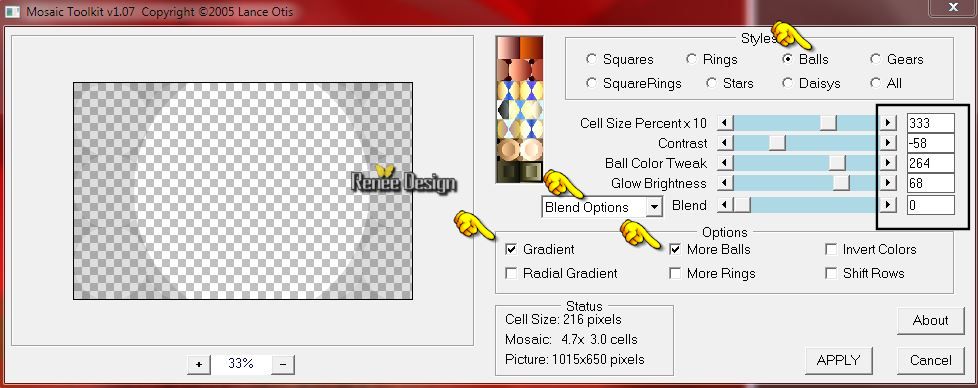
33.
Effects- Plugins Lotis Filters - Mosais Toolkit
with these settings (Squares-Rng and balls)
34. Effects- Edge Effects- Enhance
35. Effects- Plugins -Mura's Meister -Perspective
Tilling
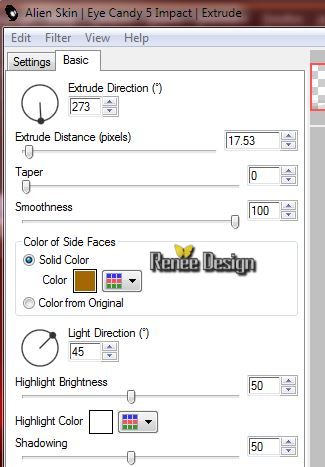
36. Effects- Plugins Eyecandy 5 Impact - Extrude -tab settings/user settings - choose my preset
''Goth_12_extrude"
-color#A36801
Or manual settings below
-Material of the foreground : foreground color white
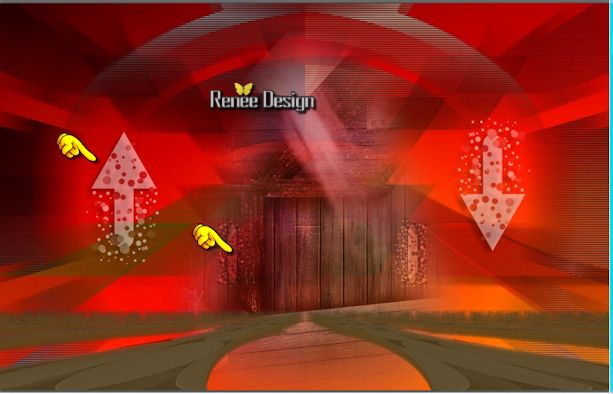
37. Layers - New raster layer
38. Activate Brush:File- Export Custom Brush (Give it a name "Goth_12_arrow-brush-06 " ) Activate Brush Tool and select my file: Goth_12_arrow-brush-06 "

-
Stamp with your foreground color white see screen
- Layers - New raster layer
- Change
>Brush Rotation 180° Stamp with the foreground color white on the right side

(Layers- Merge- Merge Down /Both brushes are one layer)
39. Effects-3D effects-Drop Shadow using the default settings
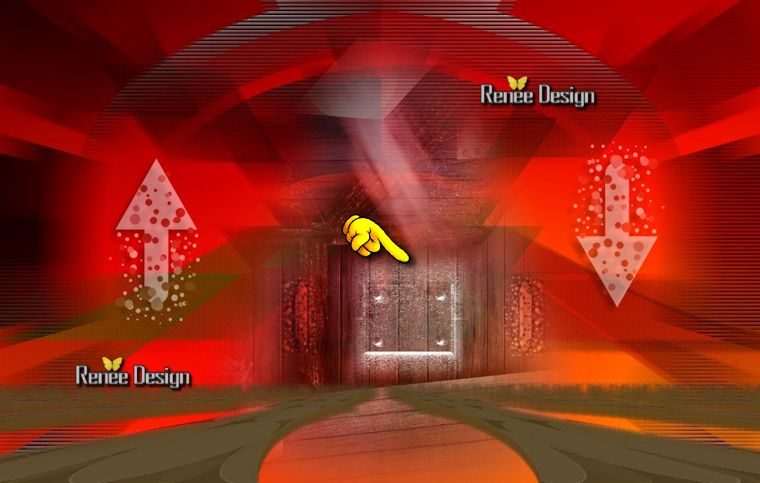
40. Layers- Duplicate
41. Effects- Plugins - Simple - Pizza Slice Mirror
42. Image
Resize with 50% resize all layers not checked
43. Effects- Image Effects- Offset with these settings
44. Layer Palette -Double click on this layer and set the Blendmode to Overlay
The result
 cap503 cap503
45. Layers - New raster layer
46.
Activate Brush:''a-dozi's-backgrounds-09
002'' File- Export Custom Brush (Give it a name ''a-dozi's-backgrounds-09
002'' // Size 175 )
-
Activate Brush Tool and select my file ":a dozi's-backgrounds-09
002''-With your foreground color white -Stamp the brush as shown in the example below:
- Like this
- In the layer palette activate raster 4
47. Activate the tube "Renee_tube_gothique12_Fillette.pspimage"- Edit - Paste as new layer on your working area and move like this
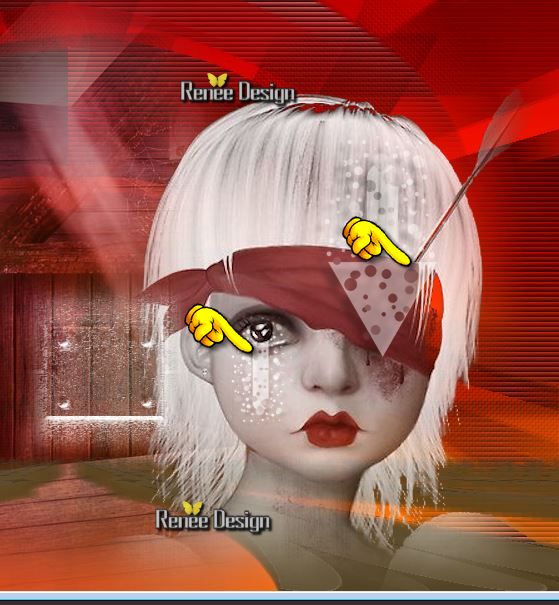
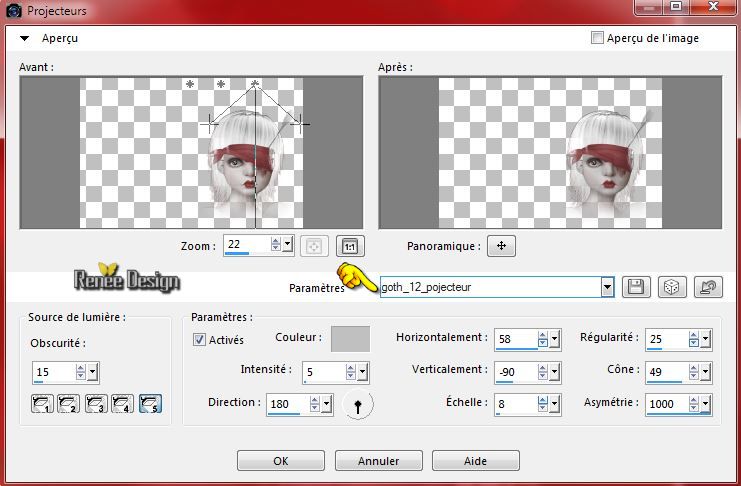
48. Effects- Illimination Effects- Lights -and choose my preset-Lights_goth_12_pojecteur ''
Or manual settings below
49. Activate the tube ''CLqOhvRJ5lIYDFPppEiaA-8YLiA@622x591.pspimage''
- Edit/copy-Edit paste as a new layer on your working aera and move to the left side
50. Activate the tube ''image_grillage de manola scrapt.png''-Edit/copy-Edit paste as a new layer on your working aera
Activate your Move Tool (M) place it in the bottom left corner
51. Layer Palette -Double click on this layer and set the Blendmode to Soft Light and set the layer opacity of this layer to 81%
-
Activate your top layer
52. Activate the tube ''chien _ attache porte de Manola''
- Activate the tube ''poignée "- Edit/copy-Edit paste as a new layer on your working aera and move
- Activate the tube ''chien "- Edit/copy-Edit paste as a new layer on your working aera and move to the left side
53.
Effects- Plugins -Persective shadow-tab Settings/User settings choose my preset:
''goth_12_perspectiveShadow''(On the layer of the dog)
54.Layers- Merge- Merge Visible
55. Layers - New raster layer
56. Activate the Brush ''kitty_454''-File- Export Custom Brush (Give it a name ''kitty_454'')
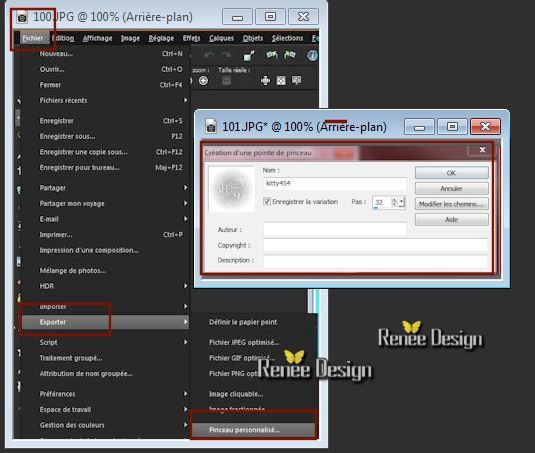
57. Activate Brush Tool and select my file:''kitty_454"

With your foreground color white -Stamp the brush on top of the work
58. Effects- Edge Effects- Enhance
59. Layer Palette -Double click on this layer and set the Blendmode to Screen
60.Image - Add borders-Symmetric checked: 1 pixel white
61.Image - Add borders-Symmetric checked: 3 pixels FG-Color #b80600
62.Image - Add borders-Symmetric checked: 50 pixels white
63.
Activate the tube''goth_12_deco''
-
Edit/copy-Edit paste as a new layer on your working area
-
With your Move Tool- Place it in the upper left corner
64.
Layers- Duplicate / Image Mirror/Image
Flip
(The option Image - mirror/flip is no longer available in PSP versions newer than X3, please use the script )
65. Image - Add borders-Symmetric checked: 1 pixel black
66.
Activer le tube ''TITRE-GOTHIQUE12''- Edit/copy-Edit paste as a new layer on your working area
67.
Layers- Merge- Merge Visible
68.
Image Resize with 995 pixels Width
69.Adjust- Sharpness-Scharpen
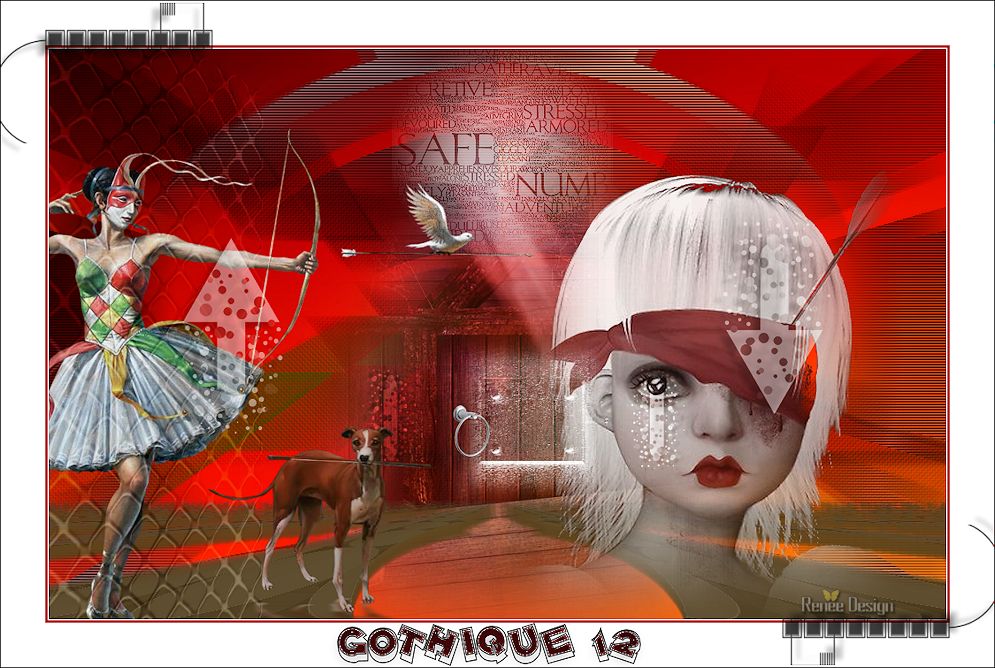
Save as JPG
I hope you enjoyed this lesson
Renée
This lesson was written by Renée 19/12/2014
Created the
01/2015
*
Any resemblance with an existing lesson is merely a coincidence *
* Don't forget to thank the people who work for us and with us. I named the tubeurs - Testers and the translators.
Thanks Renée.
| 
 Translations


 When you see this logo the filter is imported in Unlimited *

 All rights reserved