|
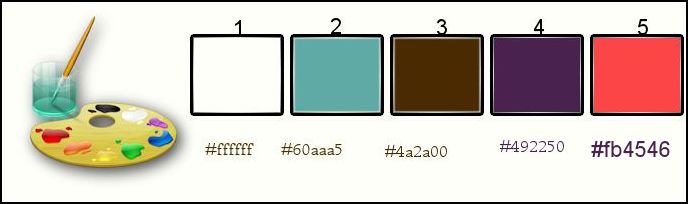
Let's start the lesson.Open the Color-Palette
1.
Open the Backgroundimage ‘’fond_gothique_14’’ / Window - Duplicate (or shift+D) - Close the original and proceed on the copy -Promote Background Layer =Raster 1
2.
Effects-Plugins - Unlimited 2.0 – Photo Aging Kit-Cracked Paper at
128/128
3. Effects- Edge Effects- Enhance
4. Effects- Plugins -
Unlimited 2.0 –Photo Aging Kit- Dust & Scratches
at 195/26
5. Layers- New raster layer -Activate Flood Fill Tool and fill the layer with black
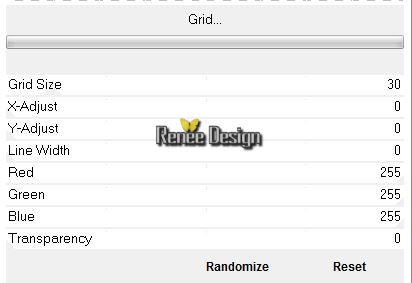
6. Effects- Plugins -
Unlimited 2.0 – VM Toolbox – Grid with these settings
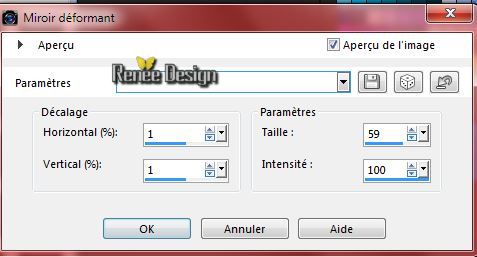
7. Effects- Distortion Effects- Warp with these settings
8. Effects- Plugins- Andromeda –Perspective Tilling -
Floors – Flore Low

9. Effects- Image Effects- Seamless Tiling with these settings
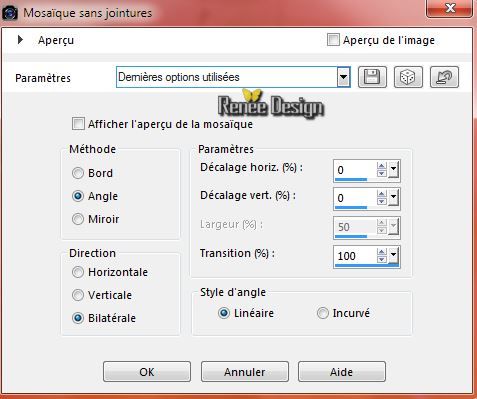
- Activate the bottom of the layer-Palette =Raster 1
10. Layers- Duplicate
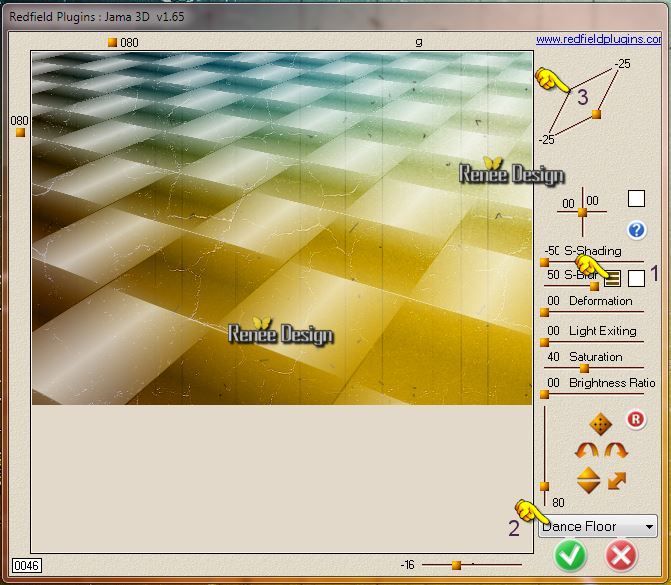
11. Effects- Plugins - Redfield Jama 3 D- Preset - Dance floors
with these settings as shown in the example below (in the menu of the filter)
12. Double click on this layer and set the Blendmode to Overlay -Set the layer opacity of this layer to 83%
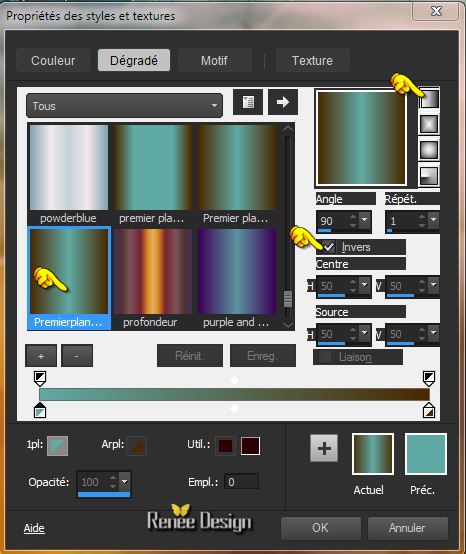
13. Set your foreground color to #60aaa5 -Set your background color to #4a2a00
Set your foreground to gradient 'Foreground-background' -Prepare a linear gradient configured like this.
- Activate the top of the layer-Palette
14. Layers- New raster layer
- Activate Flood Fill Tool and fill the layer with the gradient
15. Effects- Plugins -
Unlimited2.0- Andrew's Filter Collection 56 (of Andrews Filters 6) - A Bit Left Over
Gradient...
Using the default settings :
189/155/222/215/188/204
16. Effects- Plugins – Transparency –Eliminate white
17 . Effects- Plugins – Simple - Top Bottom Wrap
18. Double click on this layer and set the Blendmode to Difference
19.
Layers- New raster layer
- Activate Flood Fill Tool and fill the layer with the layer with the foregroundcolor
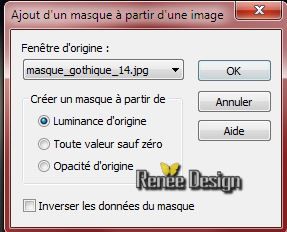
20. Layers- New Mask layer from Image and select :‘’masque_gothique_14 »
- Layers- Merge- Merge- group
21. Effects- Plugins – Tramage – Wee Scratches at
255
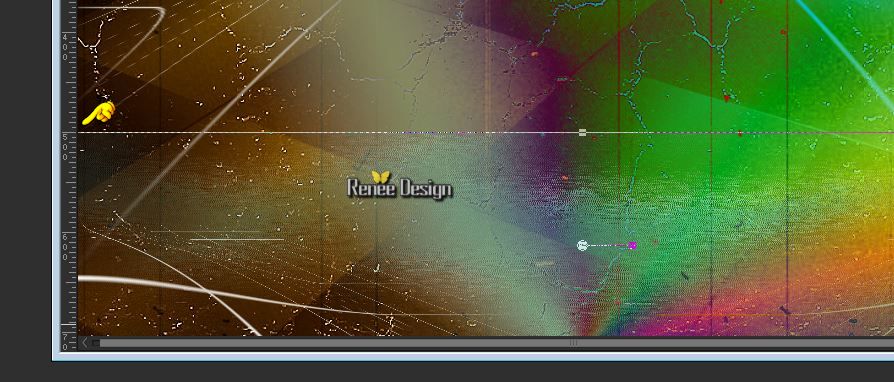
22. Activate Pick Tool K) –move down as shown in the example below 500 Pixels
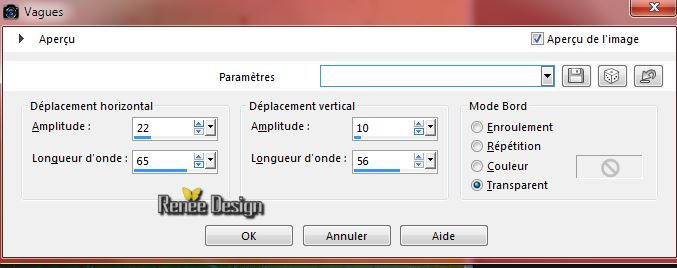
23. Effects- Distortion Effects- Wave with these settings
24. Activate the tube ‘’ gothique14_image1’’
- Edit/ Copy-Edit - Paste as new layer on your working area
- Move Tool - place your tube on the bottom left side of your image
25. Layers- Arrange- Move Down – Double click on this layer and set the Blendmode to Luminance- Legacy
- Activate the top of the layer-Palette
26. Activate the tube’’personnage_gothique_14’’
- Edit/ Copy-Edit - Paste as new layer on your working area
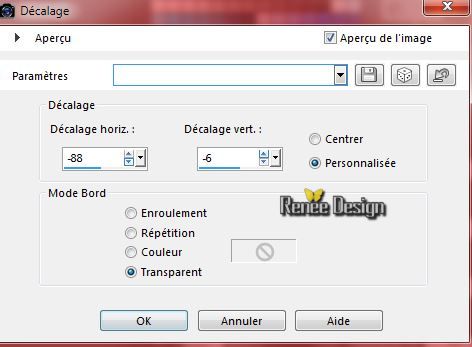
27. Effects- Image Effects-Offset with these settings
28. Double click on this layer and set the Blendmode to Luminance -Legacy
29. Activate the tube ‘’ gothique14_image2 »
- Edit/ Copy-Edit - Paste as new layer on your working area
- With your move tool move to the right side
30. Effects- Distortion Effects- Warp with these settings

- Set your background color to #492250
31. Layers- New raster layer
32.
Selections - load/save selection - load selection from disk and select my file:
‘’gothique_14_1 »
- Activate Flood Fill Tool and fill the selection with the backgroundcolor (click 3 times into selection)
Selections- Deselect All
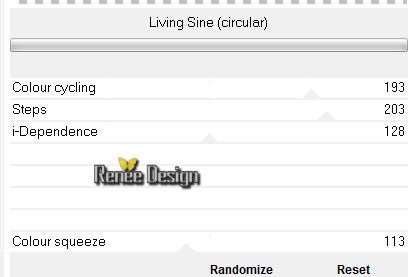
33.
Effects- Plugins – Unlimited 2.0 – Toadies- Living Sine
with these settings (circular)
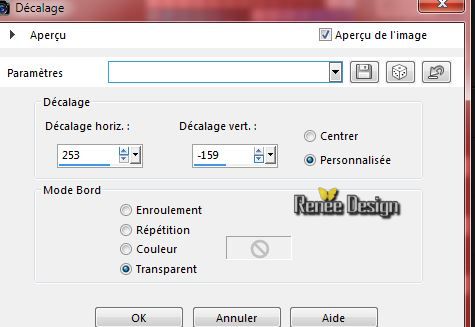
34. Activate the tube ‘’ Ninaisu_Stairs_28-10-2007’’- activate layer ‘’’stairs’’of the tube
- Edit/ Copy-Edit - Paste as new layer on your working area
- Effects- Image Effects-Offset with these settings
35. Layers- Arrange- Move under Raster 6
35. Double click on this layer and set the Blendmode to Luminance-Legacy
- Activate the top of the layer-Palette
36. Set your foreground color to
#fb4546
37. Layers- New raster layer
38.
Selections - load/save selection - load selection from disk and select my file: ‘’gothique_14_2’’
- Activate Flood Fill Tool and fill the selection with the foregroundcolor (1 clic )
Selections- Deselect All
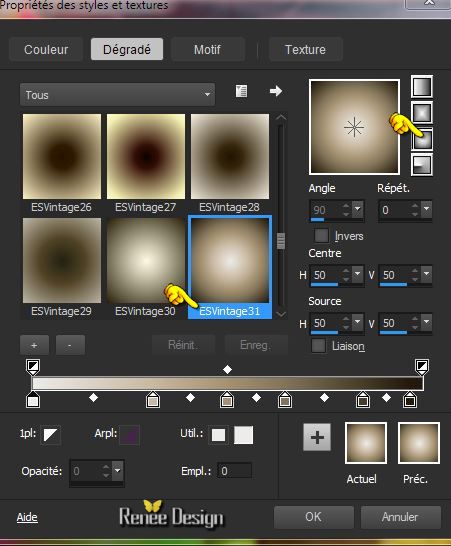
39. Material of the foreground - select my file in the list " EsVintage31"-
Prepare a sunburst gradient configured like this.
40. Layers- New raster layer
41.
Selections - load/save selection - load selection from disk and select my file: ‘’ gothique_14_3’’
- Activate Flood Fill Tool and fill the selection with the gradient
Selections- Deselect All
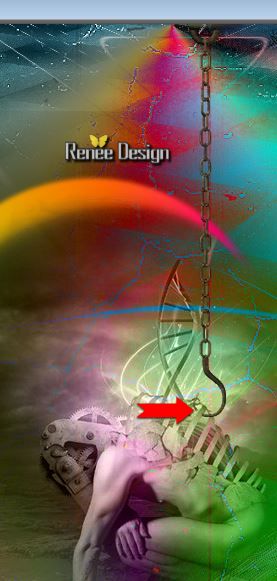
42. Activate the tube ‘’
Gothic_element_scrapt_hexchen.pspimage’’
- Edit/ Copy-Edit - Paste as new layer on your working area
- Move Tool(M) move it is in the right place- Erase Tool -erase this part of the hook as shown below
43. Activate the tube ‘’ Gothique_14_livre’’
- Edit/ Copy-Edit - Paste as new layer on your working area
44. Double click on this layer and set the Blendmode to Luminance -Legacy
45. Activate the tube ‘’ DAWN MDZ TUBE.pspimage’’
- I have resized that tube at 80 %
- Edit/ Copy-Edit - Paste as new layer on your working area (select the person)
46. - Activate the Move Tool-move to the right side – Double click on this layer and set the Blendmode to Luminance-
Legacy
47. Layers- New raster layer
48.
Selections - load/save selection - load selection from disk and select my file: ‘’ gothique_14_4’’
49. Activate the tube ‘’ renee_gothique_14_effet_nuages’’
- Edit/ Copy-Edit - Paste into selection
Selections- Deselect All
50. Layers- Merge- Merge Visible
51. Activate the tube ‘’ Frost_E7_LCM.pspimage’’
- Edit/ Copy-Edit - Paste as new layer on your working area
52. Move Tool(M) Move in the upper left corner.Set the layer opacity of this layer to 77%
53. Image - Add borders-Symmetric checked:2 pixels Color 2
54. Image - Add borders-Symmetric checked:10 pixels Color 3
55. Image - Add borders-Symmetric checked:30 pixels Color 1
56. Image - Add borders-Symmetric checked:2 pixels Color 3
57. Image - Add borders-Symmetric checked:50 pixels Color 1
58. Image - Add borders-Symmetric checked:1 pixels Color 3
59. Activate the tube '' renee_gothique_14_titre''
- Edit/ Copy-Edit - Paste as new layer on your working area and move at the top of the border
60. Activate the tube ''monstre_gothique_coeur_terreur_magique''
- Edit/ Copy-Edit - Paste as new layer on your working area and move at the top of the border
61. Layers- Duplicate -and move ( both sides of the title)
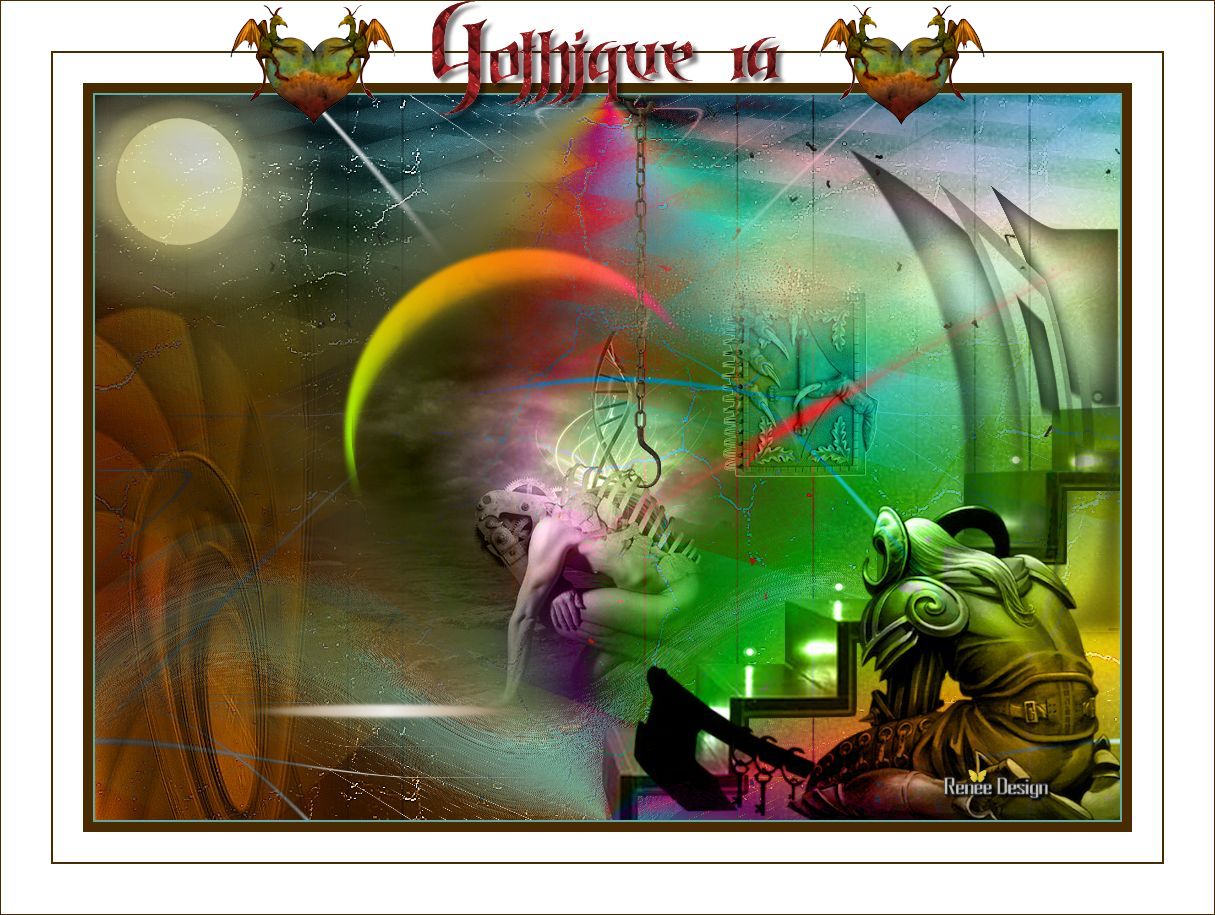
62. You can resize your work of choice
Save as JPG
I hope you enjoyed this tutorial .
Renée
This lesson was written by Renée
22/02/2015
Placing
2015
*
Any resemblance with an existing lesson is merely a coincidence *
* Don't forget to thank the people who work for us and with us. I named the tubeurs - Testers and the translators.
Thanks Renée.
| 
 Translations


 When you see this logo the filter is imported in Unlimited

 All rights reserved