|
Let's start the lesson.
- Preparation: Color-palette:Set your foreground color to #024d6a Set your background color to#001821

1.
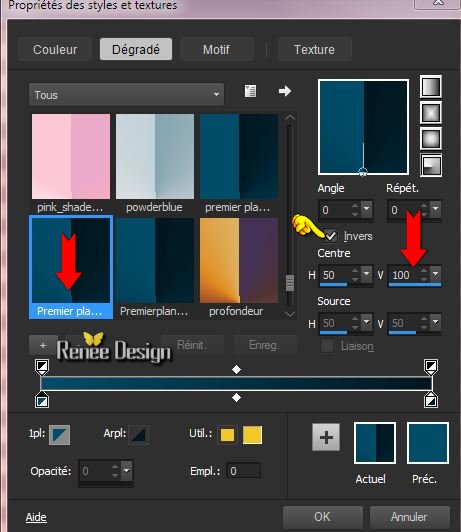
Properties Forground; Set your Foregroundcolor to forground-background radial gradient, with these settings
2. File - New - Open a new transparent image of 1025 x 645 pixels
3. Flood Fill Tool - fill the layer with your forground-background gradient
4. Effects-Plugins Funhouse – Heizenberg’s Mirror setting 190
5. Effects-Edge Effects-Enhance
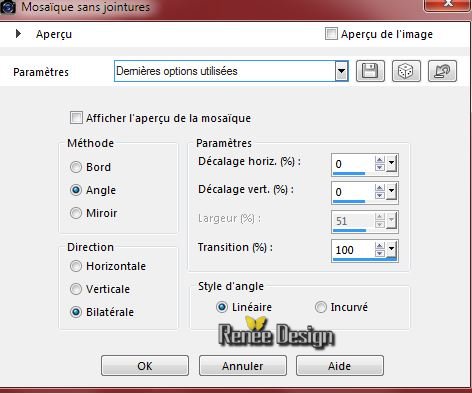
6. Effects- Image Effects- Seamless Tiling with these settings
7. Layers-Duplicate
8. Effects-Plugins –
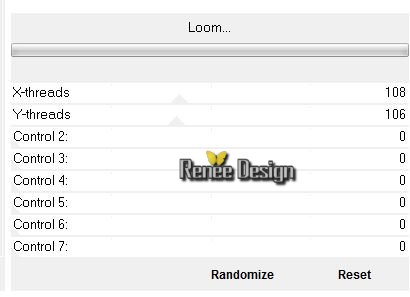
Unlimited 2.0 – Funhouse- loom…with these settings
9.
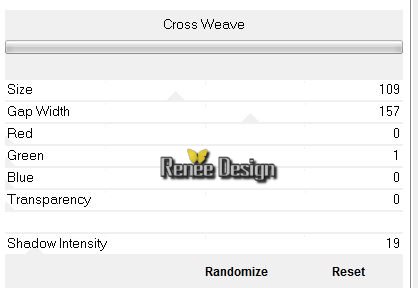
Effects-Plugins – Unlimited – VM Texture -Cross Weave
10.
Effects-Plugins – Flaming Pear –Flexify2/
click open => look for your preset -
Renee_Goth15_Setting_Flex_7-5-2015
Or manual settings as shown in the example below
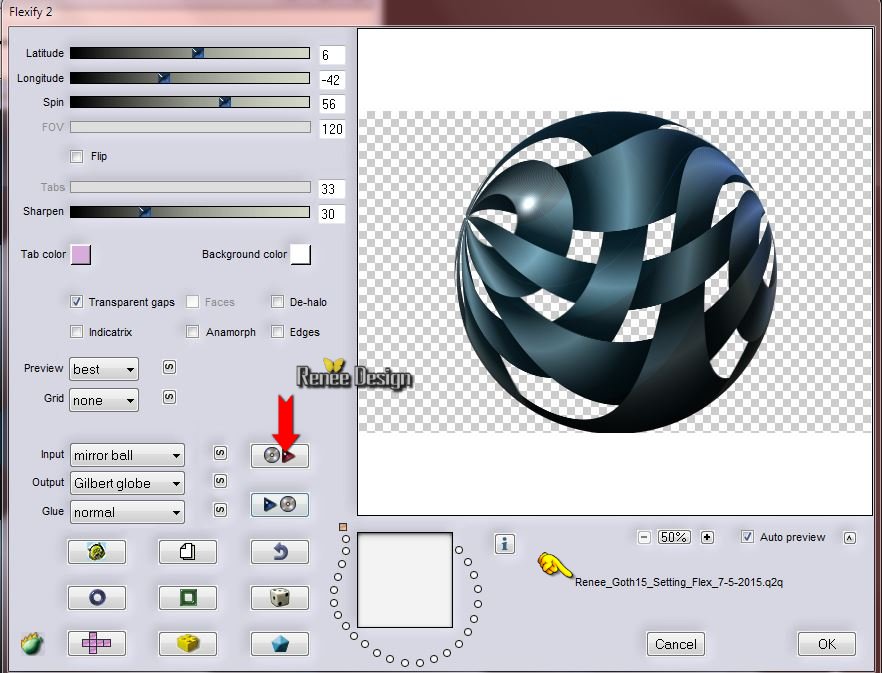
11.Effects-Plugins AFS[import] sqborder2 with these settings
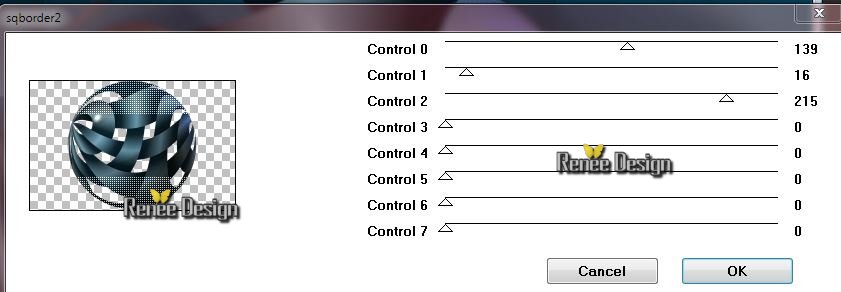
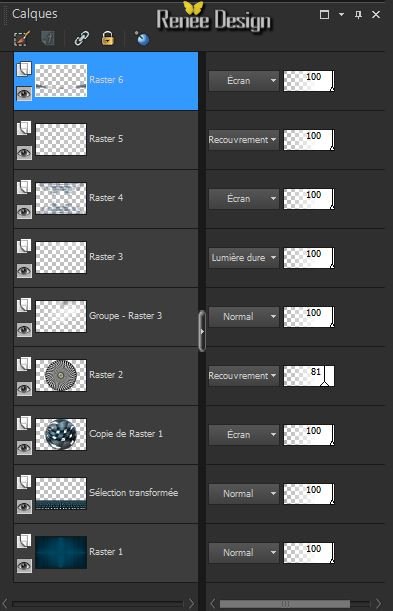
12. Double click on this layer and set the Blendmode to Screen
13. Activate the tube’’ renee_tube_gothique_15_oeil’’
- Edit/copy- Edit/ paste as new layer (do not move it is in the right place)
14. Double click on this layer and set the Blendmode to Overlay -Set the layer opacity of this layer to 81%
- Activate the bottom of the layer palette= Raster 1
15.
Selection Tool ( S ) Custom selection use settings below
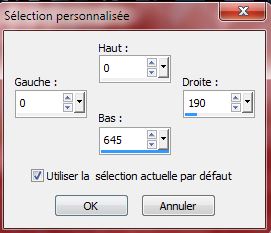
16.
Selections-Promote selection to layer
17. Effects-Texture Effects-Weave with these settings
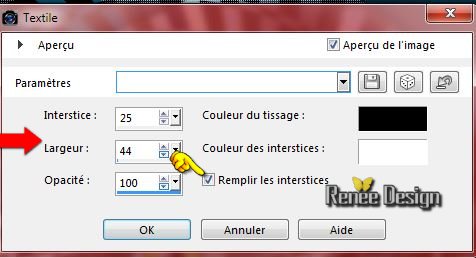
Selections-Deselect All
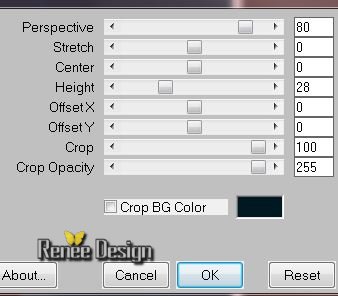
18. Effects-Plugins - Mura’s Meister –Perspective
Tilling
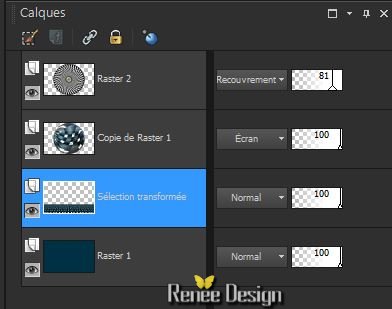
- Activate the bottom of the layer palette=Raster 1
19. Effects-Plugins Simple- Top left Mirror
- you should have this result:
- Activate the top of the layer palette
20. Layers-New raster layer
- Preparation:
Color Palette: Set your Foregroundcolor to #ffffff
21. Activate Flood Fill Tool and fill the layer with the foreground color white
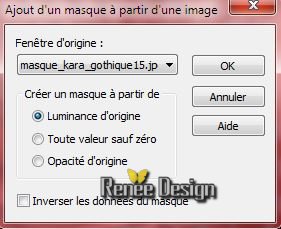
22. Layers- New Mask layer from Image and choose Mask:’’masque_kara_gothique15.jpg’’
- Layers-Merge-Merge Group
23. Effects-Image Effects-Offset with these settings
H =100 and V = 150
transparent
24. Effects-Plugins – Graphic plus / Cross Shadow using the default setting
25. Activate the tube ’’gothique15_cubes
- Edit/copy- Edit/ paste as new layer
- With your move tool place it to the top of your working image
26. Double click on this layer and set the Blendmode to Hard Light
27. Layers-New raster layer
27.
Selections –load/save selection –load selection from disc and choose: ‘‘gothique15_1’’
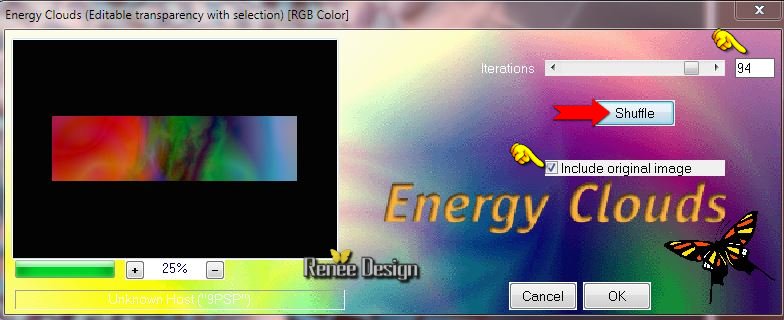
28. Effects-Plugins – FM/FF - Energy Clouds
NOTE: You must click the Shuffle button “AFTER” you place a check mark in “Include original image” and set Iterations (repetitions) to “94”.
This filter creates colored patterns. The number of iterations determines how dense the clouds will be. The Shuffle button changes
your final result each time you select it. Please note that what you see in the preview window is not going to be what you will get in your end image.
Results are totally random.
Selections-Deselect All
29. Double click on this layer and set the Blendmode to Screen
30. Effects-Plugins –Unlimited2.0 –Simple - 4 Way average
31. Layers-New raster layer
32.
Selections –load/save selection –load selection from disc and choose: ‘’ gothique15_2’’
33. *Pot of Paint: Change the opacity of the color at 30%
- Activate Flood Fill Tool and fill the selections with the foreground color white
Keep Selected
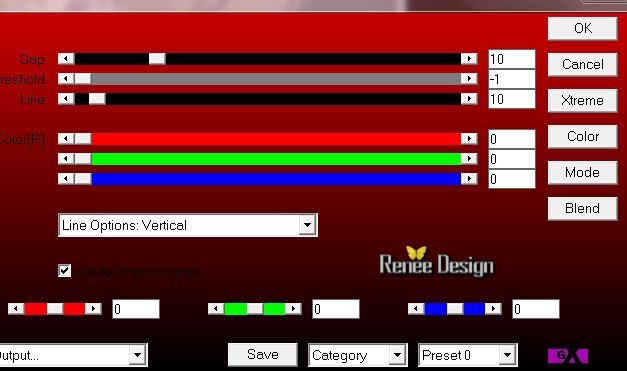
34. Effects-Plugins – AP01- Lines Silverling with these settings
35.
Effects-Plugins –Toadies –What are you
20/20
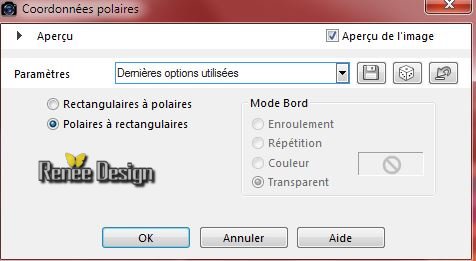
36. Effects- Distortions Effects-Polar Coordinates-Polar to Rectangular
37.
Selections-Invert
Hit the Delete Key of your Keyboard 
Selections-Deselect All
38. Double click on this layer and set the Blendmode to Overlay
39. Activate the tube ‘’’renee_tube_gothique_15_effet1.pspimage’’
- Edit/copy- Edit/ paste as new layer on your working image
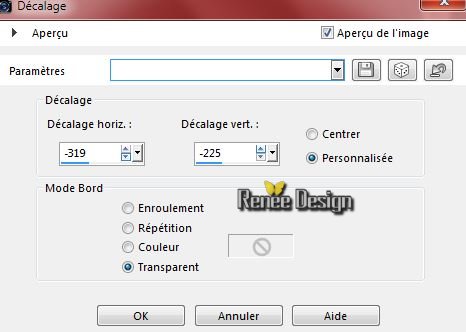
40. Effects-Image Effects-Offset with these settings
H = 0 and V = -150
41. Double click on this layer and set the Blendmode to Screen
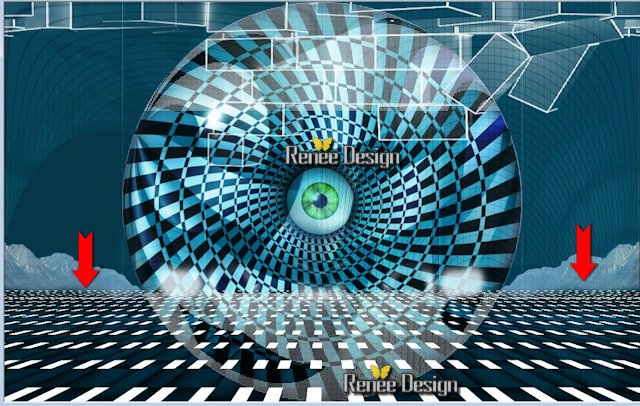
- you should have this result:
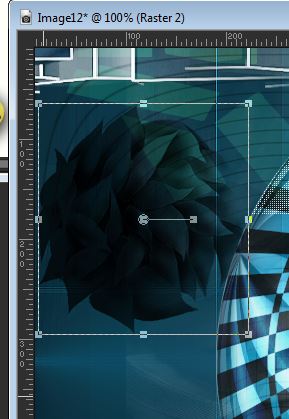
42. Activate the tube ‘’ renee_tube_gothique_15_effet2.pspimage’’
- Edit/ Copy-Edit - Paste as new layer on your working image - ¨With your Move Tool:move to the top left corner as shown in the example below
43. Activate the tube ‘’ ‘’renee_tube_gothique_15_effet3.pspimage’’
- Edit/copy- Edit/ paste as new layer on your working image
-With your move tool place it to the top of your working image
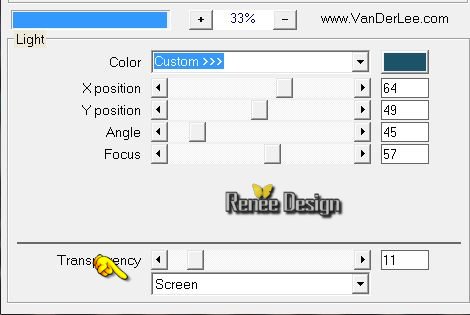
44. Effects-Plugins – Vanderlee Unplugged X –Light -Color #024d6a
45. Effects-Plugins – Graphic Plus – Horizontal
Mirror 25/0
46. Double click on this layer and set the Blendmode to Hard Light
47. Activate the tube ‘’Cherokee_Shhhhhh_UKA.spimage’’
- Image
Resize with 80%
- Edit/ Copy-Edit - Paste as new layer on your working image
- With your Move Tool:move to the bottom right corner
48. Effects - 3D-Effects-Drop shadow with these settings: 2/ -2/ 100 / 5 black
49.
Activate the tube ‘’ Do we not bleed - tubed by A PSP
Devil.pspimage" -Edit/ Copy-Edit - Paste as new layer on your working image
50. Effects-Image Effects-Offset with these settings
51. Activate the tube ’’coeur_lies’’
- Edit/copy- Edit/ paste as new layer on your working image
- Move Tool: move as shown in the example 
- Preparation: Color-palette:Set your foreground color to #850203- Set your background color to#ffffff
52. Layers-New raster layer
53.
Selections –load/save selection –load selection from disc and choose: ‘’ gothique15_3’’
54. *Pot of Paint: Change the opacity of the color at 100% –Activate Flood Fill Tool and fill the selections with the background color ( click 2 times in the selection)
Selections-Deselect All
55. Layers-New raster layer
56.
Selections –load/save selection –load selection from disc and choose: ‘’ gothique15_4’’
57. Color-palette:Set your foreground to gradient 'Foreground-background' -Prepare a sunburst gradient configured like this.
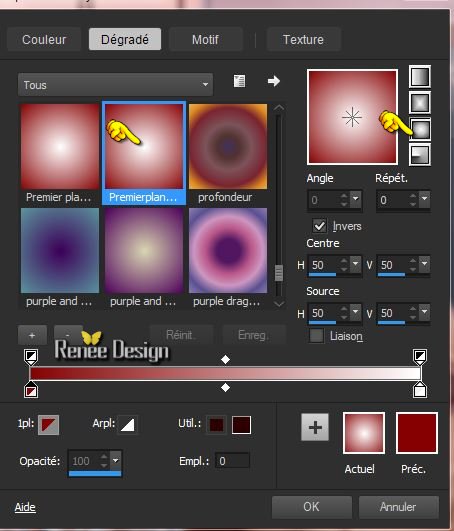
58. Activate Flood Fill Tool and fill the selections with the gradient ( click 3 times in the selection)
Selections-Deselect All
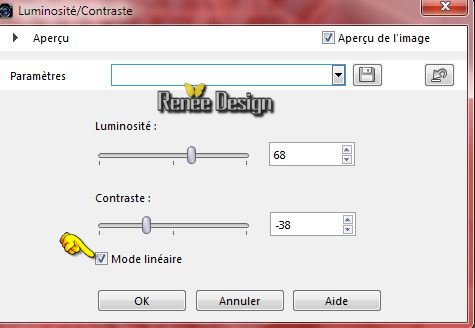
59. Adjust-Brightness and Contrast-Brightness and Contrast with these settings
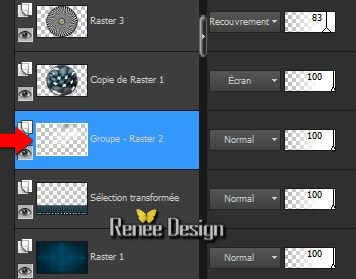
60. In the the layer palette make Group- Raster 2 active
61. Layers-Arrange-Move down underneath copy of raster 1
62. Image - Add borders-Symmetric checked:1 pixel black
63. Image - Add borders-Symmetric checked:100 pixels white
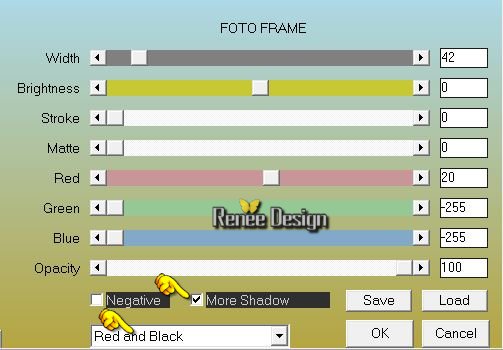
64. Effects-Plugins - AAA Frame Foto frame with these settings
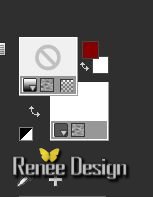
65. Color palette close the visibility of the foreground color
66. Activate your Text Tool -Font « ALPHASTE » - Size 150
Write your text"
Gothique 15"
67.
Vector-Convert to raster layer
68.
Selections: Select All- Selections - Float
-Selections – Defloat.
69. Properties Forground; Set your Foregroundcolor to forground-background sunburst gradient
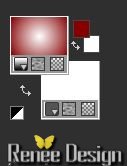
70. Activate Flood Fill Tool and fill the selection with the gradient
71.
Effects-Plugins –EyeCandy 5 Impact – Glass– tab Settings/User settings choose my preset: ’ goth_15_glass’’
Selections-Deselect All
72. Effects - 3D-Effects-Drop shadow with these settings:2/2/100/8 black
73. Activate your Text Tool -Font « Ambassador Script Alt Caps »
-Size 40
74. Color palette close the visibility of the foreground color-
Swap your materials, so the red color is on the bottom (back) #850203
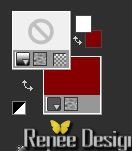
75. Write your text. ‘’Chut…. »
76. Vector-Convert to raster layer
77. Effects - 3D-Effects-Drop shadow with the same settings
78. Activate the tube ‘’ Gothique_15_effet_sang’’
79. Edit/copy- Edit/ paste as new layer on your working image
80. Image - Add borders-Symmetric checked:1 pixel black
81. Image
Resize with 995 pixels Width
Save as JPG
I hope you enjoyed this tutorial .
Renée
This lesson was written by Renée 14/04/2015
edited and update
on 2015
*
Any resemblance with an existing lesson is merely a coincidence *
* Don't forget to thank the people who work for us and with us.
I named the tubeurs - Testers and the translators.
Thanks Renée.
*
|