|
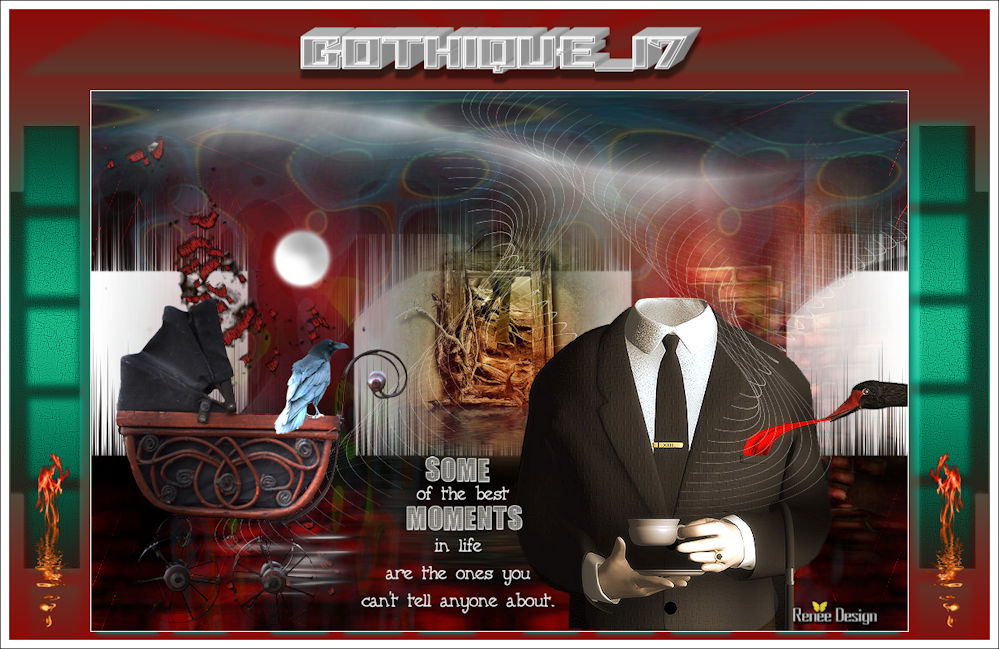
Let's start the lesson.
-
Material Properties:Set your foreground color to: #7f0000
- Set your background color to: #100000

1.
Open the background image ‘’Fond_Gothique_17’’- Window - Duplicate (or shift+D) - Close the original and proceed on the copy -Promote Background Layer =Raster 1
2.
Layers- Duplicate
3.
Adjust- Blur- Gaussian Blur: Radius 35
4.
Effects –Plugins - Unlimited - &<Bkg Designer sf10 I>-AFS
Tangent Waves... 201/127
5.
Effects- Plugins – Distort- Wave use settings shown below
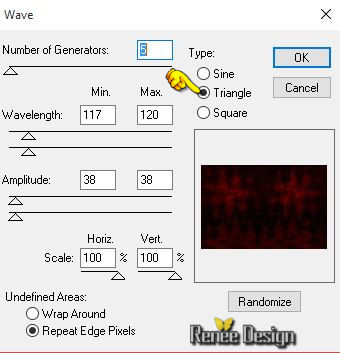
6. -Double click on this Layer and set the Blend Mode to "Dodge"
7.
Layers- New Mask layer from Image and choose Mask:
masque_gothique_17.jpg
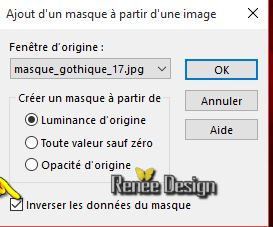
- Layers- Merge- Merge Group
8. Effects- Edge Effects- Enhance More
9. Activate the tube ‘’ Gothique_17_image1.pspimage’’
- Edit/Copy -Edit paste as new layer on your working image (do not move it is in the right place)
10. Effects-Distortion Effects-Wave use settings shown below
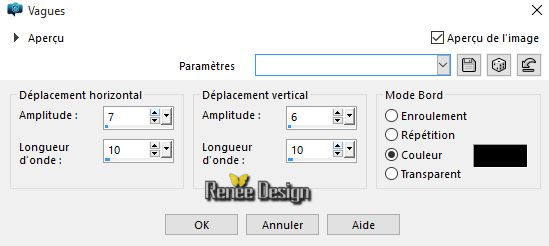
- Double click on this Layer and set the Blend Mode to "Screen "
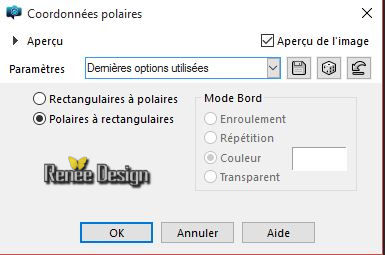
11. Effects- Distortions Effects-Polar Coordinates-Polar to Rectangular
-
Set the layer opacity of this layer to 69%
12. Activate the tube ‘’’ Gothique_17_image2.pspimage’’
- Edit/Copy -Edit paste as new layer on your working image (do not move it is in the right place)
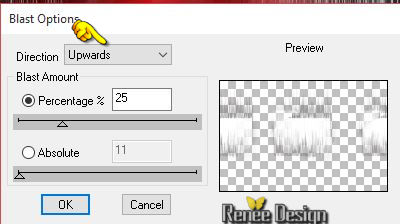
13. Effects- Plugins – DSB Flux- Blast use settings shown below
14. Activate the tube ‘’ Gothique_17_mur’’
- Edit/Copy -Edit paste as new layer on your working image
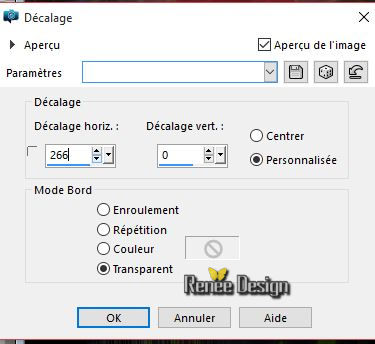
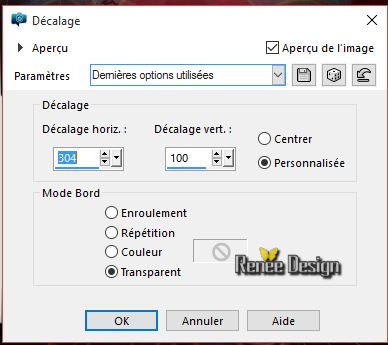
15. Effects-Image Effects-Offset use settings shown below
16. Layers- Arrange- Move Down
17. Double click on this Layer and set the Blend Mode to "Screen"
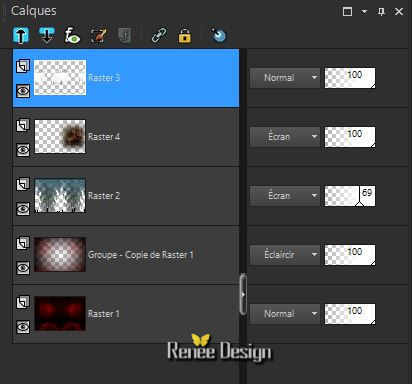
- Activate the top of the layer palette
-Layer Palette look like this now-You should have this result
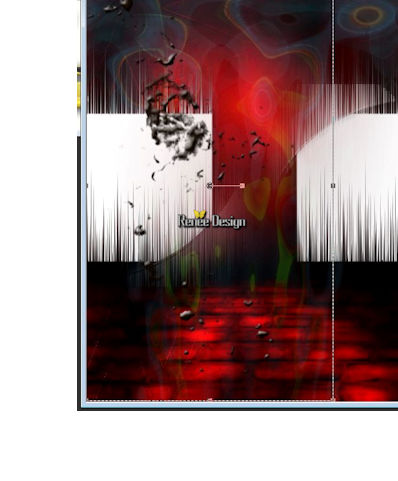
18. Activate the tube ‘’ Gothique_17_image3’’
- Edit/ Copy-Edit - Paste as new layer on your working image
- With your move tool move to the left side as shown in the example below
19.Effects- Plugins– EyeCandy 5 - Nature– Fire
-tab Settings/User settings choose my preset:
‘’gothique_17_fire’’

- In the Layer-Palette- Make ‘’Group-Copy of Raster 1 active
20. Layers-Load/Save Mask-Load mask from Disk and select Mask /20/20
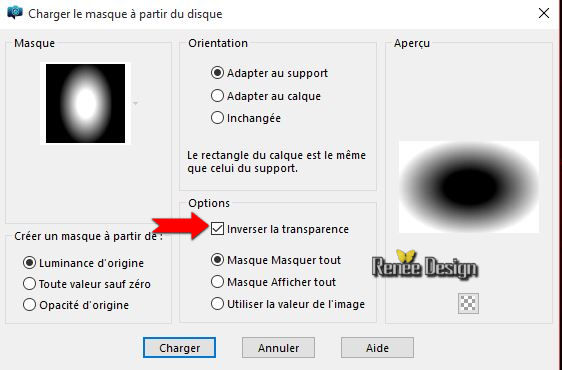
21. Layers- Merge- Merge- Group
- Activate the top of the layer palette
- Properties Foreground: Set your foreground color to: #ffffff
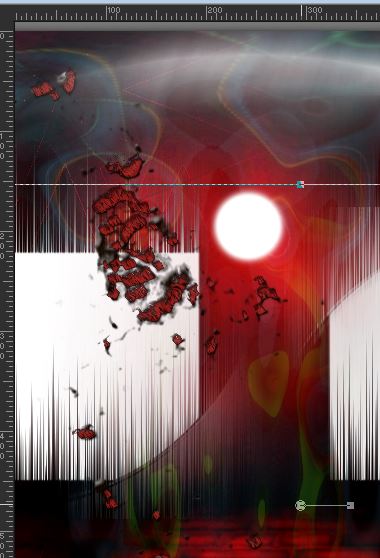
22. Layers- New Raster Layer
23.
Selections –load/save selection –load selection from disc and choose my selection: ’’ Gothique_17_1’’
24. Activate Flood Fill Tool and fill the selection with the foreground color white ( click 2x)
Selections - Deselect All
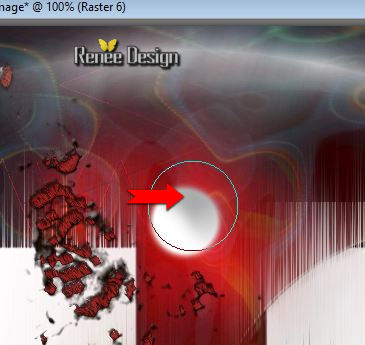
25. Layers- New Raster Layer
26. Activate the Brush Tool and choose the Brush Round use settings shown below

- Stamp with the foreground color #ffffff (see example)
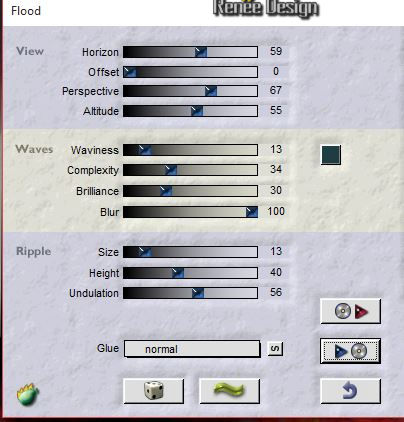
27.
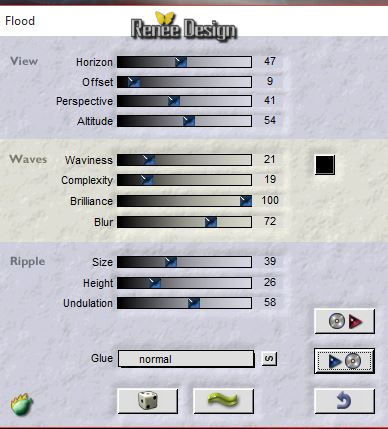
Effects- Plugins – Flaming Pear Flood -click on the red arrow>> and select my file-preset‘’Gothique_17_Flood_1’’ 2. can be used in any folder of your choice by clicking it. -3 Open it will be ok in your filter
!!!
View - Horizon to between 47 and 54-The setting of the filter depends on where the tube is placed

28. Activate the Tool Lighten/Darken brush (push L on your keyboard)use settings as shown in the example below
 - -
-
-With the left button of the mouse pressed glide gently over your image- Your result will depend on these moves-Start high and than go down in order to obtain this effect as shown in the example below-Push M to deselect the tool
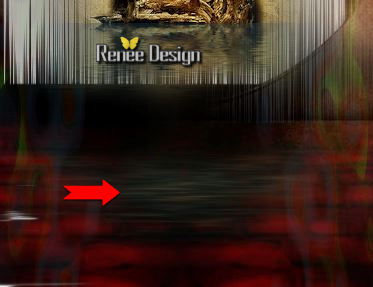
29. Activate thetube ’’Gothique-17_fenetre »
- Edit/Copy -Edit paste as new layer on your working image (do not move it is in the right place)
30. Effects- Plugins – Flaming Pear Flood /
click on the red arrow>> and select my file-preset “Gothique_17_Flood_2”
31. Activate your Eraser Tool use settings shown below

-Skip the center to the left and the right on the bottom- see example in order to eliminate the middle part
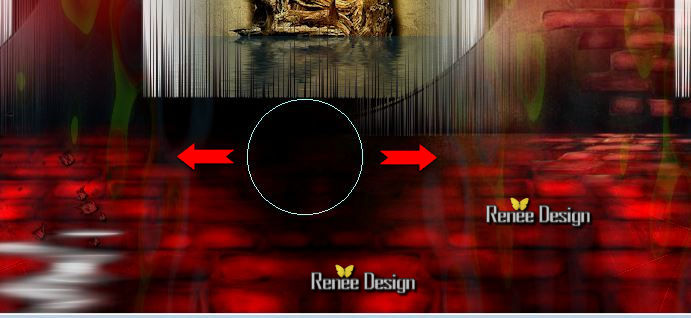
To obtain this effect as shown in the example below
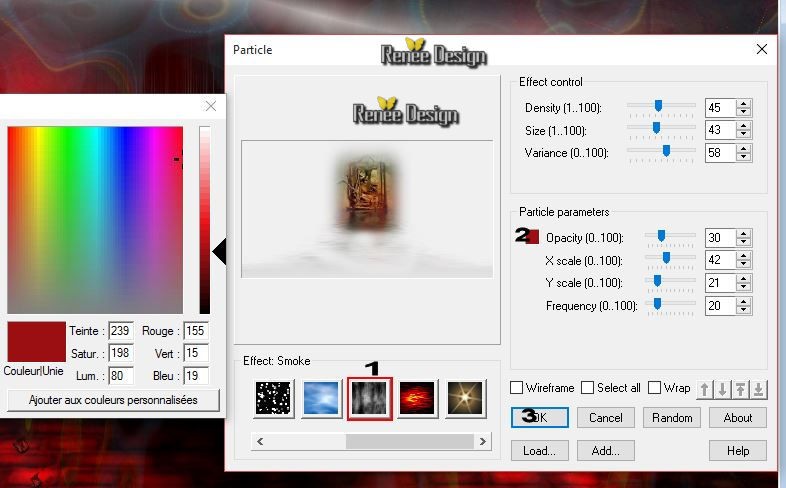
32.
Effects –Plugins – Ulead Effects – Particle **Attention for this filter **
1. -First: click on the icon = effects" Smoke"
2.
To set the color –Click (2 ) and the window will open /click Custom color
for the choice of color - control the settings
3. Ok to confirm
4 .Ok to apply
33. Layers- New Raster Layer
34.Activate Flood Fill Tool and fill the layer with black
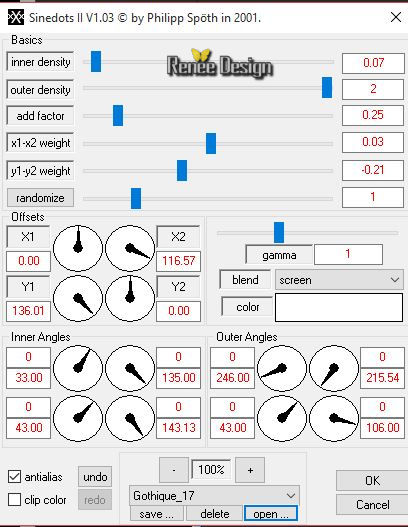
35. Effects- Plugins – Dragon Fly – Sinedot II use settings shown below
36.
Effects- Plugins Transparency eliminate
black
37. Effects- Edge Effects- Enhance
38. Double click on this Layer and set the Blend Mode to "Screen" -Set the layer opacity of this layer to 57%
39. Layers- Duplicate – Image Flip
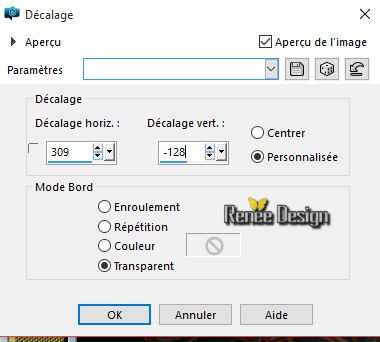
40. Effects-Image Effects-Offset use settings shown below
41. Activate the tube
‘’Renee_tube_hombre_desconocido_vespertino.pspimage’’
- Edit/ Copy-Edit - Paste as new layer on your working image
42. Effects-Image Effects-Offset use settings shown below
43. Layers- Arrange- Move Down
- Activate the top of the layer palette
44. Activate the tube ‘’ Renee_tube_landeau_Gothique_17’’
- Edit/Copy -Edit paste as new layer on your working image
- Activate your Move Tool (M) place it to the left (see finished image)
45. Effects-Plugins – Graphic plus - Cross shadow using the default settings
46. Image - Add borders-Symmetric checked:1 pixel white – Promote Background Layer =Raster 1
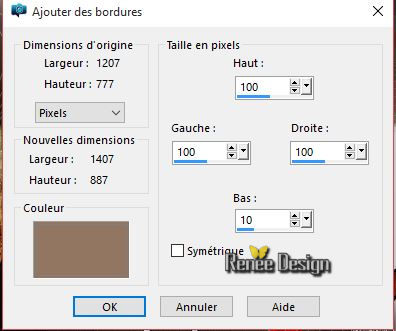
47. Image - Add borders-Symmetric not checked use settings shown below -Color #927662
48. With the the Magic Wand select this border
49.
Selections- Promote selection to Layer
- Material Properties:Set your foreground color to: #927662 - Set your background color to:
#100000
50. Effects- Plugins – Medhi – Wavy Lab use settings shown below
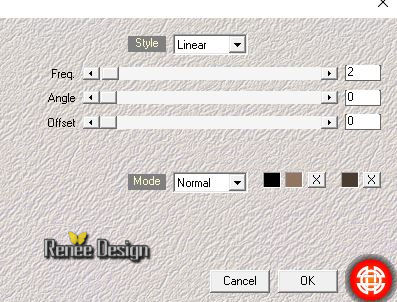
Keep Selection active
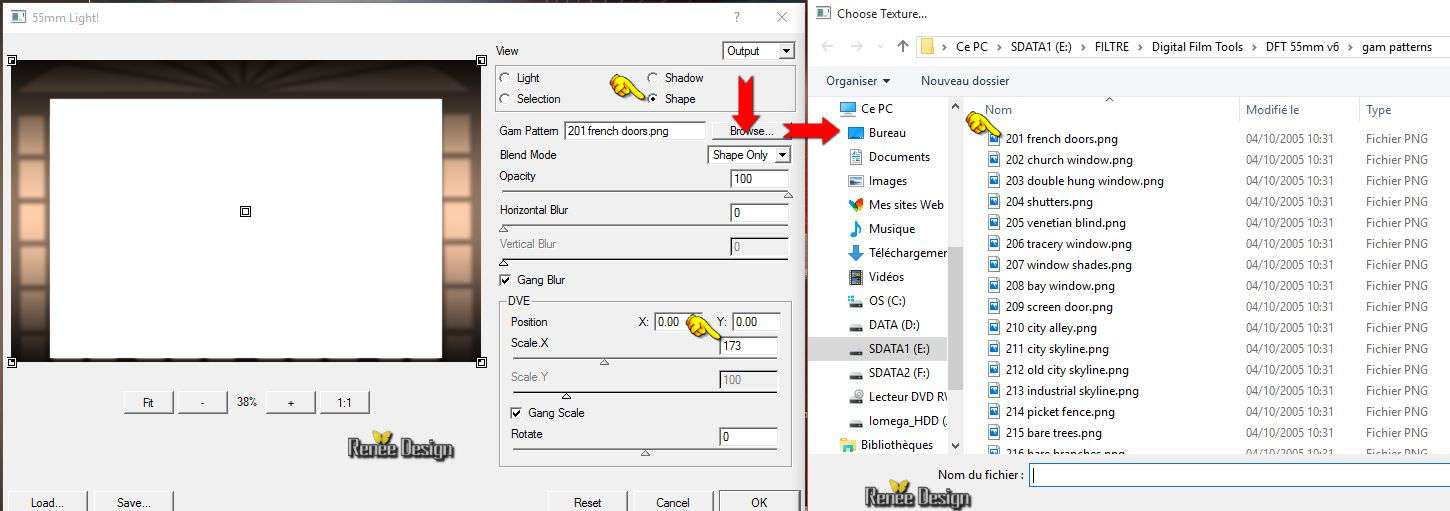
51. Effects- Plugins – DigitalFimlTileTool-Lightv3 use settings shown below
Do you have problems with this filter- - Image ‘’effet_Digital_tools’’ is into the zipfile and paste into selection
52.
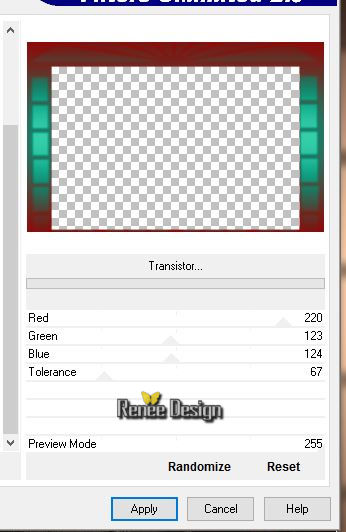
Effects –Plugins - Unlimited - VM Toolbox –
Transistor use settings shown below
Selections - Deselect All
53.
Selections –load/save selection –load selection from disc and choose my selection: ‘’ gothique_17_2’
54.
Selections- Promote selection to Layer
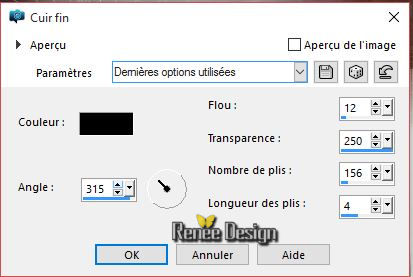
55. Effects-Textur Effects- Fine Leather use settings shown below
56. Effects- Edge Effects- Enhance More
Selections - Deselect All
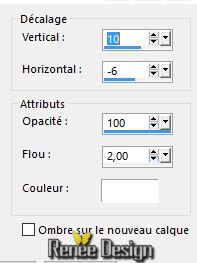
57. Effects- 3 D Effects- Drop Shadow use settings shown below
58. Double click on this Layer and set the Blend Mode to "Multiply " -Set the layer opacity of this layer to
73%
59. Activate the tube ‘’Gothique_17_flamme’’
- Edit/Copy -Edit paste as new layer on your working image
- Activate your Move Tool (M) place it in the bottom left corner (see finished image)
60. Layers- Duplicate – Image Mirror
61.
Activate the tube ‘’ Some of the best moments - tubed by A PSP
Devil.pspimage’’
62. Image-Resize to 50%
-
Edit/Copy -Edit paste as new layer on your working image
-Activate Move Tool (M) move it the right place (see finished image)
63. Coller
le tube du "text " Edit/ Copy-Edit - Paste as new layer on your working image/ or write your own text
64. Image - Add borders-Symmetric checked:10 pixels white
65. Image - Add borders-Symmetric checked: 1 pixel black
66. ImageResize to 999 pixels width
Save as JPG
I hope you enjoyed this lesson
Renée
This lesson was written by Renée 10/10/2015
Edited and Update
2015
*
Any resemblance with an existing lesson is merely a coincidence *
* Don't forget to thank the people who work for us and with us. I named the tubeurs - Testers and the translators.
Thanks Renée.
| 
 Translations


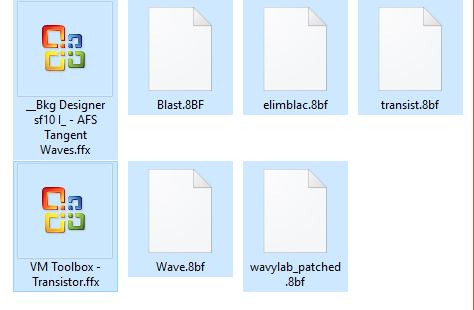

 When you see this logo the filter is imported in Unlimited

 All rights reserved