|
Let's start the lesson.
 –
28 –
28
-
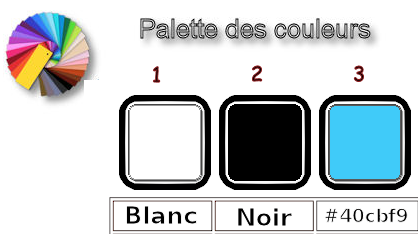
Preparation - Material Properties: Set your foreground color to color white- Set your background color to color black
1. Open the Backgroundimage ‘’Gothique_28 ‘’ – Window - Duplicate (or shift+D) - Close the original and proceed on the copy -Promote Background Layer =Raster 1
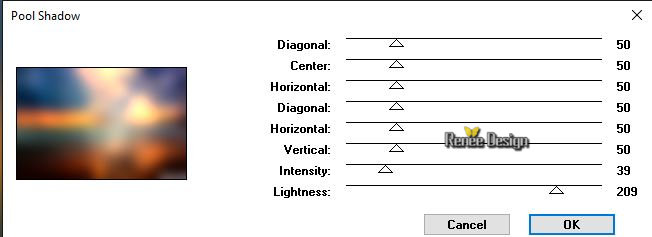
2. Effects – Plugins – Greg’s Factory Output vol
II – Pool Shadow use the settings below
3. Open the tube ‘’Gothique_28_Image 1
-Edit - Copy- Activate your work -Edit - Paste as a new layer
4. Layers- Duplicate
5. Effects- Image Effects- Seamless Tiling using the default settings
6. Effects- Edge Effects- Enhance More
Layer-Palette- Activate the layer underneath=Raster 2
7. Activate Selection Tool -Custom Selection (S) -Rectangle with these settings
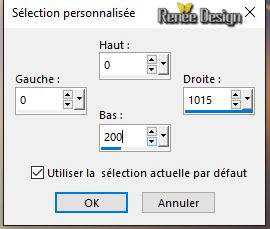
8. Effects –Plugins – Mura’s Meister –
Perspective Tilling using the default settings
Selections- Deselect All
- To replace the top of the layer-palette
9. Layers- Merge-Merge Down
10. Effects- 3 D Effects- Drop Shadow with these settings : 2/1/61/3 color black
-Activate the bottom layer in the layer palette = Raster 1
11. Activate Selection Tool -Custom Selection (S) -Rectangle with these settings
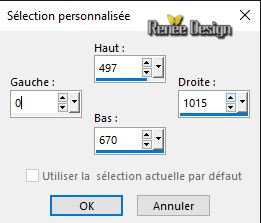
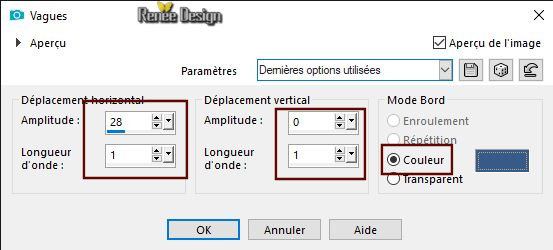
12. Effects –Distortion Effects-Wave use the settings below / Color #385b89
13. Effects – Plugins - Mura’s Meister –
Perspective Tilling using the default settings
14. Selections- Promote selection to layer
Selections- Deselect All
15. Layers-Properties-Set the Blend Mode to " Screen "
16. Activate Selection Tool -Custom Selection (S) -Rectangle with these settings
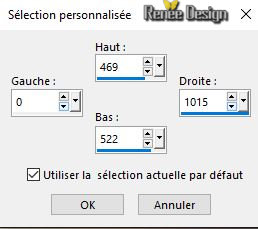
17. Effects –Plugins – Vanderlee – Unplugged X
– Defocus
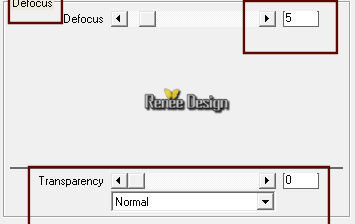
Selections- Deselect All
18. Effects- 3 D Effects- Drop Shadow with these settings: 1/1/100/1 color black
19. Open the tube ‘’ Gothique_28_Image
2.png’’
-Edit - Copy- Activate your work -Edit - Paste as a new layer
20. Objects - Align-Down
Place it exactly on the line, see arrow
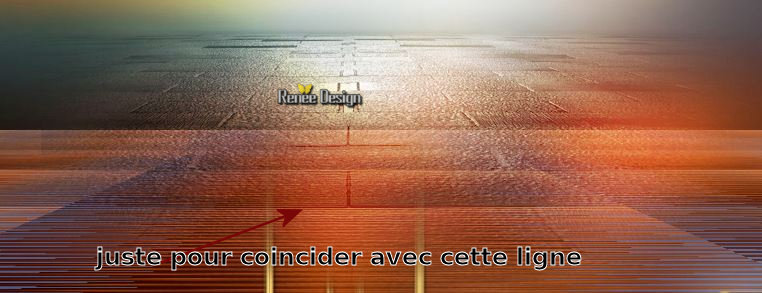
21. Layers-Properties-Set the Blend Mode to " Overlay "
22. Layers- New Raster Layer
23. Selections –load/save selection –load selection from disc and select my selection: ‘’ Gothique_28_1’’
24.Activate the Flood Fill Tool  (Click outside the dots/of the selection) – Flood Fill the selection with the foreground color #ffffff (Click outside the dots/of the selection) – Flood Fill the selection with the foreground color #ffffff
Selections- Deselect All
25. Adjust- Blur- Gaussian Blur- Radius 25
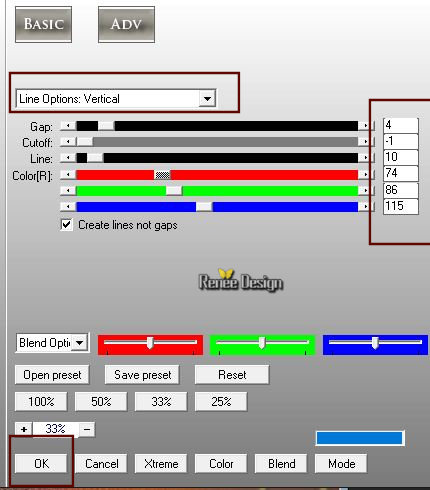
26. Effects –Plugins – AP[Lines]
Silverling with these settings
27. Lower the Opacity of the layer to 48%
-
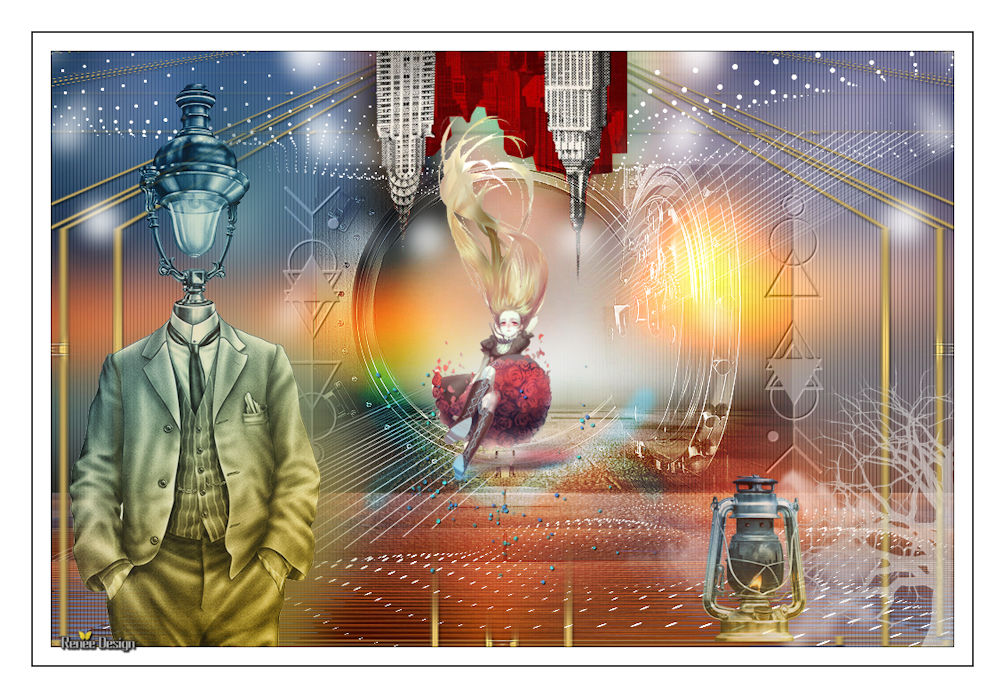
Your work and Layer Palette look like this now-You should have this result
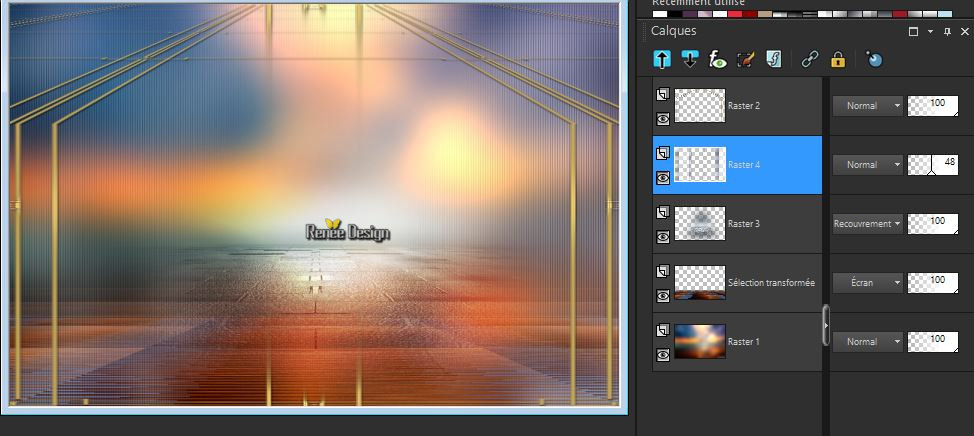
- To replace the top of the layer-palette
28. Open the tube ‘’ Gothique_28_Image 3.png’’
-Edit - Copy- Activate your work -Edit - Paste as a new layer
29. Objects – Align- Top
30. Layers- Duplicate
31. Layers- Arrange- Move Down
32. Adjust- Blur- Gaussian Blur- Radius 25
33. Layers-Properties-Set the Blend Mode to " Difference"
- To replace the top of the layer-palette
34. Layers- New Raster Layer
35. Selections –load/save selection –load selection from disc and select my selection: ‘’ Gothique_28_2’’
36.Activate the Flood Fill Tool – Flood Fill the selection with the foreground color #ffffff(zoom if necessary) 2 or 3
clicks
Selections- Deselect All
37. Layers- Arrange- Move Down
- To replace the top of the layer-palette
38. Open the tube ‘’ Gothique_28_Image 4.png’’
-Edit - Copy- Activate your work -Edit - Paste as a new layer
39. Effects- Image Effects- Offset with these settings H = 56 and V =
22
- Layers-Properties-Set the Blend Mode to " Overlay "
40. Effects- Edge Effects- Enhance
41. Layers- New Raster Layer
42. Activate Brush Tool (B) and select my file ‘’
Gothique_28_Pinceau’’
(In case of problems:File- Export Custom Brush (Give it a name) – ‘’ Gothique_28_Pinceau’’ )
Activate your Brush - with these settings- Size 350-Opacity 60

- Stamp your brush at the right place by using your foreground color white
43. Effects- 3 D Effects- Drop Shadow with these settings : 1/1/100/1 color black
44. Layers- Duplicate
45.Image - Mirror - Mirror Horizontal (Image - Mirror in older versions of PSP)
Image - Mirror - Mirror vertical ( Image - Flip in older versions of PSP) and move in the right place
46. Open the tube ‘’
Gothique_28_Image5.png’’
-Edit - Copy- Activate your work -Edit - Paste as a new layer
- Activate your Move Tool (M) place it in the right place ( see finished image )
47. Effects –Plugins – Eyecandy 5 Impact –
Perpsective shadow /Preset ‘’Reflect Behind’’
48.
Layers- New Raster Layer
49. Selections –load/save selection –load selection from disc and select my selection: ‘’ Gothique_28_3’’
50.Activate the Flood Fill Tool – Flood Fill the selection with the foreground color #ffffff(zoom if necessary)
51. Layers- Arrange- Move Down
- To replace the top of the layer-palette
52. Layers- New Raster Layer
53. Selections –load/save selection –load selection from disc and select my selection: ‘’ Gothique_28_4’’
54. Properties foreground: Set your foreground color to color #40cbf9 =(3)
Activate the Flood Fill Tool – Flood Fill the selection with #40cbf9
55. Layers-Properties-Set the Blend Mode to " Overlay "- Lower the Opacity of the layer to
53%
Selections- Deselect All
56. Open the tube ‘’ Gothique_28_Image
petits_points’’
-Edit - Copy- Activate your work -Edit - Paste as a new layer
–Activate your Move Tool (M) place it in the right place ( see finished image )
57. Layers- New Raster Layer
58. Selections –load/save selection –load selection from disc and select my selection: ‘’ Gothique_28_5’’
59.Activate the Flood Fill Tool – Flood Fill the selection with the foreground color #ffffff( 4 or 5 clicks)
Selections- Deselect All
60. Adjust- Blur- Gaussian Blur- Radius 6
61. Open the tube ‘’
Gothique_28_Image 6.png’’
-Edit - Copy- Activate your work -Edit - Paste as a new layer
- With the move tool, move it in the bottom right corner
62. Lower the Opacity of the layer to 57%
63. Open the tube ‘’
Gothique_28_Image 7.png’’
-Edit - Copy- Activate your work -Edit - Paste as a new layer
-
With the move tool, move it in the bottom right – Lower the Opacity of the layer to 75%
64. Open the tube of the character ‘’ Renee_tube_Gothique_28.png
or Renee_tube_Gothique_28._Image 2’
There are two models. Choose one
-
Edit - Copy- Activate your work -Edit - Paste as a new layer
-With the move tool, move it in the bottom left corner
65. Layers- Duplicate
66. Adjust- Blur- Gaussian Blur -Radius 28
-
Move slightly to the right
67. Layers- Arrange- Move Down
68. Image - Add borders-Symmetric checked 1 Pixel color black
69.
Image - Add borders-Symmetric checked 20 Pixels color white
70. Image - Add borders-Symmetric checked 1 Pixel color black
71. Image - Add borders-Symmetric checked 35 Pixels color white
72. Image -Resize to 1005 pixels width.
Save as JPG
I hope you enjoyed this lesson
Renée
This lesson was written by Renée 18-09-2018
Edited and Update
2018
*
Any resemblance with an existing lesson is a coincidence
* Do not forget to thank the people who work with us and for us I have appointed the tubeurs and translators
Thanks
| 
 Translations


 If a plugin supplied appears with this icon it must necessarily be imported into Unlimited *