|
Let us begin with the
lesson

- Material Properties:Set
the color of your foreground to color 1 -Set the color
of your background to color 2

- Replace your foreground
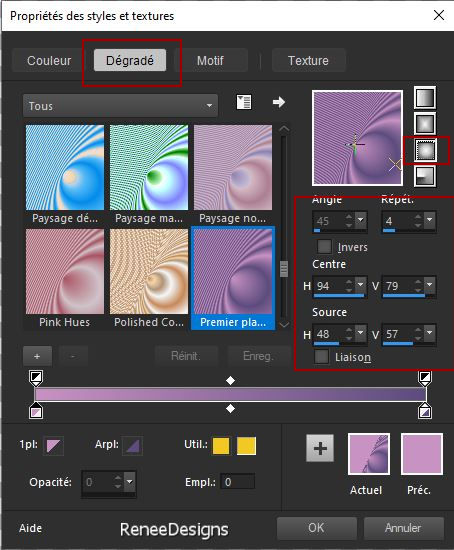
colour with a sunburst foreground/background
gradient configured as follows
1. File-Open a new
transparent image in this size : 1050
x 750 Pixels
2. Activate Flood Fill Tool
 – Fill the layer with the gradient
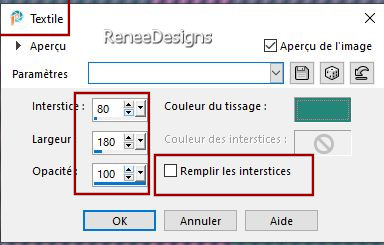
3. Effects –Texture Effects –
Weave use the settings below - Color 3
4. Effects – Edge Effects
– Enhance
5. Effects -Plugins - Filters
in Unlimited 2.0 - Crescent Moon -SpookyFade...with
these settings: 164/79/224/3
- Properties of the
foreground > close the gradient > now we have the colour
back again
6. Layers- New Raster Layer
7. Activate Flood Fill Tool
 -
Fill the layer with the Foreground color 1 -
Fill the layer with the Foreground color 1
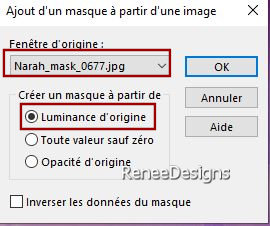
8. Layers-New mask
layer-From image and choose mask :
- Layers- Merge- Merge
Group
9. Effects - Edge Effects –
Enhance
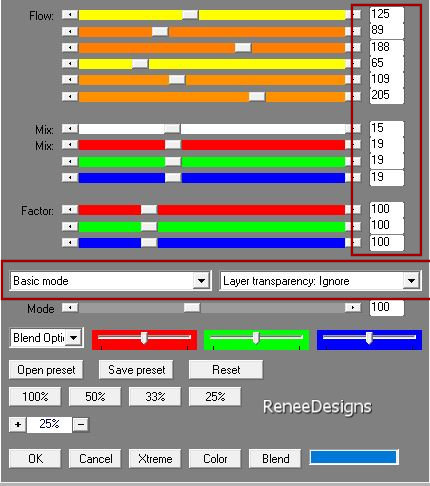
10. Effects -Plugins – AP [Dots] Dots- DotFlow
use the settings below
11. Effects – 3D-Effects-
Drop Shadow with these settings- Color 4-shadow on new
layer checked
!!!!
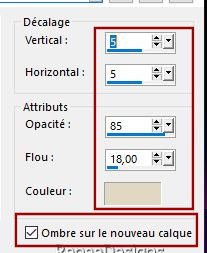
- On the shadow layer
12. Effects - Plugins - AP[Lines] Lines – Silverlining
use the settings below
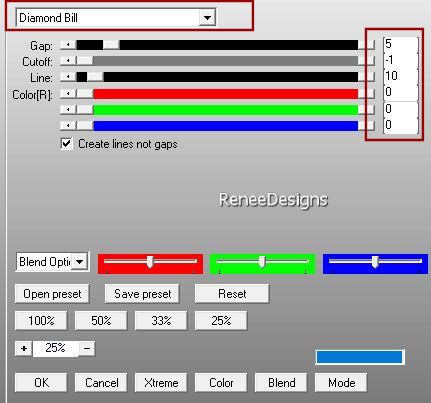
13. Layers-Properties-Set
the Blend Mode to " Screen"
14. Effects – Distortion
Effects – Wind-Wind strength 60° -Wind direction -From
right
-
Activate the layer above
15. Effects – Reflection
Effects-Rotating Mirror use the settings below
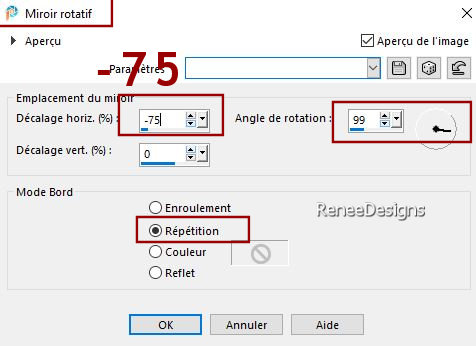
16. Effects – Reflection
Effects-Rotating Mirror use the settings below
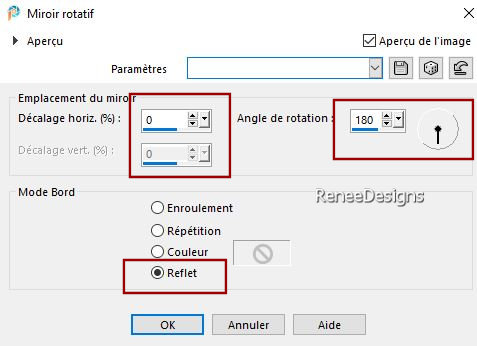
Activate the top of
the layer palette
17. Open the tube ‘’ Renee-TUBES-Halloween2024-
Personnage 1’’
-Edit - Copy- Activate your
work -Edit - Paste as new layer
18. Pick Tool: (K) on your
keyboard - Enter the following parameters in the toolbar
 329/ 9
19.
Layers-Properties-Reduce the opacity of this layer to 53%
20. Effects – Plugins – FM Tile Tools – Saturation Emboss
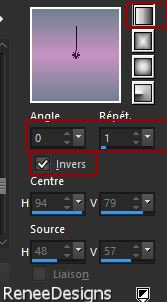
- Material Properties: Set
the color of your foreground to color 1 -Set the color
of your background to color 5
- Replace your foreground
colour with a linear foreground/background gradient
configured as follows
- Activate Raster 1 in the
Layers palette
21. Layers- New Raster
Layer
22.
Selections –load/save selection –load selection from
disc and select my selection: – ‘’Halloween-2024-1’’
23. Activate Flood Fill
Tool
 –
Opacity 55% – Fill
the selection with the gradient –
Opacity 55% – Fill
the selection with the gradient
Flood Fill
Tool-Opacity
100 %
24. Effects - Plugins - Filters
in Unlimited 2.0 - ICNET-Filters -Special
Effects 1- Square Bumps with these settings: 48/63
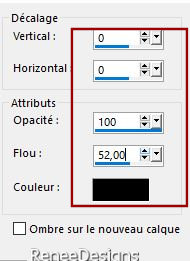
25. Effects – 3D-Effects-
Drop Shadow with these settings-Color Black
Shadow on new layer not
checked
 Repeat
the same effect for a second time. Repeat
the same effect for a second time.

26. Layers – Duplicate –
Image - Mirror - Mirror vertical ( Image - Flip in older
versions of PSP)
27. Layers- Merge-Merge
Down
28. Effects - Plugins - Filters
in Unlimited 2.0 - It@lian Editors
Effect - Effetto Fantasma using the default settings ( 41/41)
29. Effects – 3D-Effects-
Drop Shadow with these settings: 0/25/80/0 Color White
- Return to the top of the
layers palette
30. Open the tube
‘’Halloween-2024- Image 1’’ -Edit - Copy- Activate your
work -Edit - Paste as new layer
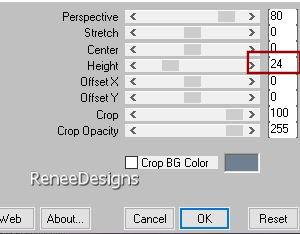
31. Effects –Plugins – Mura’s Meister – Perspective Tiling
use the settings below
32. Effects -Plugins - Alien Skin EyeCandy 5 – Textures – Stone Wall
–Tab-Settings/User Settings and select my file-Preset : ‘’ Halloween-2024-stone wall’’
33. Effects – Edge Effects
– Enhance More
34. Layers-Properties-Set
the Blend Mode to " Difference"
35. Layers – Duplicate –
Layers-Properties-Set the Blend Mode to " Hard Light "
36. Layers- Merge-Merge
Down
- Remain on this layer
37.
Selections –load/save selection –load
selection from disc and select my selection: – ‘’Halloween-2024-2’’

38. Layers– Duplicate
39.
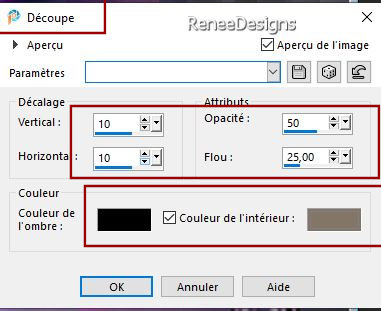
Effects-3D-Effects-Cutout use the settings below / Color
Black and Color #837669
40. Selections –Invert


41. Adjust- Blur-Gaussian
Blur-Radius 55%
- Blend Mode remains on "Difference"
- Return to the top of the
layers palette
42. Open the tube -Edit -
Copy- Activate your work -Edit - Paste as new layer
43. Objects – Align – Top
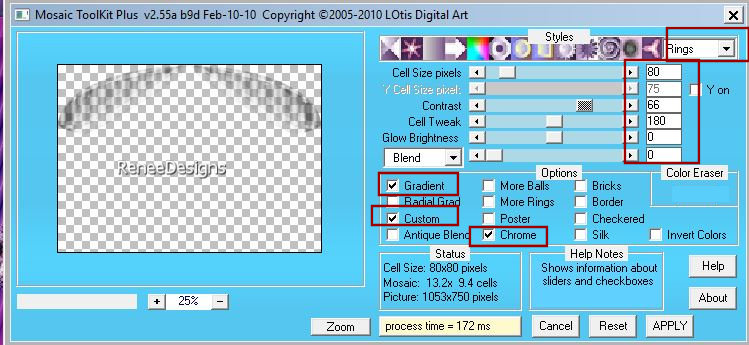
44. Effects – Plugins – Lotis Filters – Mosaic Toolkit Plus
use the settings below
45. Layers-Properties-Set
the Blend Mode to " Lighten"
46.
Selections –load/save selection –load
selection from disc and select my selection: – ‘’Halloween-2024-3’’


47.
Effects - Plugins - Filters in Unlimited 2.0 -
Color Effects -
Colorize (HSB)
using the default settings
48. Effects – Plugins– FM Tile Tools – Saturation Emboss
using the default settings
49. Open the tube -’’Halloween-2024- Image 3 ‘’
-Edit
- Copy- Activate your work -Edit - Paste as new layer
- Place at bottom left
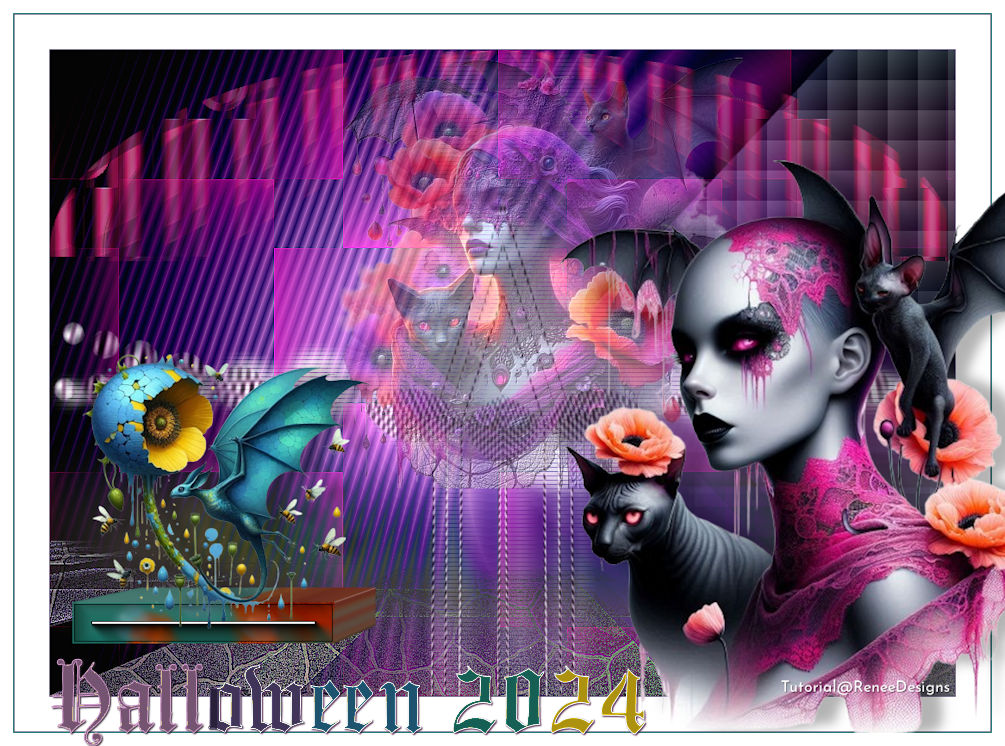
( see finished image)
50. Open the tube
’’Halloween Renee-TUBES-Halloween2024- Personnage 3’’
-Edit - Copy- Activate your
work -Edit - Paste as new layer
- Place it on the top of
the previous tube ( see finished image)
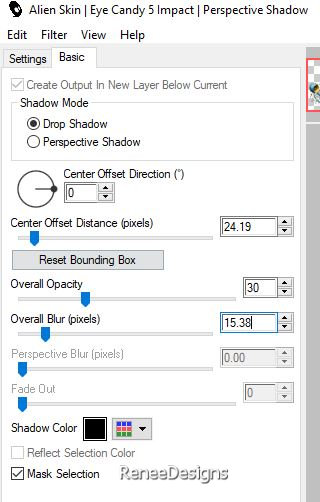
51. Effects - Plugins - Alien Skin EyeCandy 5 – Impact- Perspective –Shadow
use the settings below
52. Image - Add
Borders-Symmetric checked: 1 Pixel -Color 2
Image - Add
Borders-Symmetric checked: 40 Pixels -Color #ffffff
Image - Add
Borders-Symmetric checked: 1 Pixel -Color 2
Image - Add
Borders-Symmetric checked: 1 Pixel -Color 3
Image - Add
Borders-Symmetric checked: 15 Pixels
-Color
#ffffff
53.
Open 1
tube of your choice and paste as a new layer on your
work.
- Drop shadow of your
choice
54. Add the author's
watermark to your work and your own watermark
55. Layers-Merge-Merge All
56. Image – Resize to 1005
pixels width- Resize all layers checked
57. With the attached font
you can write your own title- Or take my text
- Layers-Merge-Merge All (flatten)
Save as JPG
Thanks for your time and enjoyment of this lesson.
Renée
This lesson has been
written by Renée
17/07/2024
Edited and Update
in 2024
*
Any resemblance to an
existing lesson is purely coincidental.
* Don't forget to thank the people who work with us and
for us - the testers and translators
Thanks
*
|
 Translations


