|
Let's start
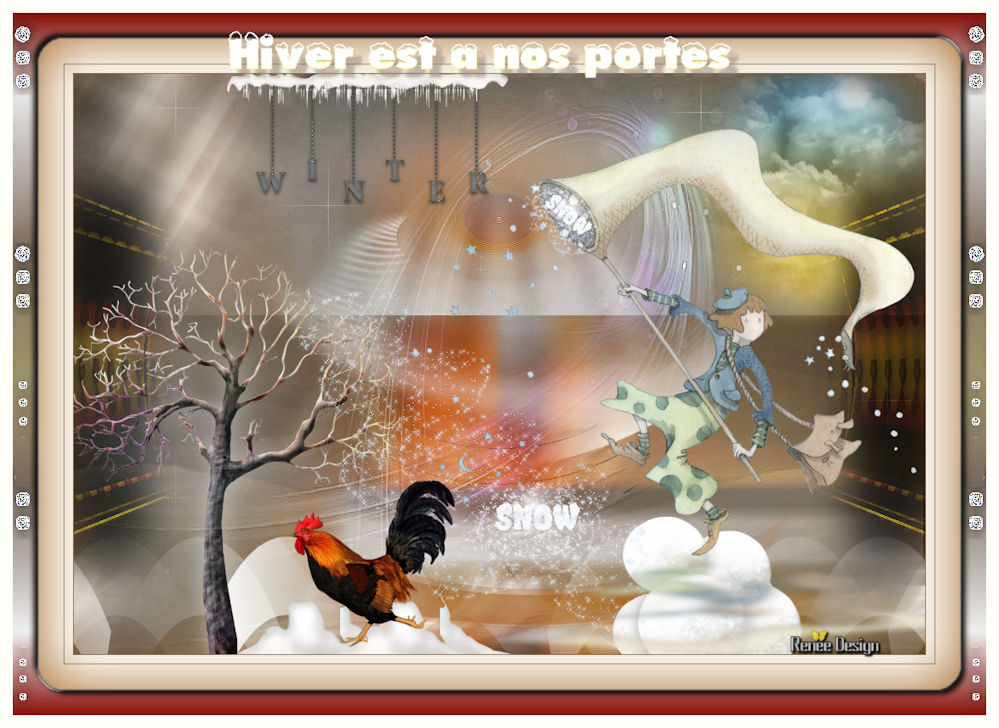
Winter is around the corner

Material Properties:Set your foreground color to:#ffffff-Set your foreground color to: #8c7a6c
1.
Open the background image ‘’fond_hiver’’/ Window - Duplicate (or shift+D) - Close the original and proceed on the copy -Promote Background Layer =Raster 1
2.
Effects - Plugins - VM Naturel –
Sparkle use settings below

3.
Open the tube ‘’hiver_image1.pspimage »
-
Edit/ Copy-Edit - Paste as new layer on your working area (do not move it is in the right place)
4.
Layers - Duplicate
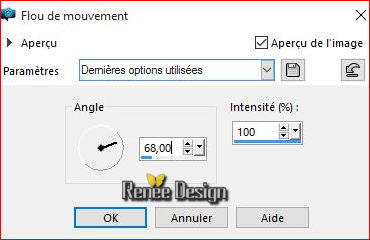
5. Adjust - Blur - Motion blur use settings below
6.
Effects -Image Effects Offset use settings below
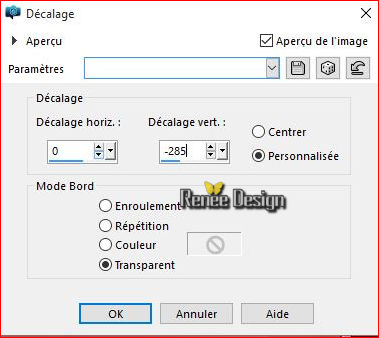
- To Be placed on the layer below(Raster 2)
7.
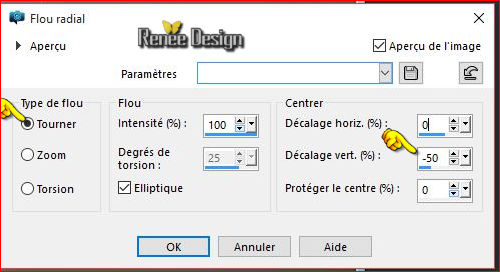
Adjust Blur - Radial Blur use settings below
8.
Effects - Edge Effects - Enhance More
9.
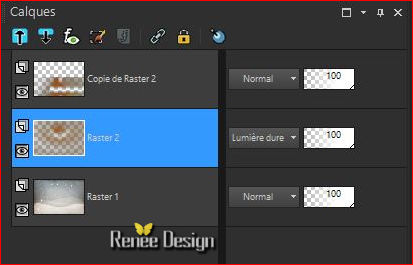
Double click on this Layer and set the Blend Mode to "Hard Light "
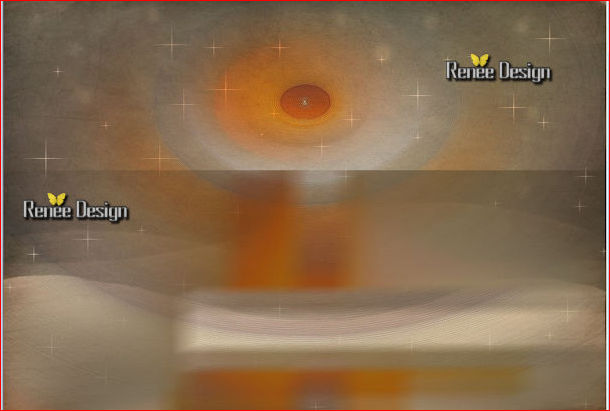
-The result
-
Activate top layer in the Layer palette
10.
Layers- New Raster Layer
11.
Selection - Load selection from disk and select
« hiver_select_1 »
12.
Activate Flood Fill Tool and fill the selection with the foreground color white
Selections- Deselect All
13.
Effects - Distortion Effects - Wind - From Left checked - Wind Strength: 65
14.
Layers- New Raster Layer
15.
Selection - Load selection from disk and select ‘’
hiver_select_2’’
16.
Activate Flood Fill Tool and fill the selection with the foreground color white (2 clicks)
Selections- Deselect All
17.
Open the tube ‘’hiver_image2 »
-Edit/ Copy-Edit - Paste as new layer on your working area (do not move it is in the right place)
18.
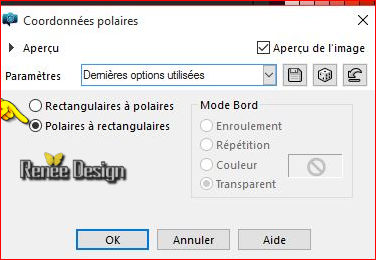
Effects - Distortion Effects - Polar Coordinates -Polar to Rectangular
19.
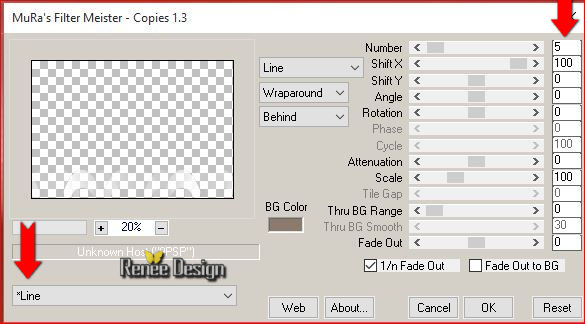
Effects- Plugins – Mura’s Meister – Copies use settings below
20.
Open the tube ‘’hiver_image3 »
-
Edit/ Copy-Edit - Paste as new layer on your working image
-
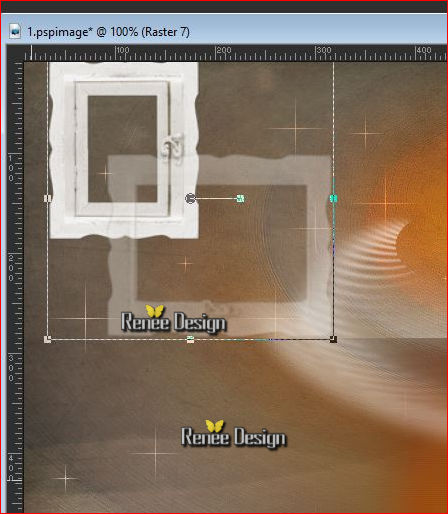
Activate Pick Tool (K) move it to the top left as shown in the example below
- (Hit the M key of your Keyboard to deselect the tool)
21.
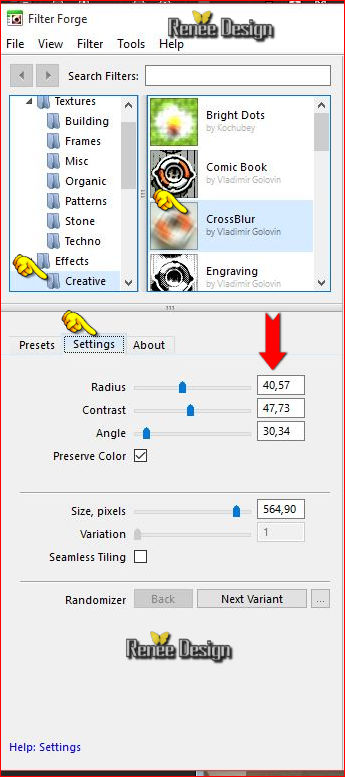
Effects- Plugins – Filtre Forge 2/ Cross Blur/
Creative
If the problem is in fact the case - 'effect-forging cross-blur / paste as a new layer
22.
Open the tube «
hiver_nuage »
-
Edit/ Copy-Edit - Paste as new layer on your working image
-
Put on the top right
23.
Layers- New Raster Layer
24.
Selection -(S) - Custom selection use settings below
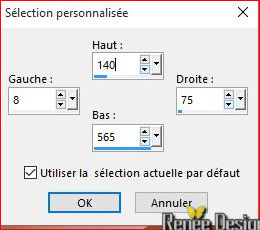
- Properties Forground; Set your Foregroundcolor to gradient and select« ES
Autumn 01 » - Put your foreground on the linear gradient with settings below
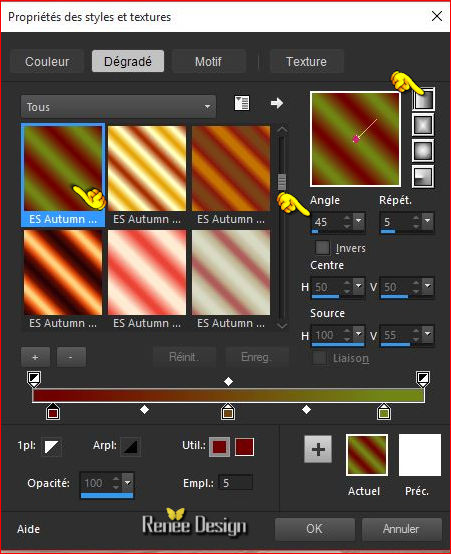
25.
Flood Fill Tool : Fill the selection with the gradient
Selections- Deselect All
26.
Adjust blur - Gaussian Blur: Radius 30
27.
Effects –Plugins- Unlimited - Tronds Filters II-
Schizofrenia use settings below
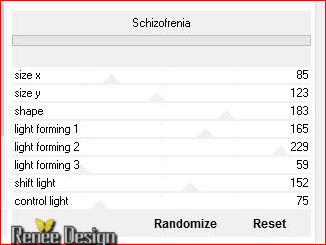
28. Double click on this Layer and set the Blend Mode to "Soft Light " Set the layer opacity of this layer to 81%
29.
Layers- Duplicate – Image Mirror
30. Open the tube’’ emeto_WM_tree’’
- Edit/ Copy-Edit - Paste as new layer on your working image
- Activate Move Tool (M) Place it in the bottom left
31. Effects- 3 D Effects- Drop Shadow with these settings: 1/1/50/40 white
-In the Layer -Palette -Make raster 2 active
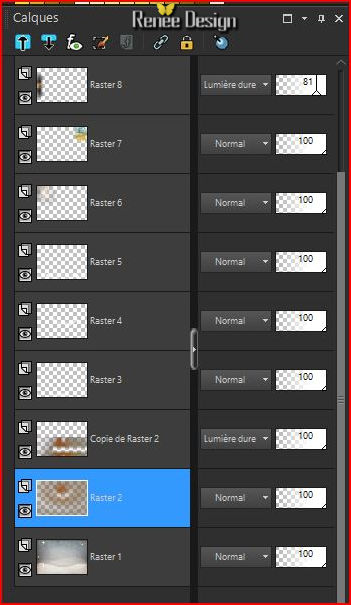
32. Layers- New Raster Layer
- Properties foreground: Close the gradient, set your foreground color to White
33. Activate Flood Fill Tool and fill the layer with the foreground color white
34. Layer - New mask layer from an image
- activate mask ‘’Narah_mask_0588’’
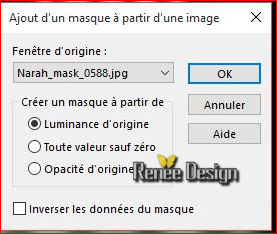
- Layers- Merge- Merge Group
35. Effects
–Plugins- Unlimited- Mirror rave – Quadrant Flip use settings below
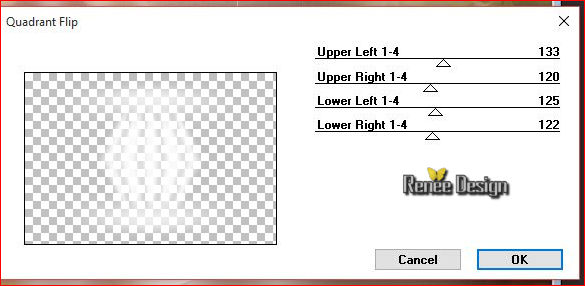
- Your Layer palette look like this now-You should have this result
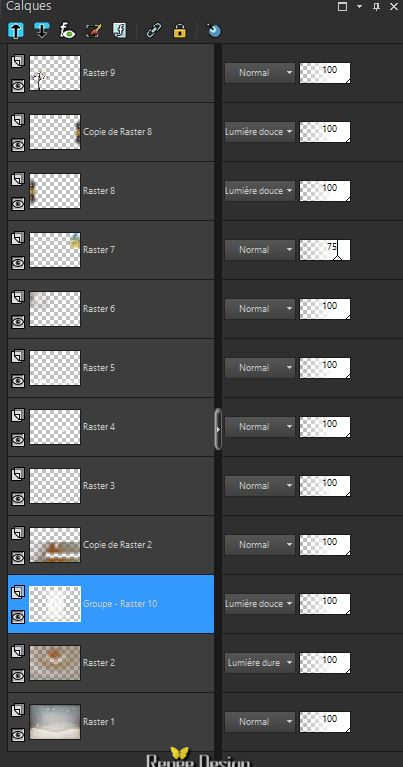 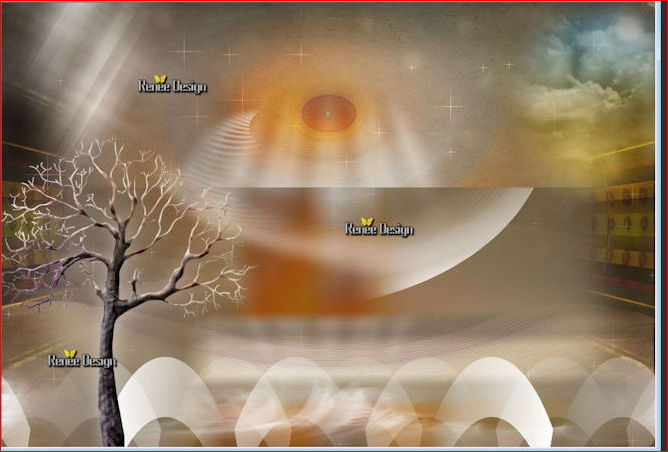
- Stay on this layer
36.
Selection -(S) - Custom selection use settings below
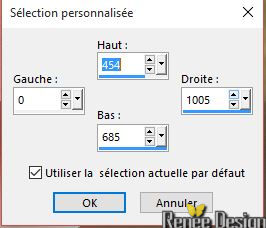
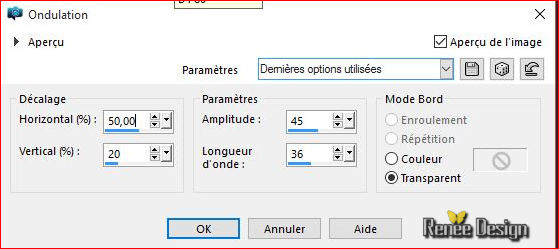
37. Effects - Distortion Effects - Ripple use settings below
38. Effects- 3 D Effects- Drop Shadow with these settings: 1/1/100/0 black
Selections- Deselect All
39. Double click and set the Blend Mode to "Soft Light "
- Activate top layer in the Layer palette
- Color Palette to foreground color #9a5510
40.
Layers- New Raster Layer
41. Selections –load/save selection –load selection from disc and select my selection:
’’hiver_select_3 »
42. Activate Flood Fill Tool and fill the selection with the foreground color (2
clicks)
Selections- Deselect All
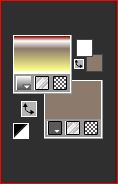
-Material Properties:Set your foreground color to: #fffffff - Set your background color to:#8c7a6c
- Properties Foreground; Set your Foregroundcolor to gradient and select’’@qua321’’/ Put your foreground on the linear gradient and configured like this
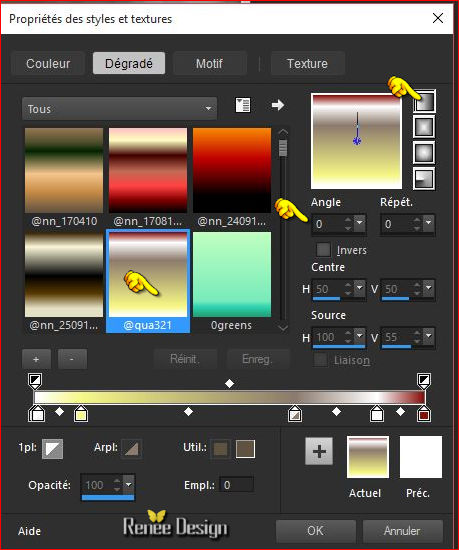 
43. Layers- New Raster Layer
44. Activate Flood Fill Tool and fill the selection with the gradient
45.
Effects –Plugins-Unlimited –ICNETFILTERS – Render - Color Clouds a
249
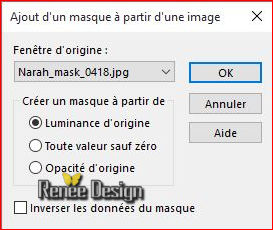
46. Layer - New mask layer from an image and activate Mask « Narah
_mask_0418 »
- Layers- Merge- Merge Group
47. Double click on this Layer and set the Blend Mode to "Screen "
48. Effects - Edge Effects - Enhance More
49. Open the tube « materiel_tuto_hiver_a_nos_portes ‘’
- Enable Layer 3 (image_1 / image_2 and image_3)
- Edit/ Copy-Edit - Paste as new layer on your working image
- Proper positioning (see end)
Do not close we still need lower
50.Open the tube ''Mira_MLC_Somnambulettes_MartineDelerm_09.pspimage’’
- Stand on the layer ‘’modifierpourletuto’’
- Edit/ Copy-Edit - Paste as new layer on your working image
51. Effects- Plugins –EyeCandy5-Impact –Perspective shadows
-tab Settings/User settings choose my preset:« Hiver_portes_persp1 »
52. Put the tube deco deco« materiel_tuto_hiver_a_nos_portes
‘’
- Activate the layer ‘’neige’’
- Edit/ Copy-Edit - Paste as new layer on your working image
- Place the top (see over)
53. Image - Add borders-Symmetric checked: 1 pixel #8c7a6c
54. Image - Add borders-Symmetric checked: 10 pixels white
55. Image - Add borders-Symmetric checked: 1 pixel en #8c7a6c
56. Image - Add borders-Symmetric checked: 60 pixels white
57. Activate magic wand and select the edge of 60 pixels
58. Layers- New Raster Layer
59. Turn the paint and fill the selection with the linear gradient / '@ qua321' same configuration
60. Effcts- Plugins – Mirror rave– Quadrant flip using the default settings
61.
Selection-Invert
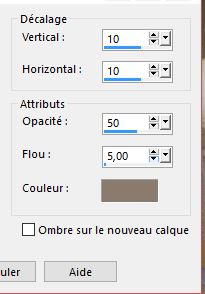
62. Effects - 3D Effects - Drop Shadow use settings below-Color #8C7A6C
63.
Selection - Modify - Expand by 30 pixels
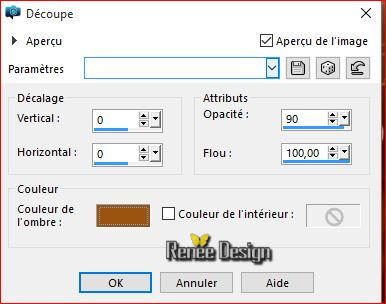
64. Effects - 3D Effects - Cutout / color #9a5510
65. Effects- 3 D Effects- Drop Shadow with these settings: 5/5/100/10 black
66. Repeat Drop Shadow negative-5/-5/100/10 black
Selections- Deselect All
67. Open the tube ‘’ hiver_nos_portes_deco_finale’’
- Edit/ Copy-Edit - Paste as new layer on your working image
-Activate Move Tool (M) move it to the left side
68. Layers- Duplicate / Image Mirror
69. Image - Add borders-Symmetric checked: 15 pixels white
70. Text Tool- With the handwriting font of your choice ( I have chosen Snow(NEIGE)Close foreground color and set the backgroundcolor to white
- Write the title '' Hiver est a nos portes '' Winter is at our doorstep "
71. Effects- 3 D Effects- Drop Shadow using the default settings
72. Layers Merge - Merge All
73. Image Resize a 999 pixels width.
Save as JPG

I hope you enjoyed this lesson
Renée
This lesson was written by Renée 22/11/2015
Edited and Update
2015
*
Any resemblance with an existing lesson is merely a coincidence *
* Don't forget to thank the people who work for us and with us. I named the tubeurs - Testers and the translators.
Thanks Renée.
| 
 Translations


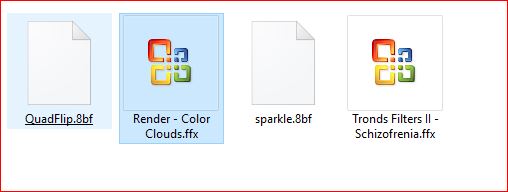
 When you see this logo the filter is imported in Unlimited


 All rights reserved