|
Let's start the lesson.
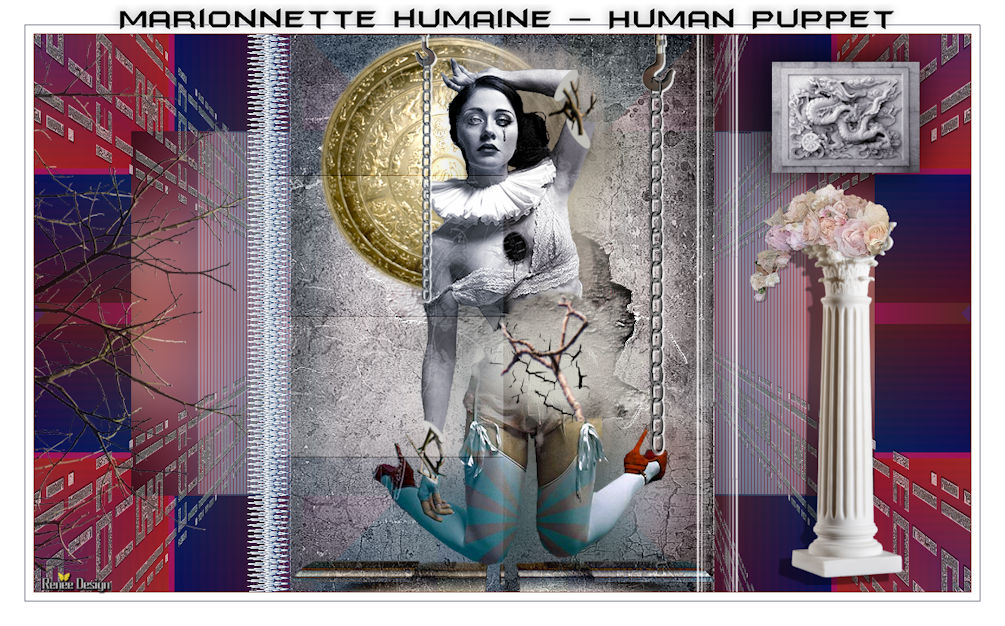
Marionnette
humaine – Human Puppet
-
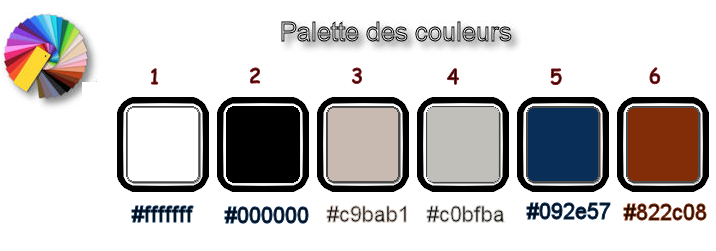
Preparation/ Material Properties: Set your foreground color to #ffffff- Set your background color to black
1.
Open the backgroundimage ‘’Fond_Human_Puppet –Window - Duplicate (or shift+D) - Close the original and proceed on the copy -Promote Background Layer =Raster 1
2.
Effects –Plugins –Mirror rave- Quadrant Flip using the default settings
3. Adjust- Blur- Gaussian Blur: Radius: 45
4.
Layers- Duplicate
5.
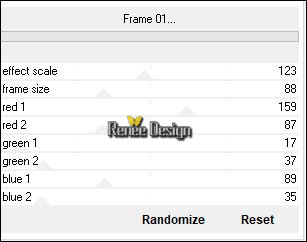
Effects –Plugins - Unlimited - Filter Factory Gallery P - Frame
01...
6.
Layers- Duplicate
7.
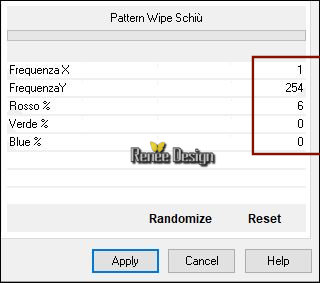
Effects –Plugins - Unlimited - Italian Editors Generatore - Pattern
Wipe Schiù
8. Image –
Resize to 65 % Resize all layers not checked
9.
Decrease the opacity of the layer to 28%
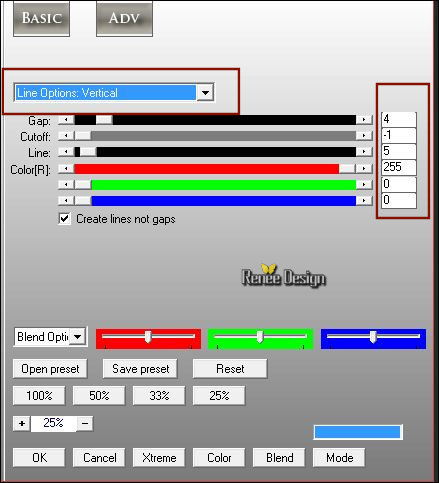
10. Effects
– Plugins – AP[Lines] Silverling use the settings below
11. Effects- Edge Effects- Enhance
12. Layers- Merge- Merge Down
13.
Selections –load/save selection –load selection from disc and select my selection:‘’ Human
Puppet_1’’
14.
Selections- Promote selection to Layer
15.
Effects –Plugins-Unlimited - Filter Factory Gallery R - Countdown..with these settings: 255/255
16.
Effects – Plugins –Transparency – Eliminate White
Selections- Deselect All
17.
Decrease the opacity of the layer to 26%
18.
Selections –Select All – Selections Float –
Selections Defloat
19. Layers- New Raster Layer
Set your foreground with the pattern and select ‘’Human Pupppet-Motif ‘’in your Psp
- with these settings
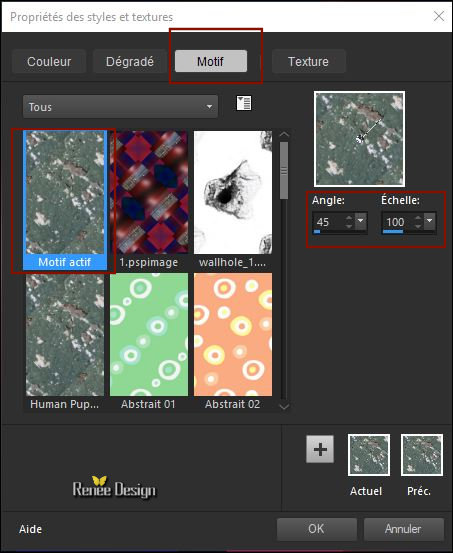
- Activate the Flood Fill Tool  fill the selection with that foreground pattern. fill the selection with that foreground pattern.
20. Effects- Edge Effects- Enhance More
Selections- Deselect All
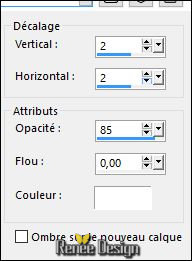
21. Effects
– 3D Effects – Drop Shadow : 2/2/80/2 black
22. Layers-Merge- Merge Down
23.
Decrease the opacity of the layer to 45%
24. Effects
–Plugins – Mirror Rave Quadrant Flip using the default settings 133/120/125/122
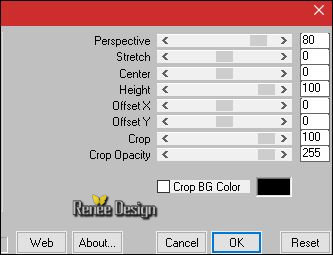
25. Effects
– Plugins – Mura’s Meister – Perspective Tilling
26. Image -Free
Rotate 90° right
27. Activate Pick Tool (K) - Apply the default setting ‘’ choose my Preset: Deformation_HumanPuppet and OK
- Manual settings-Hit the letter K (select)- Position X = 0 Position Y = -
240
28. Layers- Duplicate
29. Layers- Merge- Merge Down
- Layers- Duplicate
- Mirror Horizontal ( Image - Mirror in previous PSP Versions)
30. Layers- Merge- Merge Down
31.
Activate the tube ‘’Human_Puppet_Mur.png’’
- Edit - Copy- Activate your work -Edit - Paste as a new layer
- Do not move it is in the right place
32.
Decrease the opacity of the layer to 85%
33.
Activate the tube
‘’Human_Puppet_Fissure.png’’
- Edit - Copy- Activate your work -Edit - Paste as a new layer
- Do not move it is in the right place
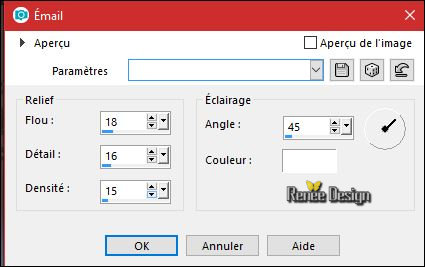
34. Effects
– User Defined Filter ‘’ Relief moyen_Tine’’
35.
Layers-Properties-Set the Blend Mode to" Luminance "
36.
Activate the tube ‘’ Renee_TUBE- Human
Puppet’’
-Edit - Copy- Activate your work -Edit - Paste as a new layer
37. Image
Resize to 75%
-
If necessary, adjust the placement of the tube if you use another one
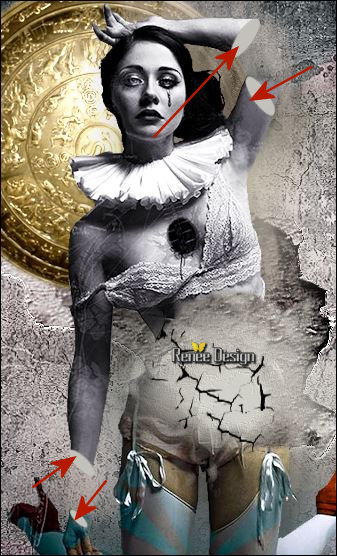
38. Activate lasso tool - point to point and trace the shape to cut
-Select a shape in his body and at the joints
Reduce the opacity of the layer to make it easier to see and track the cut as if the body were coming out of the crack of the wall
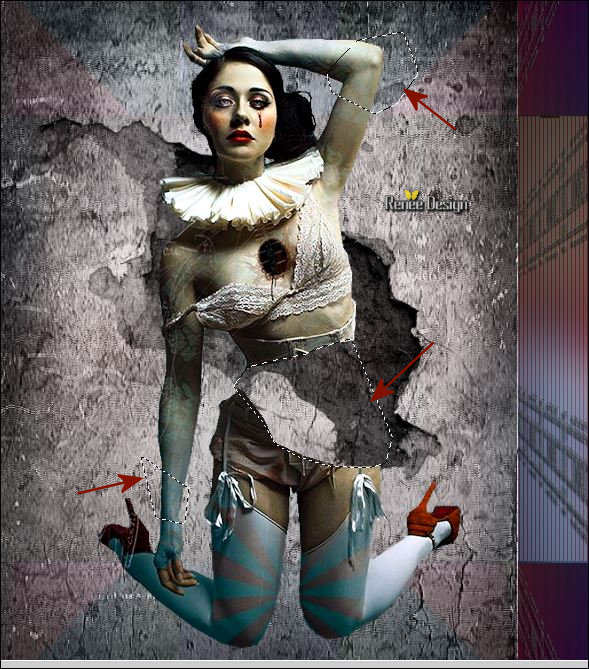
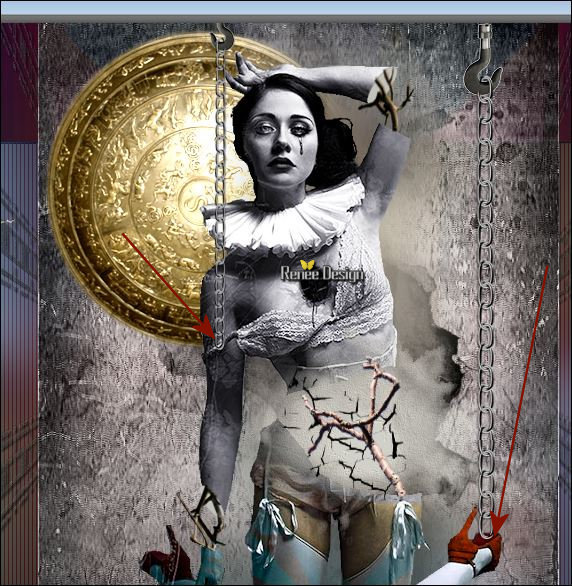
The Result 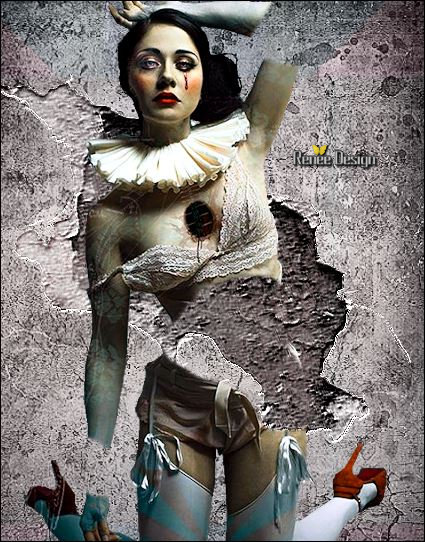
DELETE

Selections- Deselect All
39. Layers- Duplicate
40. Adjust- Blur- Gaussian Blur: Radius 30
- Move the tube slightly to the right
41. Layers- Arrange- Move Down
-Color Palette: Set your foreground color to #c9bab1
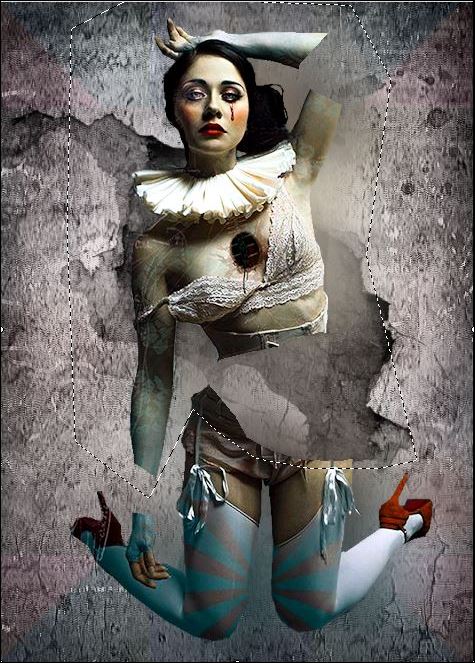
42. Activate Paint Brush-Shape Round use the settings below

In the Layer-Palette - Activate Copy of Raster 4
- Apply around the character and cuts of the arms slightly with the brush( to give a little more shade on the contours we have selected)
on the inside of the line as shown in the example 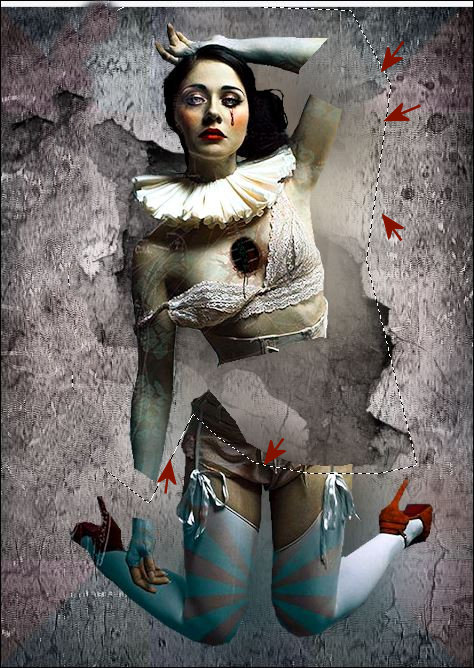
- To replace the top of the layer-Palette
43. Activate lasso tool - point to point
-
(with this selection we will colorize the tube to blend with the colors you have choosen)
44. Adjust- Hue and Saturation- Colorize
>>Teinte = 174 and Saturation 11
(By using this setting it will blend with the background color)
Selections- Deselect All
45. Activate the tube ‘’ Human_Puppet_Bouclier.png’’
- Edit - Copy- Activate your work -Edit - Paste as a new layer
- Move Tool (M) move it the right place ( see finished Image)
46.
Layers- Arrange- Move 2 x Down
47.
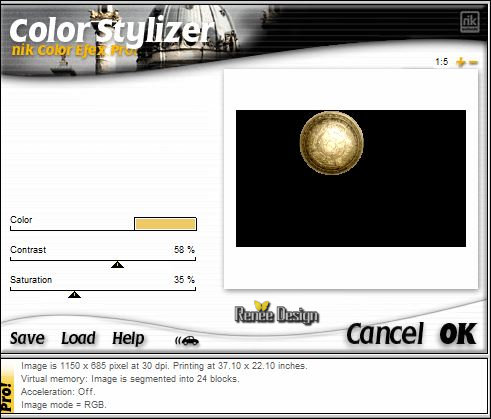
Effects – Plugins Modules- Nick Color Effex Pro 1– Color
Stylizer
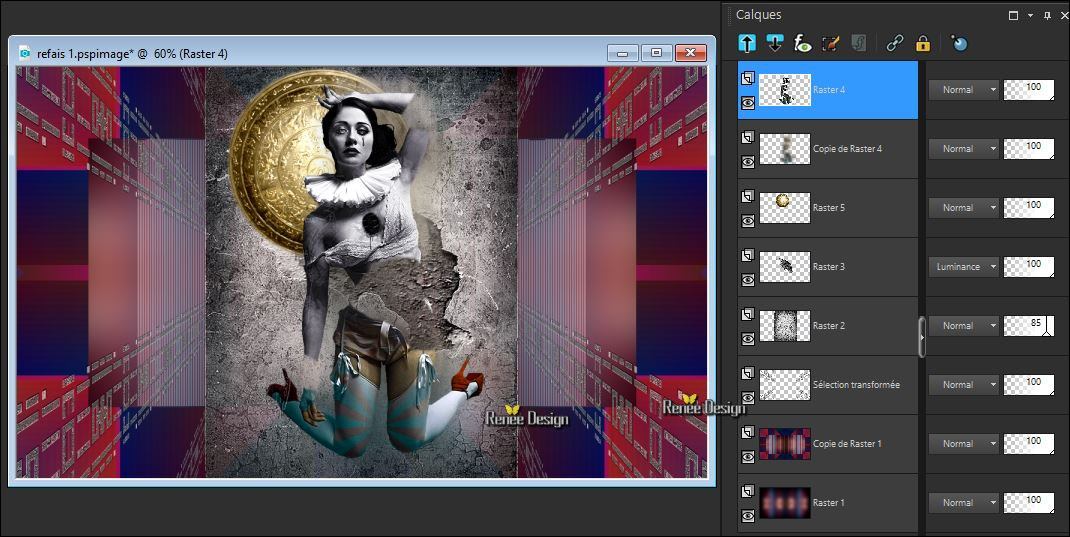
- To replace the top of the layer-Palette
- Your work and Layer Palette look like this now-You should have this result
-Color Palette: Set your foreground color to
#c0bfba
48. Layers- New Raster Layer
49.
Selections –load/save selection –load selection from disc and select my selection:‘’ Human
Puppet_2’’
50.
Activate the Flood Fill Tool fill the selection with the foreground color#c0bfba
51.
Effects – Artistic Effects – Enamel
Selections- Deselect All
52.
Layers- New Raster Layer
53. Selections –load/save selection –load selection from disc and select my selection:‘’ Human
Puppet_3’’
54.
Activate the Flood Fill Tool and fill the selection with the background color black
Selections- Deselect All
55.
Activate Ellipse Tool (Q) and trace small shapes to arm cuts
-
Select inside of the shape with the magic wand
DELETE
-
Activate the Flood Fill Tool and fill the selection with the foreground color (
If you use other colors, make sure that the colors harmonize with your tube!)
Selections- Deselect All
-
Activate Pick Tool (K) move it to its place (see finished image)
Do you have problems with this ? Image is included in the zipfile -Adapt it to your work and color if necessary
56. Activate the tube ‘’Branches ‘’ Select branches and adjust them to create the reconstruction for the connection of the arms and the body
57.
Activate the tube ‘’ Human_Puppet_Branches
verticales’’
-
Edit - Copy- Activate your work -Edit - Paste as a new layer
58.
Objet – Align -Left
59.
Decrease the opacity of the layer to 67%
60.
Activate the tubes ‘’ Human_Puppet_Crochet.png and
Human_Puppet_Chaine.png’’
-
Edit - Copy- Activate your work -Edit - Paste as a new layer
-
Move Tool (M) move it the right place ( see finished Image)
61.
Layers- Merge- Merge Down ( hook and chain
)
62.
Layers- Duplicate
- Mirror Horizontal ( Image - Mirror in previous PSP Versions)
-
Image Resize 65 % - Resize all layers not checked
-
Move as shown in the example below
63.
Effects – 3 D Effects –Drop Shadow on the 2 layers (2 chains)
64.
Activate the tube ‘’
Human_Puppet_colonne.png’’
-
Edit - Copy- Activate your work -Edit - Paste as a new layer
-Move Tool / place your tube at the bottom right
65.
Activate the tube ‘’ Human_Puppet_rose.png’’
-
Edit - Copy- Activate your work -Edit - Paste as a new layer
-
Move it on the column
-
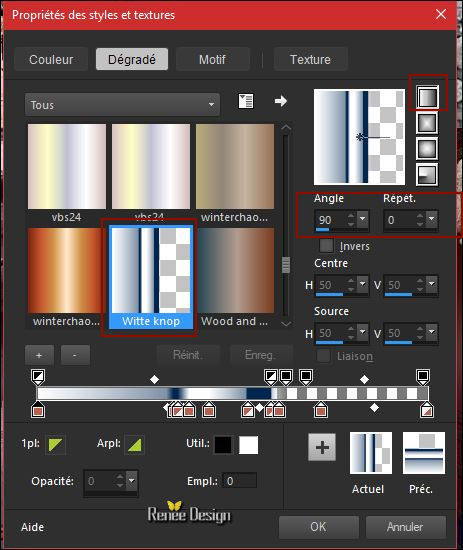
Color Palette: Set your foreground color to #092e57 =Nr5
-
Material Properties: Change material of the foreground into linear gradient and select my gradient ‘’Witte
knop.PspGradient’’
(Be careful, the foreground color determines the color of this gradient)
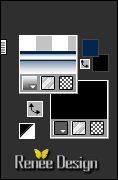
Material palette looks like this:
66.
Layers- New Raster Layer
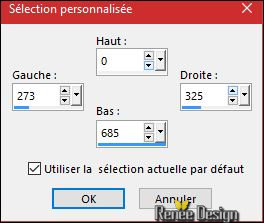
67.
Activate Selection Tool -Custom Selection (S) -Rectangle with these settings
68.
Activate the Flood Fill Tool and fill the selection with the gradient
Selections- Deselect All
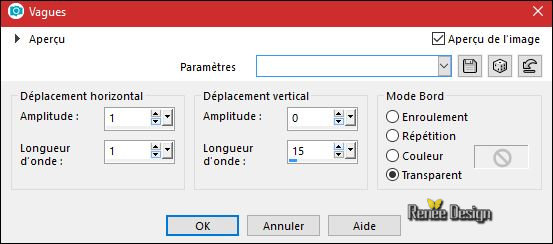
69.
Effects – Distortion Effect- Wave with these settings
70.
Layers- Duplicate
71.
Effects- Plugins – L & K’s – Jouri with these settings:
128/129/128
72.
Layers-Properties-Set the Blend Mode to " Soft Light "– Opacity
100
73.
Layers- New Raster Layer
74. Selections –load/save selection –load selection from disc and select my selection:‘’ Human
Puppet_4’’
75.
Properties foreground -Change the setting of the gradient Angle 0
-Activate the Flood Fill Tool and fill the selection with the gradient
Selections- Deselect All
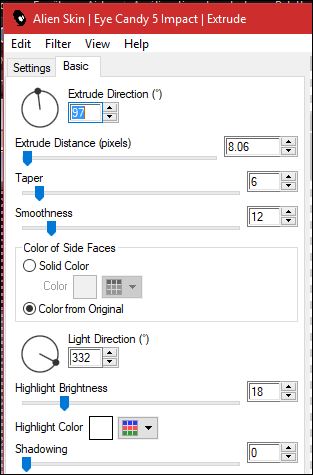
76.
Effects – Plugins – EyeCandy 5 Impact –
Extrude use the settings below
77.
Layers-Properties-Set the Blend Mode to" Difference"
78.
Layers- Merge- Merge Visible
79.
Layers- New Raster Layer
80. Selections –load/save selection –load selection from disc and select my selection:‘’ Human
Puppet_5’’
-
Color Palette: Set your foreground color to #ffffff
81.
Activate the Flood Fill Tool and fill the selection with #ffffff
Selections- Deselect All
-
Color Palette: Set your foreground color to #822c08 =Nr
6
82. Selections –load/save selection –load selection from disc and select my selection:‘’ Human
Puppet_6’’
83.
Activate the Flood Fill Tool and fill the selection with the foreground color #822c08
Selections- Deselect All
84.
Image - Add borders-Symmetric checked 1 pixel #822c08 = No
6
85.
Image - Add borders-Symmetric checked 10 pixels #ffffff
86.
Image - Add borders-Symmetric checked 1 pixel #092e57 =Nr
5
87.
Image - Add borders-Symmetric checked 30 pixels #ffffff
88. Open the tube ‘’Titre‘’ and paste as a new Layer and move/ or write your own text
89.
Layers- Merge- Merged All ( flatten)
90.
Image –Resize to 1005 Pixels width.
Save as JPG
I hope you enjoyed this lesson
Renée
This lesson was written by Renée 20 Januar 2018
Edited and Update
2018
*
Any resemblance with an existing lesson is a coincidence
* Do not forget to thank the people who work with us and for us I have appointed the tubeurs and translators
Thanks
*
| 
 Translations


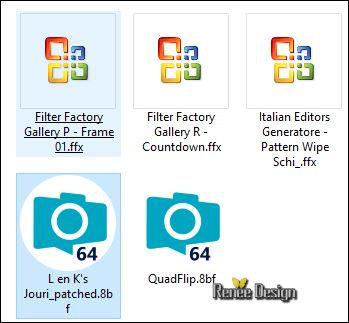


 If a plugin supplied appears with this icon it must necessarily be imported into Unlimited *