|
Let's start the lesson.
Indécise/Undecided
- Preparation
-
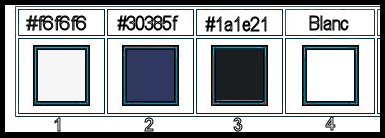
Color Palette: Set your Foreground color to color #f6f6f6=1 – Set your Background color to color #30385f= 2
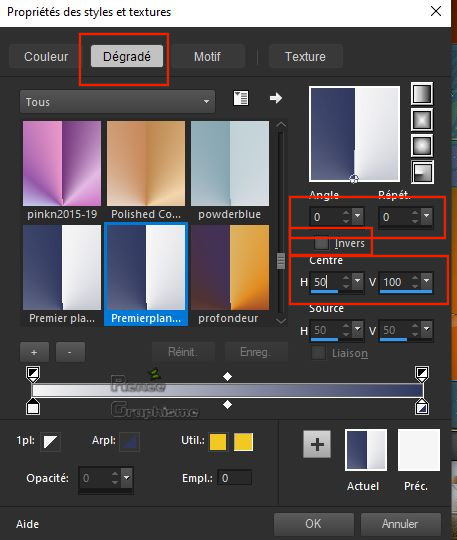
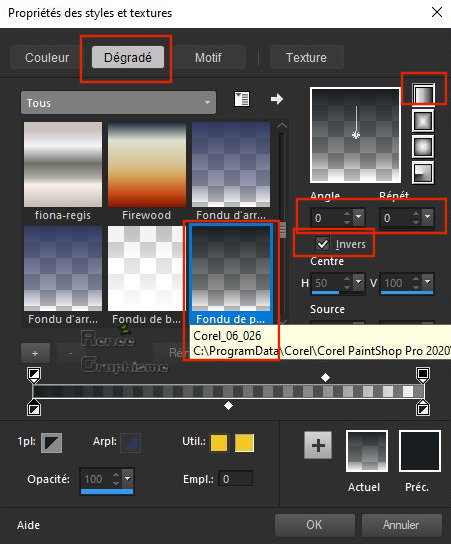
- Color Palette: Set your Foreground color to gradient- Prepare radial gradient configured like this.
1. File: Open a New Transparent Layer: 1000 x 600 Pixels
2. Flood Fill Tool
 –Flood fill the Layer with the gradient –Flood fill the Layer with the gradient
3. Effects –Plugins -
Unlimited 2.0 – Toadies – Weaver using the default settings : 59/48/222
4. Effects – Edge Effects
-Enhance
5. Effects – Reflection Effects- Rotating Mirror use the settings below

6. Effects –Plugins-
Unlimited 2.0 – Toadies – Weaver using the default settings
7. Effects –Plugins-
Unlimited 2.0- Simple – 4 Way average
8. Effects – Edge Effects- Enhance More
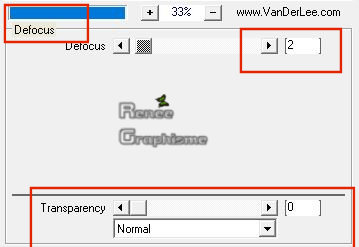
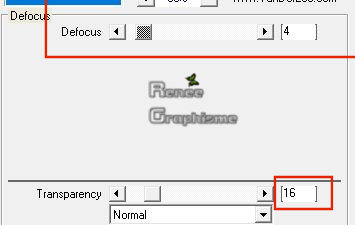
9. Effects – Plugins – Vanderlee Unplugged X- Defocus with thse settings
10. Layers - New Raster Layer
11. Flood Fill Tool
–
Fill the Layer with the gradient
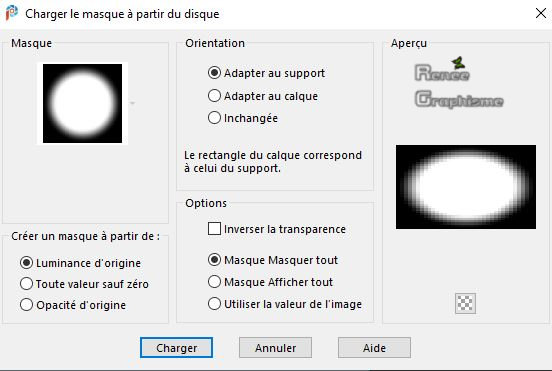
12. Layers - New Mask Layer - From Image -
‘’alenza_masque66’’
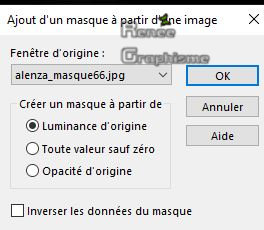
- Layers - Merge - Merge Group
13. Effects - 3D Effects - Drop Shadow with these settings: 2/2/25/15,85 Color Black
Color Palette - Change the Foreground Gradient back to Color #f6f6f6=1
14. Layers - New Raster Layer
15. Flood Fill Tool
-
Fill the Layer with the Foreground Color =1
16. Layers - New Mask Layer - From Image -
‘’Narh_Mask_0361’’

- Layers- Merge- Merge Group
17. Effects - 3D Effects - Drop Shadow -Same settings
Color Palette -Change the Foreground Color to #1a1e21 = 3
-Color Palette: Set your Foregroundcolor to Gradient and select "Fading Foreground "
-Prepare a linear gradient configured like this. (Corel_06_026)
18. Layers- New Raster Layer
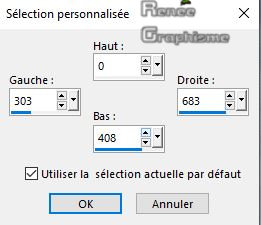
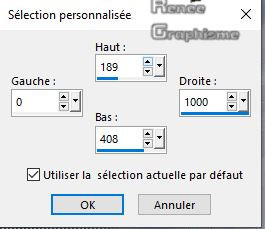
19. Activate Selection Tool -Custom Selection (S) -Rectangle with these settings

20. Flood Fill Tool
–
Fill the Selection with the Gradient
21. Effects –Plugins-
Unlimited 2.0 - VM Natural – Weave Distorsion use the settings below
22. Effects –Plugins-
Vanderlee Unplugged-X – Defocus use the settings below
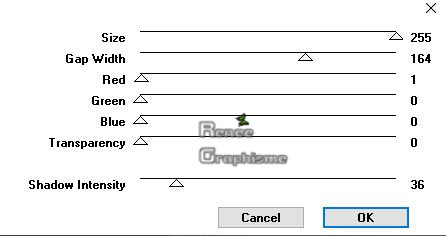
23. Effects – Plugins (or Unlimited )- AFS Import sqborder- Using the Default Settings :
141/34/215
Selections- Select None
24. Effects - Image Effects - Seamless Tiling-Side by Side
25. Layers-Properties-Change the Blend Mode to " Hard Light or Multiply " at your own discretion
26. Layers- Duplicate
27. Layers- Merge- Merge Down
28. Layers- Duplicate
29. Effects –Plugins- Mura’s
Meister – Perspective Tiling -Using the Default Settings
30. Effects – Image Effects - Offset with these settings: H = 0 and V = – 200
31. Activate Selection Tool -Custom Selection (S) -Rectangle with these settings
32. Adjust- Blur- Gaussian Blur: Radius 25
33. Effects –Plugins - AFS Import sqborder2-Using the Default Settings
34. Selections- Promote Selection To Layer
- Layer-Palette-Activate the Layer underneath
DELETE

- Layer-Palette-Activate the Layer above (Promoted Selection )
Selections- Select None
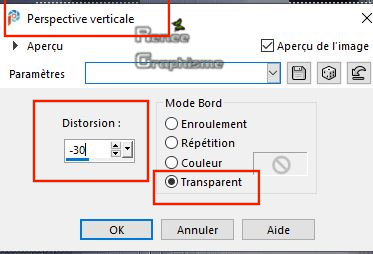
35. Effects –Geometric Effects -Perspective Vertical use the settings below
36. Effects- 3 D Effects- Drop Shadow with these settings : 1/1/100/2 -Color-Background Color
37. Layers- Arrange- Move Down
38. Layers-Properties-Change the Blend Mode to " Screen "
39. Objects – Align
- Bottom
-Your work and Layer Palette look like this now-You should have this result
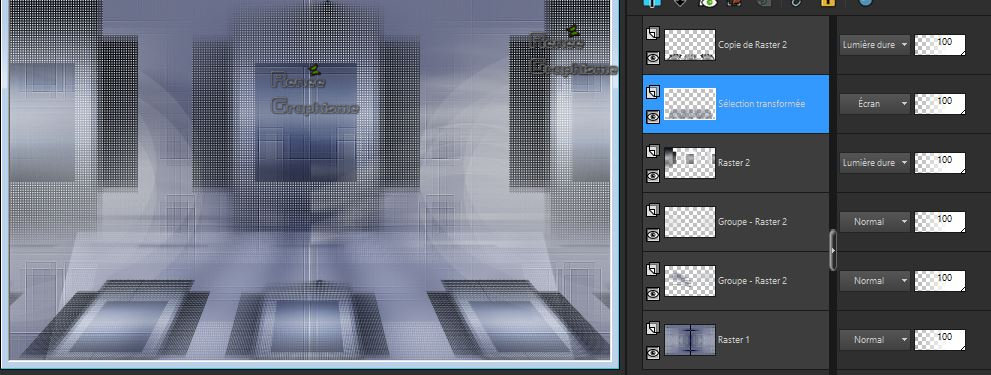
-To replace the top of the Layer-Palette
40. Open the tube
‘’ Renee_TUBES_-daark6rsh.pspimage’’
41. Image -
Resize with 80%
-Edit - Copy
On your work image: Edit - Paste As New Layer
42. Pick Tool: (K) on your keyboard -Enter these parameters for the X:91,00 and Y:7,00 positions on the Toolbar
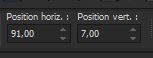
Press " M " to close the Pick Tool
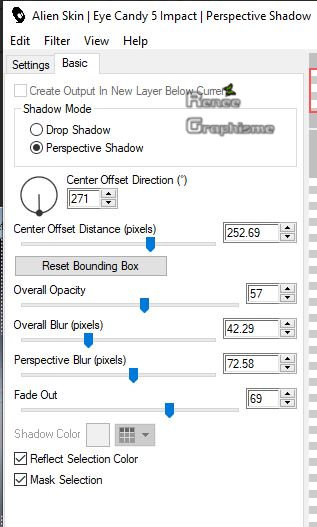
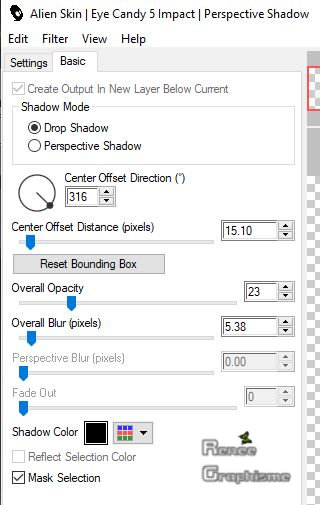
43. Effects – Plugins – Alien skin EyeCandy 5 Impact – Perspective
shadow-Settings Tab-User Setting and select my file- Preset : ‘’Indecise_Shadow 1’’
If the Preset isn't working for you, use these settings in the Basic Tab
44. Layers-Properties-Change the Blend Mode to " Overlay "
45. Layers- New Raster Layer
46.Color Palette: Change the Foreground Color to #ffffff
Flood Fill Tool
–Fill the Layer with #ffffff
47. Layers - New Mask Layer - From Image "Renee_Masque_Indecis.jpg"
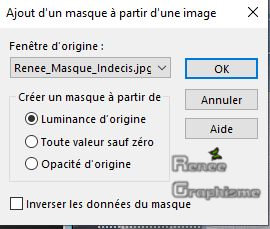
- Layers - Merge - Merge Group
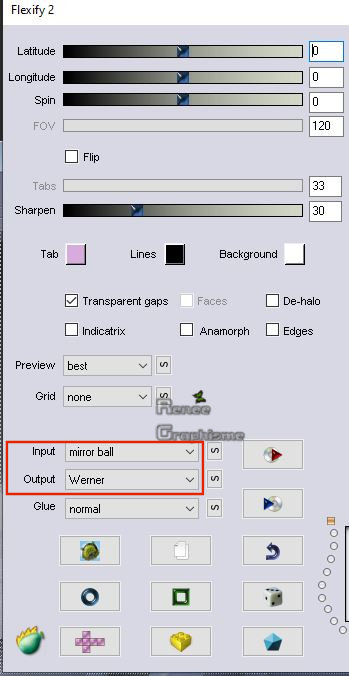
48. Effects –Plugins – Flaming Pear - Flexify 2 use the settings below
49. Effects –Distortion Effects-
Polar Coordinates-Rectangular to Polar -Transparent
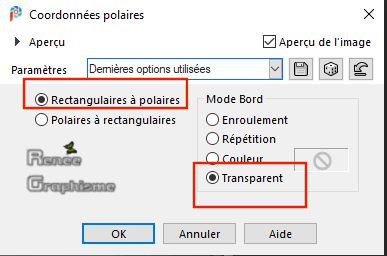
50. Repeat: Effects –Distortion Effects- Polar Coordinates-Same Settings
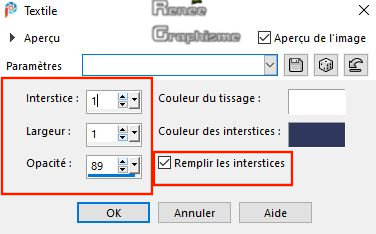
51. Effects – Texture Effects –Weave use the settings below (Color White and Background Color =2 )
52. Effects- Plugins– Alien skin EyeCandy 5 Impact – Perspective
shadow-Settings Tab-User Setting and select my file- Preset ‘’Indesise_Shadow 2’’
If the Preset isn't working for you, use these settings in the Basic Tab
53. Edit- Copy Special-Copy Merged
54. Edit- Paste as New Image
55. Image -
Resize with 60 % - Resize All Layers -Checked
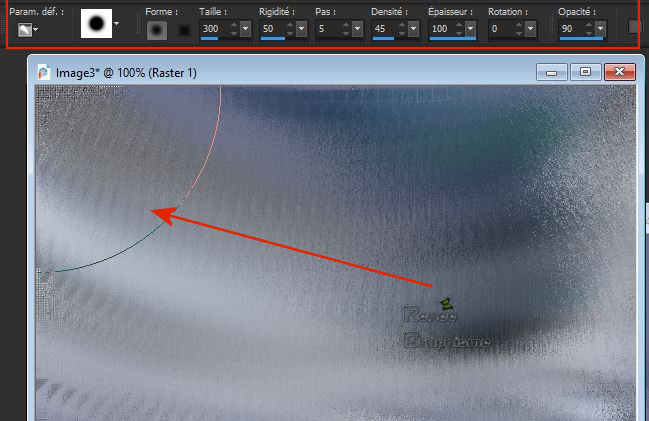
56. Activate- Smudge Brush
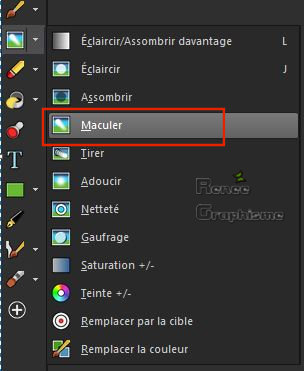
- Use the settings below
-
Start from the upper left corner and draw in a curve to the right up
For a similar result (no matter how different)
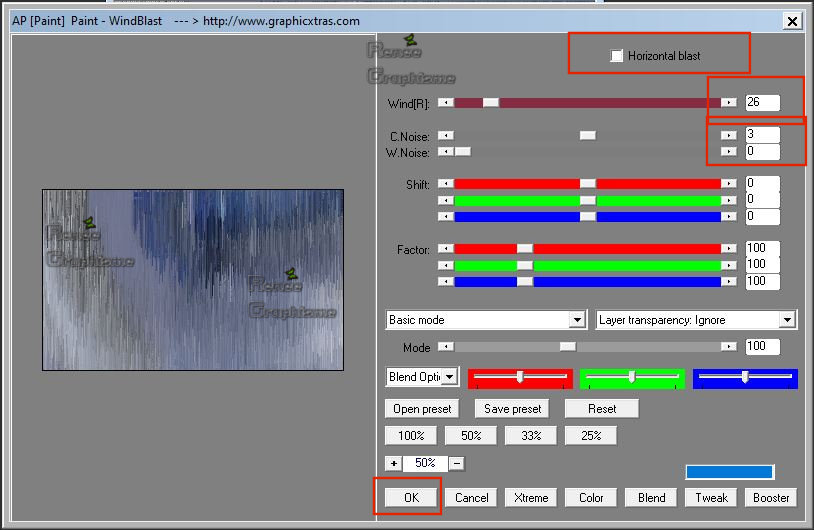
57. Effects – Plugins – AP [Paint] Paint – WindBlast use the Settings below (
older versions AP14 Motion – Paint WindBlast
58. Effects –Plugins– Graphic Plus – Emboss - with these settings: 63/25/0/0
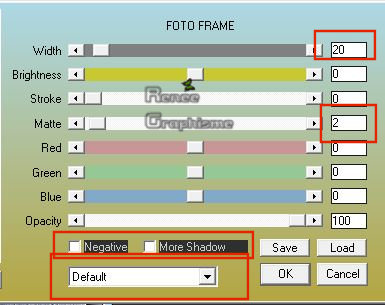
59. Effects – Plugins - AAA Frame – Foto Frame use the settings below
60.Open the tube ‘’Renee_TUBES_-daark6rsh.pspimage’’ -Edit - Copy
-On your work image: Edit - Paste As New Layer
- Do Not Resize !!
- Do Not Move !!
61. Selections - Load/Save - Load Selection From Disk ‘’ ETmask_re07’’
- Layers- Merge- Merge Group
62. Open the tube ‘texte-indecision and tube indecision ‘’ Edit - Copy -On your work image- Edit - Paste As New Layer
- Layers- Merge- Merge Visible
63. Image
Resize with 48% - Resize All Layers - Checked
64. Edit - Copy
-On your work image- Edit - Paste As New Layer
65. Pick Tool: (K) on your keyboard -Enter these parameters for the X:700,00 and Y:412,00 positions on the Toolbar
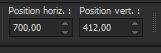
Press " M " to close the Pick Tool
66. Layers- Duplicate
67. Image
Resize with 65 % Resize All Layers -Not Checked
68. Pick Tool (K)
Enter these parameters for the X:740,00 and Y: 240,00 positions on the Toolbar
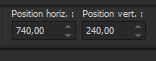
Press" M" to close the Pick Tool
69. Layers- Duplicate
70. Image
Resize with 65 % - Resize All Layers -Not Checked
71. Pick Tool (K)
Enter these parameters for the X:765,00 and Y:95,00 positions on the Toolbar
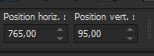
Press" M" to close the Pick Tool
72. Layers- Merged- Merged Down and Repeat 1x
73. Effects - 3D Effects - Drop Shadow with these settings: 8/12/60/4 Color White
74. Layers- New Raster Layer
75. Layers- Arrange- Move Down
76. Selections –load/save selection –load selection from disc and select my selection: ‘’ Indecise-1’’
77. Flood Fill Tool
–
Fill the Selection with #ffffff ( 3 or 4 clicks)
Selections- Select None
78. Open the tube
‘’ Renee_TUBES_448.png’’
-Edit - Copy
-On your work image: Edit - Paste As New Layer
79.
Pick Tool (K)
Enter these parameters for the X:-123,00 and Y:-56,00 positions on the Toolbar
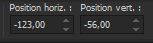
Press " M " to close the Pick Tool
80. Lower the Opacity to 83
81. Open the tube ’’l indecise.png’’
-Edit - Copy
-On your work image- Edit - Paste As New Layer and Move
82. Image - Add Borders - Symmetric - checked - 2 Pixels Color #ffffff
83. Edit- Copy !!
84. Selections –
Select All
85. Image - Add Borders - Symmetric - checked - 40 Pixels Color # 30385f= 2
86. Selections -
Invert
87. Edit -On your work image -Paste Into Selection
88. Adjust- Blur- Gaussian Blur: Radius 30
89. Effects –Plugins-
Unlimited 2.0 – Penta Com – Jeans 62/4
Selections- Select None
90. Image - Add Borders - Symmetric - checked - 1 Pixel Color # 30385f= 2
91. Image - Add Borders - Symmetric - checked - 30 Pixels Color #ffffff
92. Image -
Resize with 999 Pixels -Resize all Layers checked
Save as JPG
That's it !! You've done it !!
Renée
This lesson was written by Renée 9/09/ 2019
Edited and Update
2019
*
Any resemblance with an existing lesson is a coincidence
* Do not forget to thank the people who work with us and for us I have appointed the tubeurs and translators
Thanks
*
|


 Translations


 If a plugin supplied appears with this icon it must necessarily be imported into Unlimited *