|
Let's start the lesson
Worried
How troubling it is when you're not sure about your doubts, and you ask yourself: are they really doubts?
Nothing great can be achieved without imagination.
- Preparation
- Material Properties: Set your foreground color to color #c2f5c2= 1 – Set your background color to color #35514b = 2

1. Open the background image ‘’Fond-Inquietude’’-
Promote background layer = Raster 1
2. Layers- Duplicate
3. Effects - Plugins – VM Natural – Weave Distorsion use the settings below
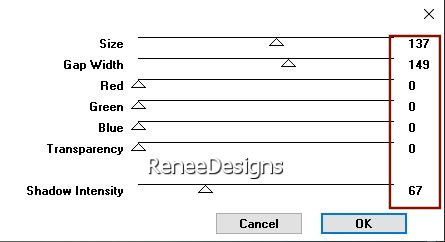
4. Effects – Plugins - L & K's – Palmyre using the default settings
5. Effects – Plugins – PluginsGalaxy – Grid -Bubble use the settings below
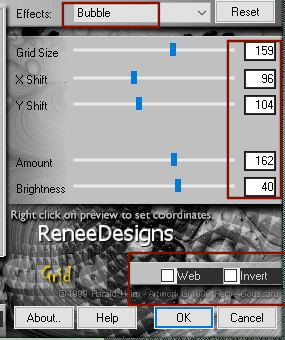
6. Adjust- One Step Photo Fix
7. Layers-Properties-Set the Blend Mode to Luminance (Legacy) -Reduce the opacity of this layer to 83%
8. Layers- New Raster Layer
9. Activate Selection Tool -Custom Selection (S) -Rectangle with these settings
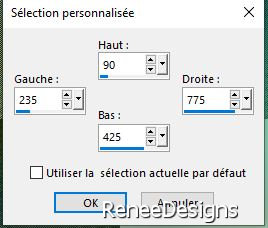
10.Material Properties: Set your foreground color to white
-Activate Flood Fill Tool  –
Opacity 30% – Flood fill the selection with the foreground color white –
Opacity 30% – Flood fill the selection with the foreground color white
11.Open the tube
‘’Renee-TUBES-Inquietude-Image 1’’ - Edit - Copy - Activate your work - Edit - Paste into selection
12. Effects – Plugins – FM TileTools – Saturation Emboss using the default settings
13. Effects – Plugins – AAA Frame – Foto Frame use the settings below
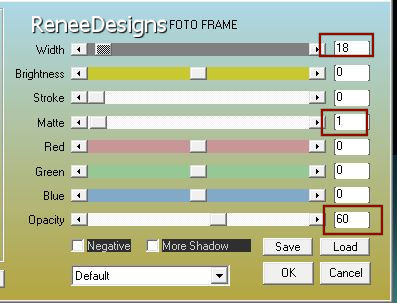
- Edit-Repeat-Foto Frame
14. Effects – 3D-Effects-Drop Shadow with these settings-Color #c2f5c2
Shadow on new layer checked!!
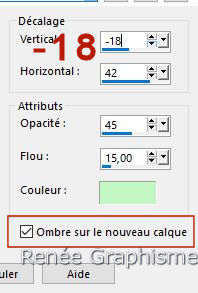

On the shadow layer
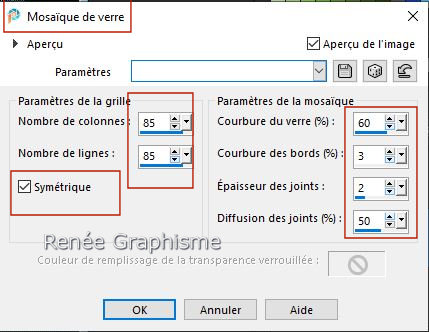
15. Effects – Texture Effects - Mosaic Glass with these settings
16. Effects- User Defined Filter –
Emboss 3 default
- Activate Raster 1 in the Layers palette
17. Layers- Duplicate
(rename this layer Copy of Raster 1 bis)
18. Effects - Plugins - Filters in Unlimited 2.0 - Mock – Window using the default settings
19. Effects - Plugins - Filters in Unlimited 2.0 - Mock - Mosaic : 55
20. Effects – Edge- Effects- Enhance
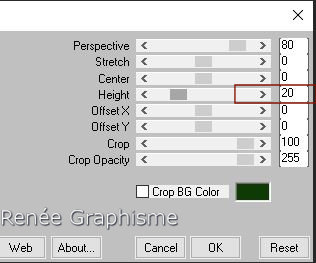
21. Effects – Plugins – Mura’s Meister – Perspective Tiling use the settings below
- Activate Raster 1 in the Layers palette
22. Selections –load/save selection –load selection from disc and select my selection: ‘’Inquietude-1’’
23. Selections- Promote selection to layer
24. Layers- Arrange- Bring to Top
25. Effects – Plugins – Carolaine & Sensibility – CS-HLines with these settings: 6/32/32
26. Layers- New Raster Layer
27. Effects – 3D-Effects- Cutout-use the settings below
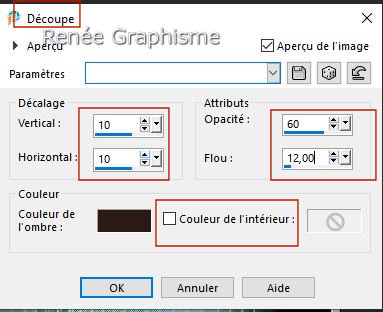
- Repeat: Effects – 3D-Effects- Cutout with these settings
-10/ -10
28. Layers- Merge- Merge Down
29. Effects – 3D-Effects-Drop Shadow with these settings: 0/0 /75 /30 Color Black (
uncheck shadow on new layer)
Do not deselect
30. Effects – Distortion Effects– Wind-Wind direction from right-Wind strength 100
-Repeat: Effects- Distortion Effects– Wind-Wind direction from left-Wind strength 100
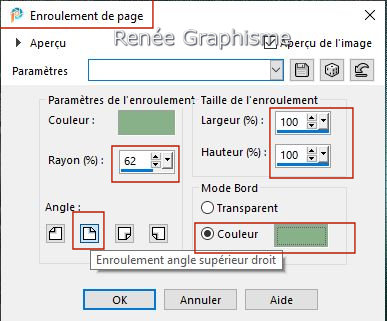
31. Effects – Image Effects– Page Curl – Color No. 4

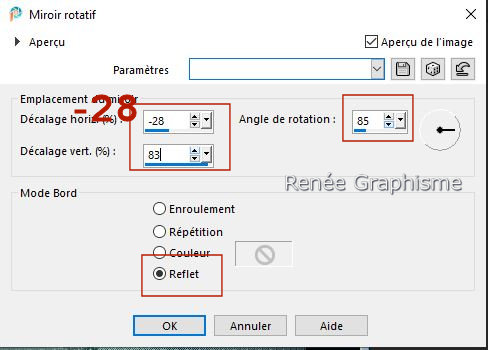
32. Effects – Reflection Effects - Rotating Mirror-use the settings below
33. Activate tube ‘’ Renee-TUBES-Inquietude-TEXTE’’ - Edit - Copy- Activate your work -Edit - Paste as new layer
- Place at top left ( see finished image)
- Activate the Copy of Raster 1 in the Layers palette.
34. Effects – Plugins - Innovations 1.5 - Wave City
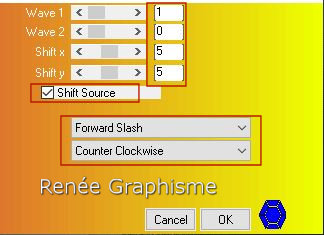
35. Effects – Plugins – Simple – Blintz
36. Layers- Arrange- Move Down
37. Effects - Plugins - Filters in Unlimited 2.0 - &<Background
Designers IV> - @Night Shadow Pool using the default settings
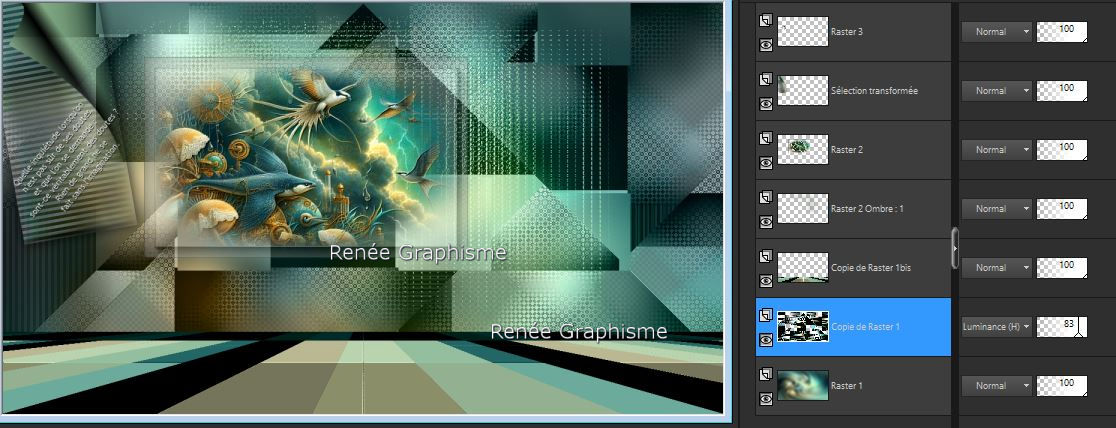
- You should get the result shown in the print screen below
-Activate the top of the Layers palette
38. Layers- New Raster Layer
39. Selections –load/save selection –load selection from disc and select my selection: ‘’Inquietude-2’’
40. Activate Flood Fill Tool
 –
Opacity 100% –
Flood fill the selection with the foreground color white –
Opacity 100% –
Flood fill the selection with the foreground color white

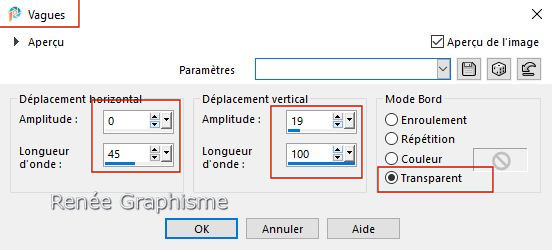
41. Effects- Distortion Effects- Wave use the settings below
42. Effects – Plugins – Toadies – What are you: 0 /31
43. Effects – Plugins – Simple – Pizza Slice Mirror
- Edit-Repeat Pizza Slice Mirror
44. Selections –load/save selection –load selection from disc and select my selection: ‘’Inquietude-3’’


45. Effects - Plugins - Filters in Unlimited 2.0 - &<Sandflower
Specials°v° > - Color Boosterz at 202
(
(If the step above does not work, you will find an image in the folder
(effet ligne 45- Color Boostez ) Paste this image into a new layer instead of raster 4)
46. Effects – 3D-Effects-Drop Shadow with these settings: 12 / -15
/ 72/ 3 Color Black
- Repeat- Effects – 3D-Effects-Drop Shadow with these settings:
-12 /15 /72/3 Color Black
47. Layers- Duplicate
48. Effects – Geometric Effects-Circle – Transparent checked
49. Layers- Duplicate
50. Layers- Merge- Merge Down
51. Layers- New Raster Layer
52. Activate Flood Fill Tool
 –
Flood fill the layer with the foreground color white –
Flood fill the layer with the foreground color white
53. Layers - New mask layer - From image and select mask: ‘’Renee-Masque-
Inquietude’’
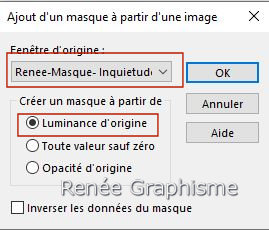
- Layers- Merge- Merge Group
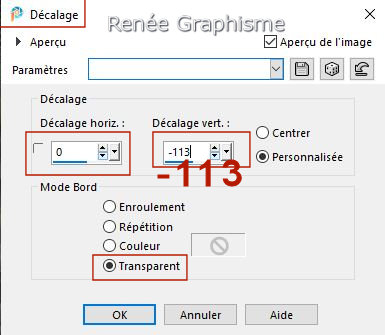
54. Effects – Image Effects- Offset use the settings below
55. Effects – Edge- Effects- Enhance
56. Activate tube ‘’Renee-TUBES-Inquietude-Image 2’’ - Edit - Copy- Activate your work -Edit - Paste as new layer
57. Objects – Align- Top
58. Reduce the opacity of this layer to 71%
59. Activate the tube ‘’
Renee-TUBES-Inquietude-Image 3’’
-Image- Resize to 75%.
- Edit - Copy- Activate your work -Edit - Paste as new layer
60. Pick Tool: (K) on your keyboard -Enter these parameters on the toolbar
 777
/ 193 777
/ 193
- Press the ( M ) button to close the tool.
61.Activate tube ‘’Renee-TUBES-Inquietude-Ampoule’’ - Edit - Copy- Activate your work -Edit - Paste as new layer
- Place of your choice
62. Image - Add Borders-Symmetric checked: 1 Pixel -Color No. 2
- Image - Add Borders-Symmetric checked: 20 Pixel -Color white
63. Selections- Select All
-Image - Add Borders-Symmetric checked: 2 Pixels - Color No. 1
-Image - Add Borders-Symmetric checked: 35 Pixels - Color white
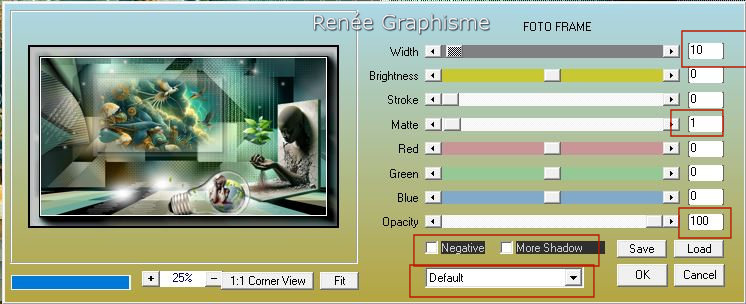
64. Effects – Plugins – AAA Frame - Foto Frame with these settings
65. Selections - Invert
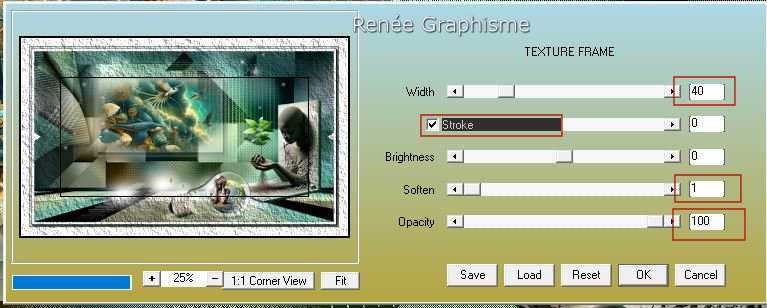
66. Effects – Plugins – AAA Frame - Texture Frame with these settings

67. Activate any tube - Change the size if necessary
- I opted for ‘’
Renee-TUBES-Inquietude-Image 4’’
- Image-Resize at 72%
- Edit - Copy- Activate your work -Edit - Paste as new layer
Place the tube wherever you want
68. Add the author's watermark to your work and your own watermark
69. Layers- Merge- Merge All (flatten)
70. Layers - Resize to 1005 pixel width -Resize all layers checked
71. Writing the title ''L'inquiétude'' is not mandatory.
Save as JPG
********
I hope you enjoyed this lesson
Renée
This lesson was written by Renée 08/11/2024
Edited and Update
in 2024
*
* Any resemblance to an existing lesson is purely coincidental.
* Don't forget to thank the people who work with us and for us - the testers and translators
Thanks
*
|


