|
Let's start the lesson
Joyeuses
– Pâques/Happy Easter 2025

Preparation
-Material Properties: Set the foreground color to color number 1-Set the background color to color number 2

1. File-Open a new transparent image in this format : 1000
x 600 Pixels
2. Effects-Plugins – Medhi – Wavy Lab 1 use the settings below
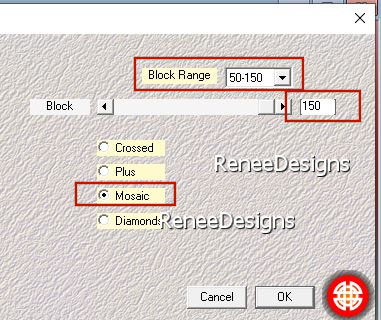
3. Effects-Plugins – Medhi – Sorting Tiles use the settings below
4. Layers – Duplicate
5. Effects-Plugins – Medhi – Sorting Tiles use the settings below

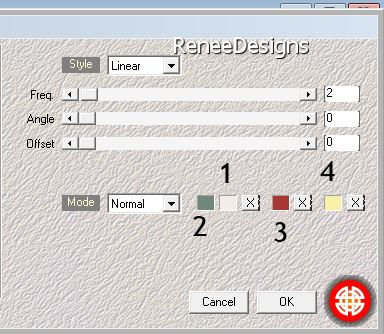
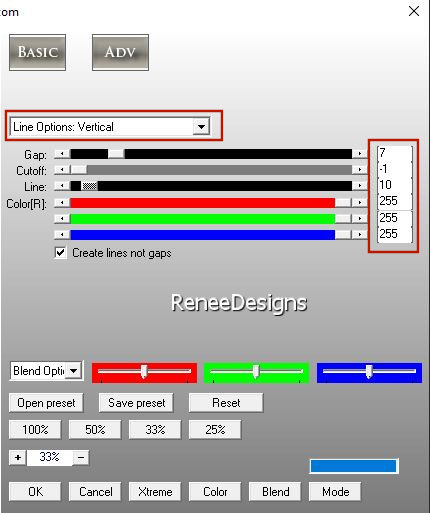
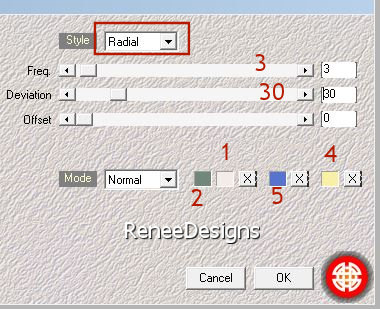
6. Effects - Plugins- AP[Lines] Lines – Silverlining use the settings below
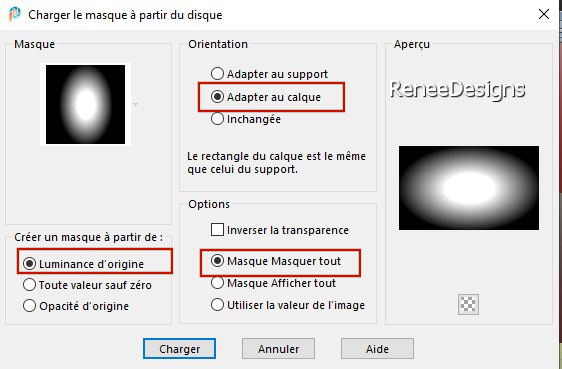
7. Layers-Load/Save Mask-Load mask from Disk and select ‘’Masque-20/20’’
- Layers-Duplicate
- Layers-Merge-Merge Group
8. Effects-Edge Effects-Enhance More
9. Effects-Plugins– VM Natural – Weave Distorsion use the settings below
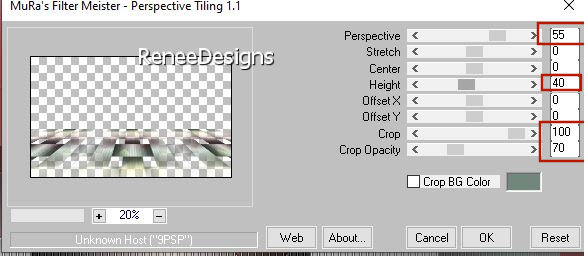
10. Effects-Plugins – Mura’s Meister – Perspective Tiling use the settings below
11. Effects-Image Effects-Offset use the settings below

12. Layers-Duplicate
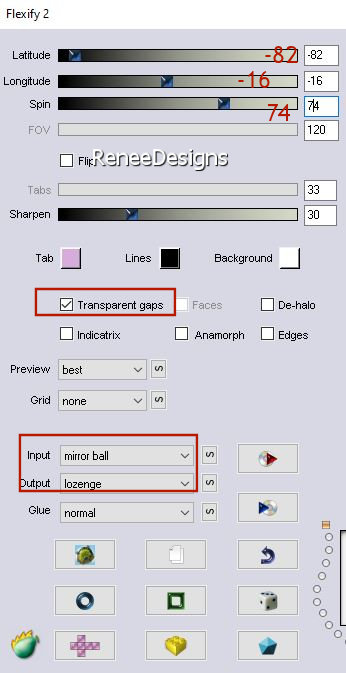
13. Effects-Plugins – Flaming Pear – Flexify 2 (Input-Mirror ball -Output Lozenge) use the settings below
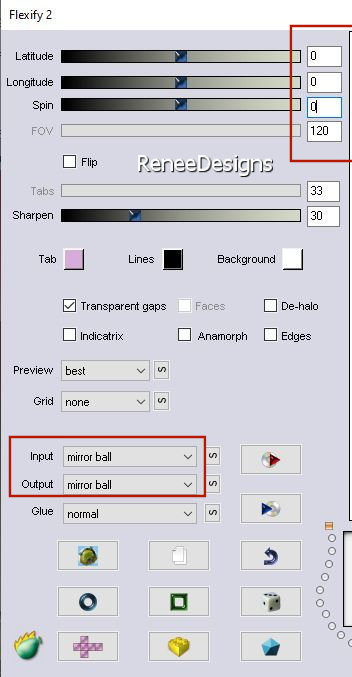
14. Effects-Plugins – Flaming Pear – Flexify 2 (In and Output Mirror ball)use the settings below
15. Image - Resize - to 60% - Resize all layers-not checked
16. Pick Tool: (K) on your keyboard -Enter these parameters on the toolbar
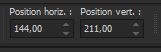 144
/ 211 144
/ 211
- Press the ( M ) button to close the tool.
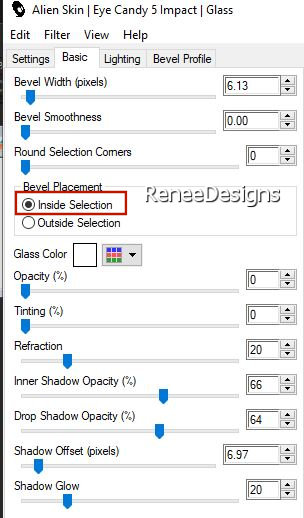
17. Effects-Plugins- Alien Skin EyeCandy 5 - Impact -Tab-Settings-User Settings and choose my file -Preset :‘’Paques-2025-ReneeGlass’’
- Activate the bottom of the layer palette (Raster 1)
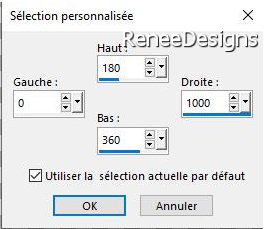
18. Activate Selection Tool -Custom Selection (S) -Rectangle with these settings

19. Selections- Promote Selection to Layer
20. Adjust- Blur- Gaussian Blur -Radius 20%
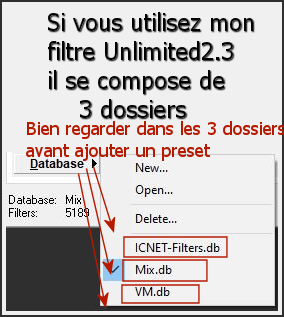
21. Effects-Plugins - Filters - Unlimited 2.0 -
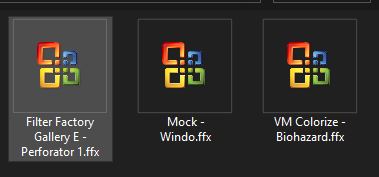
VM Colorize – Biohazard -Using the default settings

22. Effects- 3D- Effects- Drop Shadow with these settings: 0/0/80/25 Color black
23. Layers-Properties-Set the Blend Mode to Soft Light
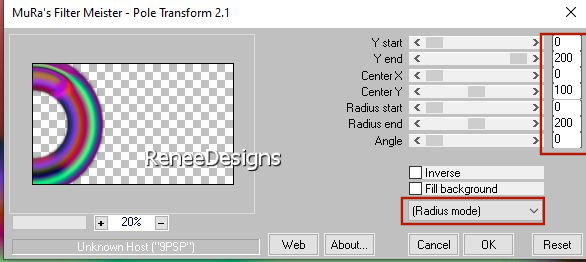
24. Effects-Plugins – Mura’s Filter Meister- Pole Transform 2.1 use the settings below
25. Layers-Duplicate
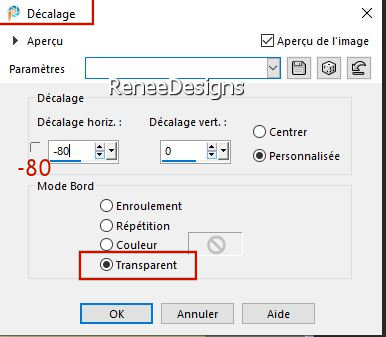
26. Effects-Image Effects-Offset use the settings below
27. Layers-Properties-Set the Blend Mode to " Hard Light " -Reduce the opacity of this layer to 85%
- Activate the bottom of the layer palette (Raster 1)
28. Layers- New Raster Layer
29. Selections - Load - Save a selection from disk - Load selection ‘’ Joyeuses–Pâques 2025-1’’
30. Material Properties: Set your foreground color to color white
Flood Fill Tool-Fill the selection with color white (3 to 4 clicks)
31. Effects - Distortion Effects - Wind - From Right checked - Wind Strength:100
- Repeat: Wind - From Left checked - Wind Strength: 100
32. Layers-Properties-Set the Blend Mode to Screen
- Activate the bottom of the layer palette (Raster 1)
- Material Properties: Set the foreground color to color number 1-Set the background color to color number 2
33. Layers- New Raster Layer
34.
Effects-Plugins – Medhi – Wavy
Lab 1 use the settings below
35. Adjust- Blur- Gaussian Blur -Radius 25
33. Effects-Plugins- Filters in Unlimited 2.0 – Mock – Windo- Using the default settings
36. Effects-Plugins– Toadies – What are you : 20 /20
37. Effects-Plugins- Filters in Unlimited 2.0 - Filter Factory
Gallery E - Perforator 1...Using the default settings
38. Effects-Plugins– VM Toolbox – Instant Tile: 224/115
39. Effects-Geometric Effects-Spherize use the settings below
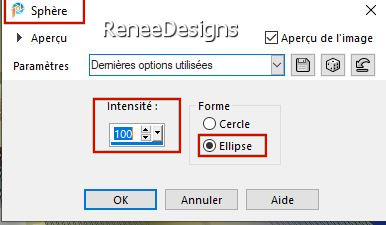
- Repeat but
Intensité = -
100
40. Effects-Edge Effects-Enhance More
41.
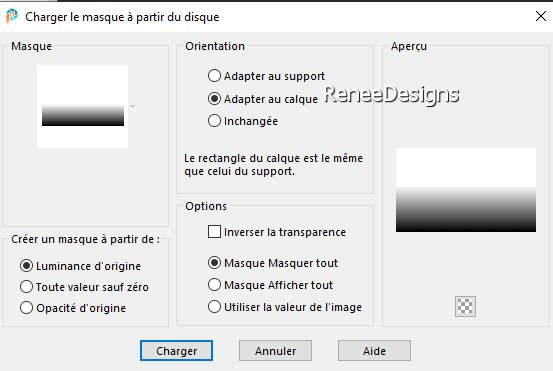
Layers-Load/Save Mask-Load mask from Disk and select ‘’gradientedworisch’’
- Layers-Merge-Merge Group
42. Selections - Load - Save a selection from disk - Load selection and select ‘’ Joyeuses–Pâques 2025-2’’
43. Selections- Promote Selection to Layer
44. Layers-Arrange-Bring to Top
45. Effects-Plugins- Filters in Unlimited 2.0 - Sapphire Filters 03
- SapphirePlugin_0268...Using the default settings
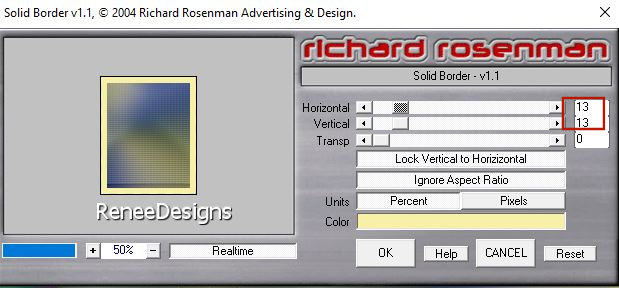
46. Effects-Plugins – Richard Rosenman – Solid Border-v.1 – Color number
4
47. Selections- Modify-Contract 20 Pixels
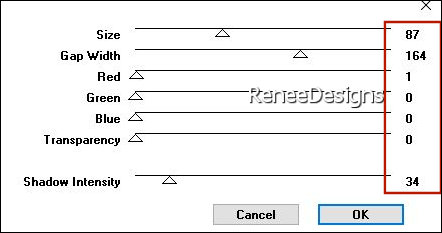
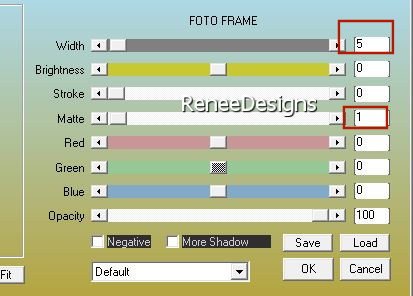
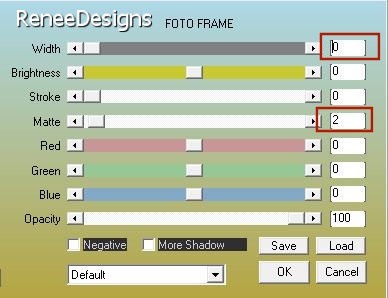
48. Effects-Plugins – AAA Frame – Foto Frame use the settings below
49. Effects- 3D-Effects- Drop Shadow with these settings: 0 / 0 / 80 /35 Color black
50. Layers- New Raster Layer
51.
Selections - Load - Save a selection from disk - Load selection and select ‘’
Joyeuses–Pâques 2025-3’’
52. Activate tube ‘’ Renee-TUBES-Paques-2025-1’’ - Edit - Copy- Activate your work -Edit - Paste into selection
53. Activate tube Renee-
‘’TUBES-Paques-2025-2’’
-Image - Resize to 55%.
- Edit - Copy- Activate your work -Edit - Paste as new layer
- Place under the frame ( see finished image)
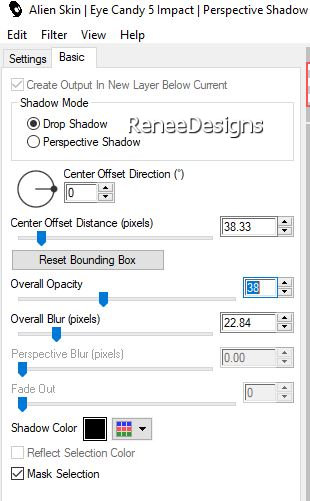
54. Effects-Plugins- Alien Skin EyeCandy 5 – Impact – Perspective
Shadow use the settings below
55. Activate tube ‘’ Joyeuses–Pâques 2025-4’’ - Edit - Copy- Activate your work -Edit - Paste as new layer
- Place on the strings at the top of the tube ( see finished image)
56. Activate tube ‘’Joyeuses–Pâques 2025-3’’
-Edit - Copy- Activate your work -Edit - Paste as new layer
57. Pick Tool: (K) on your keyboard -Enter these parameters on the toolbar
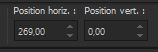 269/ 0
- Press the ( M ) button to close the tool.
58. Layers-Properties-Set the Blend Mode to Overlay -Reduce the opacity of this layer to 69%
59. Activate tube
‘’Joyeuses –Pâques 2025-5’’ - Edit - Copy- Activate your work -Edit - Paste as new layer
60. Pick Tool: (K) on your keyboard -Enter these parameters on the toolbar
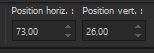 73
/26 73
/26
- Press the ( M ) button to close the tool.
61. Layers- New Raster Layer
62. Selections - Load - Save a selection from disk - Load selection and select ‘’ Joyeuses–Pâques 2025-4’’
63.Flood Fill Tool
 –
Opacity 50% –
Fill the selection with color number 1 (reset paint pot opacity to 100 %) –
Opacity 50% –
Fill the selection with color number 1 (reset paint pot opacity to 100 %)
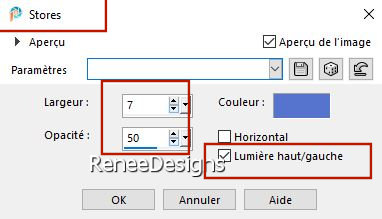
64. Effects-Texture Effects- Blinds – Color 5
65. Effects-Plugins – AAA Frame – Foto Frame use the settings below
66. Selections- Modify-Contract 10 Pixels
67. Effects-Plugins – AAA Frame – Foto Frame same settings
68. Activate tube ‘’Renee-TUBES-Paques-2025-6.’’ - Edit - Copy- Activate your work -Edit - Paste into selection
70. Activate tube ‘’Renee-TUBES-Paques-2025-7.’’ - Edit - Copy- Activate your work -Edit - Paste as new layer
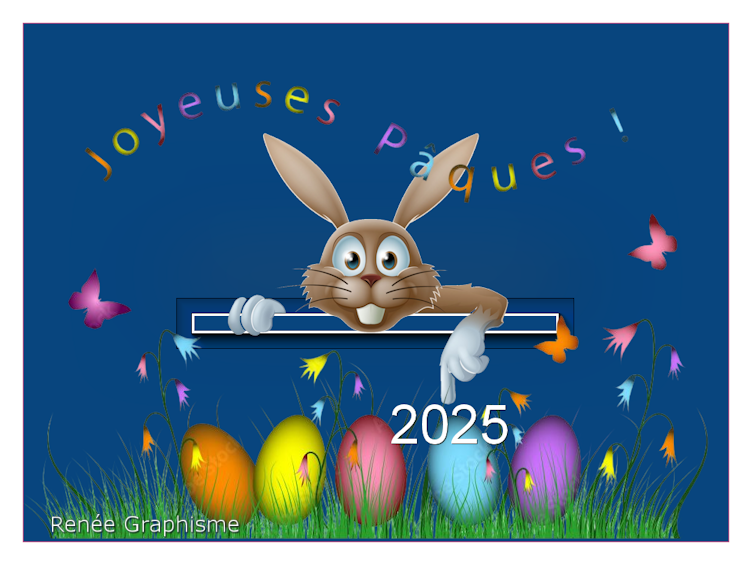
- Move the tube in the right place (If you want to change the colors, you have the title in PSP image.)
71. Image - Add Borders-Symmetric checked: 1 Pixel -Color number 5
EDIT-COPY
72. Activate the tube frame/
cadre
73. EDIT-PASTE INTO SELECTION
74. Add the author's watermark to your work and your own watermark
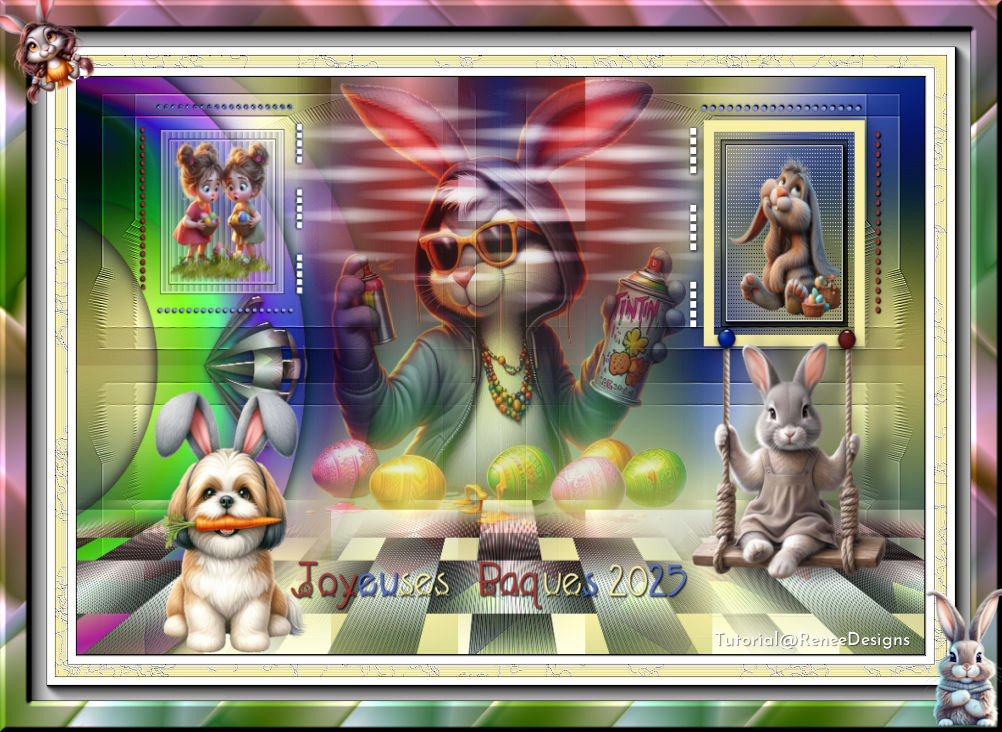
- Layers- Merge- Merge All ( flatten)
Save as JPG
Thanks for your time and enjoyment of this lesson.
Renée
****
This lesson was written by Renée
26/12/2024
Edited and Update
in 2025
*
* Any resemblance to an existing lesson is purely coincidental.
* Don't forget to thank the people who work with us and for us - the testers and translators
Thanks
*
|
 Translations