|
Let's begin
1. Open Image ''fond_foret_blanche''/
Promote Background Layer= raster 1
2. Layers - New raster layer. /Activate flood fill tool and fill the layer with black
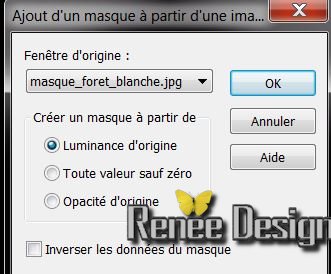
3.Layers-New Mask Layer From Image and choose Mask:
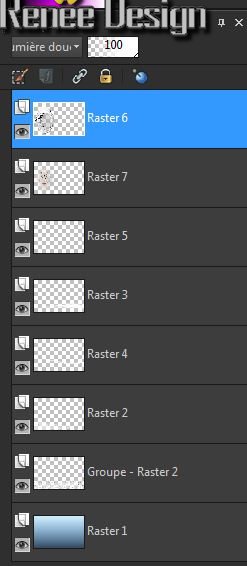
4. Layers-Merge-Merge-Group
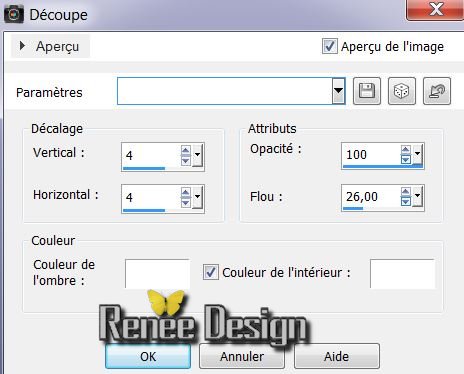
5. Effects-3D effects-Cutout
6. Effects-Edge effects-Enhance more
7. Layers - New raster layer
8. Selections - load/save selection - load selection from disk and choose:''foret_blanche_1''
9. Pot of Paint: Opacity 50% .Foreground color to color white(#ffffff) .Flood Fill Tool: fill the selection with FG-Color
10. Selections - Deselect all
11. Open tube
''image1_foret_blanche'' Edit - Copy -Edit - Paste as new layer on your working area
12. With your move tool place it like this
12. Open tube ''image2_foret_blanche''
Edit - Copy -Edit - Paste as new layer on your working area and move
Your work look like this now

13. Open tube''image3_foret_blanche'' Edit - Copy -Edit - Paste as new layer on your working area and move
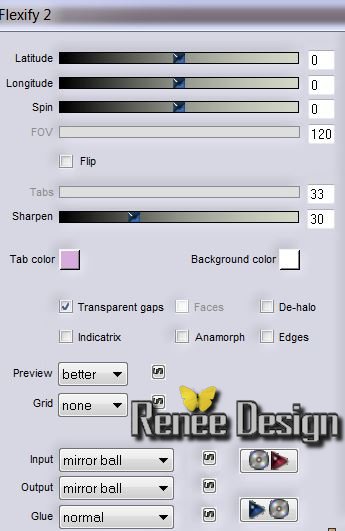
14. Effects -Filter Flaming Pear
/Flexify2
15. Effects - Images Effects - Offset H= -325 and V
= 0 / transparent
16. Effects - 3D Effects - Drop shadow: /
default
Layer palette: Blend mode:"Soft Light"
17. Layers - New raster layer
18. Selections - load/save selection - load selection from disk and choose:''foret_blanche_3''
19. Open tube
''aclis_face_02_21_07'' /Edit-Copy-Edit paste into selection
20. Selections - Deselect all
21.Layers-Arrange-Move Down /Layer palette: Blend mode:"Soft Light"
22. Activate the top of the layer-palette.
23. Layers - New raster layer
24. Selections - load/save selection - load selection from disk and choose:
''foret_blanche_2''
25. Material Properties: foreground color to color: #d3e4e9 Background color to color:
#ffffff
26. Pot of Paint: Opacity
100% /right click 1x /left click 1x /right click 1 x /left click 1x (blue-white-blue-white)
27. Selections - Deselect all
Your work look like this now
28. Open tube ''ours_024''
Edit - Copy -Edit - Paste as new layer on your working area and move /Layer palette: Blend mode: "Luminance Legacy"
29. Open tube ''image _023" Edit - Copy -Edit - Paste as new layer on your working area and move
30. Effects -Filter Flaming Pear /
flood- color white
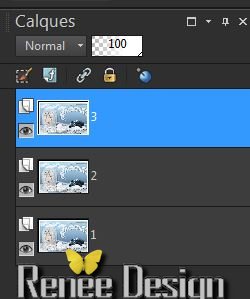
31. Open tube
''image4_foret_blanche ''Edit - Copy -Edit - Paste as new layer on your working area and move
32. Open tube
''image5_foret_blanche (nuage ) Edit - Copy -Edit - Paste as new layer on your working area and move
33. Open tube ''nicole-cigne''( on this tube
/Layers- Merge-Merge visible -Image mirror / Image resize 65% ) Edit - Copy -Edit - Paste as new layer on your working area and move
34. Layers - New raster layer
35. Selections - load/save selection - load selection from disk and choose:
''foret_blanche_4''
36. Activate flood fill tool and fill the selection with color: #d3e4e9
37. Selections - Deselect all
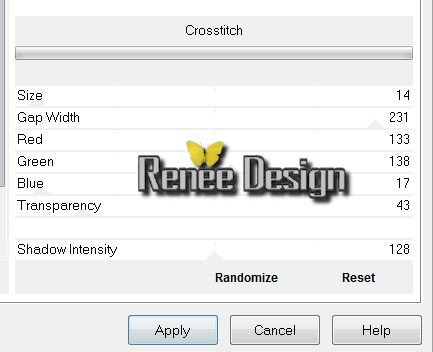
38. Effects -Filter Unlimited
&<BKG Designer sf10I> / Crosstitch
39. Effects -Filter EyeCandy 5 Impact Glass- tab-Factory Settings and choose preset
Clear No Drop Shadow
40. Effects - Distortions effects - Twirl / Degrees a
-250
41. Effects - Distortions effects - Twirl / Degrees a
-100
42. Effects - Images effects - Offset H=125 and V = 0
43. Effects - 3D Effects - Drop shadow:/ default
44. Layers- Merge-Merge Visible
45. Image - Add Borders - Symmetric checked 5 pixels color #1a2229
46. Image - Add Borders - Symmetric checked 35 pixels white
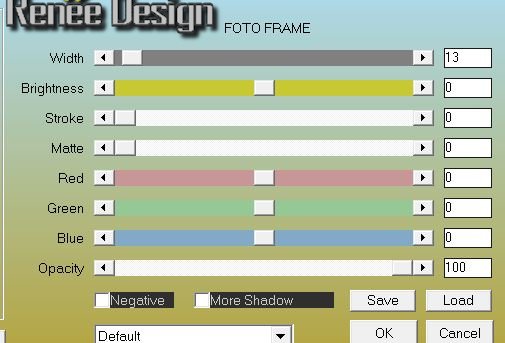
47. Effects-Filter AAA Frame / Foto Frame
48. Layers- Duplicate twice (rename layers 1/2/3)
49. Layer Palette: activate layer 2
50. Effects-Filter Andromeda
Perspective / Swing the camera to 40° left

With your move tool move to the left side
51. Layer Palette: activate layer 3
52. Effects-Filter Vizros - Cylinder
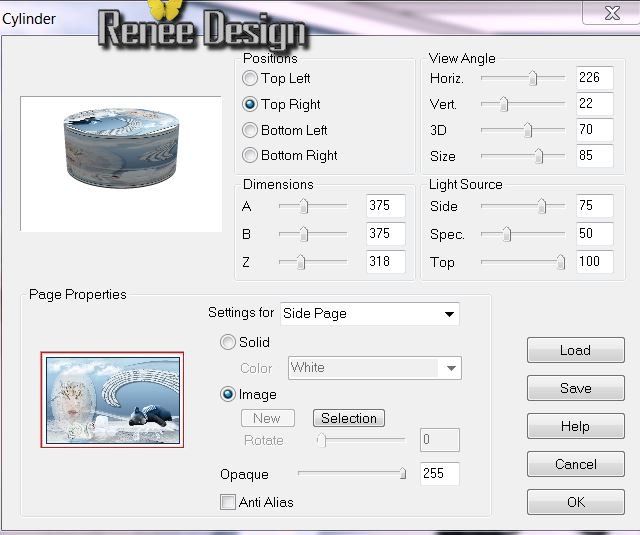
53. With your magic wand select the part
white
54. Delete
55. Selections-Invert/ Selections-Modify-Contract
4 pixels
56. Selections-Invert / Delete
57. Selections - Deselect all
58. Image Resize 35 % Resize all Layers not checked / With your move tool move to the bottom right
59. Effects-Filter EyeCandy 5
Impact -perspective shadow in the settings tab, click on the Preset ''foret_blanche_shadow"
60. Layer Palette: activate layer 1 /Adjust-Blur-Gaussian Blur: Radius 15
61. Open tube ''image_018_lapin'' Edit - Copy -Edit - Paste as new layer on your working area and move
62. Open tube ''nicole-mist-paysage1-2013'' Edit-Copy
63. Activate the bottom of the layer-palette. Edit - Paste as new layer on your working area and move
64. Effects-Edge Effects-Enhance
* Back to the tube .Image mirror / Edit - Copy -Edit - Paste as new layer on your working area and move
65. Effects-Edge Effects-Enhance
66. Layers- Merge-Merge visible
67. Image - Add Borders - Symmetric checked 5 black
68.Image - Add Borders - Symmetric checked 25 white
69. Image - Add Borders - Symmetric checked 5 black
70. Open texte: Edit - Copy -Edit - Paste as new layer on your working area and move

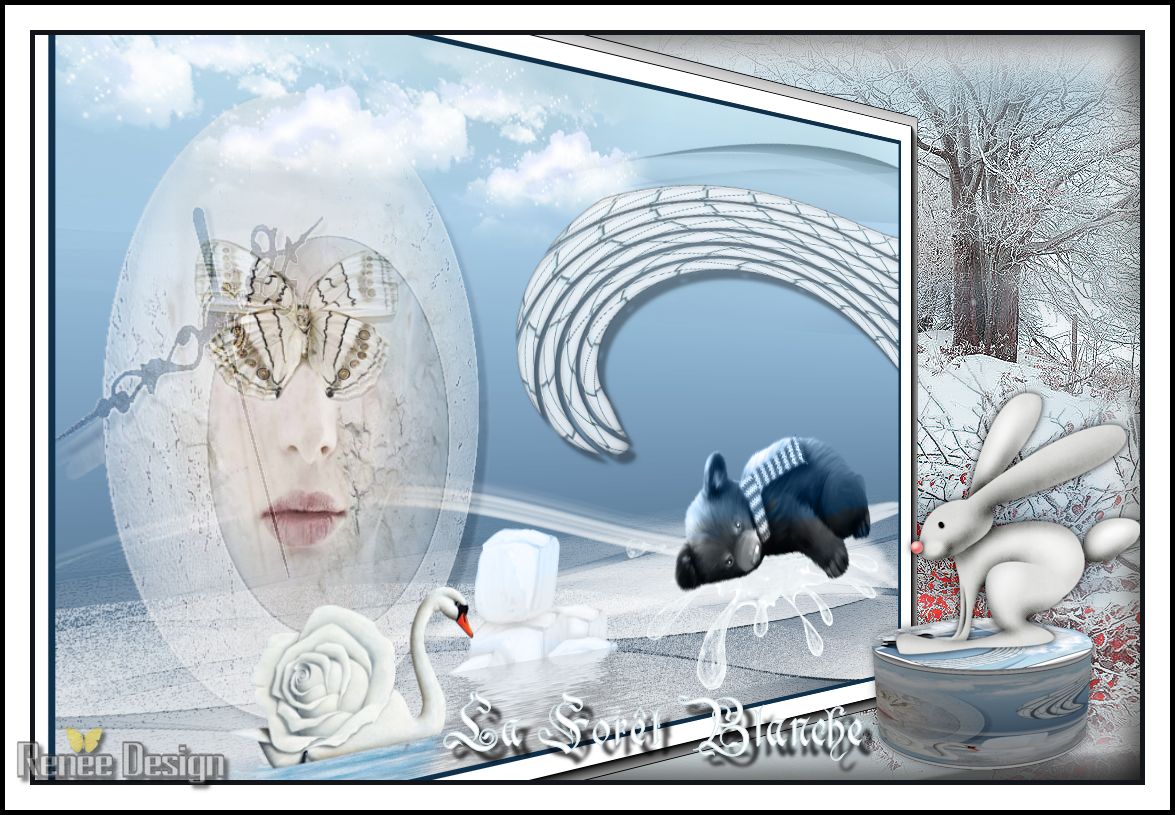
I hope you enjoyed this lesson
Renée the 17/10/2013
Any resemblance with an existing lesson is merely a coincidence
* Don't forget to thank the people who work for us and with us. I named the tubeurs - Testers and the translators.
Thanks Renée.
| 

 Translations