|
Let's start the lesson.
-
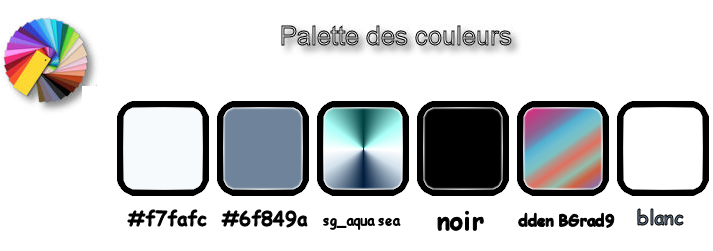
Used Colors
Preparation:
- Properties foreground: Foreground material into gradient and select ’’sg_aqua sea’’
Prepare a radial gradient configured like this. -Set your Background color to
#6f849a

1.
File - New - Open a new transparent image 1005 x 675 pixels
2.
Activate Flood Fill Tool and fill the layer with the gradient

3.
Adjust- Blur- Gaussian Blur: Radius 28
4.
Effects –Plugins- Unlimited - Filter Factory Gallery C- Border Noisy
Fade III: 97/89/0
5. Effects- Image Effects- Seamless Tiling using the default settings
6. Open your tube ‘’ Renee_tube_arbre_bleu.pspimage’’
- Edit - Copy- Activate your work -Edit - Paste as a new layer
- Do not move ! It is in the right place
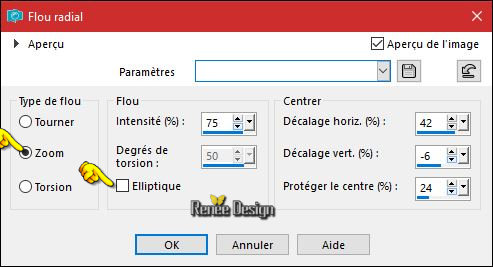
7. Adjust-Blur- Radial Blur use the settings below
8. Effects- Image Effects- Offset with these settings:H = 125 and V = 27
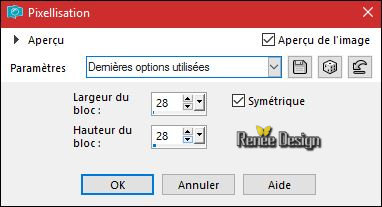
9. Effects –
Distortion Effects– Pixelate use the settings below
10. Effects- Edge Effects- Enhance More
11.
Layers-Properties-Set the Blend Mode to "Exclusion "
12.
Effects –Plugins- Unlimited - &<BKg Designer sf10 II> - Line
Panel Stripes: 30 /169/69
13. Layers- Duplicate
14. Effects
– Distortion Effects - Twirl - Degrees = 42
15.
Layers-Properties-Set the Blend Mode to Luminance- Legacy - Set the Opacity of this layer to
42
16. Adjust- Blur- Gaussian Blur: Radius : 8
17. Open your tube ‘’La_locomotive_Paves.png’’
- Edit - Copy- Activate your work -Edit - Paste as a new layer
18. Effects- Image Effects- Offset with these settings: H = 0 and V = - 300
19. Layers- New Raster Layer
20.
Selections –load/save selection –load selection from disc and select my selection: ‘’Locomotive_2’’
21. Activate Flood Fill Tool and fill the selection with the background color #6f849a
22. Effects
– Texture Effects – Polished Stone use the settings below -#ffffff

Selections- Deselect All
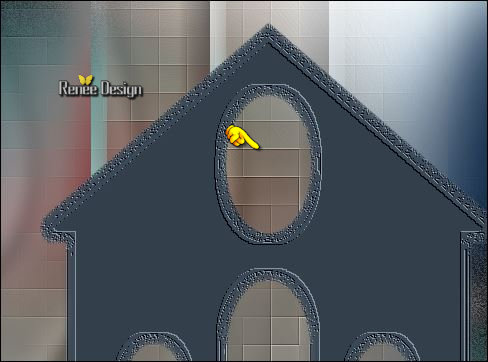
23. Take your Eraser Tool and remove the letter V
To obtain this effect as shown in the example below
24. Effects-
Plugins – Alien Skin EyeCandy 5 Impact – Extrude -tab Settings/User settings choose my-
Preset ‘’ Locomotive_extrude’’
Or manual settings as shown in the example below
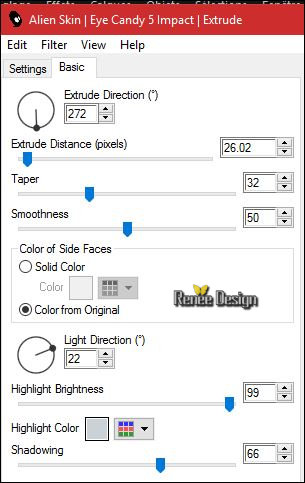
25.
Selections –load/save selection –load selection from disc and select my selection: ‘’Locomotive_3’’
26. Adjust- Blur- Gaussian Blur: Radius 45
27.
Selections – Modify – Contract 6 pixels
28.
Effects –Plugins- Unlimited - &<Bkg Designer sf10 II>- MURA
Diagonal..using the default settings.
Selections- Deselect All
29. Open your tube ‘’locomotive_la petite gare’’
-Edit - Copy- Activate your work -Edit - Paste as a new layer
- Activate your Move Tool (M) place it in the right place (see finished image)
30. Effects- 3 D Effects- Drop Shadow with these settings 1/1/100/0 black
31. Open the tube ‘’ locomotive_poteau_barriere’’
- Edit - Copy- Activate your work -Edit - Paste as a new layer
32. Effects- Image Effects- Offset with these settings:H = - 379 and V = -84
33.
Selections –load/save selection –load selection from disc and select my selection: ‘’Locomotive_4’’
34. Properties Foreground: Change the foreground color into black  and fill the selection with the foreground color black and fill the selection with the foreground color black
35. Effects
–Plugins– EyeCandy 5 Chrome-tab Settings/User settings choose my Preset
“locomotive_chrome’’
Or manual settings as shown in the example below
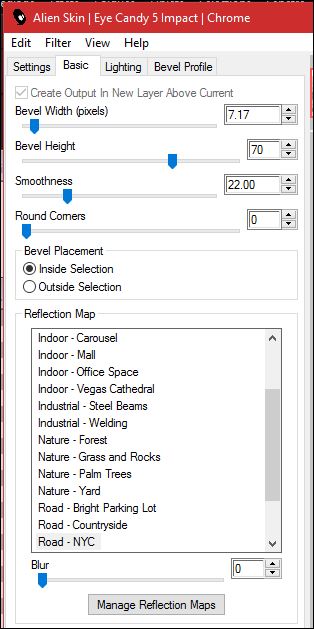
Selections- Deselect All
36. Layers- New Raster Layer
37.
Selections –load/save selection –load selection from disc and select my selection: ‘’Locomotive_1’’
38. Properties Foreground: Change the foreground color into #f7fafc -and fill the selection with the foreground color
Selections- Deselect All
39. Effects
–Plugins – Flaming Pear – Flexify2 use the settings below

- Properties foreground: Change your foreground material into gradient and select ’’ dden BGrad9’’-
Prepare a linear gradient configured like this
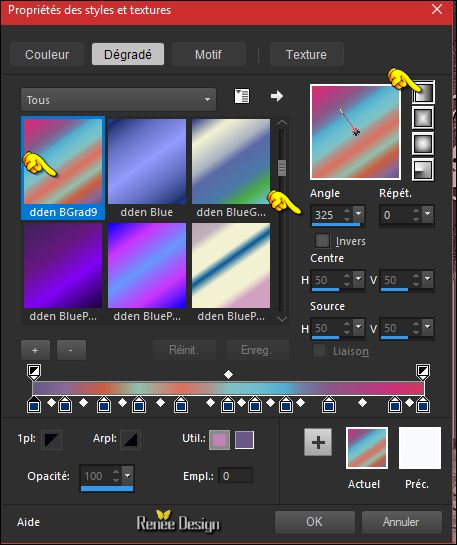
40. Activate the magic wand and select the 3 parts
as shown in the example below
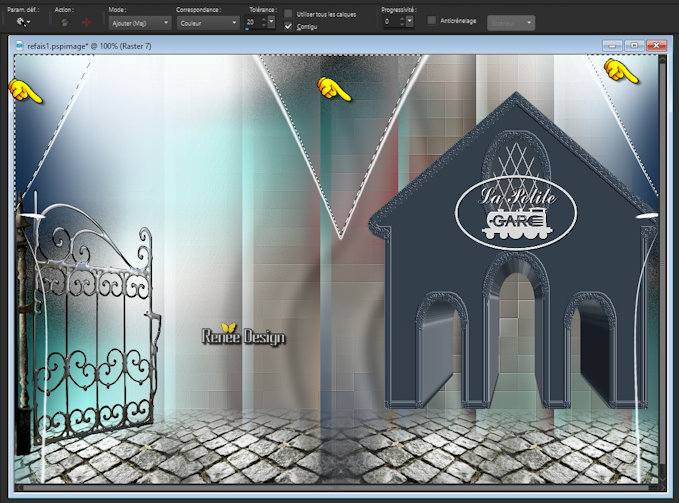
41. Activate Flood Fill Tool and fill the selection with the gradient (Do not add a new layer)
42.
Adjust- Blur- Gaussian Blur : Radius : 56
43.
Selections –load/save selection –load selection from disc and select my selection: ‘’La_locomotive_5’’
DELETE
Selections- Deselect All
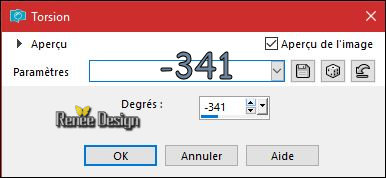
44. Effects – Distortion Effects – Twirl use the settings below
45. Effects
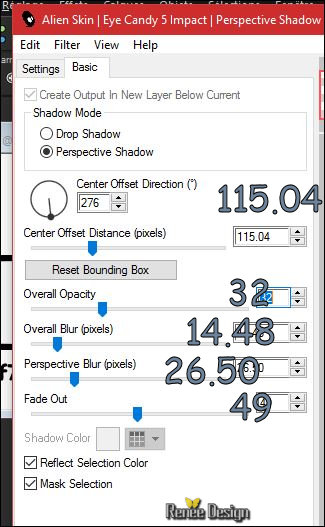
–Plugins – EyeCandy 5 Impact – Perpective
Shadow use the settings below

- Layer Palette -Make Raster 2 active
46.
Activate Selection Tool -Custom Selection (S) -Rectangle with these settings
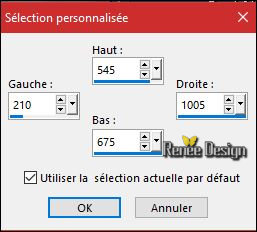
DELETE

Keep the selection active
- Layer Palette -Make Copy of Raster 2 active
DELETE

Selections- Deselect All
Your work and Layer Palette look like this now-You should have this result
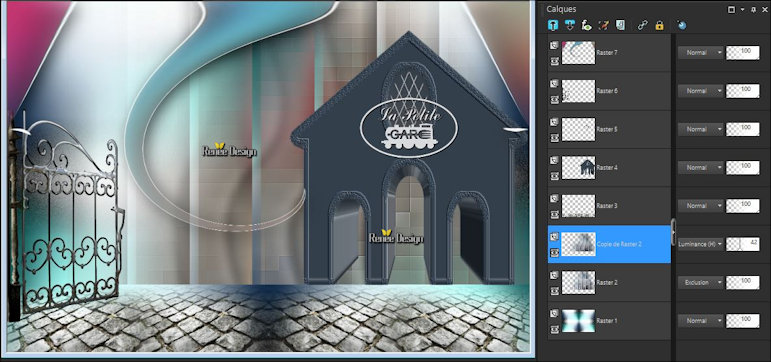
Layer Palette -Make Raster 5 active
47. Open the tube ‘’ Renee_tube_voitures’’
- Activate a layer of your choise (I chose the red car)
- Edit - Copy- Activate your work -Edit - Paste as a new layer
48. Effects- Image Effects- Offset with these settings:H = - 279 and V = - 177
49. Effects
– Plugins – EyeCandy5 impact – Perspective
Shadow use the settings below
- To replace the top of the layers palette
50. Open your tube ‘’ locomotive_plaque_sortie’’
- Edit - Copy- Activate your work -Edit - Paste as a new layer
51. Effects- Image Effects- Offset with these settings: H = - 410 and V =
236
52. Layers- New Raster Layer
53.
Selections –load/save selection –load selection from disc and select my selection: ‘’La_locomotive_6’’
54. Properties Foreground: Change the foreground color into #ffffff  Activate Flood Fill Tool and fill the selection with the foreground color #ffffff (3 clicks) Activate Flood Fill Tool and fill the selection with the foreground color #ffffff (3 clicks)
Selections- Deselect All
55. Effects
–Plugins- Unlimited - It@lian Editors Effect- Effetto Fantasma 0 /56
56.
Layers-Properties-Set the Blend Mode to "Dissolve"
57. Effects- Edge Effects- Enhance
58.Layers- New Raster Layer
59.
Selections –load/save selection –load selection from disc and select my selection: ‘’Locomotive_7’’
60. Activate Flood Fill Tool and fill the selection with the foreground color #ffffff
Selections- Deselect All
(If you choose to use a different car than mine,
replace the headlights )
61. Layers- Merge- Merge Visible
62. -Activate Brush Image ‘’Renee_pinceau_locomotive’’ in your PSP
- File- Export -Custom Brush - Give it a name ’’locomotive’’
63. Layers- New Raster Layer
64. Activate Brush Tool and select my file in the list: ’’locomotive’’ –use the settings below

- Put your brush in the right place by using your foreground color #ffffff
65. Effects- 3 D Effects- Drop Shadow with these settings 1/1/100/1 black
66. Layers- New Raster Layer
67.
Selections –load/save selection –load selection from disc and select my selection: ‘’Locomotive_8’’
68. Activate Flood Fill Tool and fill the selection with the foreground color #ffffff (2 clicks)
Selections- Deselect All
69. Open your tube ‘’ Renee_tube_en_Voyage’’
- Image
-Resize to 80 %
- Edit - Copy- Activate your work -Edit - Paste as a new layer
- Activate your Move Tool (M) place it in the right place (see finished image)
70. Image - Add borders-Symmetric checked: 1 pixel #6f849a
71. Image - Add borders-Symmetric checked: 40 pixels #f7fafc
72. Image - Add borders-Symmetric checked: 1 pixel #6f849a
73. Image - Add borders-Symmetric checked: 5 pixels #f7fafc
74. Image - Add borders-Symmetric checked: 1 pixel #6f849a
75. Open the tube ‘’ Ma Locomotive_titre_tuto’’
- Edit - Copy- Activate your work -Edit - Paste as a new layer
- Move Tool / place your tube to the top of your image
76. Layers- Merge- Merge All (flatten)
77. Image
Resize to 90%
Save as JPG
I hope you enjoyed this lesson
Renée
This lesson was written by Renée 21/03/2017
Edited and Update
2017
*
Any resemblance with an existing lesson is a coincidence
* Do not forget to thank the people who work with us and for us I have appointed the tubeurs and translators
Thanks Renée *
*
| 

 Translations


 If a plugin supplied appears with this icon it must necessarily be imported into Unlimited *


 All rights reserved
