|
Let's start the lesson.
1.
Open the image ‘’Mur_des_ombres_fond’’- Window - Duplicate (or shift+D) - Close the original and proceed on the copy -Promote Background Layer =Raster 1
2.
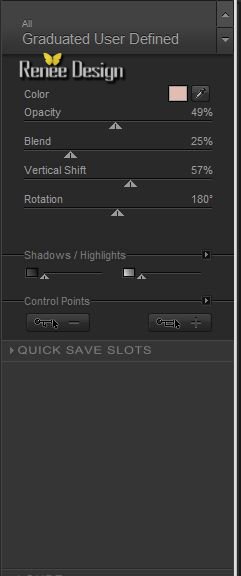
Effects-Plugins - Nick Color Effex pro.3/ Graduated
User Defined - Color #e4bbb0
3. Layers-Duplicate
4. Adjust-Blur-Gaussian Blur- Radius: 85%
5.
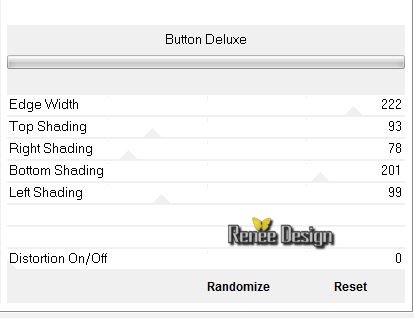
Effects –Plugins-Unlimited - Filter Factory Gallery B- Button
Deluxe
6. Layer Palette - Double click on this Layer and set the Blend Mode to" Multiply'
7.
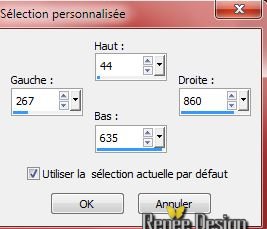
Activate Selection Tool (S)- Custom Selection with these settings: 
8.
Selections-Promote selection to layer
9.
Effects –Plugins- Unlimited - &<Bkg Kaleidoscope>- Cake
mix a 214/169
10. Layer Palette - Double click on this Layer and set the Blend Mode to "luminance"
11. Effects-Plugins –AAA Frame - Foto frame with these settings
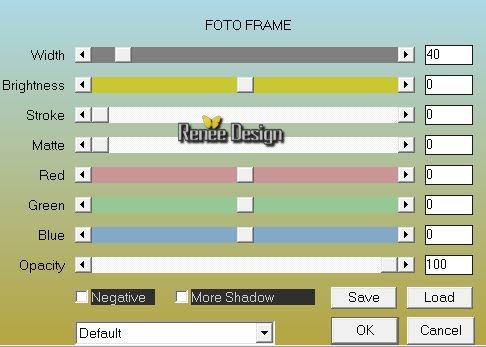
12. Repeat the same filter effect
13. Layers-Duplicate
14. Effects –Plugins -
Unlimited - &<Bkg Kaleidoscope>- Cake mix a
214/169
Selections-Deselect All
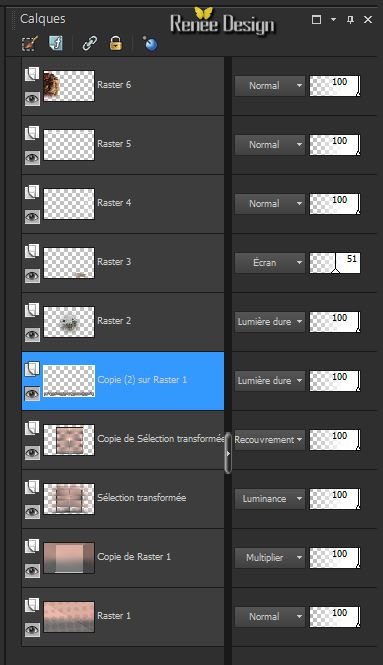
Layer palette look like this now
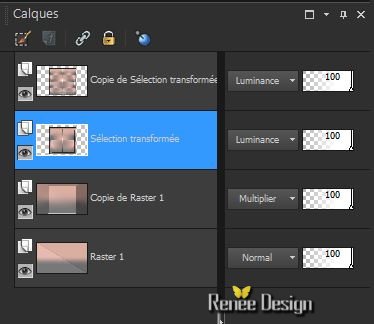
-. Layer-Palette: Be placed on the layer of the transformed selection
15. Effects
–Plugins -Unlimited – Toadies – Weaver… a
64/48/222
- Activate the bottom of the layer palette= Raster 1
- Material Porperties- Set your foreground color to #e4bbb0- Set your background color to white
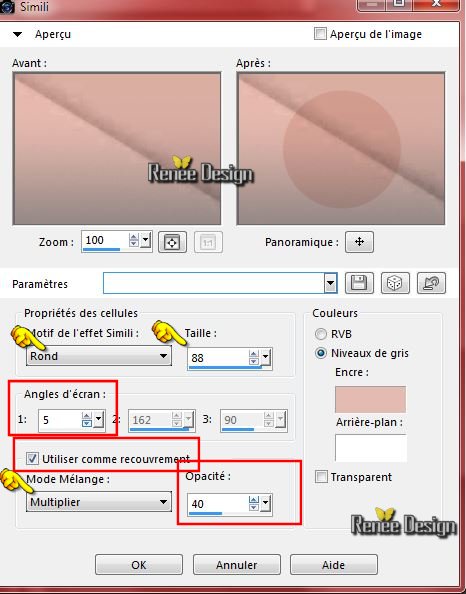
16.Effects-Artistic Effects-Halftone with thee settings
-Activate the top of the layer palette
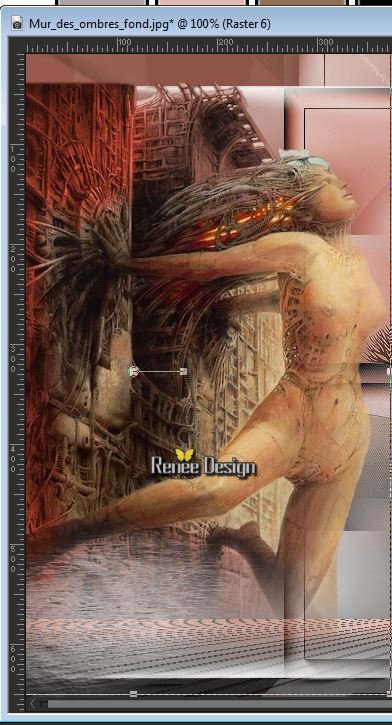
17.Activate the tube ‘’ Renee_tube_Mur_des_ombres_paysages’’
- Activate layer ‘’
murombre_paysage2’’of the tube (or use another tube)
(see what is best for you ! )
-Edit/ Copy-Edit - Paste as new layer on your working image
(do not move it is in the right place)
18. Adjust-Sharpness-Sharpen
19. Layer Palette - Double click on this Layer and set the Blend Mode to "Hard Light "
- Color Palette: Set the foreground color to
#926e58
20. Layers-New raster layer
21.Selections –load/save selection –load selection from disc and choose:
‘’mur_ombre_1’’
22. Flood Fill Tool: fill the selection with the foreground color #926e58 (click 2 times in the selection )
Selections-Deselect All
23. Layer Palette - Double click on this Layer and set the Blend Mode to "Screen "Set the Layer Opacity of this Layer to 53%
- Color Palette: Set the background color to white
24. Activate brush
image ‘’hymne garde de ombre' in your PSP'
- File- Export Custom Brush
-Give it a name ‘’hymne garde de ombre''
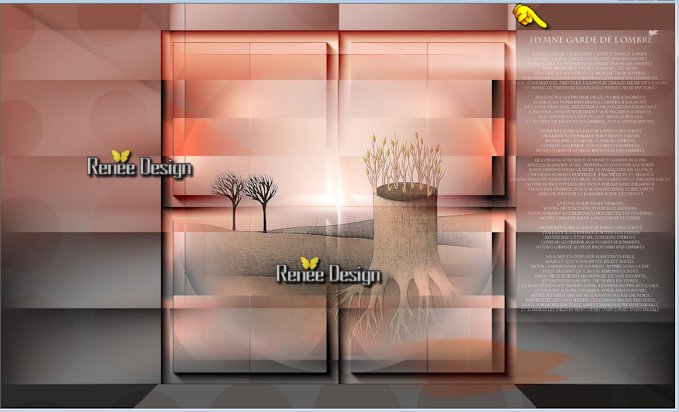
25. Layers-New raster layer
26. Activate the Brush Tool and choose the brush:‘’hymne garde de ombre'' with these settings

-
Stamp your brush on the upper right side by using your background color white as shown below
27. Layers-New raster layer
28. Selections –load/save selection –load selection from disc and choose: ‘’
mur_ombre_2’’
29. Flood Fill Tool: fill the selection with the background color ( click 2 a 3
times in the selection )
Selections-Deselect All
30. Activate the tube ‘Renee_tube_mur_des_ombres »
- Image
Resize 80%
- Edit/copy- Edit/ paste as new layer on your working image
- Move tool / place your tube on the left side as shown below
-. Layer-Palette: Make Copy of Raster 1 active
31. Layers- Duplicate
32. Effects
–Plugins- Unlimited – VM Extravanga – Shoutin’ !

33. Effects-3D Effects-Drop Shadow with these settings: 1/1/100/18 black
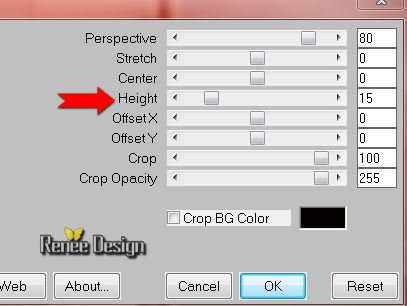
34. Effects-Plugins – Mura’s Meister – Perspective Tilling with these settings
35. Layers-Arrange-Move 2x Up
36. Layer Palette - Double click on this Layer and set the Blend Mode to "Hard Light "
Layer palette look like this now
-Activate the top of the Layer-Palette
37. Layers-New raster layer
38. Selections –load/save selection –load selection from disc and choose: ‘’
mur_ombre_3’’
39. Change the backgroundcolor to white
- Flood Fill Tool:
fill the selection with the background color white
Selections-Deselect All
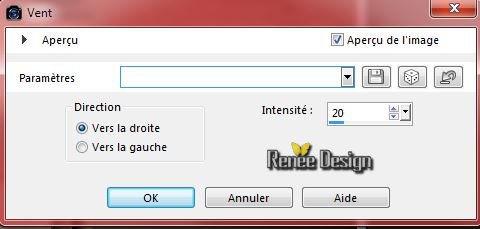
40. Effects - Distortion Effects - Wind - From right checked - Wind Strength: 20%
41. Activate Emboss Brush

42. Activate Emboss Brush with these settings

With the left button of the mouse pressed glide gently over your image
Repeat several times until you are satisfied with the result(Your result will depend on these moves)
- Push M to deselect the tool
43. Activate the tube ‘’ Renee_tube_Femme_tissus.pspimage’’
- Image
Miroir
- Image
Resize 70 %
- Edit/copy- Edit/ paste as new layer on your working image
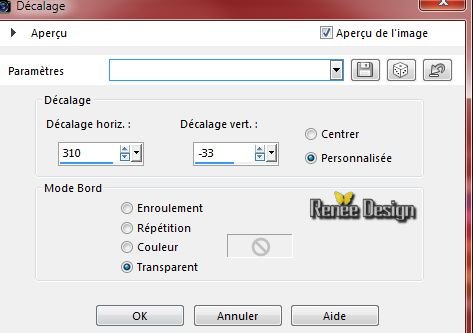
44. Effects-Image Effects-Offset with these settings
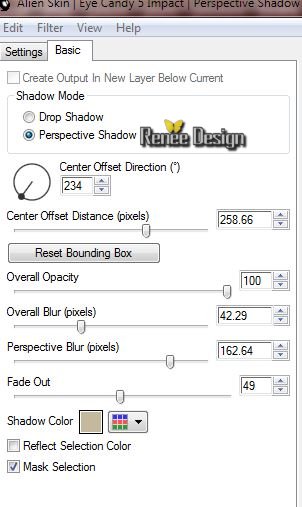
45. Effects-Plugins – Eyecandy 5 –Impact –Perspective shadows
–tab Settings/User settings choose my preset: ’’mur_ombre_perspShadow’" -Or manual settings as shown in the example below
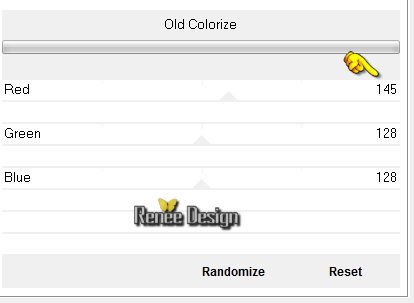
46.
Effects –Plugins- Unlimited - CPK Designs-Old
Colorize
(
The color depends on the base color that you can change this here)
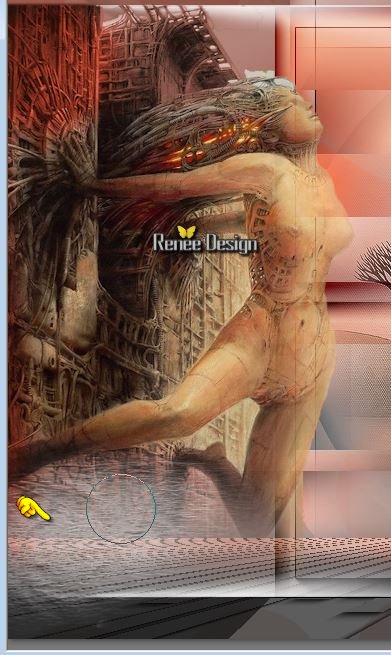
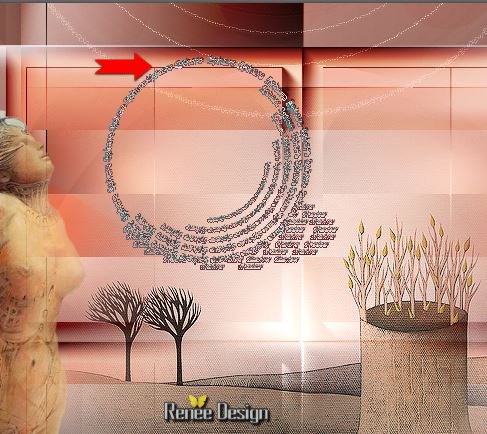
47. Activate the tube ‘’ mur_ombre_image1’’
- Edit/copy- Edit/ paste as new layer on your working image
- With your move tool place it in the middle of your image
48. Layer Palette - Double click on this Layer and set the Blend Mode to "Overlay "
49. Activate brush
l, image ‘’ Mur_ombre_Sphere_Text.jpg’ in your PSP
- File- Export- Custom Brush
-Give it a name: ‘’ Mur_ombre_Sphere_Text.jpg’
50. Layers-New raster layer
- Color Palette: Set your foreground color to black
51. Activate the Brush Tool and choose the brush: ‘’ Mur_ombre_Sphere_Text.jpg’ with these settings

- Stamp your brush by using your foreground color as shown in the ecxample below
52. Layers-New raster layer
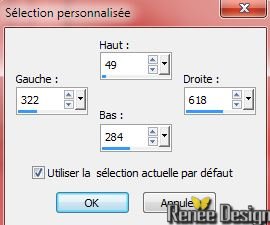
53.
Activate Selection Tool (S)- Custom Selection with these settings:
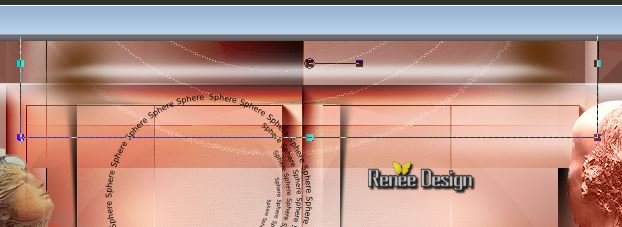
54. Activate the tube ‘’ top_shadow’’
- Edit/copy-Edit paste into selection
Selections-Deselect All
55. Activate the tube ‘’ mur_ombre_image2.pspimage’’
- Edit/copy- Edit/ paste as new layer on your working image
56.Activate the Pick Tool/Deformation tool (K) Mode Scale -place it in the right place as shown below (Stretch lightly on the both sides if necessary)
57. Layer Palette - Double click on this Layer and set the Blend Mode to "Hard Light "
58. Layers- Duplicate
- Image
Flip
59. Layer Palette - Double click on this Layer and set the Blend Mode to "Overlay"
60. Activate the tube ‘’mur_ombre_image3.pspimage’’
- Edit/copy- Edit/ paste as new layer on your working image and move
- Layer Palette - Double click on this Layer and set the Blend Mode to "Hard Light "
61. Layers-New raster layer
62.
Selections –load/save selection –load selection from disc and choose:’’mur_ombre_4’’
63. Flood Fill Tool:
fill the selection with white ( click 2 times in the selection )
Selections-Deselect All
64. Image - Add borders-Symmetric checked: 1 pixel black
65. Image - Add borders-Symmetric checked: 40 pixels white
66. Image - Add borders-Symmetric checked: 1 pixel black
67. Image - Add borders-Symmetric checked: 20 pixels white
68. Open the tube text- Edit/copy- Edit/ paste as new layer on your working image and move( Font included into the zipfile)
69. Image
Resize 995 pixels Width
Save as JPG
I hope you enjoyed this tutorial .
Renée
This lesson was written by Renée
21/05/2015
edited and update
2015
*
Any resemblance with an existing lesson is merely a coincidence *
* Don't forget to thank the people who work for us and with us. I named the tubeurs - Testers and the translators.
Thanks Renée.
*
| 

 Translations


 *
When you see this logo the filter is imported in Unlimited
*
When you see this logo the filter is imported in Unlimited


 All rights reserved
