|
New
Translations here
Lincoln
*
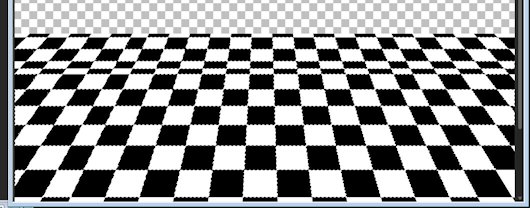
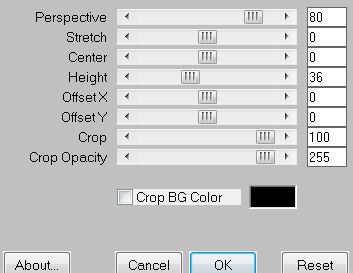
Let's start the lesson. 1. File - New - Transparent - New Image 1000 x 800 pixels - Activate Flood Fill Tool and fill the layer with color white 2. Effects- Plugins -Italian Editors Effet – Scacchi -using the default settings 3. Effects-Plugins -Mura's Meister /perspective Tilling
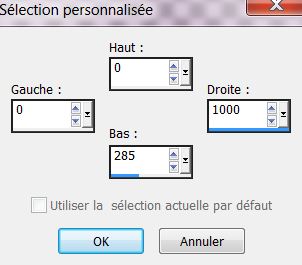
4. Selection Tool ( S ) Custom selection use settings below
5. Delete - With your magic wand select the white parts like this
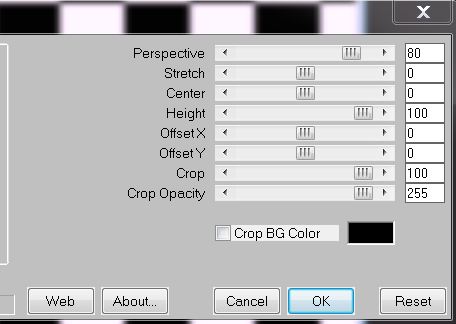
on these white squares 6. Effects- Plugins Eye Candy 5 -glass-tab -Settings/User Settings and choose my preset ''renee_lincoln'' 7. Selections- Deselect All 8. Effects- Plugins - Mura's Meister - Perspective Tilling
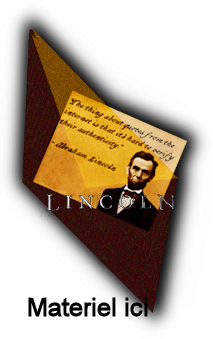
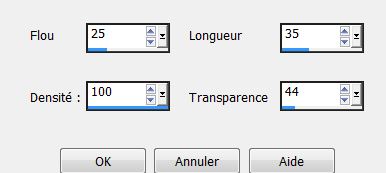
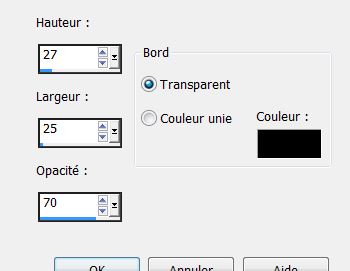
- Magic Wand: With the magic wand select the transparent part 9. Layer-New raster layer-//Flood Fill Tool-fill the selection with this color #ddd4c9 10. Selections- Deselect All 11. Open the tube ''nuages_lincoln'' Edit/copy-Edit paste as a new layer on your working area and move. Opacity of this layer to 67% - Activate the top of the layer-Palette 12. Open the tube ''image_1_lincoln Edit/copy-Edit paste as a new layer on your working area and move a little 13. Effects- Texture Effects-Fur with these settings
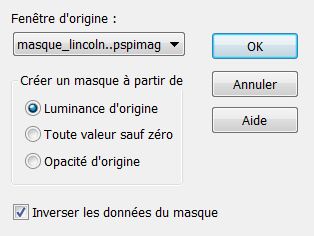
- Open the mask in your psp 14. Layer -New mask layer from Image
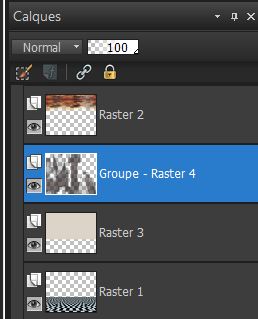
15. Effects- Edge Effects- Enhance 16. Layers- Merge- Merge Group 17. Layers- Arrange- Move Down - You should have this result:
18. Effects-Image Effects- Seamless Tiling using the default setting - In the layer palette activate raster 3- Magic Wand: with your magic wand select the transparent part of the bottom - Activate the layer above (group-raster4) – Press the Delete button on your key board 19. Selections- Deselect All - Activate the top of the layer-Palette 20. Layers-New raster layer 21. Selections - load/save selection - load selection from disk and choose my selection: ''renee_lincoln_1'' 22. Color-Palette:Change the Foreground color to color black// Pot of Paint: Change the opacity of the color to 45 % /Activate Flood Fill Tool and fill the selection with the foreground color black 23. Selections- Deselect All - Pot of Paint: Change the opacity of the color to 100% 24. Layers- Merge- Merge Visible 25. Selections - load/save selection - load selection from disk and choose my selection: ''renee_lincoln2'' 26. Selections- Promote selection to layer 27. Effects-3D Effects-Buttonize
28. Selections- Deselect All 29. Layers- New raster layer 30. Activate Brush in your PSP ''pinceau_lincoln 1860'' File- Export Custom Brush (Give it a name) Activate Brush Tool and select my file:''pinceau_lincoln 1860'' //Properties Foreground: FG-Color Black/ Stamp your brush in the bottom left corner by using your foreground (Size 800 )
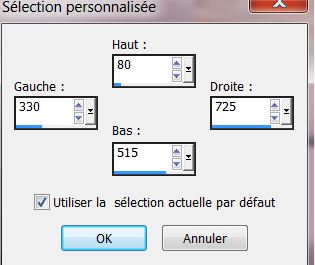
31. Layers- Merge- Merge Down - Activate the top of the layer-Palette 32. Selections - load/save selection - load selection from disk and choose my selection: ''renee_lincoln3 33. Layers-New raster layer - Flood Fill Tool: fill the selection with color black 34. Effects- Plugins -EyeCandy 5 Impact - Glass - Preset /Clear 35. Selections- Deselect All 36. Layers- New raster layer 37. Selection Tool ( S ) Custom selection use settings below
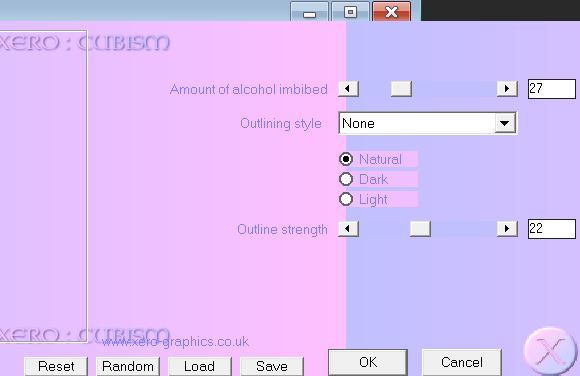
38. Color-Palette:Change the Foreground color to color #ddd4c9 -Background color to color black - Put your foreground/background linear gradient with settings below 0/0 invert checked 39. Flood Fill Tool: fill the selection with the gradient 40. Effects- Plugins -Xero XL - Cubism
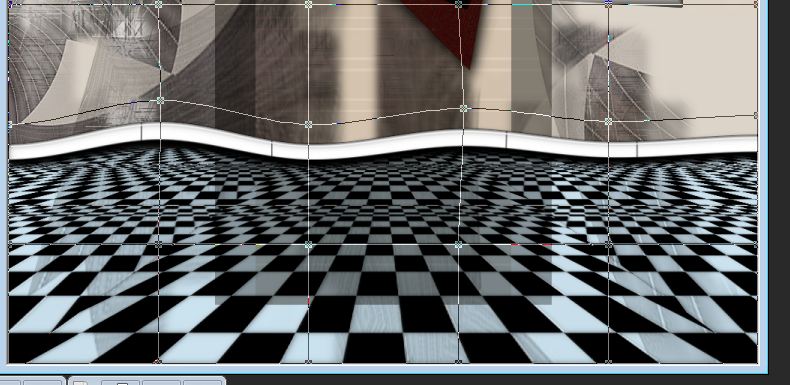
41. Effects- Plugins -Simple – 4 way average 42. Selections- Deselect All 43. Repeat: Effects -Simple - 4 way average -Layer Palette -Double click on this layer and set the Blendmode to Hard Light 44. Open the tube ''lincoln-ligne ''Edit/copy-Edit paste as a new layer on your working area /Put down to 500 pixels 45. Activate Mesh Warp Tool: deform as seen on the screen
46. Open the tube ''lincoln -enveloppe and ''lincoln attache" Edit/copy-Edit paste as a new layer on your working area and move 47. Open the tube ''oeil '' Edit/copy-Edit paste as a new layer on your working area /With your move tool move to the upper left corner Layer Palette -Double click on this layer and set the Blendmode to Luminance-Legacy 48. Open the tube ''2009_Abraham Lincoln commémoration" Edit/copy-Edit paste as a new layer on your working area and move 49. Open the tube ''logane_Abraham Lincoln_fevrier 2013'' Edit/copy-Edit paste as a new layer on your working area and move. /With your move tool move to the bottom right side 50. Open the tube ''lincoln_fauteuil'' Edit/copy-Edit paste as a new layer on your working area/ With your move tool move to the bottom left corner 51. Layers- New raster layer 52. Selections - load/save selection - load selection from disk and choose my selection: ''renee_lincoln 4''/Flood Fill Tool: fill the selection with color black 53. Selections- Deselect All 54. Layers- Merge- Merge All 55. Image - Add borders-Symmetric checked:5 pixels color black 56. Image - Add borders-Symmetric checked:25 pixels #ddd4c9 57. Image - Add borders-Symmetric checked:5 pixels color black
I am part of Tutorial Writers Inc . My tutorials are regularly recorded. ReneeGraphisme_All rights reserved
*
|

 Translations