|
Let's start the lesson.
-
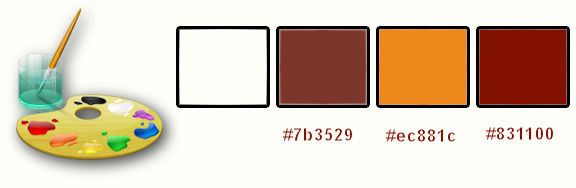
Color Palette- Set your foreground color to #ffffff - Set your background color to
#7b3529
1.
Open the background image « Fond_Ma_vision’’- Window - Duplicate (or shift+D) - Close the original and proceed on the copy -Promote Background Layer = Raster 1
2.
Effects- Image Effects- Seamless Tiling use settings below

3.
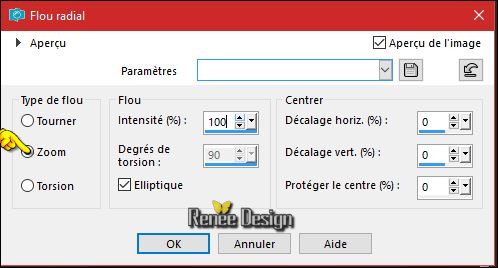
Adjust- Blur- Radial Blur use settings below
4.
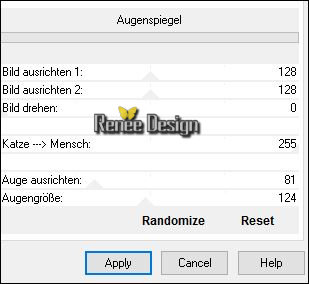
Effects –Plugins- Unlimited2.0 - °v° Kiwi`s Oelfilter°-
Augenspiegel use settings below
5. Open the tube ‘’ Ma_vision_Image_1.png’’
- Edit - Copy
-Activate your working area,
Edit - Paste as a new layer
-
Move Tool / place your tube to the bottom of your image
6. Layers- New Raster Layer
7. Activate Flood Fill Tool and fill the layer with the background color
- Open the mask ‘’Masque_26 .jpg’’- in your PSP and minimize it
8. Layers - New Mask Layer - From Image and choose mask :« « Masque_26’’

- Layers- Merge- Merge Group
9.
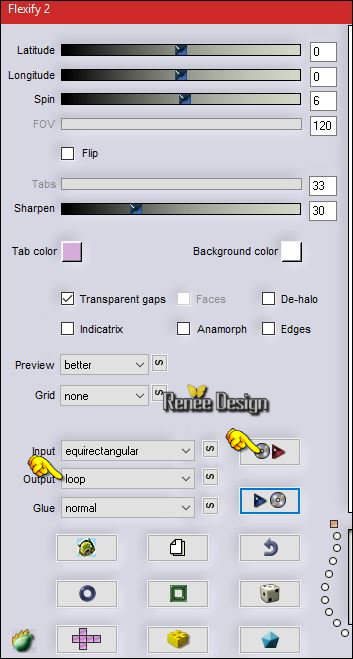
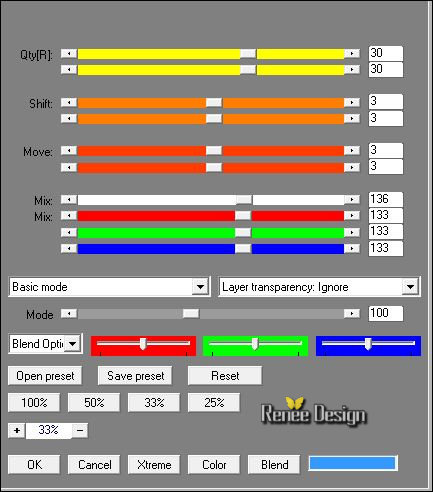
Effects –Plugins –Flaming Pear – Flexify2 -select my -Preset
Vision_Flexify 2 settings.q2q
clicking on the red arrow  and select my file-Preset
Vision_Flexify 2 settings.q2q - can be used in any folder of your choice by clicking it. -3 Open it will be ok in your filter and select my file-Preset
Vision_Flexify 2 settings.q2q - can be used in any folder of your choice by clicking it. -3 Open it will be ok in your filter

10. Effects- Edge Effects- Enhance
11. Open the tube ‘’ Ma_vision_Image_2.png’’
Edit - Copy
-Activate your working area,
Edit - Paste as a new layer
-
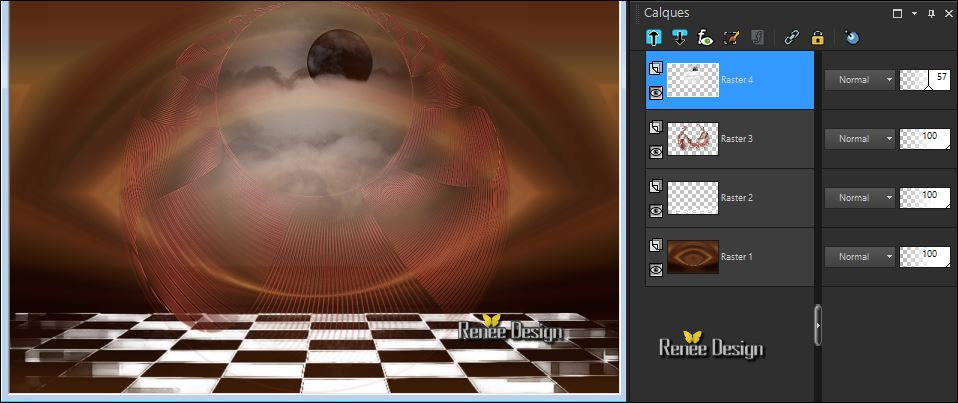
Set the layer Opacity of this layer to 55 % or 63%
- Move as shown in the example below
– Your Layer palette look like this now-You should have this result
- Swap your materials, so the white colour is on the bottom 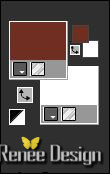
12. Layers- New Raster Layer
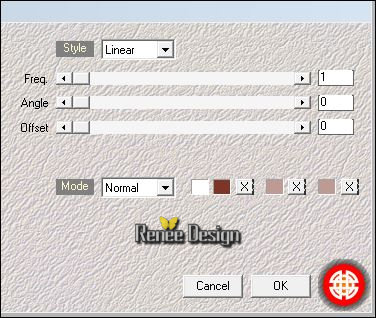
13. Effects
–Plugins – Medhi – Wavy Labs 1
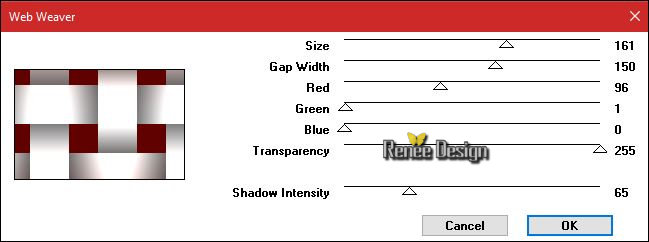
14.
Effects –Plugins-(or Unlimited ) VM Natural- Weave no
Distorsion
If you see this name " Web Weaver "it's the same
15. Image
Resize to 75% all layers not checked
16. Effects- Image Effects- Seamless Tiling using the default settings
17.
Effects –Plugins- Unlimited 2.0 - Alf's Border FX - Border Fade
III: 111/137
18. Effects –Plugins - Unlimited 2.0 - Alf's Border FX - Mirror
Bevel: 41/64
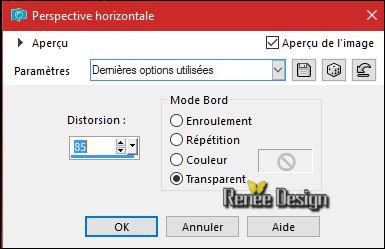
19. Effects
– Geometric Effects – Perspective Horizontal
/Distorsion 85
20. Pick Tool (K)
extract into:– C:\Users\YourName\Documents\My PSP-files \presets (Preset_Pick_Renee_Ma_vision) is included with the material
- Activate Pick Tool (K) - select my preset
''Renee_Ma_vision” and OK -Click any other Tool to deactivate
- Or manual settings as shown in the example below

21. Open the tube ‘’ Ma_vision_Image_3.png’’
- Edit - Copy
-Activate your working area,
Edit - Paste as a new layer
- With the Move Tool, move it in the bottom right corner
22. Open the tube ‘’ Renee_tube_174 ‘’
-Image-
Resize to 60%
Edit - Copy-
Activate your working area,
Edit - Paste as a new layer
- Effects- Image Effects- Offset with these settings : H = - 169 and V = - 18
- In the Layer-Palette- Make Raster 1 active
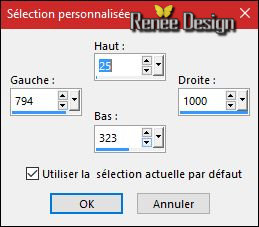
23.
Activate Selection Tool -Custom Selection (S) -Rectangle with these settings
24.
Selections- Promote selection to Layer
- Layers- Arrange- Bring to Top
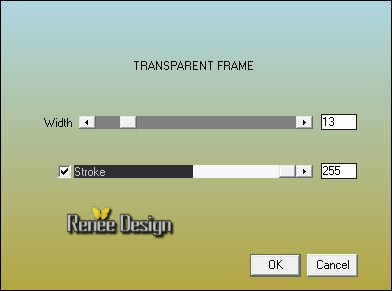
25. Effects
–Plugins – AAA Frame – Transparent Frames
Selections- Deselect All
26. Layers- Duplicate
27. Image
Resize to 75% all layers not checked
-Layers- Merge- Merge Down
28. Effects
–Plugins- Unlimited 2.0 - Sapphire Filters 08-
SapphirePlugin_0714...

29. Open the tube ‘’Ma_vision_oeil_36’’
- Image
Resize to 50%
- Edit - Copy
-Activate your working area,
Edit - Paste as a new layer
-
Activate your Move Tool (M) move into the top right corner (see finished image)
- Open the tube "" TUBES_Decos_ma_vision""Do not close we need it later for the rest of the work
30. Activate the layer « sang’’of the tube
- Edit - Copy
-Activate your working area,
Edit - Paste as a new layer
31. Effects- Image Effects- Offset with these settings : H = 168 and V =
56
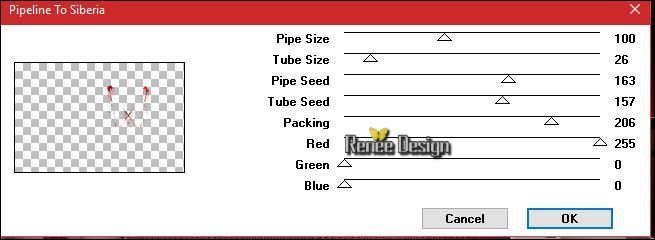
32.
Effects –Plugins – VM Instant Art – Pipeline To
Siberia
33. Back on tube "DECOS"
- Activate the layer ‘’ triangles’’of the tube
- Edit - Copy-
Activate your working area,
Edit - Paste as a new layer
- Activate your Move Tool (M) place it in the top left corner (see finished image)
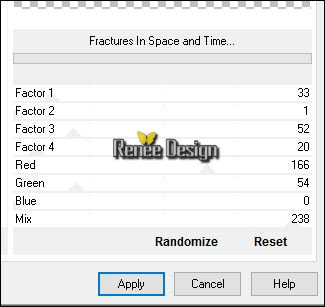
34.
Effects –Plugins - Unlimited 2.0 - Andrew's Filter Collection 58-
Fractures In Space and Time...
35. Effects- Edge Effects- Enhance
36. Layers- New Raster Layer
37.
Selections –load/save selection –load selection from disc and select my selection: ‘’Ma_vision’’
38. Activate Flood Fill Tool and fill the selection with the background color #ffffff
Selections- Deselect All
39. Back on tube "DECOS"
- Activate the layer ‘’ human_respire’’of the tube
- Edit - Copy-
Activate your working area,
Edit - Paste as a new layer
- Move as shown in the example below
40. Layers- New Raster Layer
41. – Selections –load/save selection –load selection from disc and select my selection: ‘’Ma_vision_1’’
- Color Palette- Set your foreground color to
#ec881c
42.Activate Flood Fill Tool and fill the selection with the foreground color (2 or 3
clicks)
Selections- Deselect All
43. Effects- Edge Effects- Enhance More
44. Layers- New Raster Layer
45. – Selections –load/save selection –load selection from disc and select my selection: ‘’Ma_vision_2’’
46. Activate Flood Fill Tool and fill the selection with the background color #ffffff
Selections- Deselect All
47. Double click on this Layer and set the Blend Mode to " Overlay "
48. Back on tube " DECOS"
- Activate the layer ‘’tourbillon’’of the tube
- Edit - Copy
-Activate your working area,
Edit - Paste as a new layer
- Move to the left
49. Layers- New Raster Layer
50. – Selections –load/save selection –load selection from disc and select my selection: ‘’Ma_vision_3’’
51. Activate Flood Fill Tool and fill the selection with the background color #ffffff ( 2 clicks )
Selections- Deselect All
For those who have Windows 10 and works with PSP 17- 18 or 19
Important to re-install this AP filter
Download from my site the AP Patch filters
Remove the old filter AP from your filterfolder and install the AP Pache filter
PSP now less problems
52. Effects
–Plugins – AP [Noise]- Noise Bad TV with these settings
53.Image - Add borders-Symmetric checked: 1 pixel #831100
54.Image - Add borders-Symmetric checked: 10 pixels #ffffff
55.Image - Add borders-Symmetric checked: 1 pixel #831100
-
Selections- Select All
56.Image - Add borders-Symmetric checked: 80 pixels #ffffff
- Selection invert
57.
Effects –Plugins - Unlimited-ICNETFILTERS - Color Filters - Blue
Sky: 214/107
58.
Effects – Plugins- AAA Frame Foto Frame
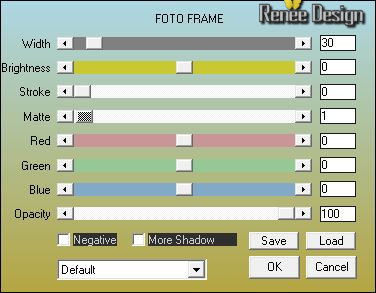
Selections- Deselect All
59.
Open the tube "Text-titre" - Edit - Copy-
Activate your working area,
Edit - Paste as a new layer and move
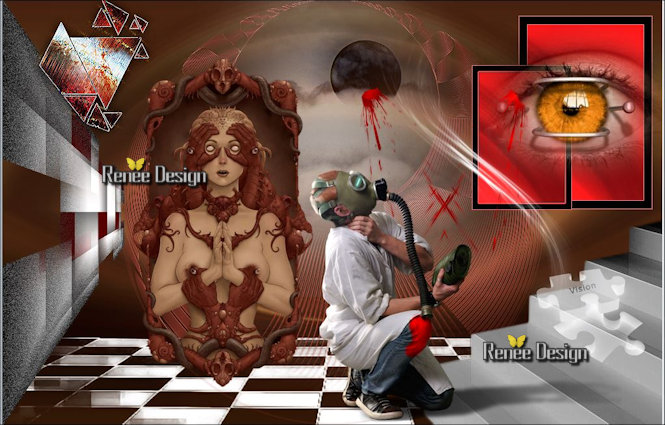
60. Layers- Merge- Merge All (flatten)
Image
Resize to 999 pixels width
Save as JPG
I hope you enjoyed this lesson
Renée
This lesson was written by Renée 20/09/2016
Edited and Update
2016
*
Any resemblance with an existing lesson is a coincidence
* Do not forget to thank the people who work with us and for us I have appointed the tubeurs and translators
Thanks Renée *
*
| 


 Translations


 If a plugin supplied appears with this icon it must necessarily be imported into Unlimited *


 All rights reserved
