|
Let's start the lesson.
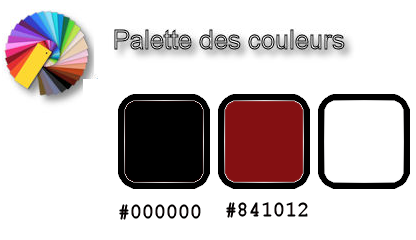
Used Colors
Preparation
-
Color Palette:Set your Foreground color to #000000 -Set your Background color to #841012
-
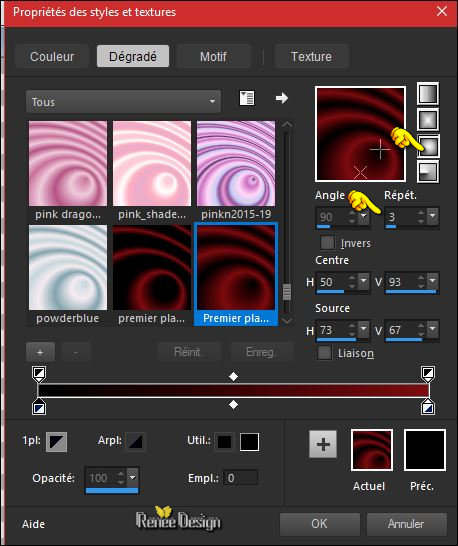
Prepare a foreground/background sunburst gradient configured like this.
1.
File - New - Open a new transparent image of 1005 x 655 Pixels
2.
Activate Flood Fill Tool  and fill the layer with the gradient and fill the layer with the gradient
3.
Layers- Duplicate
4.
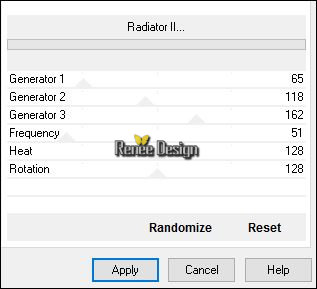
Effects –Plugins - ( or Unlimited) VM Distorsion –
Radiator II use the settings below
5.
Effects –Plugins-Unlimited - &<Bkg Kaleidoscope>- Flip
SidesLsf
6.
Effecte- Plugins –Unlimited - &<Bkg Kaleidoscope>- Zandflower:
127/127/2
7.
Selections –load/save selection –load selection from disc and select my selection: ‘’ Magdy_1’’
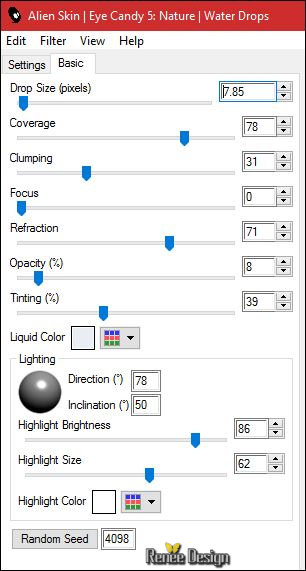
8. Effects –Plugins – Eye Candy 5 - Nature –
Water Drops use the settings below-Color #e8eef3
9. Effects- 3 D Effects- Drop Shadow with these settings: 4/4/35/15 black
Selections- Deselect All
10. Open your tube ‘’ Magdy_image_1’’
- Edit - Copy- Activate your work -Edit - Paste as a new layer
Do not move, it is in the right place
11. Effects
–Plugins - Mura’s Meister – Perspective Tilling use the settings below
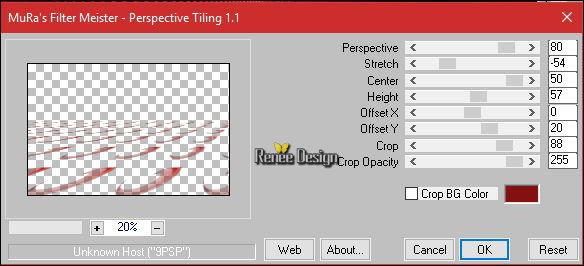
12. Effects- 3 D Effects- Drop Shadow with these settings: 18/16/18/30 black
13. Layers- Duplicate
14.
Effects –Plugins– Andromeda- Perspective – Side
Walls / It wrongside
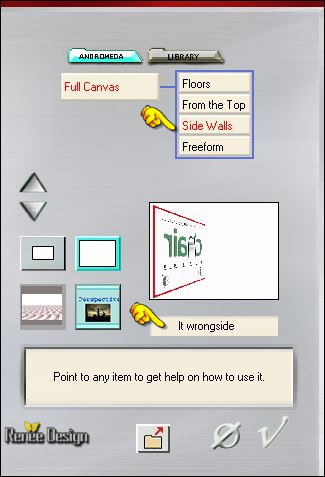
15.
Layers-Properties-Set the Blend Mode to " Hard Light "
16. Layers- Duplicate
17.
Image - Mirror - Mirror Horizontal (Image - Mirror in older versions of PSP)
18. Layers- Merge- Merge Down
19. Effects-Distortion Effects- Wave use the settings below
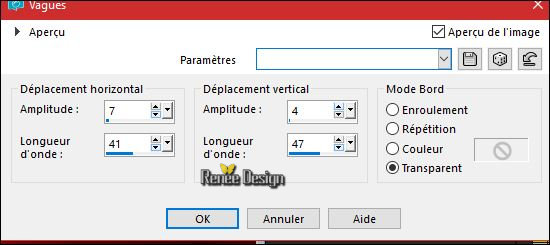
20. Effects- 3 D Effects- Drop Shadow with these settings: 18/16/18/30 black
21. Layers- Merge- Merge Down
22.
Selections –load/save selection –load selection from disc and select my selection: ‘’ Magdy_2’’
DELETE
 (click 3 times ) (click 3 times )
Selections- Deselect All
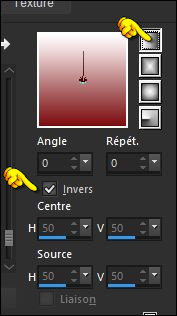
- Color Palette:Set your foreground color to #ffffff 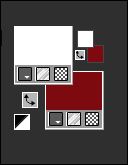
- Prepare a foreground/background linear gradient configured like this.
23.
Layers- New Raster Layer
24. Activate Flood Fill Tool and fill the layer with the gradient
25.
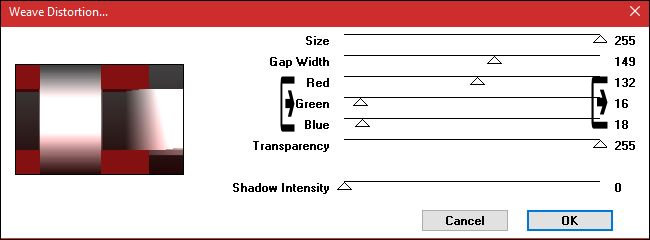
Effects – Plugins (Unlimited ) VM Natural – Weave
Distorsion
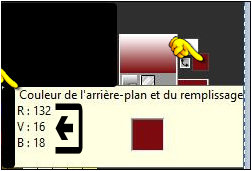
Click on the background color of your color palette (for me is it red)
Notice the three numbers on the left
For the filter, To determine the background color effect.
See Screen
26.
Effects –Plugins – Toadies – What are you 20 /
20
27. Effects –Plugins - Filter Factory Gallery J-
Reverb…
125
28. Image –Resize to
65 % all layers not checked
- Swap your materials, so the white color is on the bottom 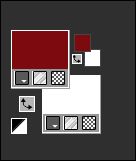
29.
Selections –load/save selection –load selection from disc and select my selection: ‘’ Magdy_3’’
DELETE

30. Open your tube ‘’ TalaNat_paysage_012-27-09-2013’’
- Image
Resize to 50%
- Edit - Copy- Activate your work -Edit - Paste as a new layer
- Put the tube in the left circle
31. Layers- Duplicate
- Image
Resize to 75 %
- Put the tube in the right circle
Keep Selected
32. Layers- New Raster Layer
33. Pot of Paint  – Match Mode RGB Value -Change the opacity of the color at 30% – Match Mode RGB Value -Change the opacity of the color at 30%
- Fill the left circle with the background color#ffffff
- Fill the right circle with the foreground color #841012
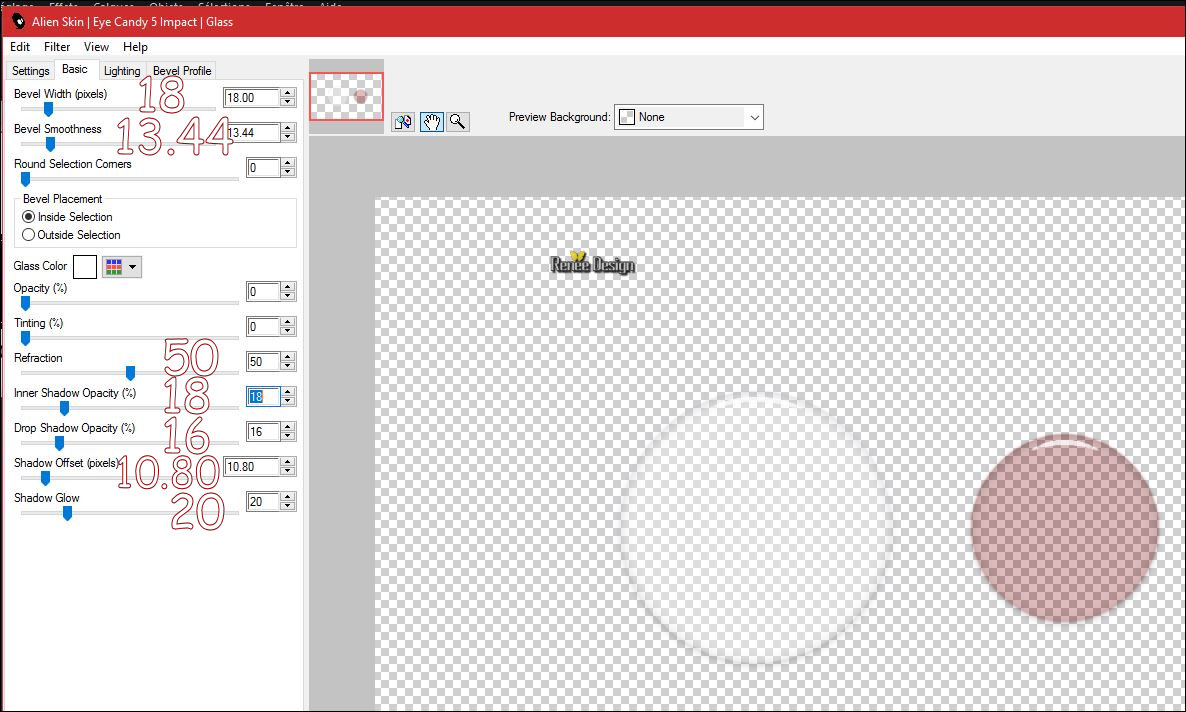
34. Effects
–Plugins - Eye Candy 5 Impact – Glass use the settings below
Selections- Deselect All
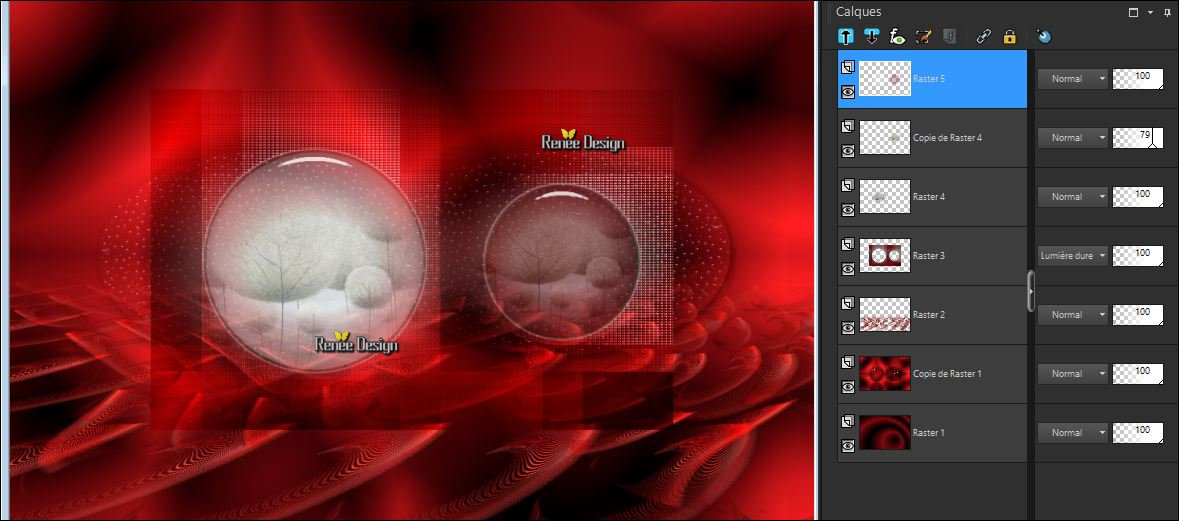
- Layer palette – Make Copy of Raster 4 active- Lower the Opacity of this Layer to 79%
- Your work and Layer Palette look like this now-You should have this result
- Layer palette – Make Raster 3 active
35.
Selections –load/save selection –load selection from disc and select my selection: ‘’ Magdy_3’’
36. Layers- New Raster Layer
37. Pot of Paint  – Match Mode -None- Change the opacity of the color at
100% – Match Mode -None- Change the opacity of the color at
100%
38. Activate Flood Fill Tool and fill the selection with the background color #ffffff
39.
Selections- Modify -Contract 1 pixel
DELETE
Selections- Deselect All
40. Layers- Merge- Merge Down
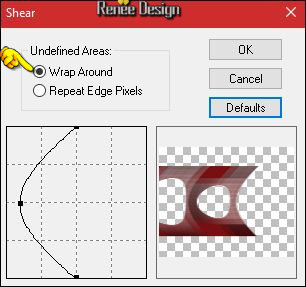
41. Effects
–Plugins – Distort – Shear
42.
Layers-Properties-Set the Blend Mode to " Hard Light "
- To replace the top of the layers palette
43. Open your tube ‘’Magdy_loup’’
- Edit - Copy- Activate your work -Edit - Paste as a new layer
- Activate your Move Tool (M) place it in the right place (see finished image)
44. Layers- New Raster Layer
45.
Selections –load/save selection –load selection from disc and select my selection: ‘’ Magdy_4’’
46. Activate Flood Fill Tool and fill the selection with the background color #ffffff (click 5 times )
Selections- Deselect All
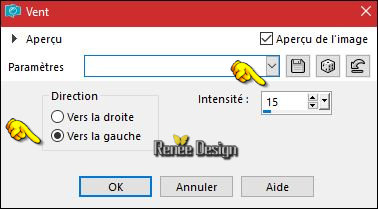
47. Effects
– Distortion Effects – Wind with these settings
48. Layers- New Raster Layer
49. Activate Flood Fill Tool  – and fill the layer with the background color #ffffff – and fill the layer with the background color #ffffff
-
Open your mask ‘’ Ildiko_Desings_Created@Mask (9)’’
in your Psp
50. Layers- New Mask Layer from Image
''Ildiko_Desings_Created@Mask
(9)''
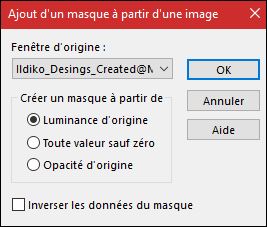
- Layers- Merge- Merge- Group
51.
Selections –load/save selection –load selection from disc and select my selection: ‘’ Magdy_3’’
DELETE

Selections- Deselect All
- Layer palette – Make Raster 1 active (bottom layer)
52.
Selections –load/save selection –load selection from disc and select my selection: ‘’ Magdy_5’’
53.
Selections-Promote Selection to Layer
54. Layers- Arrange- Bring to Top
55. Effects
–Plugins– Forge 5 or Forge 2 or 4 use the settings below (If you have a problem with this filter- choose a different texture )
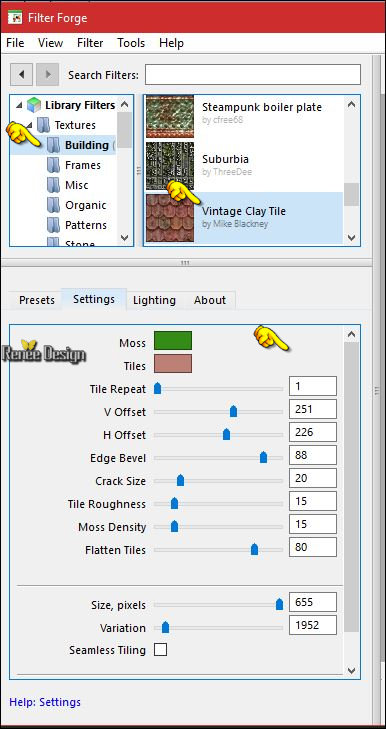
Selections- Deselect All
56. Effects
–Plugins – Alien Skin Exposure 2/Color film-tab Settings/User settings choose my Preset

Or manual settings as shown in the example below
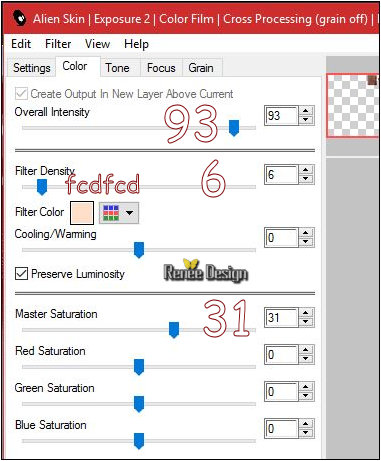 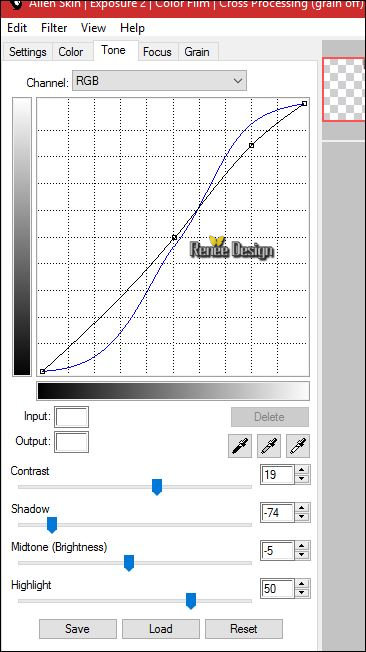 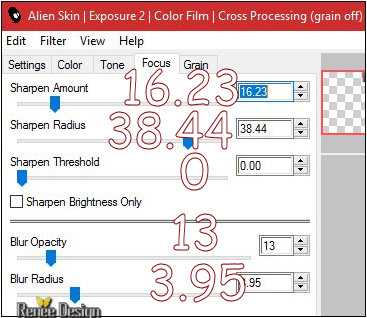
57. Effects- 3 D Effects- Drop Shadow with these settings: 15/11/65/8 black
58. Activate your Text Tool- Font-"Race 1 Brannt Chiseled NCV " (or take a font of your choice )
write your text "MAGDY"Activate Move Tool (M) move it the right place at the top of your image
- Apply a drop shadow (of your choice)
59.
Layers- Merge- Merge Visible
60. Image - Add borders-Symmetric NOT checked
-Color #841012
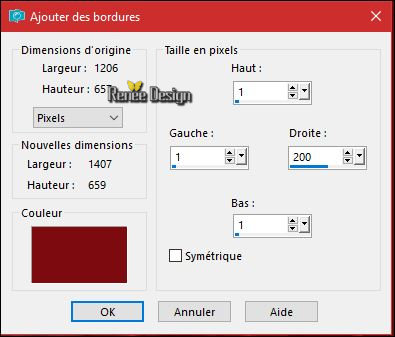
61.
Activate Selection Tool -Custom Selection (S) -Rectangle with these settings
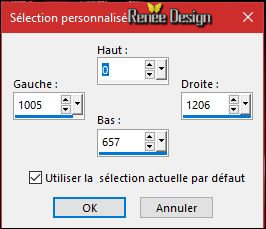
62. Effects
–Plugins – Alien Skin Image Doctor /Smart
Fill
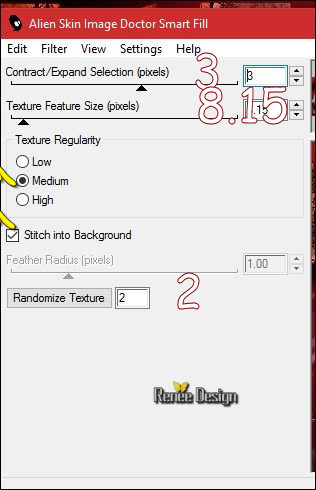
Selections- Deselect All
63. Open your tube ‘’ Renee_tube_escalier .png’’
- Edit - Copy- Activate your work -Edit - Paste as a new layer
- Activate your Move Tool (M)-move to the bottom right
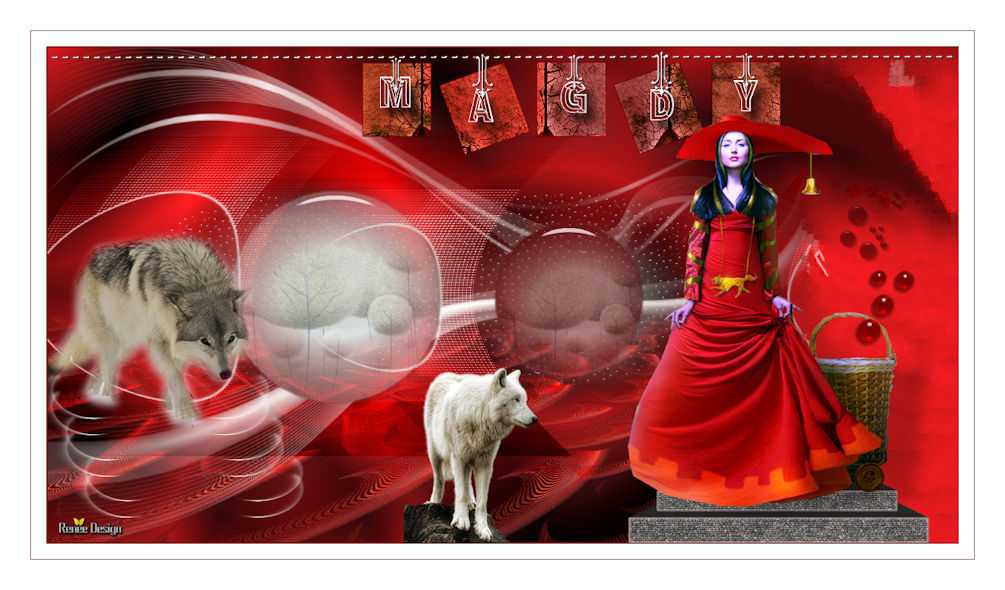
64. Open your tube ‘’ Renee_tube_magdy’’
- Activate the layer ‘’Magdy’’ -of the tube - Image Resize to 2 x
80%
- Edit - Copy- Activate your work -Edit - Paste as a new layer
- Activate your Move Tool (M) place it in the right place (see finished image)
65.
Effects –Plugins – EyeCandy5 Impact – Perspective
shadow/Preset ‘’Magdy_shadow’’
66. Back on tube -Activate the layer " loup" of the tube
- Image -
Resize to 60 %
- Edit - Copy- Activate your work -Edit - Paste as a new layer
- Activate your Move Tool (M) place it in the right place (see finished image)
67. Back on tube -Activate the layer ‘’boules’’ of the tube
- Edit - Copy- Activate your work -Edit - Paste as a new layer
-
Activate your Move Tool (M) place it in the right place
68. Open your tube ‘’ Magdy_image_2’’
- Edit - Copy- Activate your work -Edit - Paste as a new layer
- Activate Move Tool (M) move it the right place at the top of your image (see finished image)
69. Layers- Merge- Merge Visible
70. Image - Add borders-Symmetric checked 1 pixel #841012
71. Image - Add borders-Symmetric checked 20 pixels #ffffff
72. Image - Add borders-Symmetric checked 1 pixel #841012
73. Image - Add borders-Symmetric checked 40 pixels #ffffff
74. Image
Resize to 1005 pixels width
Save as JPG
I hope you enjoyed this lesson
Renée
This lesson was written by Renée 30/03/2017
Edited and Update
2017
*
Any resemblance with an existing lesson is a coincidence
* Do not forget to thank the people who work with us and for us I have appointed the tubeurs and translators
Thanks Renée
*
| 
 Translations


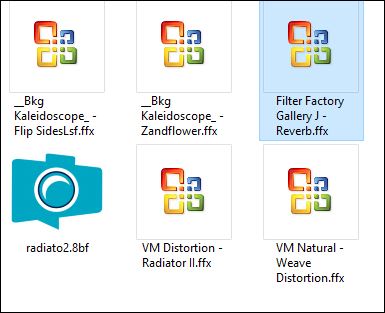

 If a plugin supplied appears with this icon it must necessarily be imported into Unlimited *


 (click 3 times )


 All rights reserved
