|
Let's start the lesson.

-
Color Palette- Set your foreground color to color #c5bbaf
- Set your background color to color #223260
-
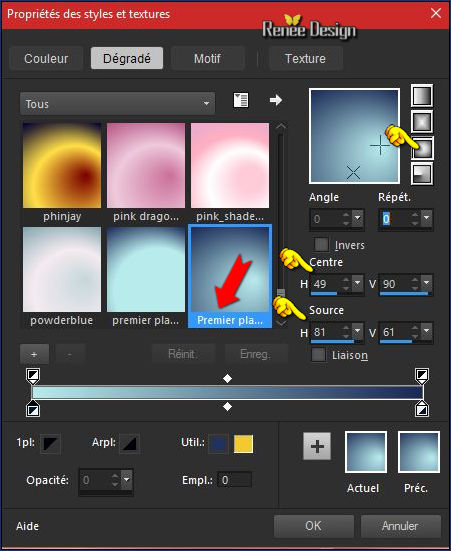
Properties Forground; Set your Foregroundcolor to foreground-background linear gradient,configured like this.

1.
Open New Transparent Image 1005 x 685 Pixels
2.
Activate Flood Fill Tool and fill the layer with the gradient
3.
Effects –Plugins -Unlimited – Toadies - *Sucking Toad* Bevel
I... - Sucking Toad* Bevel I

4.
Effects –Plugins - Unlimited - RCS Filter Pak 1.0- RCS
TripleExposure 255
5. Effects
–Edge Effects- Enhance More
6. Layers- Duplicate
- Image
Mirror(CTRL+B)
7. Effects –Plugins -
Unlimited - RCS Filter Pak 1.0- RCS TripleExposure
255
- Double click on this Layer and set the Blend Mode to " Soft Light "
8. Layers- Merge- Merge Down
9.
Effects –Plugins -Unlimited - Sapphire Filters 02-
SapphirePlugin_0199..use settings below.

- Color Palette- Set your foreground color to color #b5e8e9
10. Layers- New Raster Layer
11. Activate Selection Tool -Custom Selection (S) -Rectangle with these settings

12. Pot of Paint: Change the Opacity of the color at 50%- Activate Flood Fill Tool and fill the selection with the foreground color
Keep Selected
13.
Effects –Plugins - Unlimited – Mock – LaserSight
14.
Effects –Plugins -Unlimited - Sapphire Filters 09-
SapphirePlugin_0801..use settings below.

Selections Deselect All
15.
Effects -Plugins- Unlimited - Filter Factory Gallery J- Drink To
Me 38
16. Effects
–Plugins – Mirror Rave- Quadrant Flip using the default settings
17.
Effects –Plugins– Vanderlee Unplugged X –
Zoomlens

18.
Activate Selection Tool -Custom Selection (S) -Rectangle with these settings

DELETE 
Selections Deselect All
19.
Effects –Plugins– EyeCandy 5 Impact – Perspective
Shadow -tab Settings/User settings choose my Preset ‘’make_up_shadow »

20.
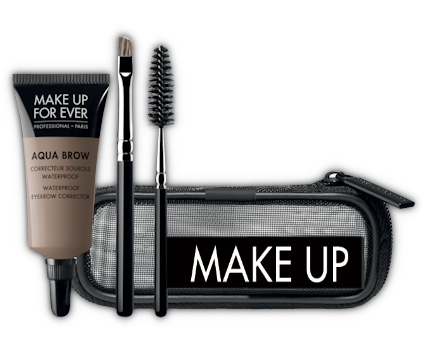
Open the tube ‘’ Renee_tube_make_up”
-
Edit/ Copy-Edit - Paste as new layer on your working image
21. Effects- Image Effects- Offset with these settings: H = 238 and V = - 6
Transparent checked
- Activate your Pick Tool (K) Mode Scale - stretch on top that it fits (Hit the M key of your Keyboard to deselect the Tool)
22. Layers- New Raster Layer
23. Activate Selection Tool -Custom Selection (S) -Rectangle with these settings

24. Pot of Paint: Change the Opacity of the color at 50% Activate Flood Fill Tool and fill the selection with the background color
Selections Deselect All
25. Effects- Distortion Effects-Wave use settings below

26. Effects- Edge Effects- Enhance More
- Layer Palette -Double click on this layer and set the Blendmode to " Screen "
27. Layers- Duplicate
- Layers- Merge- Merge Down
28.
Open the tube ‘’ Renee_tube_make_up_1’’
- Edit/ Copy-Edit - Paste as new layer on your working image
29. Effects- Image Effects- Offset with these settings: H = - 116 and V = - 41
Color Palette- Set your foreground color to color #ffffff - Set your background color to color#223260
30. Layers- New Raster Layer
31.
Selections –load/save selection –load selection from disc and select my selection:‘’ Make_up_1’’
32. Pot of Paint: Change the Opacity of the color at 100%
- Activate Flood Fill Tool and fill the selection with the foreground color #ffffff
Selections Deselect All
33.
Effects – Plugins-Unlimited – L &K’s – Pia 3
34.
Effects –Plugins– EyeCandy 5 Impact – Perspective
Shadow use settings below

35.
Open the tube ‘’’ Renee_tube_make_up_2”
-Edit/ Copy-Edit - Paste as new layer on your working image
36. Image-
Negative Image
37. Effects- Image Effects- Offset with these settings: H = 0 and V =
236
38. Layer Palette -Double click on this layer and set the Blendmode to " Screen "-Set the layer Opacity of this layer to 87%
- Properties Forground; Set your Foregroundcolor to foreground-background sunburst gradient,configured like this.

39. Layers- New Raster Layer
40.
Selections –load/save selection –load selection from disc and select my selection:‘’Make_up_2’’
41. Pot of Paint:Opacity of the color at 100% -Activate Flood Fill Tool and fill the selection with the gradient
42.
Effects - Distortion Effects – Pixelate use settings below

Selections Deselect All
43. Effects – Plugins-Unlimited - °v°
Kiwi`s Oelfilter – Setzboard 7
44.
Effects –Plugins- Unlimited - Italian Editors Effect-
Disturbo con dissolvenza sui Bordi 254/
94
-
Set the layer Opacity of this layer to 69%
45.
Open the tube ‘’
Renee_tube_make_up_3.png’’
-
Edit/ Copy-Edit - Paste as new layer on your working image
- With the Move Tool, move it to the left
- Color Palette: Set your Foregroundcolor to gradient and select : «
‘’dden BRainbow2 ‘’ - Prepare a sunburst gradient configured like this.

46. Layers- New Raster Layer
47
Selections –load/save selection –load selection from disc and select my selection:‘’Make_up_3’’
48. Pot of Paint:Opacity of the color at 100 % -Activate Flood Fill Tool and fill the selection with the gradient
Selections Deselect All
49. Open the tube ‘’ Renee_tube_make_up-image-3’’
- Activate layer "Raster 1" of the tube
-
Edit/ Copy-Edit - Paste as new layer on your working image
50. Effects- Image Effects- Offset with these settings:

- Layers- Arrange- Move 2x Down
- To replace the top of the layers palette
51. Layers- New Raster Layer
52.
Selections –load/save selection –load selection from disc and select my selection:‘’Make_up_4’’
53. Activate Flood Fill Tool and fill the selection with the gradient ( 3
clicks)
54. Layers- Duplicate
Selections Deselect All
-Layers- Merge- Merge Down
55. Layers- Merge- Merge Visible
56. Open the tube ‘’ Renee_tube_make_up-image-4.pspimage’’
-
Edit/ Copy-Edit - Paste as new layer on your working image
57. Effects- Image Effects- Offset with these settings:

58. Layers- Duplicate
59. Effects
–Plugins – Medhi – Weaver

60. Double click on this Layer and set the Blend Mode to " Hard Light "
- Color-Palette :Set your foreground color to color #b5e8e9 - Set your background color to color #223260
-Properties Forground; Set your Foregroundcolor to foreground-background sunburst gradient,configured like this.

61. Layers- New Raster Layer
62.
Selections –load/save selection –load selection from disc and select my selection:‘’Make_up_5’’
63. Activate Flood Fill Tool and fill the selection with the gradient
Keep Selected
64. Effects
–Plugins– Medhi – Weaver

Selections Deselect All
65. Effects
– Plugins- Penta Com- jeans 62/4
66.
Effects –Plugins– Flaming Pear – Flexify 2
click on the red arrow>>select my file preset ‘’ Make_up_Flexify 2 settings” can be used in any folder of your choice by clicking it.
3 Open it will be ok in your filter
Or manual settings as shown in the example below

67. Double click on this Layer and set the Blend Mode to " Multiply " -Set the layer Opacity of this layer to 71%
68. Effects- Edge Effects Enhance
69. Effects-Image Effects- Seamless Tiling use settings below

70. Image - Add borders-Symmetric checked:10 pixels #ffffff
71.
Image - Add borders-Symmetric checked:1 Pixel
#223260
72. Image - Add borders-Symmetric checked:50 pixels #ffffff
73. Effects
-Plugins - AAA Frames- Frame Works use settings below

74. Open the tube "titre" -Edit -Copy- Edit Paste as a new layer and move
75. Layers- Merge- Merge All (flatten)
Save as JPG
I hope you enjoyed this lesson
Renée
This lesson was written by Renée 20/07/2016
Edited and Update
2016
*
Any resemblance with an existing lesson is a coincidence
* Do not forget to thank the people who work with us and for us I have appointed the tubeurs and translators
Thanks Renée *
| 

 Translations


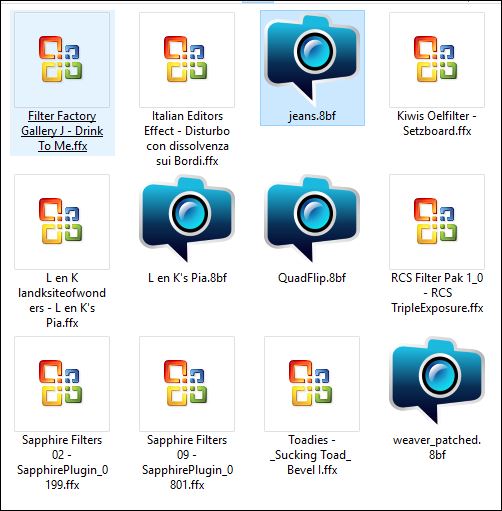
 When you see this logo the filter is imported in Unlimited


 All rights reserved