|
Let's start the lesson . Open your color palette in PSP
Your colors for this tutorial
1. Open the Background image ''fond_merveilleux_hiver''-
Promote to Raster Layer = Raster 1
2. Activate this tube ''_k@rine_
dreams _Ice_Queen_2114_Janvier_2012.jpg''/ Edit-Copy - Edit-Paste as a new layer (do not move it is in the right place)
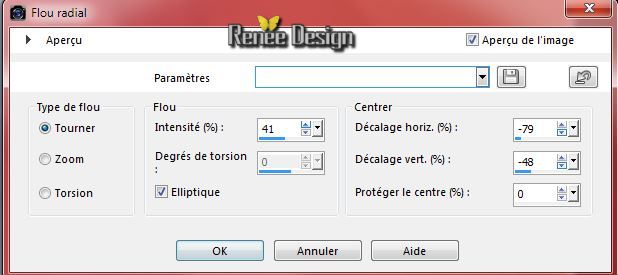
3. Adjust-Blur-Radial Blur with these settings
4. Effects-User Defined Filter- - Emboss 3 default
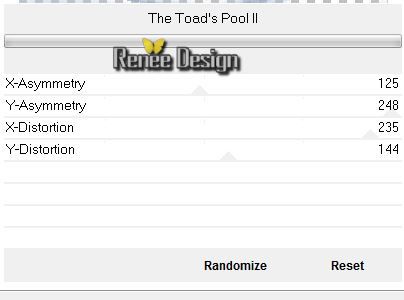
5. Effects- Plugins - Unlimited 2.0
- Distort - The Toaad's Pool II
6.
Effects-Plugins - Deformation- Circle Cell
57/ 184
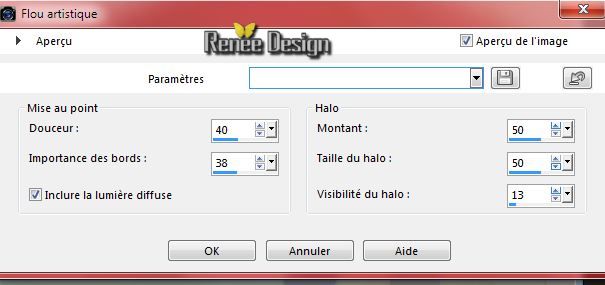
7.
Adjust-Softness-Soft Focus use settings below
8.
Adjust-Sharpness-Sharpen More
9.
Effects-Plugins - Penta Com - VTR2 /
31/0/169/0
10.
Layers- New Raster layer
11.
Selections - load/save selection - load selection from disk and choose my selection:''merveilleux hiver_1''
-
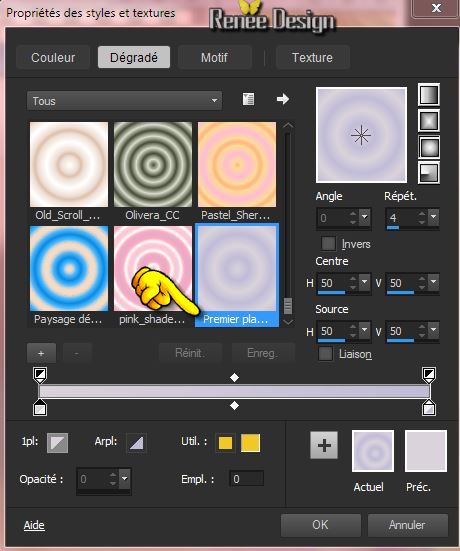
Material Properties: Foreground color
#dad3db Background color #c0bcd7
-
Prepare a Sunburst Gradient as configured like this Repeats 4/ invert not checked
12.
Activate Flood Fill Tool and fill the selection with the gradient
13.
Effects-Plugins -Redfield - Umatrix (I add this effect to the download map - in case you can't manage the plugin just past my effect as a new layer )
1.
First: set it to Comics !!! At the right: Tic on the " R "in the little red circle to restore the custom settings
2. Still at the right: tic on the image from the first icon ''horny''. On the left a raster with images will open - select image ''Cross''

-
Click on the litle eyes to close the other icons - see print screen
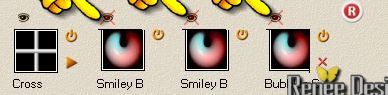
This is your result

14.
Layer Palette -Double click on this Layer and set the Blend Mode to "Screen "
Selections-Deselect All
15.
Activate this tube ''sd_winterbride_snow.pspimage''
-
Edit/copy-Edit paste as a new layer
16.Activate Pick Tool(K) "mode scale" place it in the right place (Pull the Left and Right Nodes outwards as shown in the example)

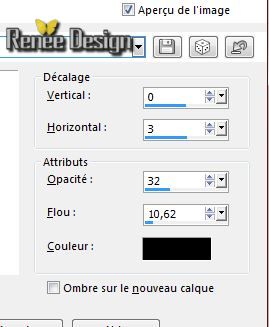
17.
Effects - 3D Effects - Drop shadow with these settings:
18.
Activate this tube ''1293040110_paysages_nikita.pspimage''
/activate ''misted-nikita '' of the tube
-Edit/copy-Edit paste as a new layer.
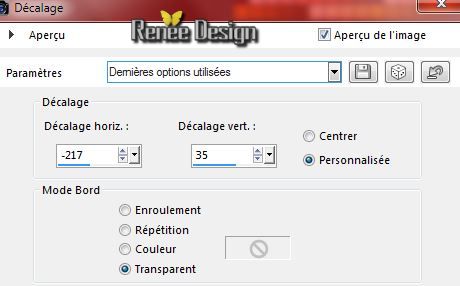
19.
Effects- Image Effects-Offset with these settings:

-
Layers-Arrange-Move Down-above raster 3 ore 2
- Activate the top of the Layer-Palette
20.
Activate this tube ''hiver_image_1''-Edit/copy-Edit paste as a new layer on your working aera.
-With your Move Tool place against the upper edge
21.
Effects-Plugins - Graphic plus - Emboss /80/0/31/0
22.
Activate this tube''merveilleux_hiver_texte" -Edit/copy-Edit paste as a new layer on your working aera .With your Move Tool move to the left
-Layer Palette -Double click on this Layer and set the Blend Mode to "
Luminance". Reduce the opacity of this layer to 44
23.
Materials Properties: foreground color to color white
24.
Layers- New Raster layer
25.
Selections - load/save selection - load selection from disk and choose my selection:''merveilleux hiver_2'-
Flood Fill Tool: fill selection with the foreground color white
Selections-Deselect All
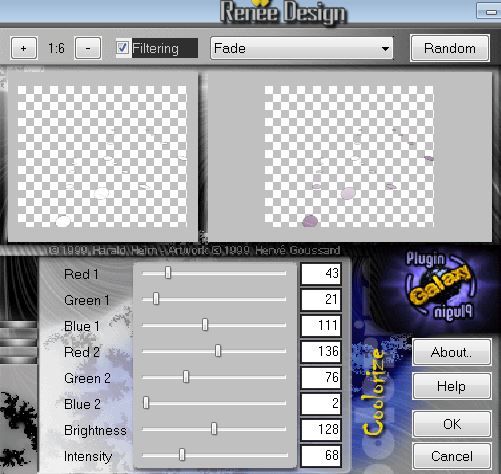
26.Effects-Plugins - Plugin Galaxy- Coolorize/Fade use settings below
27.
Effects-Plugins - EyeCandy 5 Impact -
Perpsective shadow-tab Settings-User settings choose my Preset ''hiver_persp''
28.Layers-Duplicate
29.
Effects-Plugins -Unlimited 2.0 - Toadies -Weaver settings
59/48/222
30.
Effects-Edge Effects-Enhance More
31.Effects-Plugins -Andromeda- Perspective - Side
walls - It wrongside

32.
Effects - 3D Effects - Drop shadow default settings
33.
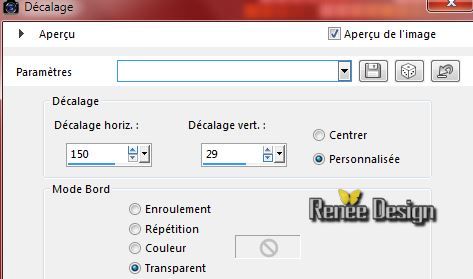
Effects- Image Effects-Offset with these settings:
34.
Layers-Duplicate
35.
Effects- Image Effects-Offset with these settings:
36.
Layers-Merge-Merge-Down
37.Effects-Plugins - EyeCandy 5 Extrude -tab Settings-User settings choose my Preset -''hiver_extrude''
38.Layer Palette -Double click on this Layer and set the Blend Mode to "Normal" .Reduce the opacity of this layer 83
39. Effects-Plugins -EyeCandy 5 - Nature/ Snow drift -tab Settings-User settings choose my Preset "
hiver-snowdrift''
40.
Activate this tube ''LKD_OSCTDecTS_icewheel.pspimage''/Edit-copy-Edit paste as a new layer on your working aera and place
41.
Activate this tube ''etoiles-neige'' - Edit-copy-Edit paste as a new layer on your working aera
(2 layers etoiles) -Edit-copy-Edit paste as a new layer on your working aera and place
-
Layers Merge-Merge -Down (all the stars together)
42.
Effects - 3D Effects - Drop shadow with these settings/color: #c0bcd7

43.
Layers- New Raster layer
44.
Selections - load/save selection - load selection from disk and choose my selection:''merveilleux hiver_3''
-
Flood Fill Tool: fill selection with color white (2-click in the selection)
Selections-Deselect All
45.
Layer Palette -Double click on this Layer and set the Blend Mode to "Dissolve " .Reduce the opacity of this layer to 55
46.
Activate this tube ''WHITE CHRISTMAS by_Mago74 el (81).pspimage''
-
Edit/copy-Edit paste as a new layer.With your move tool move to the left
47.
Activate this tube ''bee_glacial_el16.pspimage''
-
Edit/copy-Edit paste as a new layer. With your move tool move to the bottom right corner
48.
Layers- New Raster layer
49.
Selections - load/save selection - load selection from disk and choose my selection:"merveilleux hiver_4"
-Material Properties :Change the background color into :
#695d61
50.
Pot of Paint opacity 50 - Flood Fill Tool: fill selections with your background color
Selections-Deselect All
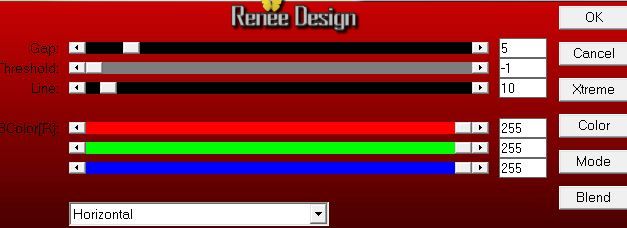
51.
Effects-Plugins - AP01-Line silverling use settings below
52. Effects-Plugins - Unlimited 2.0
- Toadies -What are you - Overdose x and y dose 255
53.
Activate this tube ''EC8AC8A72@Lulu.pspimage''-
Edit/copy-Edit paste as a new layer and place .
54. Effects-Plugins - Eyecandy 5 Impact -Perpsective shadow-tab Settings-User settings choose my Preset ''hiver_1''
55.
Activate this tube ''e36_ks (2).pspimage''/Image
Resize 70%
-Edit/copy-Edit paste as a new layer and place
56. Effects-Plugins Eyecandy 5Impact -Perpsective
shadow-tab Settings-User settings choose my Preset - ''hiver_2''
57.
Layers- Merge-Merge Visible
58.
Image - Add borders-Symmetric checked: 2 pixels color 4
59.-
Image - Add borders-Symmetric checked: 20 pixels color 1
60.-
Image - Add borders-Symmetric checked: 5 pixels color 5
61.-
Image - Add borders-Symmetric checked: 30 pixels color 2
62.-
Image - Add borders-Symmetric checked: 10 pixels color 1
63.-
Image - Add borders-Symmetric checked: 1 pixels color 5
64.
Activate Magic Wand and click in the white border of 30
pixels
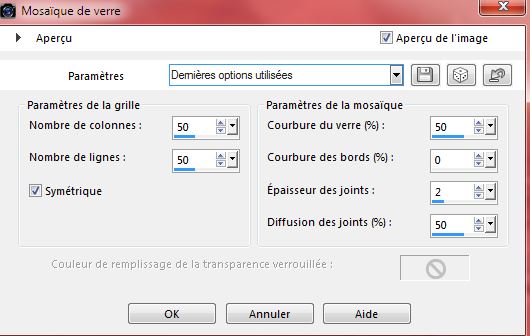
65.-Effects-Textur Effects-Mosaic Glass use settings below
66.-
Effects-Edge Effects-Enhance More
Selections-Deselect All
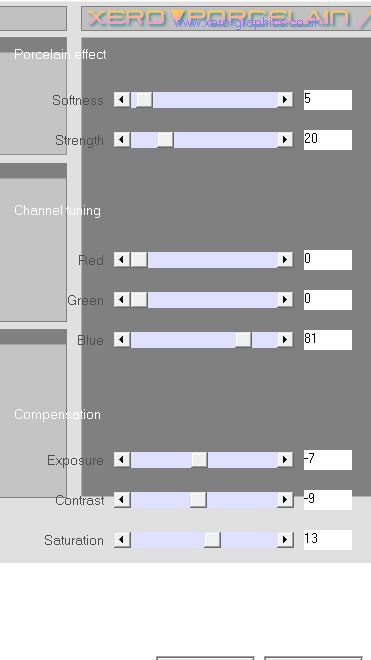
67.Effects-Plugins - XERO XL -Porcelaine
68.
Image Resize 985 pixels Width
Save as JPG
I hope you enjoyed this lesson
This lesson was written by Renée
6/09/2014
Created the
09//2014
*
Any resemblance with an existing lesson is merely a coincidence *
* Don't forget to thank the people who work for us and with us. I named the tubeurs - Testers and the translators.
Thanks Renée. |

 Tranlations


 All rights reserved