|
Let's start the lesson.Open the color palette

1. File - New - Open a new transparente image of 1025 x 625 pixels
- Preparation: Color-palette:Set your foreground color to #f8d7b4 -Set your background color to#6f6151
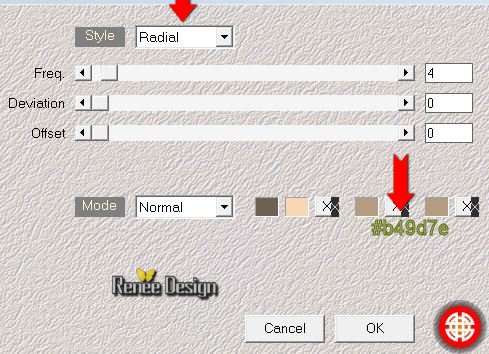
2. Effects-Plugins – Medhi - Wavy Lab 1.1 with these settings = third color is (#b39c82)
3. Effects-Plugins –Unlimited
- &<Bkg Kaleidoscope>-Swirl Away- With this setting,
12
4. Adjust-Blur-Gaussian Blur: Radius 42
5. Layers- Duplicate
6. Effects-Plugins – Simple – Horizontal
Grain
7. Effects-Edge Effects-Enhance
8. Double click on this layer and set the Blendmode to Burn
9. Layers-Merge- Merge- Down
10.Layers- Duplicate
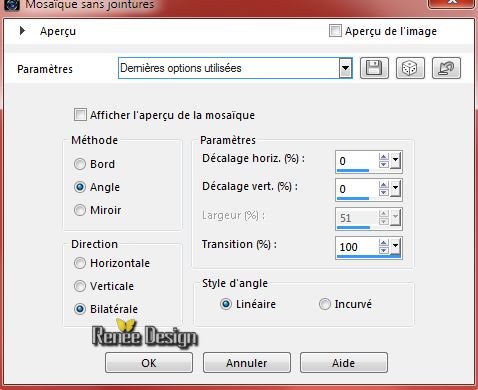
11. Effects-Image Effects-Seamless Tiling with these settings
12. Effects-Plugins –Unlimited - Render –
Clouds using the default settings
13. Selections –load/save selection –load selection from disc and choose: ‘’ Etrange
_forêt_1’’
14. Effects-Artistic Effects-Aged Newspaper 100
15. Effects-Edge Effects-Enhance More
16. Selections-Promote selection to layer
17. Effects-3D Effects-Drop Shadow with these settings: 0/0/65/40 black
Selections-Deselect All
18. Layers- Duplicate
19. Effects-Plugins – Unlimited – VM Extravanga- Aura
Detector with these settings

20. Double click on this layer and set the Blendmode to Overlay -Set the layer opacity of this layer to
34%
21. Effects-User Defined Filter– Emboss 3 using the default settings
22. Layers-Merge- Merge- Down
23. Double click on this layer and set the Blendmode to Exclusion
24. Effects-3D Effects-Drop Shadow -as in step 17
25. Effects-Edge Effects-Enhance More
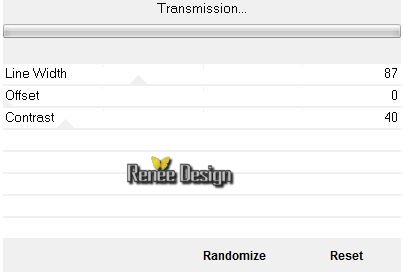
26. Layer-Palette: activate layer underneath (Copy of Raster 1)
27. Effects-Plugins – Unlimited – VM Extravanga –
Transmission
28. Selections –load/save selection –load selection from disc and choose: ‘’ ’ Etrange
_forêt_2’’
29. Edit-Cut!!!-Edit paste as a new layer on your working image
Selections-Deselect All
30. Image Free Rotate – 90 ° direction left
31. Effects-Plugins –Simple –
Blintz
32. Image Resize 82 % All layers not checked
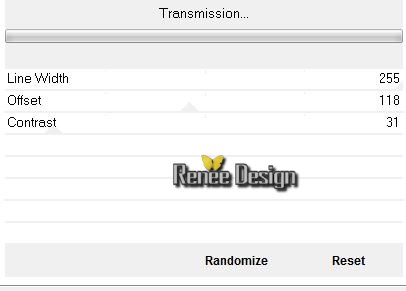
33. Effects-Plugins – Unlimited - VM Extravanga –
Transmission
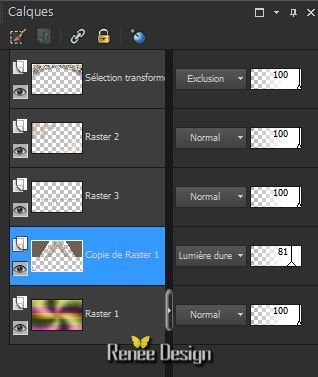
- Layer Palette; Make Copy of Raster 1 active
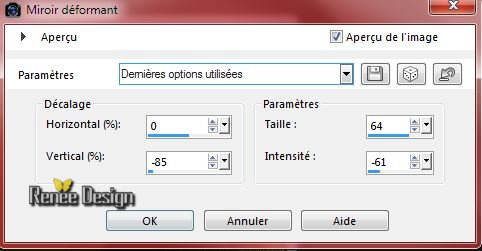
34. Effects-Reflection Effects-Rotating Mirror with settings below
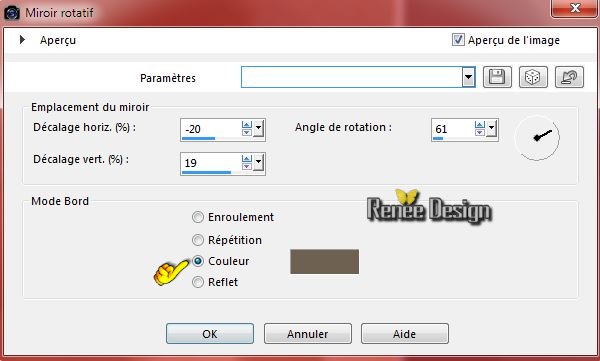
35. Double click on this layer and set the Blendmode to Hard Light -Set the layer opacity of this layer to 81%
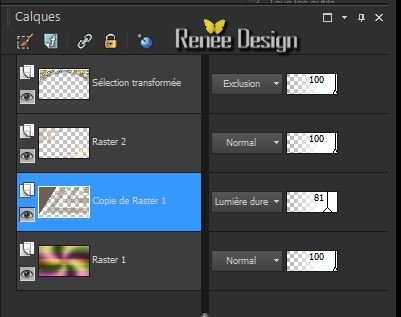
Layer palette look like this now
36. Selection Tool ( S ) Custom selection use settings below
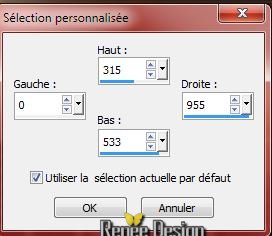
Hit the Delete Key of your Keyboard
Keep Selected !!
37. Layers- New raster layer
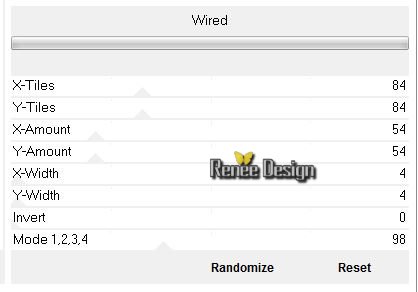
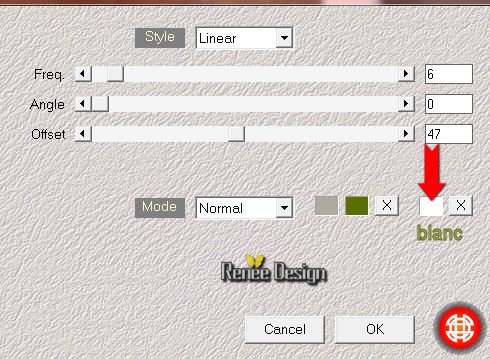
38. Effects-Plugins –
Unlimited - VM Instant Art- Wired with settings below
39. Effects-Plugins –Transparency – Eliminate Black
Selections-Deselect All
40. Effects-Plugins – Simple - Zoom out and Flip
41. Effects-Plugins –
Unlimited - &<Bkg Kaleidoscope>-Flip
SidesLsf
- Layer Palette: Make Copy of Raster 1 active
42. Effects-Plugins –
Unlimited - &<Bkg Kaleidoscope>-Flip
SidesLsf
Layer palette look like this now
- Layer Palette; make raster 2 active
43. Effects-Geometric Effects–Perspective
Vertical with these settings-Warp
44. Double click on this layer and set the Blendmode to Soft Light
45. Effects-3D Effects-Drop Shadow with these settings: 0/0/65/40 black
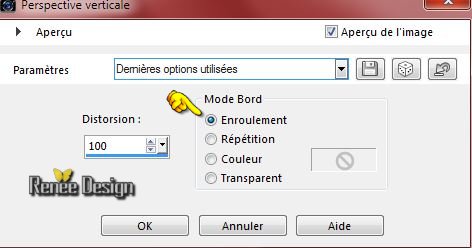
46. Effects-Geometric Effects–Perspective Vertical with these settings /Color = black

- Layer Palette;Make raster 3 active
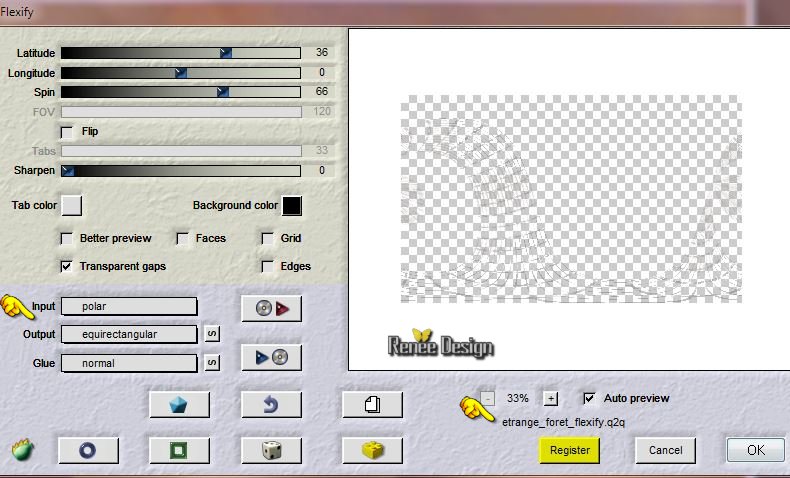
47. Effects-Plugins –Flaming Pear Flexify
clicking on the red arrow and search your file:: ‘’ etrange_foret_flexify (attention not filter flexify2)
Or manual settings as shown in the example below
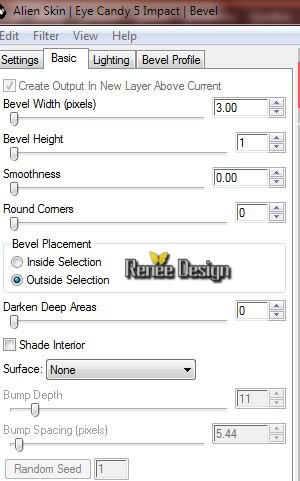
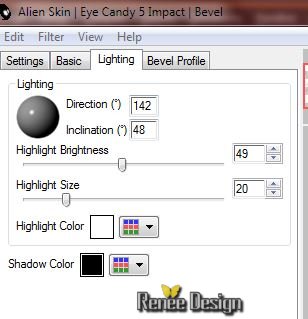
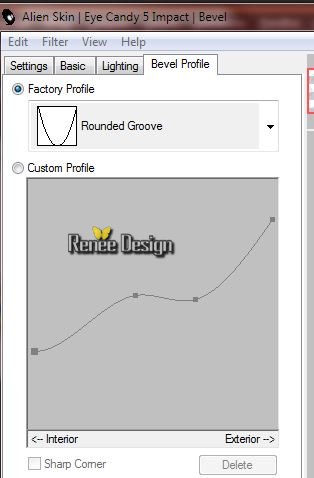
48. Effects-Plugins –EyeCandy 5 Impact –
Bevel-tab Settings/User settings choose my preset: etrange_foret_bevel
Or manual settings as shown in the example below
Preparation:Color-palette:Set your foreground color to
#5b6e02
49. Layers- New raster layer
50. Selections –load/save selection –load selection from disc and choose: ‘’Etrange
_forêt_3’’
*Pot of Paint: Opacity of the color at 100% -Activate Flood Fill Tool and fill the selection with the foreground color
Selections-Deselect All
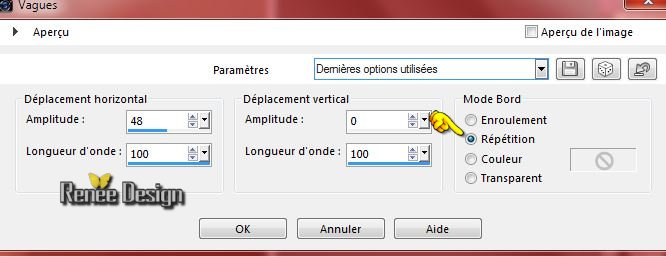
51.Effects-Distortion Effects-Wave with settings below
52. Effects- Artistic Effects-Neon Glow with these settings 20/
95
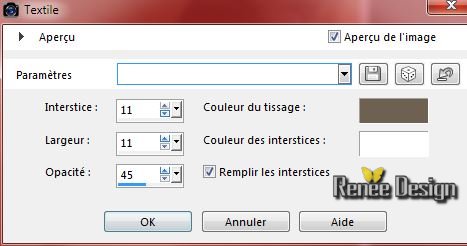
53. Effects-Texture Effects- Weave with these settings
54. Effects-Edge Effects-Enhance
55. Effets
–Plugins -Unlimited - Alf's Border FX- Border Circular Fade...With this setting 195 /158
56. Freehand selection Tool -Point to Point-Selection tool rectangle – Draw a selection as shown below

57. Effects-Distortion Effects-Warp with settings below
Selections-Deselect All
Activate top layer in the Layer palette
58. Layers- New raster layer
59. Activate the brush image ‘’etrange_foret_lighting’’
- File- Export Custom Brush (Give it a name) ‘’etrange_foret_lighting’’
- Activate Brush Tool and select my file:'‘’etrange_foret_lighting’’ with these settings

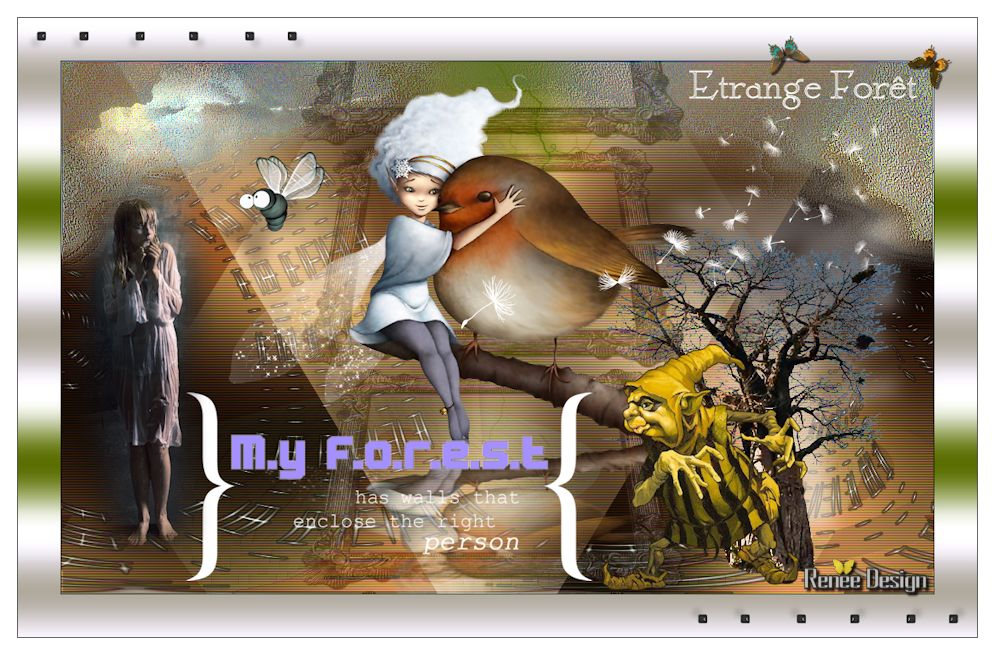
-Stamp your brush in the right place by using your foreground color (See Finished Image )
60. Activate the tube ‘’
3kFm998JutSdPSF-sfUcg0RxZBk’’-Erase the
signature
- Edit - Copy -Edit - Paste as new layer on your working image
- With the Move Tool, move it in the bottom right corner
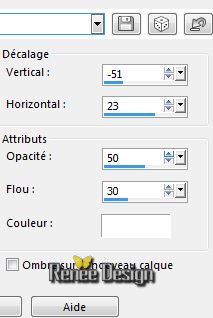
61. Effects-3D Effects-Drop Shadow with these settings -Color white
62. Activate the tube ‘’etrange_foret_cadre’’
- Edit - Copy -Edit - Paste as new layer on your working image
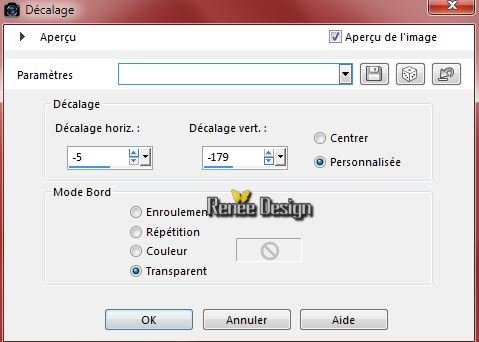
63. Effects-Image Effects-Offset with these settings
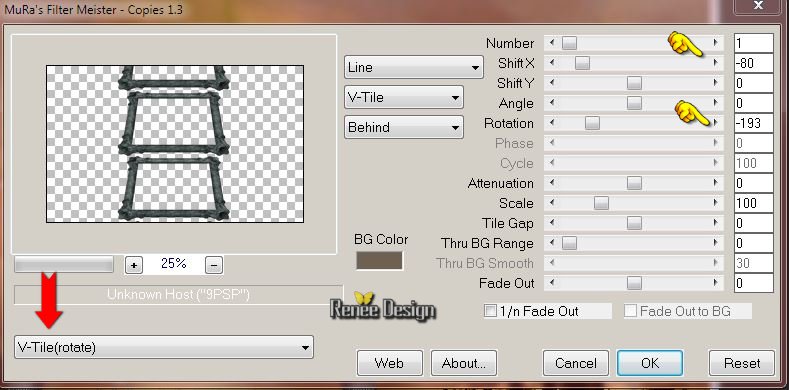
64. Effects-Plugins - Mura’s Meister –
Copies with these settings
65. Double click on this layer and set the Blendmode to Luminance Legacy -Set the layer opacity of this layer to 53%
66. Activate the tube ‘’
Aster_fairies5.pspimage »
Image Resize 75%
- Edit - Copy -Edit - Paste as new layer on your working image
- With your Move Tool place it in the right place
67. Effects-Plugins – Eyecandy 5
Impact Perspective shadow -tab Settings/User settings choose my preset: ‘’etrange_foret-PERSP’’
68. Activate the tube ‘’
ajgv_IRONCRA-1_211008.psp’’
- Image Resize 75%
- Edit - Copy -Edit - Paste as new layer on your working image
-
Pick Tool (K) put the image in it's place, as in the example below
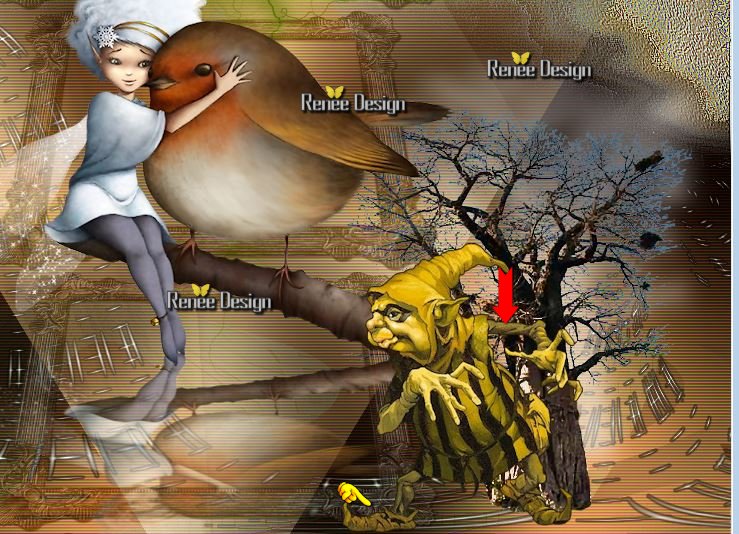
69. Activate the tube ‘’ texte_renee_my
forest’’
- Edit - Copy -Edit - Paste as new layer on your working image
- With your Move Tool move to the bottom left ( see finished image)
70. Image – Negative Image
(When you want to use different colours you now can colorize
Adjust - Hue and Saturation - Colorize *
)
71. Activate the tube’’ Alone FlexFlex-misted tube of
A PSP Devil’’ Image Resize 60%
- Edit - Copy -Edit - Paste as new layer on your working image
- With your Move Tool move to the bottom left ( see finished image)
72. Layers- New raster layer
73. Selections –load/save selection –load selection from disc and choose: ‘’ Etrange
_forêt_4’’
74.
Properties – foreground color / Put your foreground color on White #ffffff -Activate Flood Fill Tool and fill the selection with the foreground color white
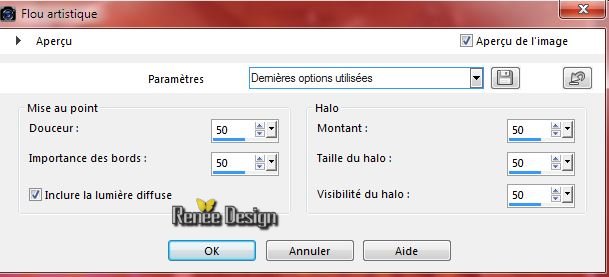
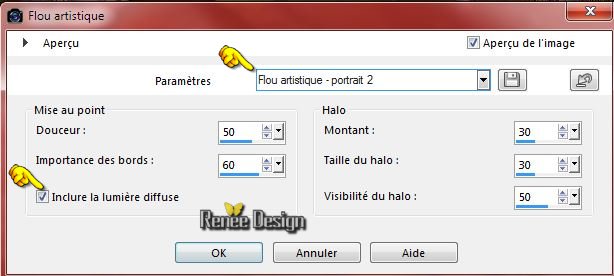
75. Adjust-Softness-Soft Focus with settings below
Selections-Deselect All
76. Effects-Plugins – Unlimited - Alf's Border FX- Border Fade
III with these settings 138/43
77. Double click on this layer and set the Blendmode to Hard Light
-Activate the tube ’’etrange_foret_decos »You may minimize your tube for a moment, but do not close, we will need it again soon
78. Activate the layer ‘’insect’’
- Edit - Copy -Edit - Paste as new layer on your working image
79. On the same tube: Activate the layer
‘’nuage
- Edit - Copy -Edit - Paste as new layer on your working image
- With your Move Tool: move to the upper left corner ( see finished image) (Blendmode =Overlay )
80. Image - Add borders-Symmetric checked: 1 pixel black
- Preparation: Color-palette:Set your foreground color on #5b6e02 -Set your background colour to #afaa9d
81. Selections-Select All
82. Image - Add borders-Symmetric checked: 50 pixels white
83. Selections-Invert
84. Effects-Plugins – Medhi –Wavy
Lab with these settings
85. Selections-Promote selections to layer
86. Adjust-Softness-Soft Focus with settings below
Selections-Deselect All
87. Activate the tube
’’etrange_foret_decos »
- Activate layer ‘’carre’ of the tube
- Edit - Copy -Edit - Paste as new layer on your working image
- With your Move Tool move to the upper left corner ( see finished image)
88. Layers- Duplicate
89. Image Mirror – Image Flip
90. Activate your Text Tool -Font ‘’ ErehwonRomanNF’’ /
Type: ‘’Etrange Forêt’’ ( my colors are white and gray -see what is best for you !) With your move tool:move to the upper right corner
91. Layers-New raster layer -Picure Tube Tool- apply two butterflies (see what is best for you !)
92. Image - Add borders-Symmetric checked: 1 pixel black
93. Image - Add borders-Symmetric checked: 20 pixels white
94. Image Resize 995 pixels Width
Save as JPG
I hope you enjoyed this tutorial .
Renée
This lesson was written by Renée 02/05/2015
edited and update
on 2015
*
Any resemblance with an existing lesson is merely a coincidence *
* Don't forget to thank the people who work for us and with us. I named the tubeurs - Testers and the translators.
Thanks Renée.
*
| 
 Translations


 When you see this logo the filter is imported in Unlimited

 All rights reserved