|
Let,s begin
1.
Open your Image ''fond_nature_fantaisie''
2.Layers-Duplicate
3.
Effects -Plugins Flaming Pear -Flexify (Attention take
Flexify2)
4.
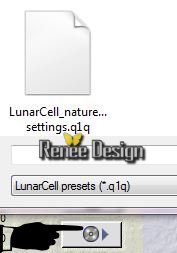
Selections - load/save selection - load selection from disk and choose ''nature_fantaisie''/
Delete
Keep Selection
5.
Aktivate the bottom of the layers-palette (Raster 1)
Selections- Promote Selection to Layer
Aktivate the top of the layers-palette
6.
Layers-Merge-Merge Down/Selections-Select none
7.
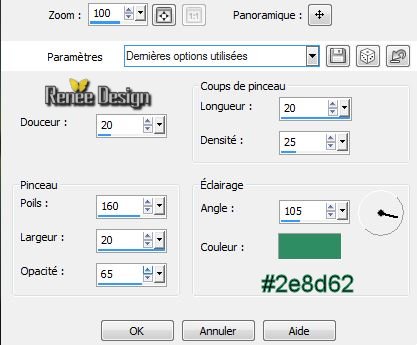
Effects- Art Media Effects (Effect old version) / Brush Strokes
8.
Effects -Plugins Simple / Simple left Right Warp
9.
Effects - Plugins Photoschofun /Kylie
10.
Effects - 3D Effects-Drop Shadow 0/0/50/55 black
11.
Image - Resize 55 % Resize all layers not checked
12.
Effects -Plugins Alien Skin Xenofex 2 / Flag
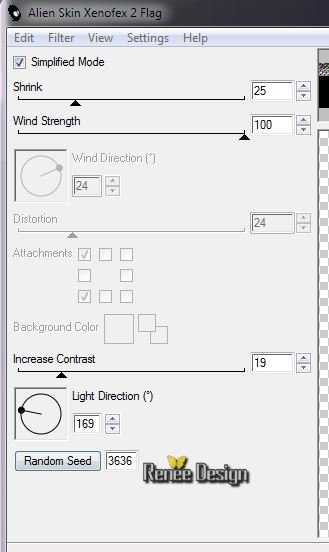
Repeat the same effect again (The colors may be slightly different into your psp)
13.
Effects- Plugins EyeCandy 5 Impact - Perspective shadow/ Preset
''nature_fantaisie_persp''
14.Layers- New Raster Layer
15.
Selections - load/save selection - load selection from disk and choose ''nature_fantaisie_1''
16.
In the color palette / Set foreground to color white /
Set the opacity of your colors to 25% / Flood Fill Tool: fill the selection with white
Selections-Select none
17.
Effects- Edge Effects - Enhance More
18.
Open the tube ''renee_nature_fantaisie_image_1'' / Edith/copy- Edith/ paste as new layer and place
19.
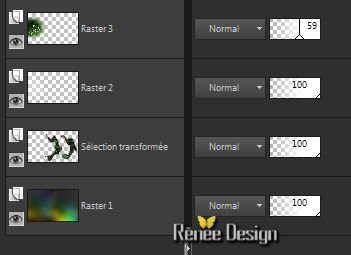
Effects-Plugins Graphic Plus - Emboss (all 0)
Your work and Layer Palette look like this now
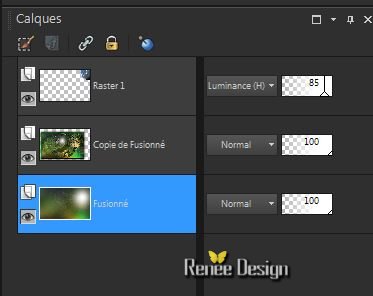
20.
Aktivate the layer selection transformed
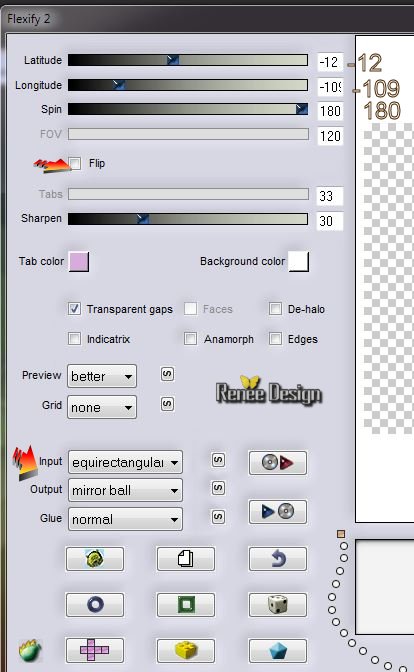
21.
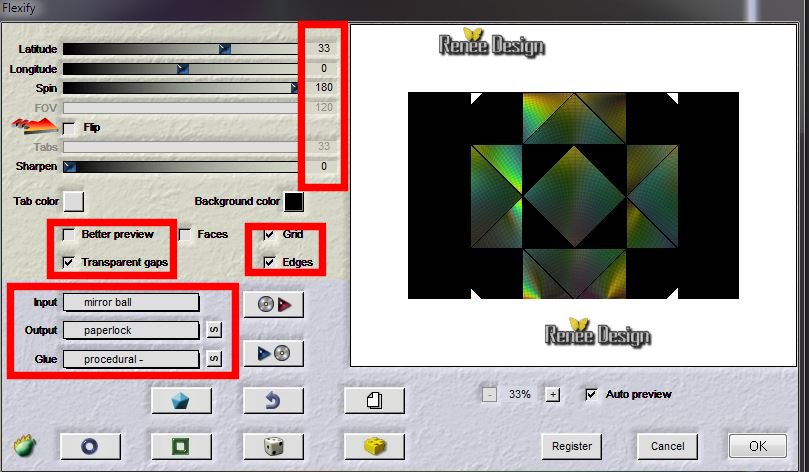
Effects -Plugins Flaming pear - Flexify2
22.
Open the tube ''KrysMisFairies16-12-13-7'' /Edith/copy- Edith/ paste as new layer / Image Mirror and place
Lower the opacity down to 61%
Aktivate the top of the Layers palette
23.
Layers-New Raster Layer
24.
Selections - load/save selection - load selection from disk and choose ''nature_fantaisie_2''
/Flood Fill Tool: fill the selection with color: #f0d438 (Attention : Set the opacity of your colors to 100)
-
Selections - Select- none
25.
Effects -Reflection Effects-Feedback 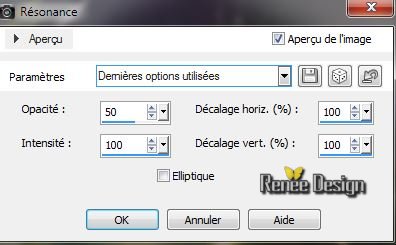
26.
Effects- Edge Effects Enhance /Blend Mode to
"Hard Light" and lower the opacity to 55%
27.
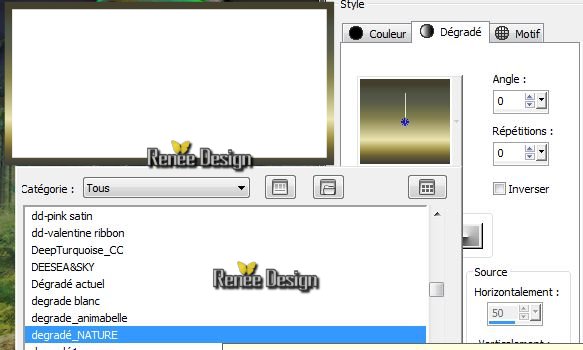
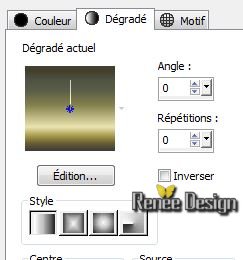
Material Properties: Set Foreground color to gradient :
''degradé_nature''/ Prepare a linear gradient configured like this
26.Layers, New Raster Layer
27.
Set the opacity of your colors to 65%. Flood Fill Tool: fill the selection with the gradient
28.
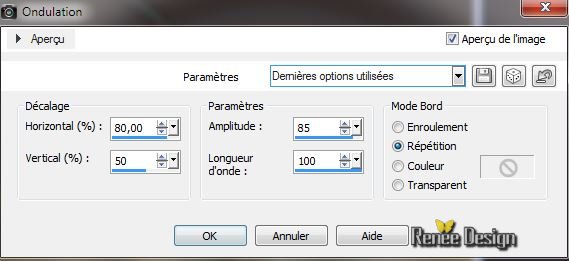
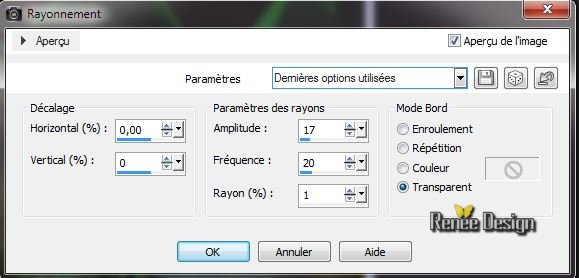
Effects - Distortion Effects- Ripple
29.
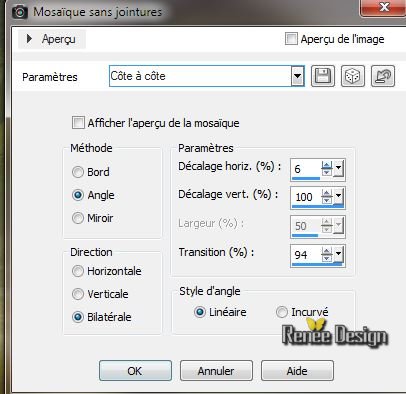
Effects- Image Effects-Seamless Tilling
30.
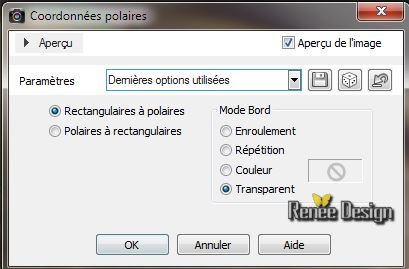
Effects -Distortion Effects - Polar Coordinates
31.
Blend Mode to "Hard Light"and lower the opacity to 51%
32.Layers- New Raster Layer
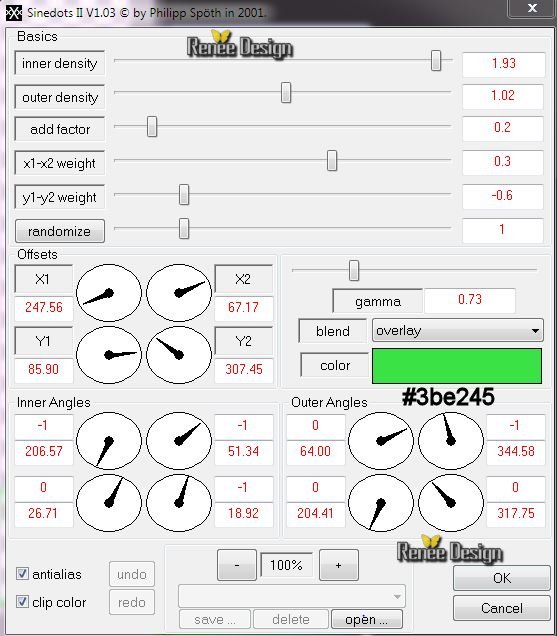
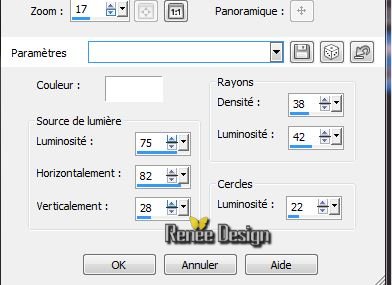
Effects - Dragon FLy -Sinedots II
(if worries put the settings manually see screenshot attached below)
33.
Image - Mirror / Lower the opacity to 48%
34.
Open the tube ''renee_nature_fantaisie_image2'' / Edit/ copy- Edit/ paste as new layer and place(do not move it is in the right place)
35.
Effects - Distortion Effects - Spiky Halo
36.
Selections - load/save selection - load selection from disk and choose
''''nature_fantaisie_3''/ Delete
37.
Selections-Select none
Eraser Tool: erase off too much on that door see example below
38.
Open the tube ''calguisbird241120111''/ Image Resize to 65% / Edit/copy-Edit past as a newlayer and place
Blend Mode " Luminance
Legacy"
39.
Open the tube ''caught_by_bibi54_by_thafs"/Image
Resize to 75% / Edit/copy -Edit paste as a new Layer and place
40.
Open the tube ''renee_nature_fantaisie_image_3'' Edit/copy -Edit paste as a new Layer /Place in the bottom right corner
41.
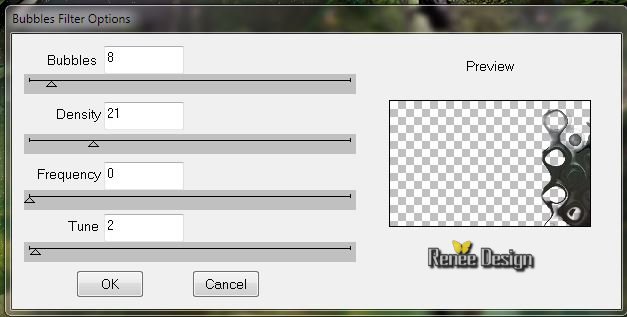
Effects - Plugins DSB Flux- Bubbles
42.
Blend Mode to "Soft Light"
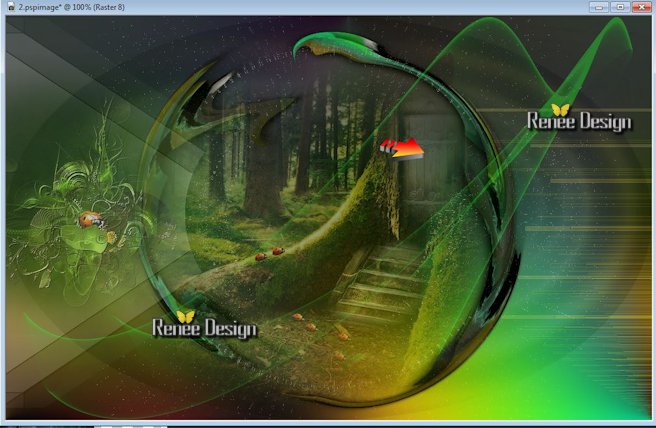
Well look like this
43.
Open the tube "agv-steampunk_Rooster_by_ursulav-13052013''
/Image- Resize to 25 % /Edit/copy - Edit/ place as a new Layer and place
Blend Mode to "Luminance Legacy"
44.
Layers-Merge-Merge Visible
45.Layers-Duplicate
46.
Effects - Illumination-Effects -Sunburst
47.
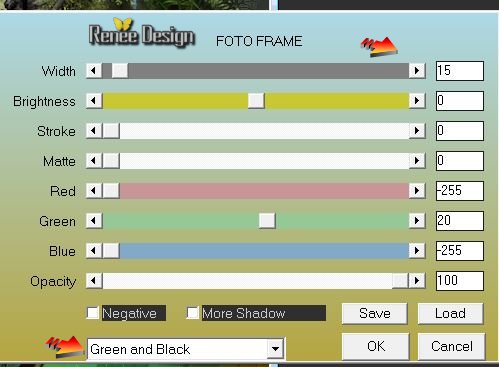
Effects - Plugins AAA Frame - Foto Frame
48.
Image -Resize 85 % Resize all layers not checked
49.
Effects - 3D Effects-Drop Shadow 0/0/85/55 black
50.
Effects- Image Effects - Offset H= -65 et V = 0
transparent
51.
Aktivate the bottom of the layers-palette (Fusionné)
52.
Adjust-Blur-Gaussian Blur-Radius 65
Aktivate the top of the Layers palette
53.
Layers-New Raster Layer
54.
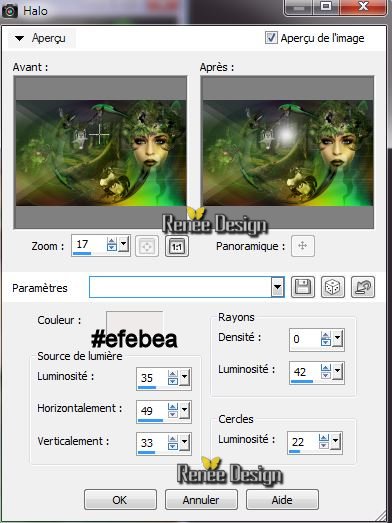
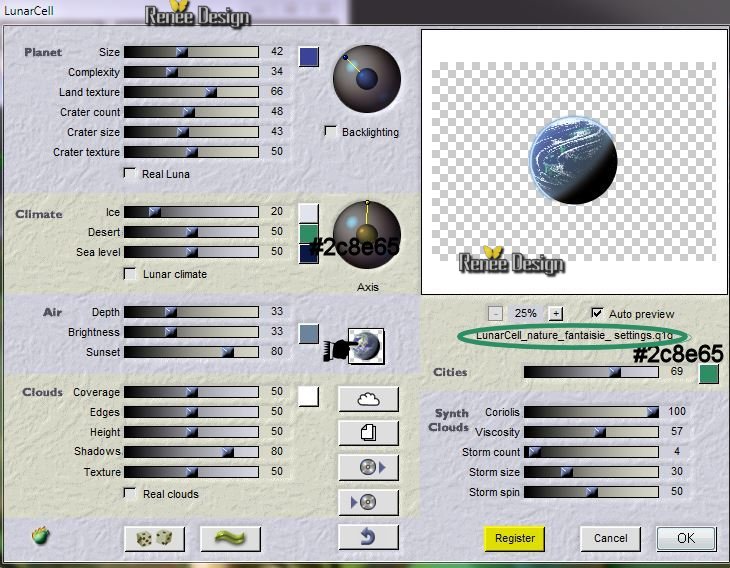
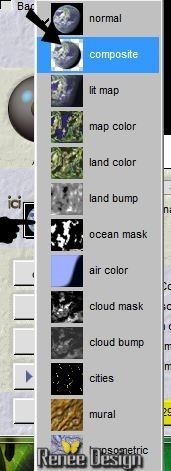
Effects-Plugins Flaming Pear -Lunar Cell / click menu
>choose Composite
Explications
preset ''lunar_cell_nature_fantaisie''click

55.
Place it in the Upper Right corner
Blend Mode to "Luminance Legacy" and lower the opacity to 85%
56. Aktivate the bottom of the layers palette (Fusionné)
57.
Effects- Illumination Effects - Sunburst
58.
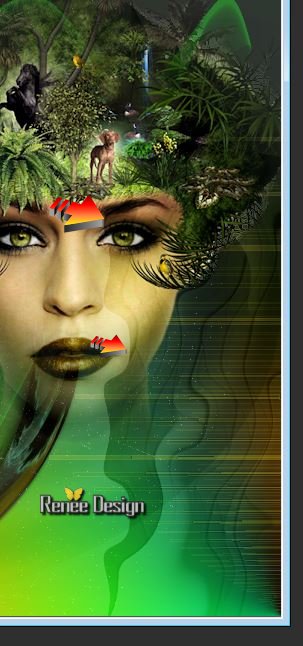
Your work and Layer Palette look like this now
59.
Open this 2 tuben "nature_fantaisie_nuage et nuage_2'' Edit/copy-Edit paste as a new layer and place to your liking /Blend Mode "Luminance Legacy"and the opacity to 100 and 59%
60.
Image - add borders symmetric 1 pixels #ffffff
61.
Image - add borders symmetric 2 pixels color #f0d438
62.
Image - add borders symmetric 2 pixels #ffffff
63.
Image - add borders symmetric 45 pixels color #6d834b
64.
Image - add borders symmetric 2 pixels en #ffffff
65.
With the magic wand -select the border of 45 pixels
66.
Color Palette: Foregroundcolor to color #6d834b Backgroundcolor to color
#ffffff
67.
Effects - Texture Effects - Mosaic Antique (The colors may be slightly different)

68.
Selections-Select none
69.
Open the tube ''Gabry-varie617''/ Image -Resize75 %
-Edit/copy- Edit past as a new Layer and place
70.
Effects - Plugins EyeCandy 5 Impact - Perspective shadow /
Preset''persp_nature_fantaisie''
71.
Image Resize to 995 pixels Width
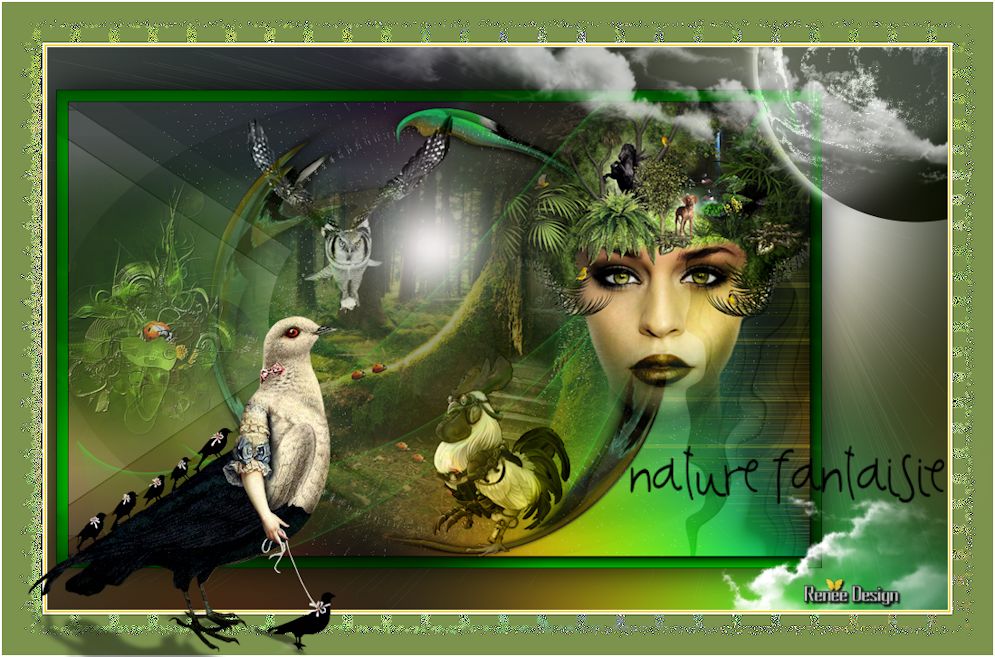
Write your own text
I hope you enjoyed this lesson
Renée
This lesson was written by Renée 26/01/2014
Created
15/02/2014
*
Any resemblance with an existing lesson is merely a coincidence
*
Don't forget to thank the people who work for us and with us. I named the tubeurs - Testers and the translators. Thanks
Renée
| 


 Translations