 Let's start the lesson.
1. File - New - Transparent - New Image
985 x 645 pixels
2. Material Properties: Foreground color to this color: #f5f4f0 Background color to this color : #0e0500
/Prepare a Linear Gradient as configured Activate Flood Fill Tool and fill the layer with the gradient

3.
Effects- Plugins – Video Rave –
Nailart (X Wave between 106 and 157)

4. Layers- Duplicate
5. Effects- Plugins -Unlimited
2.0 -
Lumière Ambiante

- Set the layer opacity of this layer to 62%
6. Layers - New raster layer
7. Color-Palette:Foreground color to color: #dbd3c6
8. Selections - load/save selection - load selection from disk and choose my selection: '' renee-novembre en hiver ''
9. Pot of Paint: Change the opacity of the color to 50%
Activate Flood Fill Tool and fill the selection with the foreground color
10. Selections- Deselect All
11.Effects- Plugins Flamig pear -Flexify
2

- With your move tool move to the upper right corner / Effects- Edge Effects-Enhance
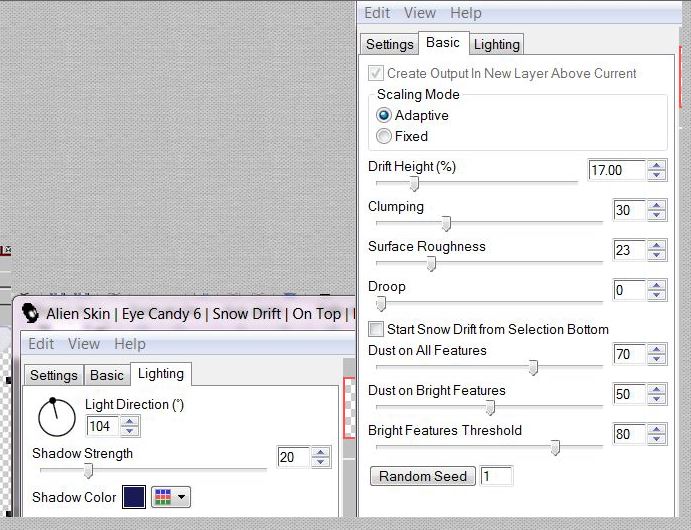
12. Effects- Plugins-EyeCandy 6 –
Blizzard
*Drift Height
% settings between 0.50 instead 17
  
If you do not have the EyeCandy 6 take
EyeCandy 5
Eye
Candy 5 Nature/Snow Drift (measures are the same as for the 6)
 
13. Layers- New raster layer
14. Color-Palette:Change the Foreground color to color: #802417
- Put your foreground/background sunburst gradient with settings below

15.
Selections - load/save selection - load selection from disk and choose my selection:''renee_novembre en hiver 1''
16. Pot of Paint: Change the opacity of the color to 100% /Activate Flood Fill Tool and fill the selection with the gradient.
17. Selections- Deselect All
18. Effects- Plugins -Unlimited
2.0 -Render /Clouds (fore-/background color)

19. Open the tube ''renee_novembre
en hiver -neige '' Edit/copy-Edit paste as a new layer on your working area and move
20. Open image
''forme fractal 21''in your PSP
**
- Explanation exporting a brush from PSP
-
Activate Brush in your PSP
-
For grayscale in preference-Image Greyscale and OK
-
File- Export Custom Brush (Give it a name)''forme fractal 21''
**

21.-
Layers- New raster layer
22. Stamp your brush 2x in the upper left corner by using your foreground color like this

23.
Layer Palette -Double click on this layer and set the Blendmode to Hard Light - and set the layer opacity of this layer to 85%
24.
Layers- New raster layer
25. Selections - load/save selection - load selection from disk and choose my selection: ''renee_novembre en hiver 2''
26. Color Palette: Change the foreground color into a linear Fading White gradient with these settings./ Activate Flood Fill Tool and fill the selection with the gradient

27.
Selections- Deselect All
28.
Effects- Distortion Effects - Wind 100 right
29. Layers- Duplicate
30. Effects- Plugins – Unlimited2.0 -Two moon- Emboston

- Your layer palette looks like this:

31.
Open the tube ''tubeclaudiaviza-mujer 3111'' -Image Resize 75% - Edit/copy-Edit paste as a new layer on your working area and move to the left like this

32. Layers- Arrange- Move 2x Down -( under raster 6)
33.
Effects- Plugins Unlimited 2.0 – Photo Agin kit – cracked paper 55/128
34. -Activate the top of the layer-Palette
35.
Layers - New raster layer
36.
Activate Brush in your PSP ''pinceau -hiver texte novembre'' : File- Export Custom Brush (Give it a name)''pinceau -hiver texte novembre''
37.
Color palette - Change the foreground to color white
Activate Brush Tool and select my file:''pinceau -hiver texte novembre'' with these settings

-Stamp your brush in the bottom left corner by using your foreground color

38.
Open the tube ''Tynaeagen2393'' - Image Resize 45% Edit/copy-Edit paste as a new layer on your working area and move
39. Activate the top of the layer-Palette
40. Layers- New raster layer
41. Selections - load/save selection - load selection from disk and choose my selection: ''renee-novembre en hiver 3''
42. Open the tube ''novembre- en hiver treille ''Edit/Copy-Edit Paste into selection
43. Selections- Deselect All
44. Effects- Edge Effects-Enhance More
45.
Effects- Plugins -Unlimited 2.0– Layout Tools -Contrast Checkers

46.
Layers-Duplicate
47.
Image- Free rotate 90 to the right

48.
Effects-Distortion Effects- Warp use settings below

-
With your move tool move to the bottom right corner

49. Layers- Arrange- Move Down
-
Layer Palette -Double click on this layer and set the Blendmode to Screen and set the layer opacity of this layer to 72%
50.
Effects- Texture Effects- Blinds with these settings

51. Layers-Duplicate -Image Mirror
52. Layer Palette -Double click on this layer and set the Blendmode to Hard Light and set the layer opacity of this layer to 100%
53. Repeat :
Effects-Distortion Effects- Warp with the same settings
54. Effects- Edge Effects-Enhance More
55. Activate the top of the layer-Palette
56. Layers- New raster layer
Activate Brush Tool and select my file: ''nuages'' Color Palette: Change the foreground to color #c5bbab

-
Stamp your brush in the upper left corner by using your Foreground color

57. Open the tube ''renee - novembre en hiver courbe '' Edit/copy-Edit paste as a new layer on your working area and move
58. Layers-Duplicate - Image Mirror and move
59. Layers- Merge- Merge Down
60.
Effects- Plugins -EyeCandy 5 – Motion trail -
tab Settings/User settings choose my preset: ''renee-novembre_hiver
_motion trail''
61. Effects- Edge Effects- Enhance
62. Open the tube ''élément 13'' - Edit/copy-Edit paste as a new layer on your working area and move. / Layer Palette -Double click on this layer and set the Blendmode to Hard Light and set the layer opacity of this layer to 100%
63. Open the tube ''element 2'' /Edit/copy-Edit paste as a new layer on your working area and move.
64. Effects-Plugins -EyeCandy 5-perpsective -Tab-Settings- reflect in front
65.
Open the tube ''oiseau echarpe « Edit/copy-Edit paste as a new layer on your working area and move.
66.
Open the tube ''branche en neige'' Edit/copy-Edit paste as a new layer on your working area and move.
67.
Open the tube ''souris bonnet ''Edit/copy-Edit paste as a new layer on your working area and move.
68. Open the Tube ''pancarte novembre en hiver
and
''attache novembre en
hiver '' Edit/copy-Edit paste as a new layer on your working area and move. /Effects- 3D Effects- Drop Shadow with these settings: 8/-2/92/24 black
69.
Layers- Merge- Merge All
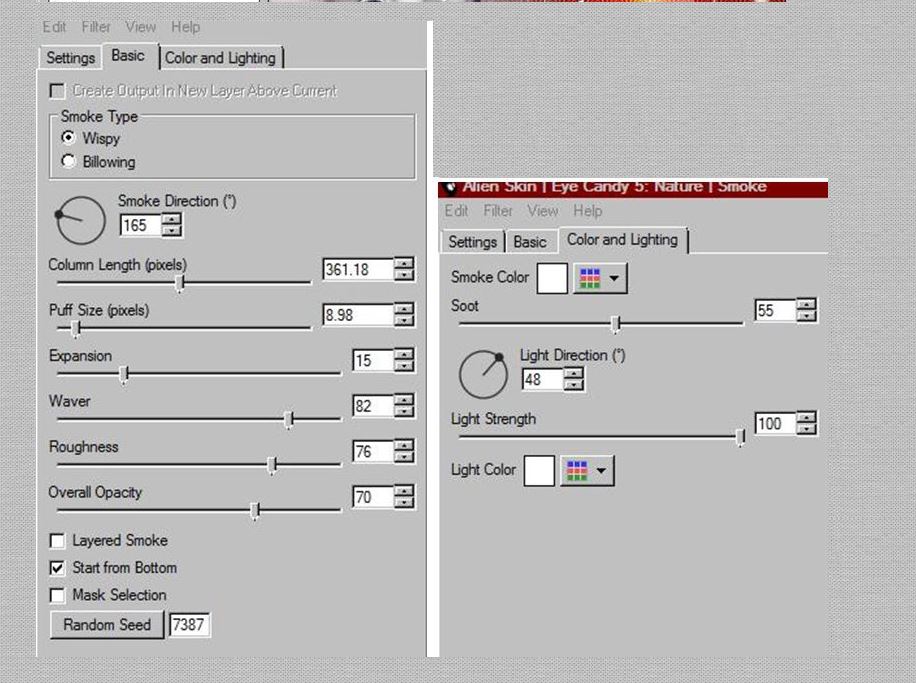
70. Effects- Plugins -Eyecandy 6 -smoke -Wispy large- Dust trail
 
----------------------------------------------------------------------------------------------------------------------------------------------------------------------------------------------
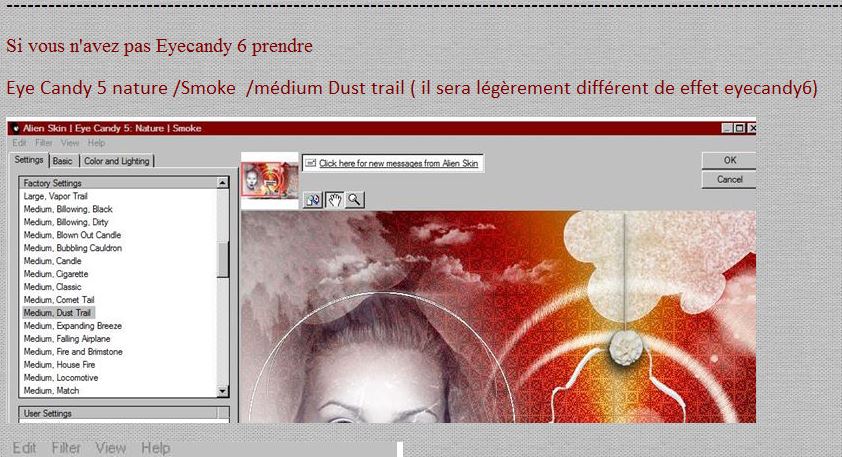
If you do not have Eyecandy 6 take
Eye Candy 5 nature /Smoke /médium Dust trail ( it will be slightly different effect eyecandy6)


-----------------------------------------------------------------------------------------------------------------------------------------------------------------------------------------------------
71.
Image - Add borders-Symmetric checked: 5 pixels black
72. Image - Add borders-Symmetric checked: 50 pixels white
73. Magic Wand : click with your magic wand in the border of 50 pixels
Open the tube paper1 Edit/Copy-Edit Paste into selection
74. Effects- Edge Effects Enhance More/ Selections- Deselect All
75. Image - Add borders-Symmetric checked: 10 pixels black
76. Open the tube ''element 21 and 7 ''Edit/copy-Edit paste as a new layer on your working area and move
77. Layers- Merge- Merge All
Save as JPG
|