|
Let's start the lesson.
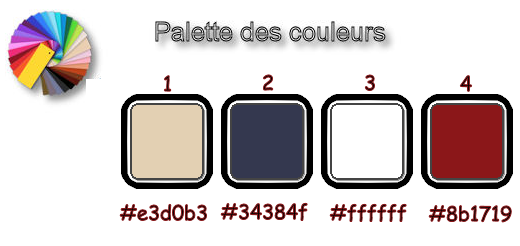
- Preparation/ - Color Palette: Set your foreground color to #ffffff- Set your background color to
#34384f
1. Open Image ‘’Fond_Obscurite ‘’- Window - Duplicate (or shift+D) - Close the original and proceed on the copy -Promote Background Layer =Raster 1
2. Adjust- Blur- Gaussian Blur: Radius 45
3. Layers- New Raster Layer
4.
Selections-Select All
5. Open the tube ‘’ JHanna_815 tube
Edit - Copy- Activate your work -Edit - Paste into Selection
Selections- Deselect All
6. Adjust- Blur-Radial Blur use the settings below
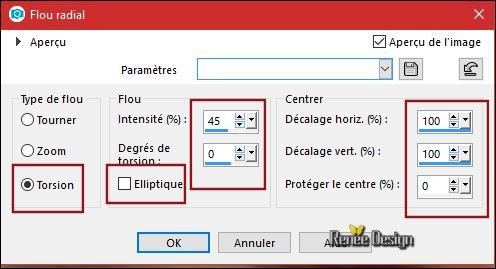
-
Layers-Properties-Set the Blend Mode to" Overlay "
7. Layers- New Raster Layer
8. Activate Flood Fill Tool  –settings of your paint pot to 60% – fill the layer with the foreground color #ffffff –settings of your paint pot to 60% – fill the layer with the foreground color #ffffff
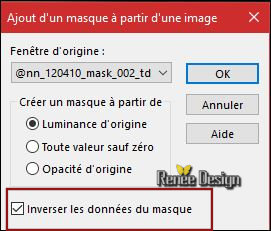
9. Layers- New Mask Layer from Image and select:‘’
@nn_120410_mask_002_tdstudio.pspimage’’
- Layers- Duplicate twice
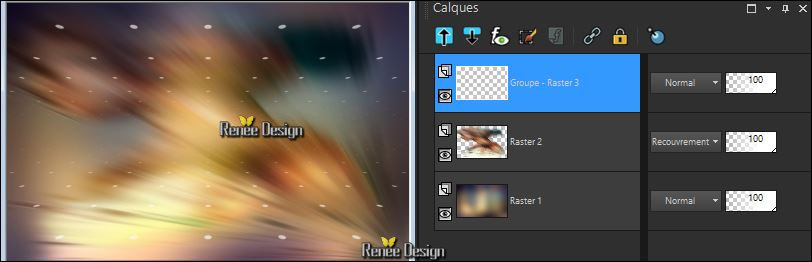
The Result

- Layers- Merge- Merge Group
- Your work and Layer Palette look like this now-You should have this result
10.
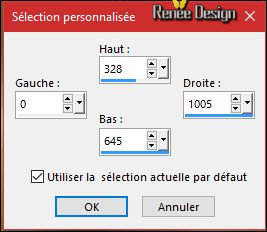
Activate Selection Tool -Custom Selection (S) -Rectangle with these settings
11.
Selections- Promote Selection to Layer
- Activate the Layer underneath = (Group –Raster 3)
DELETE
Selections- Deselect All
- Activate the Layer above (promoted selection )
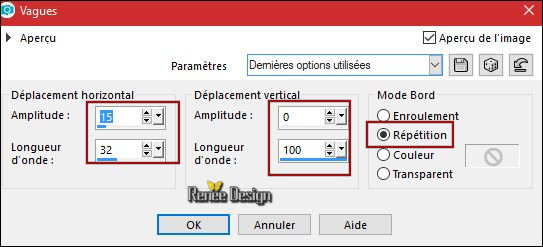
12. Effects
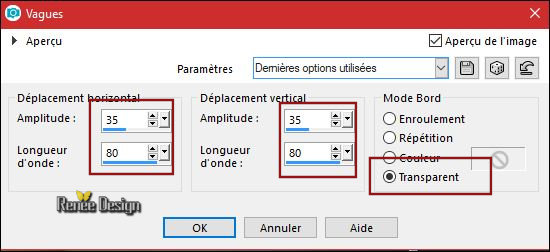
– Distortion Effects –Wave use the settings below
13. Effects
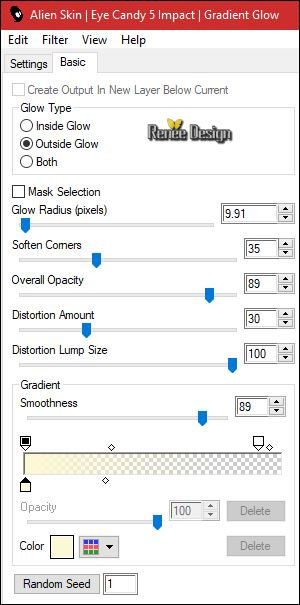
–Plugins – Eyecandy 5 Impact – Gradient glow -tab SETTINGS/USER SETTINGS and choose my Preset ‘’Obscurite_G_GLOW.f1s’’- color #fcf7d4
Or manual settings as shown in the example below
14. Layers- Duplicate
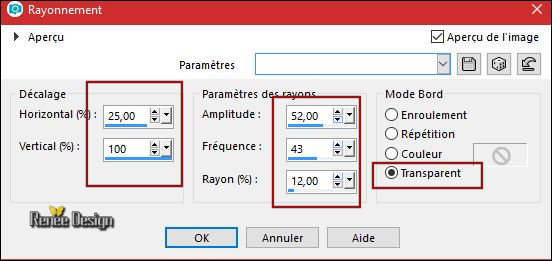
15. Effects- Distortion Effects-Spiky-Halo use the settings below
16.
Layers-Properties-Set the Blend Mode to" Screen"
17. Layers- Merge- Merge Down
18.
Layers-Properties-Set the Blend Mode to" Overlay "-Set the Opacity of this layer to
75
19. Layers- New Raster Layer
20. Activate the Flood Fill Tool – settings of your paint pot to 100% – fill the layer with the foreground color #ffffff
21. Layers- New Mask Layer from Image and select:‘’Renee_Masque_Obscure’’
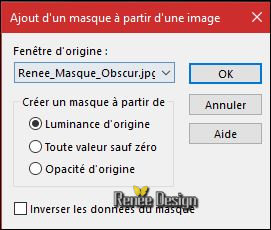
- Layers Duplicate 3 times
- Layers- Merge- Merge Group
22. Effects- User Defined Filter – Emboss 3 using the default settings
23.
Layers-Properties-Set the Blend Mode to " Soft Light "
24.
Effects –Plugins- Unlimited – ECWS- Woodcut 4
25. Effects – 3D Effects- Drop Shadow with these settings: 1/1/100/1 black
26. Layers- New Raster Layer
27. Activate Flood Fill Tool –fill the Layer with #ffffff
28. Layers- New Mask Layer from Image and select Mask :‘’Renee_Masque_Obscure_2’’
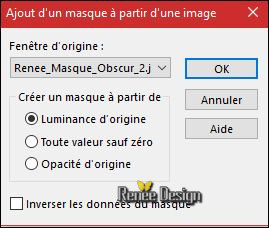
- Layers- Merge- Merge Group
29.
Layers-Properties-Set the Blend Mode to" Overlay "
- Move Tool (M) move it the right place as shown in the example below
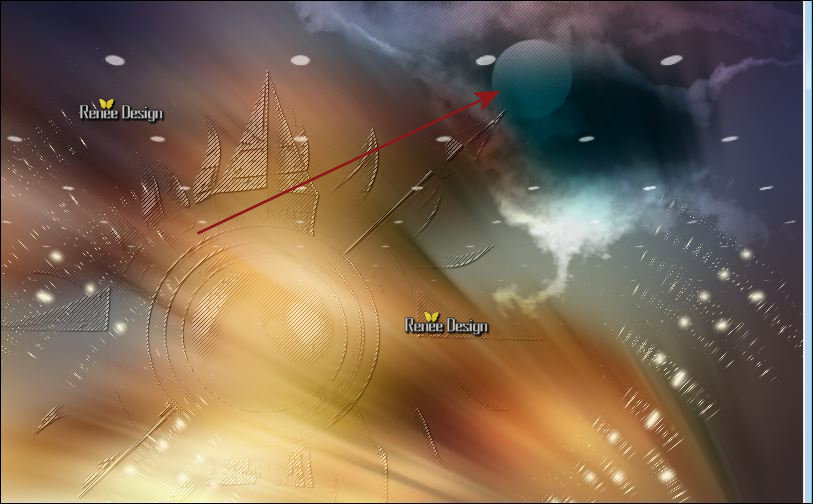
30. Open the tube ‘’ Renee_TUBES_lune_Obscurite’’
-
Edit - Copy- Activate your work -Edit - Paste as a new layer
31. Effects- Image Effects- Offset with these settings: H = - 304 and V = 44
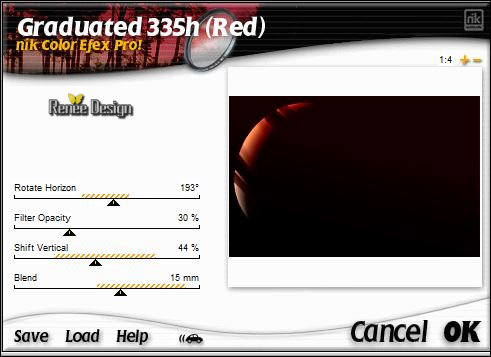
32. Effects
– Plugins – Nick Color effect Pro 1 –Graduated 335 h
(Red) (You can choose another preset in harmony with the color of your work )
33.
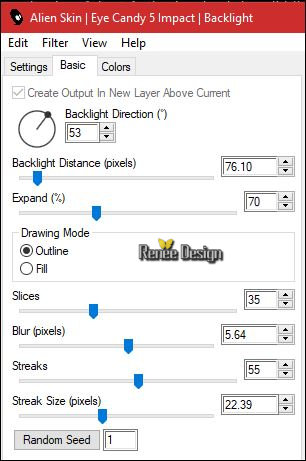
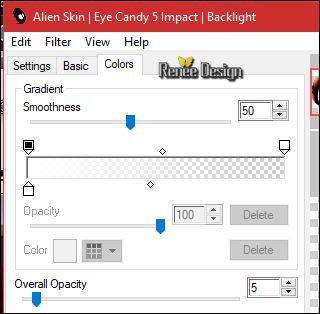
Effects – Plugins – EyeCandy 5 Impact – Black light
-tab SETTINGS/USER SETTINGS and choose myPreset ‘’ Obscurite_blacklight.f1s’’
Or manual settings as shown in the example below
34. Open the tube ‘’ Renee_TUBES_cadre_Obscurite.png’’
-
Edit - Copy- Activate your work -Edit - Paste as a new layer
35. Effects- Image Effects- Offset with these settings: H = - 250 and V =
0
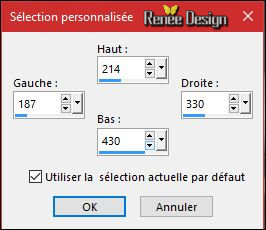
36.
Activate Selection Tool -Custom Selection (S) -Rectangle with these settings
37. Layers- New Raster Layer
- Open the
tube ‘’ Renee_tube_desespoir.pspimage’’ (part of the tube is selected–keep selected )
38. Edit - Copy- Activate your work -Edit - Paste into Selection
Keep Selected !
39.Layers- Arrange- Move Down
- Activate the layer above (frame )
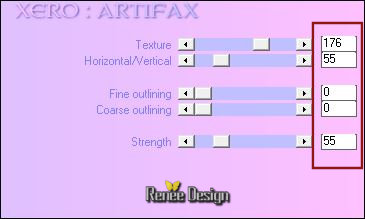
40. Effects
–Plugins – Xero – Artifax use the settings below
- Activate the Layer underneath = (image)
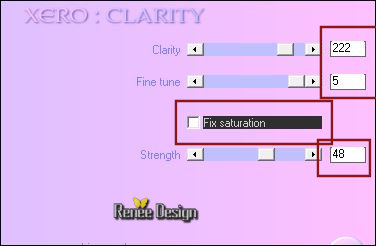
41. Effects
– Plugins – Xero – Clarity use the settings below
Selections- Deselect All
-In the Layer-Palette-Make Raster 2 active
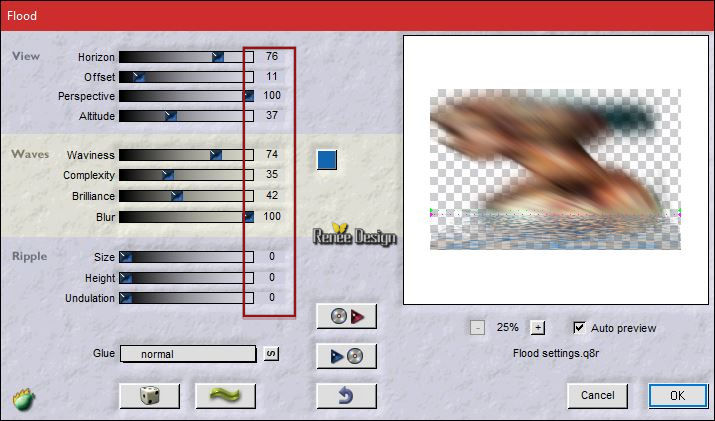
42. Effects
– Plugins – Flaming Pear – Flood – Color #1366af -select my
Preset ’’Obscur_Flood settings.q8r ‘’( Take a color in harmony with your creation if you choose other basic colors but no black )
43.
Selections –load/save selection –load selection from disc and select my selection: ‘’Obscurité_1’’
44.
Adjust- Blur- Gaussian Blur: Radius 55
Selections- Deselect All
- In the Layer-Palette-Make Raster 5 active (the small image)
45. Effects
–Plugins – Flaming Pear – Flood – Color
#1366af
- Repeat a second time with the same settings / Just change Horizon = 63
- To replace the top of the layers palette (frame )
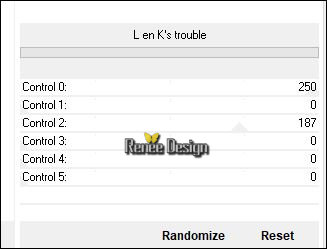
46. Effects
–Plugins – L & K’s – Trouble use the settings below
47. Effects- Edge Effects- Enhance
- Color Palette: Set your foreground color to#8b1719 (color 4 )
48. Layers- New Raster Layer
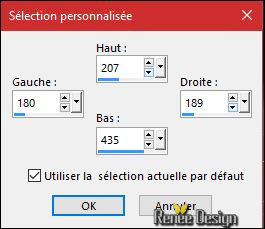
49.
Activate Selection Tool -Custom Selection (S) -Rectangle with these settings
50. Activate the Flood Fill Tool /settings of your paint pot to 100% - Fill the selection with the foreground color#8b1719
Selections- Deselect All
51.
Effects – Plugins – Eyecandy 5 – Impact – Glass select
-Preset ‘’Clear No Drop Shadow’’
52. Layers- Duplicate
53. Effects- Distortion Effects- Wave use the settings below
54. Mirror Horizontal ( Image - Mirror in previous PSP Versions)
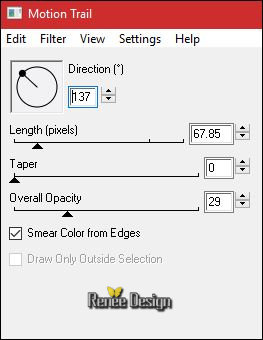
55. Effects
– Plugins – Eye Candy 4000 – Motion Trail use the settings below
- Move it so that it fits exactly to this line
56. Layers- New Raster Layer
57.
Selections –load/save selection –load selection from disc and select my selection: ‘’Obscurité_2’’
58. Color Palette: Set your foreground color to #ffffff. Activate the Flood Fill Tool and fill the selection with #ffffff
Selections- Deselect All
59.
Selections –load/save selection –load selection from disc and select my selection: ‘’Obscurité_3’’
DELETE
(5 or 6 times )
Selections- Deselect All
- In the Layer-Palette-Make Raster 1 active ( bottom layer)
60. Layers- New Raster Layer
61. Activate the Flood Fill Tool - and fill the layer with #ffffff
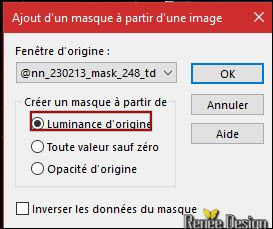
62. Layers- New Mask Layer from Image and select Mask :‘’
@nn_230213_mask_248_tdstudio.jpg’’
- Layers- Duplicate
- Layers- Merge- Merge Group
63.
Selections –load/save selection –load selection from disc and select my selection: ‘’Obscurité_4’
DELETE
64.
Layers-Properties-Set the Blend Mode to" Screen"
Keep Selected
65. Layers- New Raster Layer
66. Open the tube ‘’ Renee_TUBES_paysage_Obscurite.png’’
- Edit - Copy- Activate your work -Edit - Paste into Selection
Selections- Deselect All
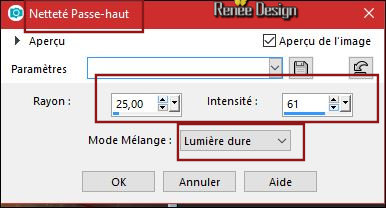
67. Adjust- Sharpness-High-Pass Sharpen
-To replace the top of the layers palette
68. Open the tube ‘’ Renee_TUBES_paperhead.pspimage’’
- Image
Resize to 65%
-
Edit - Copy- Activate your work -Edit - Paste as a new layer
- With the Move Tool (M), move it in the bottom right corner
69.
Set the Opacity of this layer to 66%
Or choose my second tube:
''Renee_TUBE_attente''
- Open the tube
‘’ Renee_TUBE_attente.pspimage’’
-
Edit - Copy- Activate your work -Edit - Paste as a new layer
- With the Move Tool (M), move it in the bottom right corner
- Layers-Properties-Set the Blend Mode to" Soft Light "
70. Image - Add borders-Symmetric checked 1 pixel #34384f color 2
71. Image - Add borders-Symmetric checked 50 pixels #ffffff
72. Image - Add borders-Symmetric checked 2 pixels #e3d0b3 color 1
73. Image - Add borders-Symmetric checked 10 pixels #ffffff
74. Selections- Select All
75.
Selections- Modify- Contract with 30 Pixels
76. Effects- 3 D Effects- Drop Shadow using the default settings
Selections- Deselect All
77. Open the tube ‘’Titre’ and paste as a new Layer and move
78. Layers- Merge- Merge All( flatten)
79. Image
Resize to 1000 pixels width.
Save as JPG
I hope you enjoyed this lesson
Renée
This lesson was written by Renée January 2018
Edited and Update
2018
*
Any resemblance with an existing lesson is a coincidence
* Do not forget to thank the people who work with us and for us I have appointed the tubeurs and translators
Thanks
*
| 


 Translations


 If a plugin supplied appears with this icon it must necessarily be imported into Unlimited *


