|
Let's start the lesson. Open the Color-Palette

- Material Properties: Foreground color to this color:#331107 Background color to this color : #205482
- Put your foreground/background linear gradient with settings below
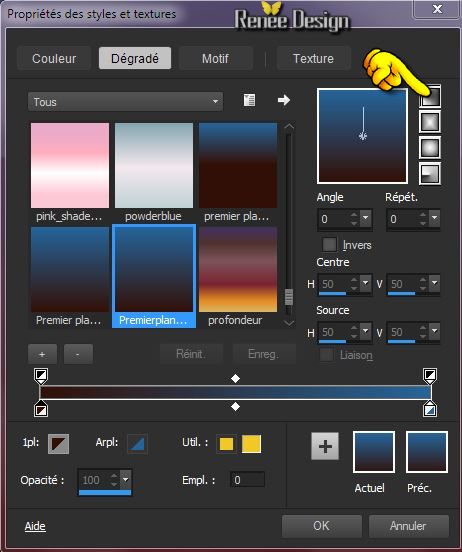
1. File - New - New Transparent Image
1115 x 850 pixels
2. Flood Fill Tool: fill the layer with the gradient
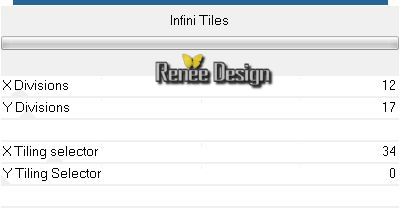
3. Effects- Plugins -Unlimited 2.0 -
Factoty Gallery D - Infini Tiles
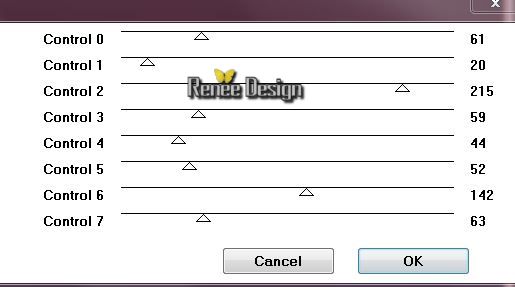
4. Effects- Plugins
- ASF Importation -Sqborder 2
5. Material Properties:Change the gradient in a foreground/background radial gradient with settings below
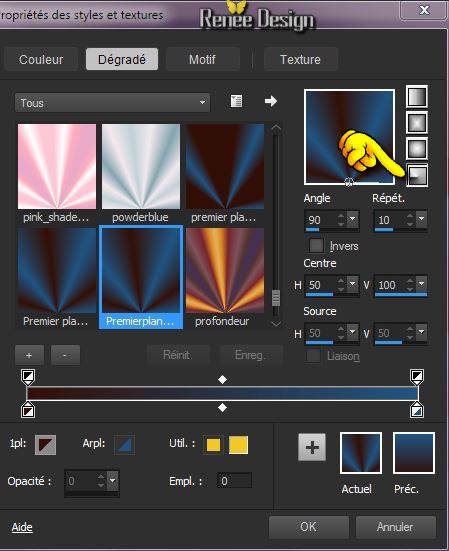
6. Layers- New raster layer- Flood Fill Tool: fill the layer with the gradient
- Set the layer opacity of this layer to 51%
7. Layers- Duplicate -Image
Flip
8. Layers- Merge- Merge Down - Set the layer opacity of this layer to 100%
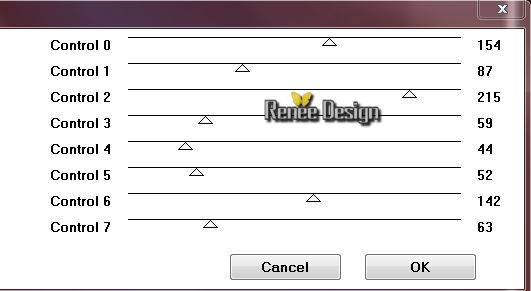
9. Effects- Plugins - ASF Importation -Sqborder 2 with these settings
10. Effects- Plugins -Unlimited 2.0
-Filter Factory Gallery E- Transparent Pizza to 81
11.
Effects- Geometric Effects-Cirkel - Transparent
12.
Effects - 3D Effects - Drop shadow with these settings : 4/4/50/5 black
13.
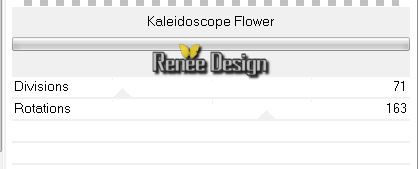
Effects- Plugins - Unlimited 2.0 - &<BkgKaleidoscope- Kaleidoscope
Flower
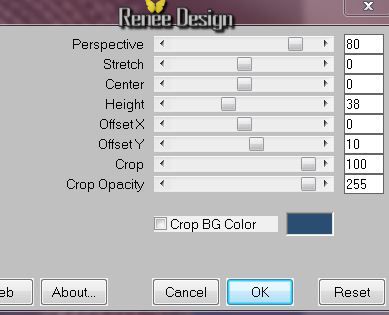
14.Effects- Plugins Mura's Meister -Perspective
Tilling
15.
Effects - 3D Effects - Drop shadow with the same settings
16.
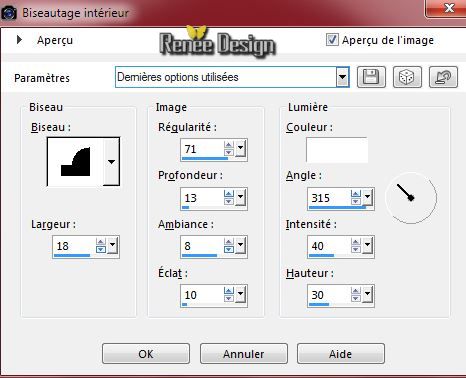
Effects- 3D Effects-Inner Bevel with these settings
17.
Activate the tube ''Renee_tube_porte"-Edit/copy-Edit paste as a new layer on your working area
18.
Effects- Image Effects- Offset use settings below
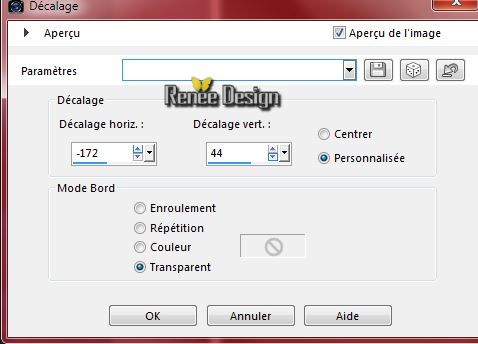
-
Layer Palette -Double click on this Layer and set the Blend Mode to Overlay
19.
Layers- New raster layer
20.
Selections - load/save selection- load selection from disk and select my file ''ouvert_sur_1''
21.
Pot of Paint: Change the opacity of the color to 70%
Flood Fill Tool : fill the selection with the gradient with the gradient
22.
Effects- Plugins - Unlimited 2.0 - Andrew's Filters 16- Leopard
Changing Spots...
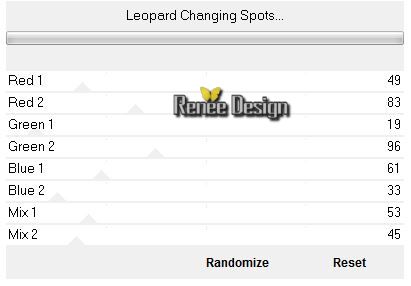
23.
Layer Palette -Double click on this layer and set the Blendmode to Screen and set the layer opacity of this layer to 55%
Keep Selected
24.
Layers- New raster layer
25.
Activate image "Ouvert_sur_paysage_tube_renee"- Edit/copy-Edit Paste into selection
Selections- Deselect All
26.
Effects- Edge Effects -Enhance
-This is the result
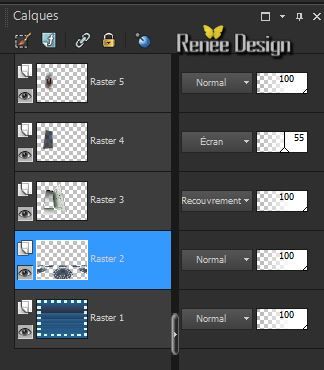
- Layer Palette: activate Raster 2
27.
Selections - load/save selection - load selection from disk and choose my selection: ''ouvert_sur_2''
28.
Selections-Promote selection to layer
29.
Effects- 3D Effects-Cutout - Color #331107
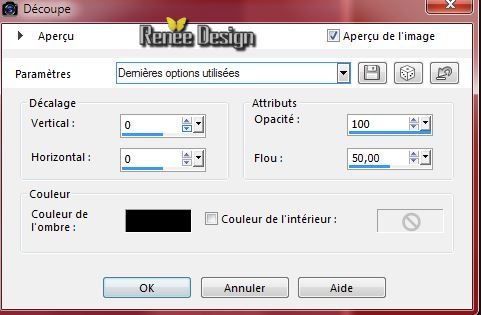
Selections- Deselect All
30.
Layers- Duplicate
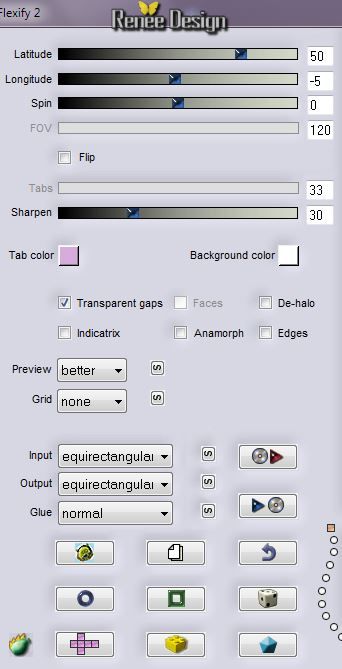
31.Effects- Plugins - Flaming Pear - Flexify2
32.
Layer Palette -Double click on this layer and set the Blendmode to Hard Light and set the layer opacity of this layer to 100%
33.
Layers- Duplicate
34.
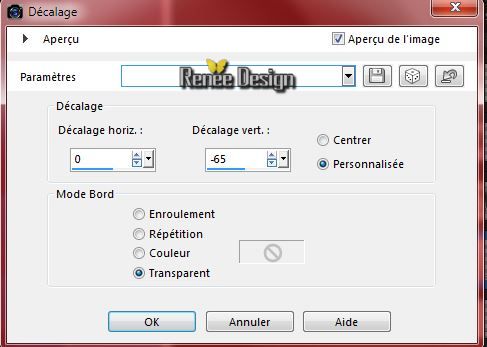
Effects- Image Effects-Offset use settings below
35.
Layers- Duplicate
36.
Effects- Image Effects-Offset use settings below

37.
Layers- Merge- Merge- Down ( 2 x )
38.
Layer Palette -Double click on this layer and set the Blendmode to Hard Light and set the layer opacity of this layer to 85%
- Activate the top of the layer-Palette
39.
Layers- New Raster layer
40.
Selections - load/save selection - load selection from disk and choose my selection: "ouvert_sur_3''
41.
Activate the tube "Renee_tube_nuage_rose''- Edit/copy- Edit Paste into selection
Selections- Deselect All
42.
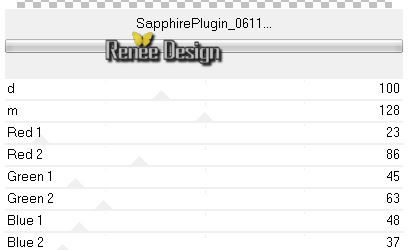
Effects- Plugins -Unlimited 2.0 - Sapphire Filters 07-
SapphirePlugin_0611...
43.
Activate the tube ''Renee_tube_balle_colors''
-Edit/copy -Edit/paste as a new Layer on your working area and place
44.
Layers- Duplicate - Image Resize 60% -and Place
45.
Layers- Duplicate and place see example

46.
Layers- Merge- Merge- Down 2x ( 3 balls in 1 layer)
47.
Layers- New raster layer
48.
Selections - load/save selection - load selection from disk and choose my selection: ''ouvert_sur_4''
49.
Properties Foreground: Foreground color to
#f3a949
50.
Pot of Paint: Change the opacity of the color to 100%
-Flood Fill : fill the selection with the gradient with the foreground color (click 2 a 3 times in the selection)
Selections- Deselect All
51.
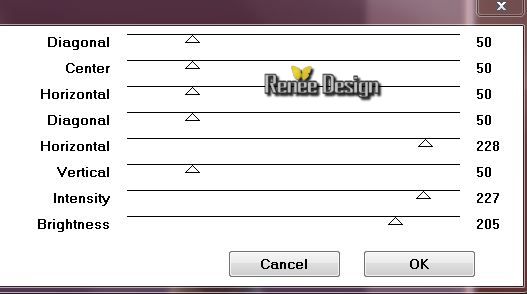
Effects- Plugins - Graphic plus Cross Shadow ( repeat 1x )
52.
Layers- Arrange- Move 2x Down (underneath Raster 6-nuages)
-
Activate the top of the layer-Palette
53.
Layers- New raster layer
54.
Selections - load/save selection - load selection from disk and choose my selection: ''ouvert_sur_5'' -
Activate Flood Fill Tool and fill the selection with color white
Selections- Deselect All
55.Effects- Plugins - Eyecandy 5 -Impact - Gradient
Glow-tab Settings/User settings choose my Preset "renee_ouvert_sur_GGlow" /Or manual settings below
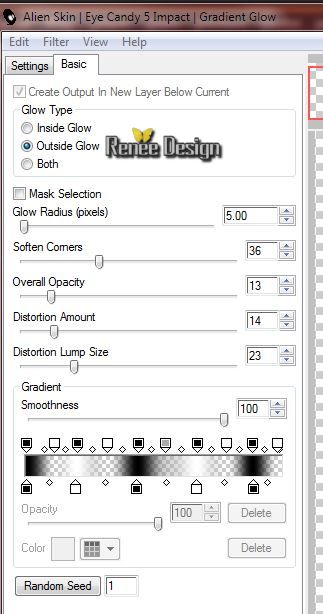
56.
Effects- Edge Effects -Find All
57.
Layers-Merge-Merge Visible
58.
Layers- New Raster layer
59.
Selection Tool ( S ) Custom selection use settings below
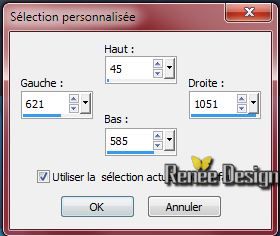
60.
Effects- 3D Effects-Cutout with these settings
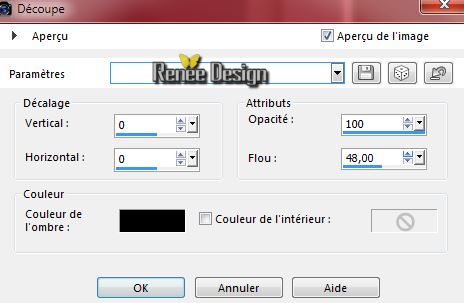
61.
Layers- New raster layer
62.
Pot of Paint: Change the opacity of the color to 45% - Flood Fill : fill the selection with this color #205482
63.
Effects- Illumination Effects- Lights-select my file-Preset ''renee_ouvert_sur_eclairage''
Or manual settings below
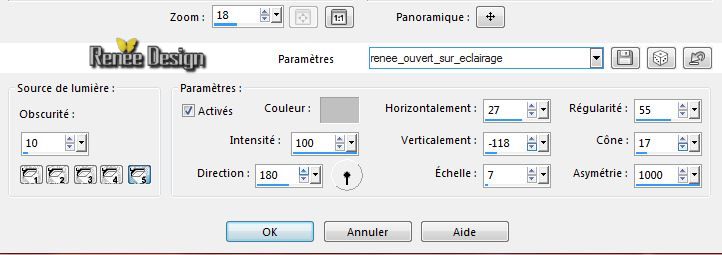
Selections- Deselect All
-Layers- Palette activate Raster1
64.
Layers- Duplicate
65.
Image-Free Rotate 45 ° to the right
- Activate the top of the layer-Palette
66.
Activate the tube ''cheval@ster-tube45.pspimage''
67.
Image Mirror
-Edit/copy-Edit paste as a new layer on your working area and move to the right side
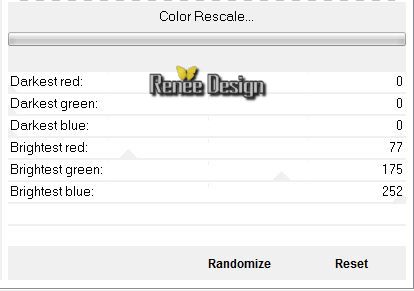
68. Effects- Plugins -Unlimited2.0 -Color-
Color Rescale
69. Effects- Plugins - Graphic Plus - Cross Shadow
using the default settings
70.
Activate the tube ''papillons '' - Edit/copy -Edit/paste as a new Layer on your working area and place
71.
Activate the tube ''gouttes _eau''- raster3 - Edit/copy -Edit/paste as a new Layer on your working area and place
72.
Duplicate -Image Mirror -and move
73.
Layers- New raster layer
74.
Selections - load/save selection - load selection from disk and choose my selection: ''ouvert_sur_6''
75.
Pot of Paint: Change the opacity of the color to 65% -Activate Flood Fill Tool and fill the selection with color white
Selections- Deselect All
76.
Effects - 3D Effects - Drop shadow with these settings : 4/4/50/5 black
-
Activate the bottom of the layer-Palette
(Merged Layer)
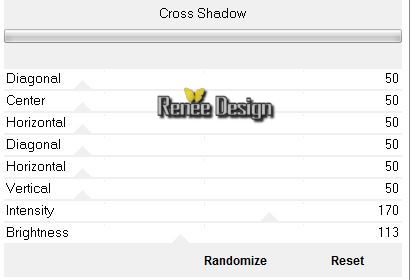
77. Effects- Plugins -Unlimited 2.0
Graphic plus - Cross Shadow
78.
Layers-Merge-Merge Visible
79. Edit-Copy!!
80.
Image - Add borders-Symmetric checked: 3 pixels white
81.
Image - Add borders-Symmetric checked: 40 pixels #205482
82.
With the magic wand -select the border of 40 pixels
83.
Edit Paste into selection
84.
Adjust- Blur- Gaussian Blur: Radius 25
85.
Image - Add borders-Symmetric checked: 20 Pixels white
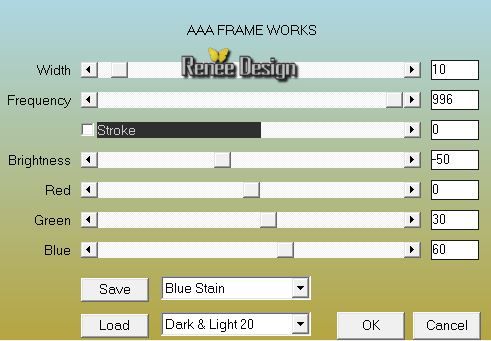
86. Effects- Plugins - AAA Frame Works with these settings
87.
Selection- Invert
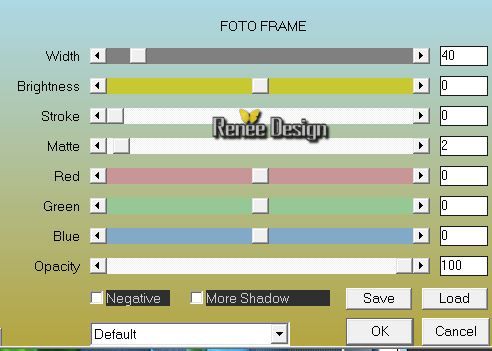
88. Effects- Plugins - AAA Frame - Foto
frame
Selections- Deselect All
89.
Image Resize 995 pixels Width
90.
Open the text/ Edit/copy-Edit paste as a new layer on your working area .Ore write your own text Save as JPG
I hope you enjoyed this lesson
Renée
This lesson was written by Renée 10/11/2014
Introduction
le 11/2014
*
Any resemblance with an existing lesson is merely a coincidence *
* Don't forget to thank the people who work for us and with us. I named the tubeurs - Testers and the translators.
Thanks Renée.
*
|