|
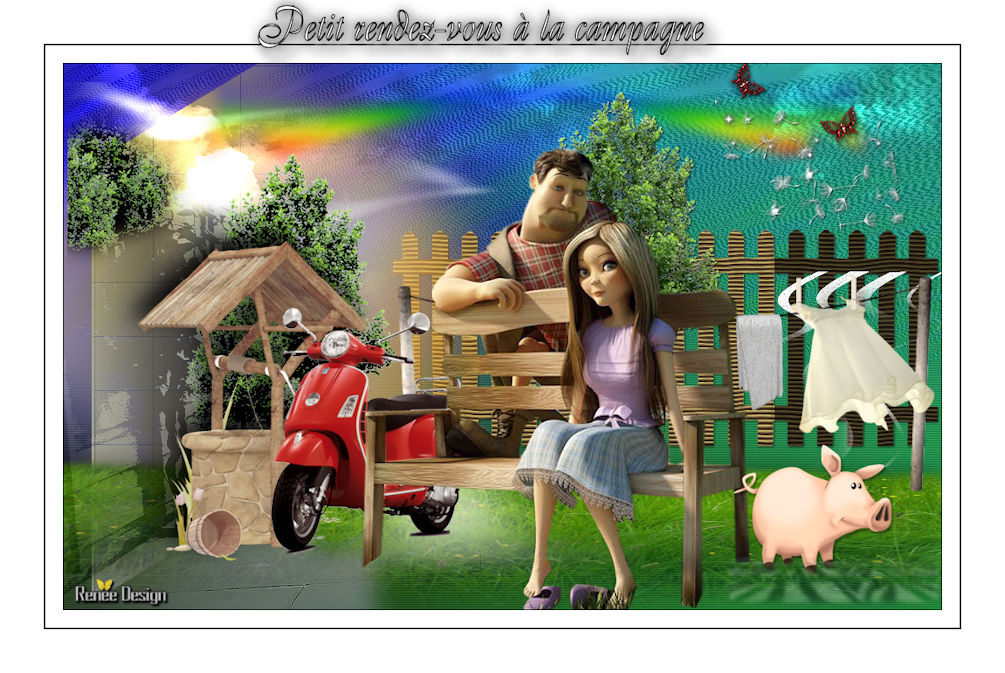
Let's start the lesson.

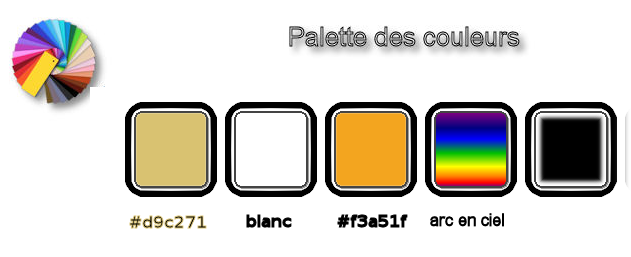
- Preparation/ - Color Palette: Set your foreground color to #d9c271
-Set your background color to #ffffff
1. File-Open a new transparent image 1005 x 625 pixels
2.
Selections- Select All
3.Open the Image
‘’ RDV_Campagne_image_1.jpg’’
-Edit - Copy- Activate your work -Edit - Paste into selection
Selections- Deselect All
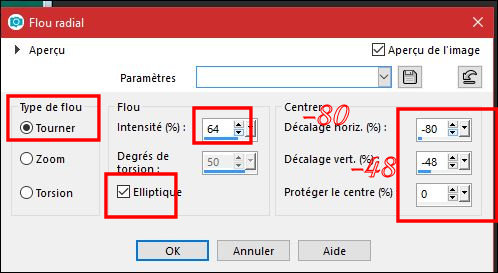
4. Adjust- Blur- Radial Blur use the settings below
5.
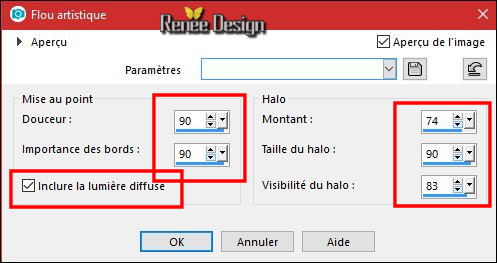
Adjust- Softness-Soft Focus use the settings below
6. Effects -Plugins – Penta Com – VTR2 use the settings below

7.
Selections –load/save selection –load selection from disc and select my selection:‘’ RDV_campagne’’
8.
Selections- Promote selection to Layer
9.
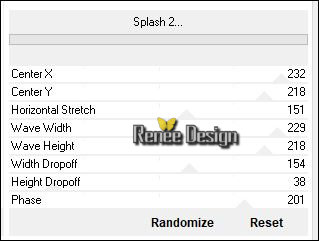
Effects –Plugins - Unlimited – Filter Factory - Gallery E –
Spash2
Selections- Deselect All
10. Layers-New Raster Layer
11.
Selections –load/save selection –load selection from disc and select my selection: ‘’ RDV_campagne_1’’
12. Activate the Flood Fill Tool  and fill the selection with the foreground color#d9c271 and fill the selection with the foreground color#d9c271
13.
Effects – Plugins – EyeCandy 5 Textures – Wood –tab Settings/User settings and choose my
Preset ‘’ RDV_campagne_textures wood.f1s’’
Selections- Deselect All
14. Effects- 3D Effects- Drop Shadow with these settings 1/1/60/3 color black
15.
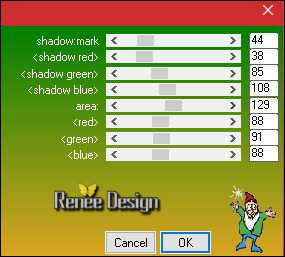
Effects -Plugins –Unlimited –Toadies - *Sucking Toad* Bevel
II.2... with these settings 156/53/94
16. Open you tube ‘’ RDV_Campagne-_effet bruit’’
- Edit - Copy- Activate your work -Edit - Paste as a new layer
- Move as shown in the example below
- Preparation/ - Color Palette: Set your foreground color to #ffffff - Set your background color to
#f3a51f
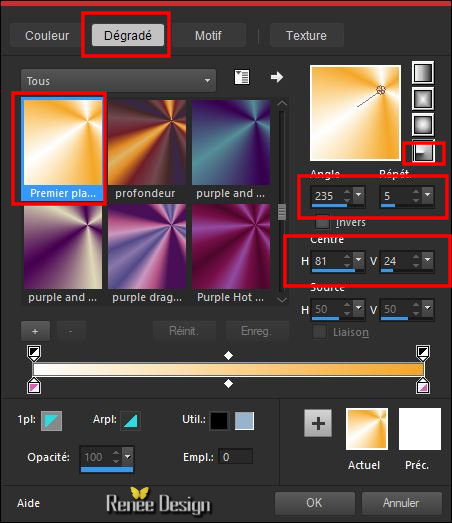
- Prepare a foreground/background-Radial gradient configured like this
17. Layers- New Raster Layer
18.
Selections –load/save selection –load selection from disc and select my selection:‘’ RDV_campagne_2’’
19. Activate the Flood Fill Tool –Change the opacity of the color to 65% –and fill the selection with the gradient
Selections- Deselect All
20. Adjust-Blur- Gaussian Blur : Radius 36
21. Layers- New Raster Layer
22.
Selections –load/save selection –load selection from disc and select my selection:‘’ RDV_campagne_3’’
23. Activate the Flood Fill Tool – Change the opacity of the color to 100% -and fill the selection with color #ffffff (3
clicks)
Selections- Deselect All
24. Layers- New Raster Layer
25.
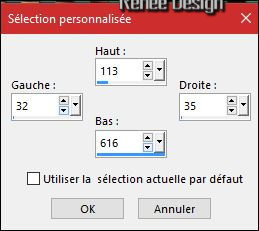
Activate Selection Tool -Custom Selection (S) -Rectangle with these settings
26. Activate the Flood Fill Tool and fill the selection with color #ffffff
Selections- Deselect All
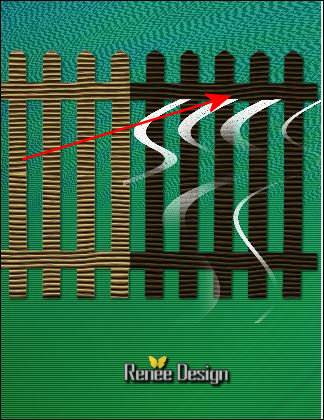
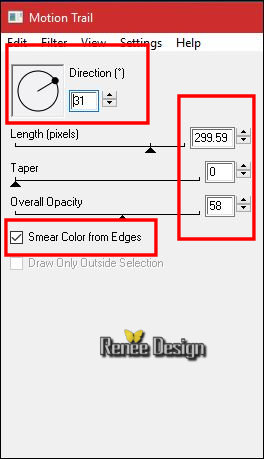
27. Effects
– Plugins – EyeCandy 4000 - Motion trail use the settings below ( Do not worry about the color, it will be displayed in white.)
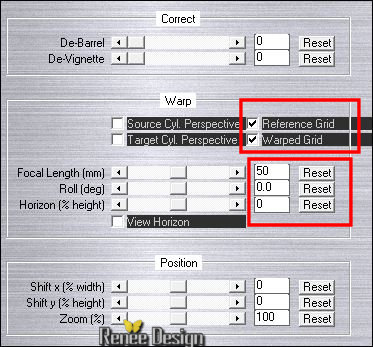
28. Effects
– Plugins – MV’s Plugins –Panopwarp ( patched filter)
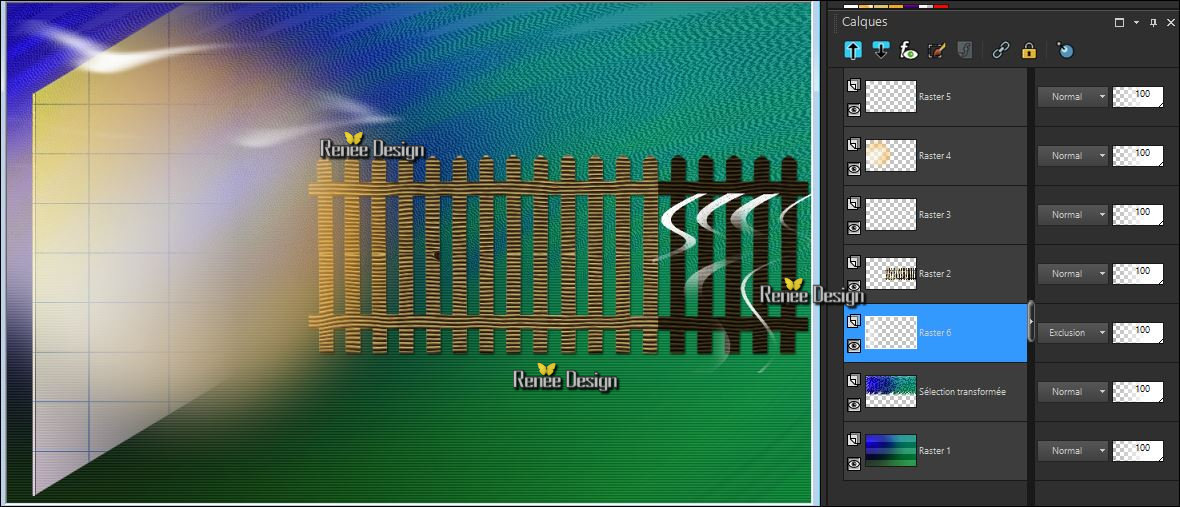
29. Layers- Arrange- 4 times down . ( above transformed selection)
30.
Layers-Properties-Set the Blend Mode to" Exclusion"
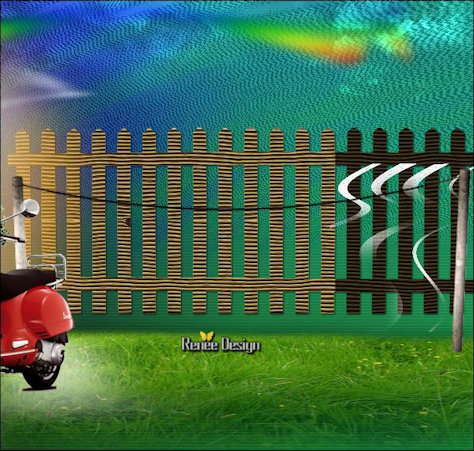
-Your work and Layer Palette look like this now-You should have this result
- To replace the top of the layers palette
31. Open your tube ‘’ RDV_Campagne-nuages.png’’
- Edit - Copy- Activate your work -Edit - Paste as a new layer
- Move Tool / place your tube at the top of your image
32.
Layers-Properties-Set the Blend Mode to" Dodge "-Set the Opacity of this layer to 89%
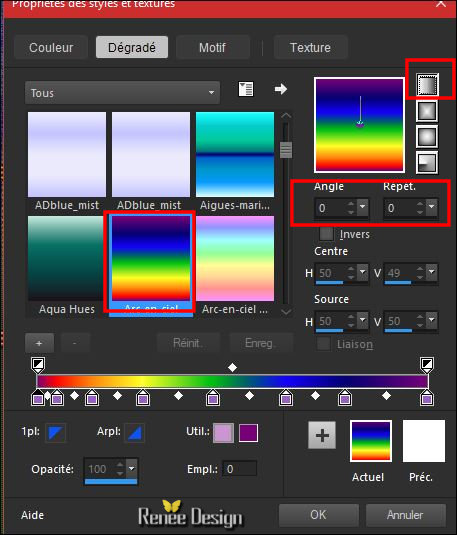
- Material of the foreground: change material of the foreground into gradient and select (Corel_06_040)
''Arc en ciel''
-Prepare a foreground-Linear gradient configured like this
33. Layers- New Raster Layer
34.
Selections –load/save selection –load selection from disc and select my selection:‘’ RDV_campagne_4’’
35. Activate the Flood Fill Tool and fill the selection with the gradient (3 clicks)
Selections- Deselect All
36. Adjust- Blur- Gaussian Blur: Radius 8
37. Open the tube ‘’ RDV_Campagne-herbes’’
- Edit - Copy- Activate your work -Edit - Paste as a new layer
- Move Tool / place your tube at the bottom of your image
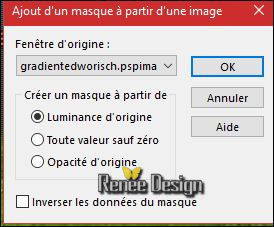
38. Layers- New Mask Layer From Image and select Mask ‘’masque
_gradientedworisch’’
- Layers- Merge-Merge Group
39.Activate the Pick Tool/Deformation tool (K)Mode Scale -Pull the Top Node down to 400 Pixels high as shown in the example below
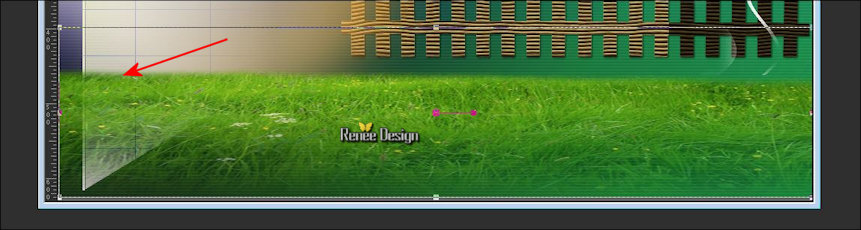
-
Hit the M key of your Keyboard to remove the Nodes
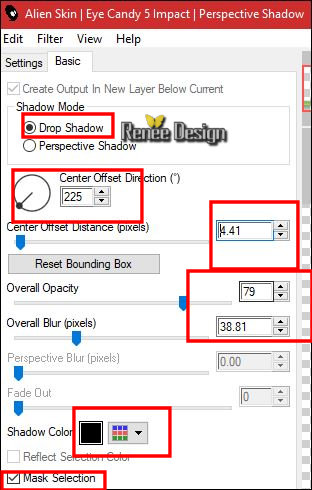
40. Effects
–Plugins –Eyecandy 5 impact – perspective
shadows with these settings
41. Open your tube ‘’ RDV_Campagne_mur_coin_gauche’’
- Edit - Copy- Activate your work -Edit - Paste as a new layer
- Move Tool / place your tube to the bottom left side of your image
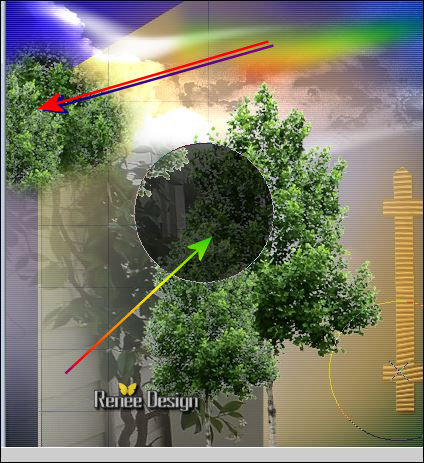
42. Activate your Clone Brush (C) use the settings below

- A clone source is an area of the image you want to copy to cover up another area. To select the clone source, right-click with your mouse and a circle will appear around the area. ( she is circled black on capture )
- Next, click the part of the image you want to cover over.
-Here is the result (the result may be slightly different)
43.
Selections –load/save selection –load selection from disc and select my selection:‘’ RDV_campagne_5’’
DELETE

Selections- Deselect All
44. Adjust- Sharpness-Sharpen
45. Effects
– Plugins – Gittes plugins – Shadow (patched filter into the zip )
46. Open the tube ‘’‘’ RDV_Campagne_puit’’
- Edit - Copy- Activate your work -Edit - Paste as a new layer
- Move Tool / place your tube to the left side of your image
47. Effects
– Plugins – Adjust variation – Lighter ( you can choose another option for this filter )
48. Effects- 3D Effects- Drop Shadow with these settings -12/-8/85/35 color black
49. Layers- New Raster Layer
50.
Selections –load/save selection –load selection from disc and select my selection:‘’ RDV_campagne_6’’
51. Activate the Flood Fill Tool and fill the selection with #ffffff
Selections- Deselect All
52. Layers-Properties-Set the Opacity of this layer to 69%
53. Open your tube ‘’ RDV_Campagne-vespa.png’’
- Edit - Copy- Activate your work -Edit - Paste as a new layer
54. Effects- Image Effects- Offset with these settings:H = - 151 and V = -
108
55. Open your tube ‘’ RDV_Campagne-corde_a_linge.png’’ Edit - Copy- Activate your work -Edit - Paste as a new layer
- Move as shown in the example below
56. Layers-Arrange- Move Down
- To replace the top of the layers palette
57. Open the tube ‘’RDV_Campagne-arbre.png’’
- Edit - Copy- Activate your work -Edit - Paste as a new layer
58. Effects- Image Effects- Offset with these settings: H = 250 and V =
100
59. Effects- 3D Effects- Drop Shadow with these settings 1/1/85/2 color black
60. Open the tube ‘’linge ‘’ (you have several tubes in this folder -choose the linen you want to hang on the clothesline)
61. Open the tube ‘’ Renee_TUBES_A_la_campagne.pspimage’’
- Edit - Copy- Activate your work -Edit - Paste as a new layer and move
62. Open your
tube ‘’RDV_campagne-cochon2 (or other choice)
-Edit - Copy- Activate your work -Edit - Paste as a new layer and move
63. Layers- New Raster Layer
64.
Selections –load/save selection –load selection from disc and select my selection:‘’ RDV_campagne_7’’
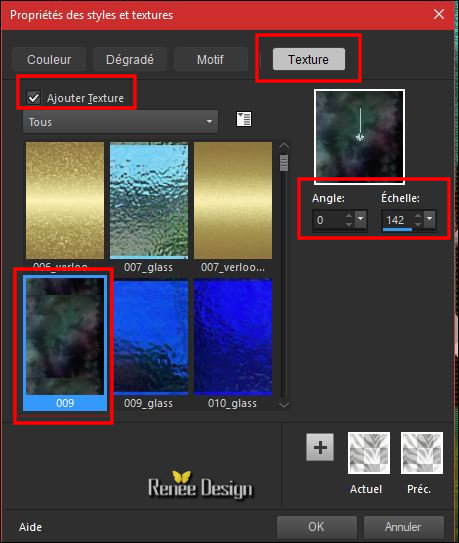
- Properties foreground:put in foreground the texture -select my file in the list- 009 '' or '' mauera '' to choose.
Configured like this
65. Activate the Flood Fill Tool and fill the selection with the foreground/texture
66. Effects
–Plugins – Mura’s Meister/ Perspective Tilling using the default settings
67. Effects- Edge Effects-Enhance
68. Adjust- Blur- Gaussian Blur: Radius 2
Selections- Deselect All
Reposition your pig as needed
69. Layers-Merge- Merge Visible
70. Image - Add borders-Symmetric checked 1 Pixel color black
71. Image - Add borders-Symmetric checked 20 Pixels color white
72. Image - Add borders-Symmetric checked 2 Pixels color black
73. Image - Add borders-Symmetric checked 50 Pixels color white
74. Open the tube Text/ Ore write your Text
75. Image
Resize to 1005 Pixels width.
Save as JPG
I hope you enjoyed this lesson
Renée
This lesson was written by Renée 30/11/2017
Edited and Update
2017
*
Any resemblance with an existing lesson is a coincidence
* Do not forget to thank the people who work with us and for us I have appointed the tubeurs and translators
Thanks
*
| 
 Translations


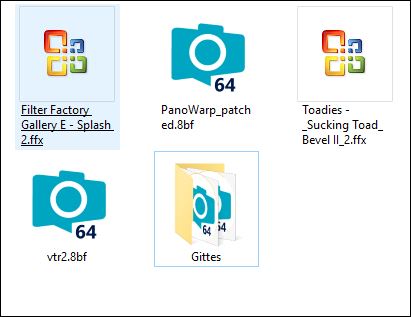


 If a plugin supplied appears with this icon it must necessarily be imported into Unlimited *