|
Let's start the lesson.
-
Color Palette- Set your foreground color to #ffd55d
- Set your background color to #a28a72
1.
File: Open a new transparent image of 1005 x665 pixels
2.
Activate Flood Fill Tool and fill the layer with the background color
-
Color Palette-; Set your Foregroundcolor to foreground-background rectangular gradient configured like this
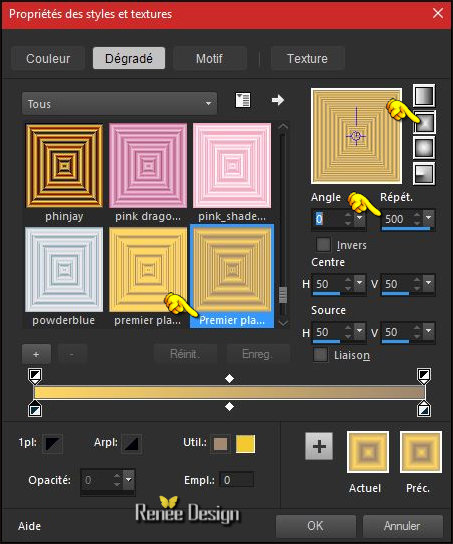
3.
Layers - New Raster Layer
-
Activate Flood Fill Tool and fill the layer with the gradient
4.
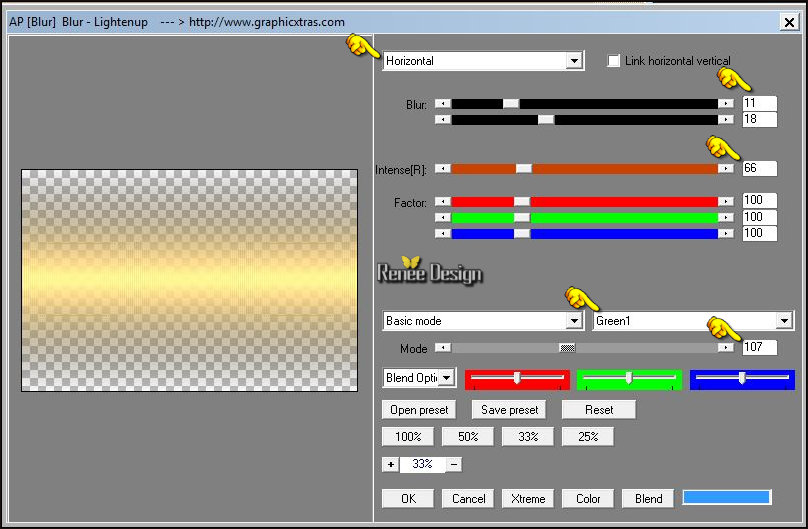
Effects -Plugins AP[Blur] Blur- Lightenup with these settings
( old version is the 09 in the list of AP filters)
5.
Effects- Edge Effects- Enhance
-
Double click on this Layer and set the Blend Mode to " Hard Light "
6.
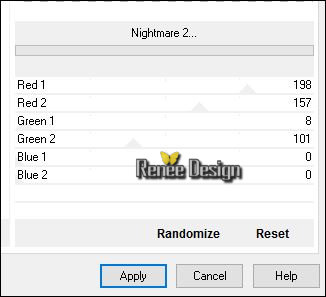
Effects –Plugins- Unlimited2.0 - Andrew's Filters 11-Nightmare
2..use settings below.
7.
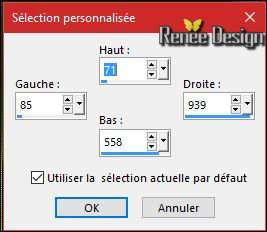
Activate Selection Tool -Custom Selection (S) -Rectangle with these settings 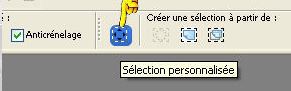
-
Selections- Promote selection to layer
8.
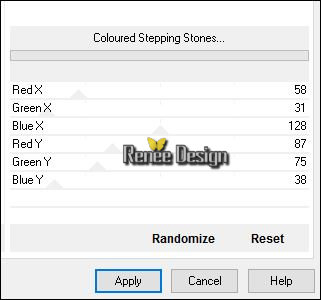
Effects –Plugins- Unlimited 2.0 - Andrew's Filters 11- Coloured
Stepping Stones...
Selections- Deselect All
9. In the Layer-Palette: activate the layer underneath = Raster 2
10.
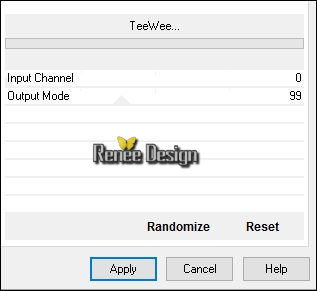
Effects –Plugins- Unlimited 2.0 - VM Experimental
-TeeWee...
- To replace the top of the layers palette
11. Open the tube ‘’ Renee_tube_pluie_automne_1’’
- Edit/ Copy-Back to your work -Edit - Paste as new layer on your working image
12. Effects- Image Effects- Offset with these settings: H = 145 and V = 45 /
transparent
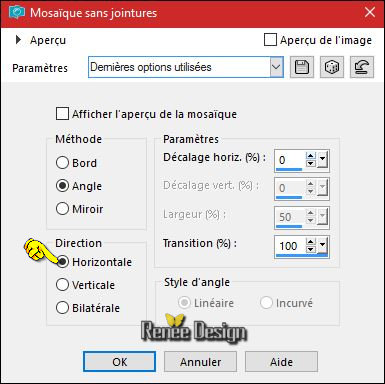
13. Effects-Image Effects- Seamless Tiling use settings below (Is not obliged)
- Layer palette – Make Raster 1 active
14. Layers- Duplicate
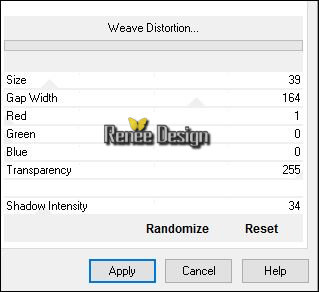
15. Effects
–Plugins - Unlimited 2.0- VM Natural- Weave Distortion..use settings below.
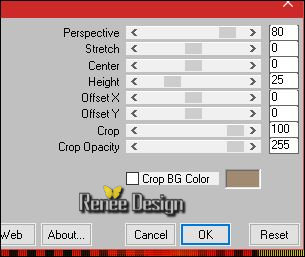
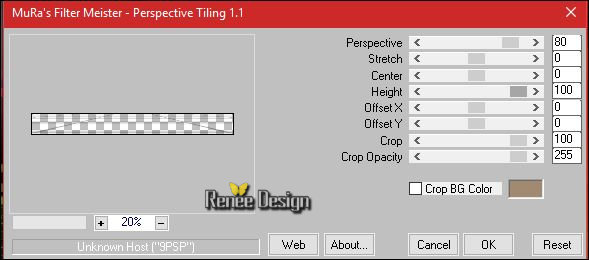
16. Effects
–Plugins–Mura’s Meister – Perspective Tilling
(Backgroundcolor )
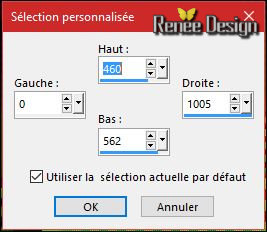
17.
Activate Selection Tool -Custom Selection (S) -Rectangle with these settings
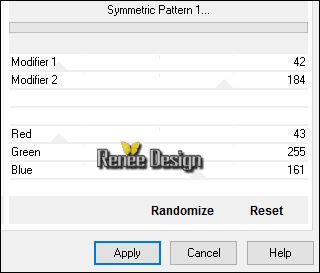
17b.
Effects -Plugins- Unlimited2.0- Johann's Filters- Symmetric Pattern
1...-
Keep Selected
18.Layers- New Raster Layer
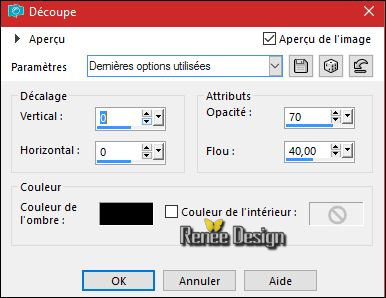
19.Effects- 3 D Effects- Cutout with these settings
20. Effects
–Plugins- Mura’s Meister – Perspective Tilling
Selections- Deselect All
21. Layers- Arrange- Bring to Top
Double click on this Layer and set the Blend Mode to " Darken"
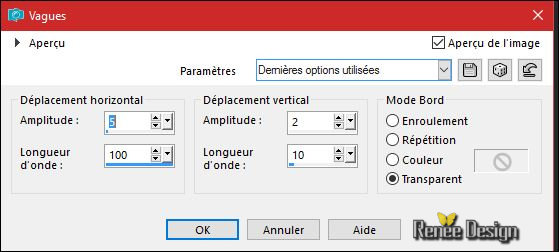
22. Layers- Duplicate
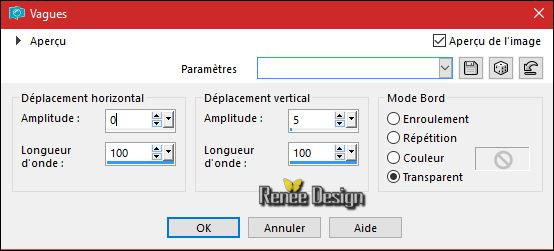
23. Effects- Distortion Effects- Wave with these settings
24. Layers- Merge- Merge Down
25. Open the tube ‘’ Renee_tube_pluie_automne_2.pspimage’’
- Edit/ Copy-Back to your work -Edit - Paste as new layer on your working image .(do not move it is in the right place)
- Double click on this Layer and set the Blend Mode to " Screen"
26. Open the tube ‘’ ARBRE-AUTOMNE’’
- Image
Resize to 65%
- Edit/ Copy-Back to your work -Edit - Paste as new layer on your working image
27. Effects- Image Effects- Offset with these settings: H = 294 and V = -
159
28.
Effects –Plugins – Final Impact – Hot
shot
(In part "Tint " you choose the color matched to your work )

29. Layers- New Raster Layer
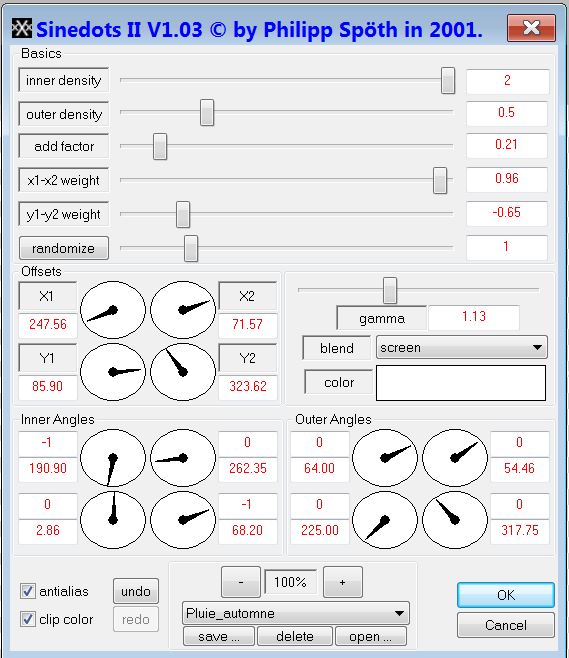
30. Effects
- Plugins – Dragon Fly – Sinedots II/ ‘’Preset
''Pluie_automne.cfg’’
1= Click open /click on the arrow>> and select my file-‘’Preset
''Pluie_automne.cfg’’ can be used in any folder of your choice by clicking it. -3 Open it will be ok in your filter
Or manual settings as shown in the example below
31.
Effects – Plugins – Flaming Pear – Flood- Preset ‘’
Renee_Pluie_automne_Flood settings.q8r’’
I will now show you how to proceed >>
click on the red arrow>>  >> and select my file-preset ‘’ Renee_Pluie_automne_Flood settings.q8r’’ can be used in any folder of your choice by clicking it. -3 Open it will be ok in your filter >> and select my file-preset ‘’ Renee_Pluie_automne_Flood settings.q8r’’ can be used in any folder of your choice by clicking it. -3 Open it will be ok in your filter 
Or manual settings as shown in the example below

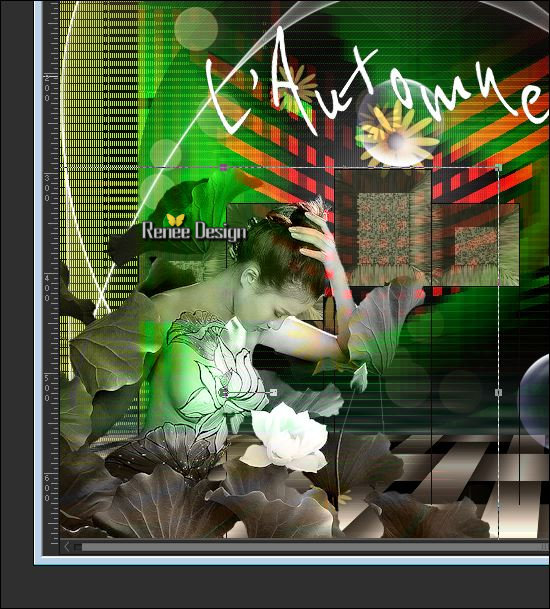
32. Open the tube ‘’ Renee_tube_pluie_automne_4.pspimage’’
- Edit/ Copy-Back to your work -Edit - Paste as new layer on your working image
- With the Move Tool, move it in the bottom right corner (near the foot of Tree )
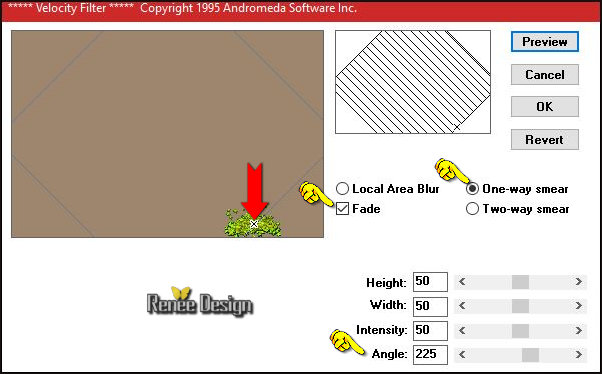
33. Effects
–Plugins– Andromeda – Velocity
(
Slide the mouse cross to the image
let there be no protruding.
The filter does not work outside the image. )
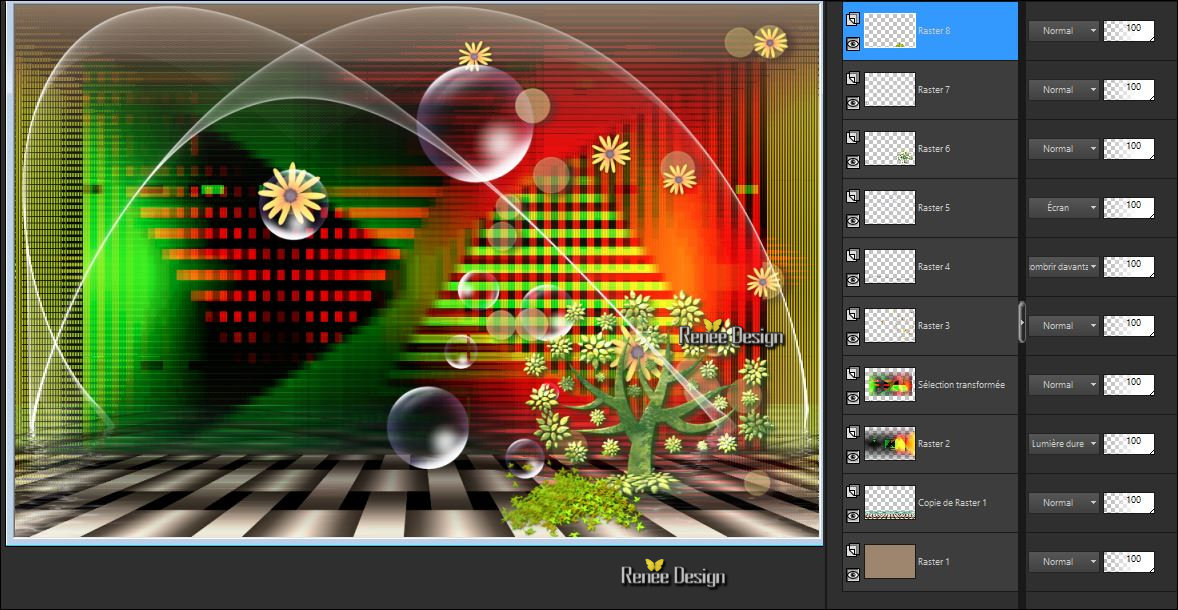
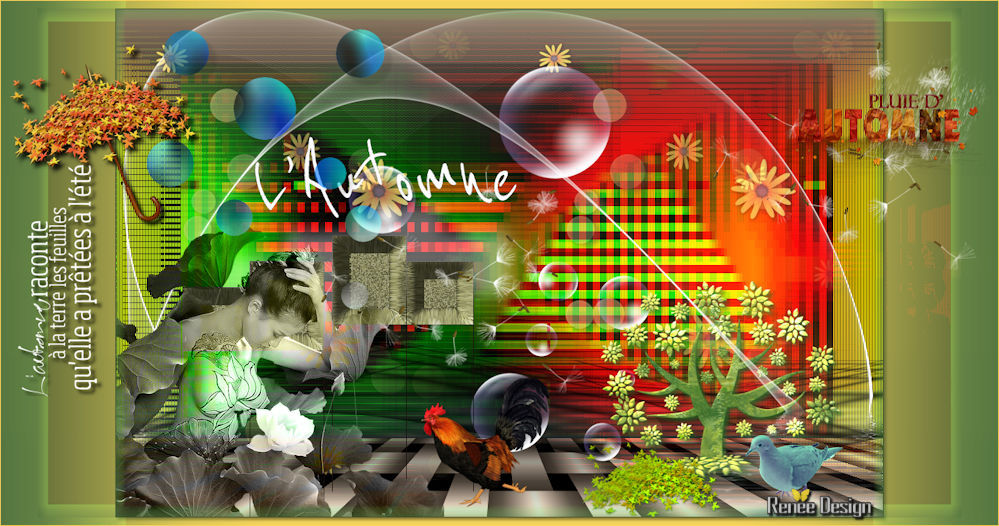
- Your work and Layer Palette look like this now-You should have this result
34. Open the tube ‘’ Renee_tube_pluie_automne_3.pspimage’’
- Edit/ Copy-Back to your work -Edit - Paste as new layer on your working image
- Move as shown in the example below
35. Effects
– Distortion Effects – Wave use settings below
36. Open the tube ‘’ Renee_tube_pluie_automne_5.pspimage’’
- Edit/ Copy-Back to your work -Edit - Paste as new layer on your working image
- With the move tool, move it in the bottom right
37.
Layers- Merge - Merge Visible
- Color Palette- Set your foreground color to #19110f
38. Layers- New Raster Layer
39.
Selections –load/save selection –load selection from disc and select my selection: ‘’Pluie_automne’’
40. Activate Flood Fill Tool and fill the selection with the foreground color
#19110f (zoom in if necessary )
Selections- Deselect All
41. Layers - New Raster Layer
42.
Selections –load/save selection –load selection from disc and select my selection: ‘’Pluie_automne_1’’
- Color Palette- Set your foreground color to #ffffff
43.Pot of Paint: Change the opacity of the color at 30%- Activate Flood Fill Tool and fill the selection with the foreground color #ffffff
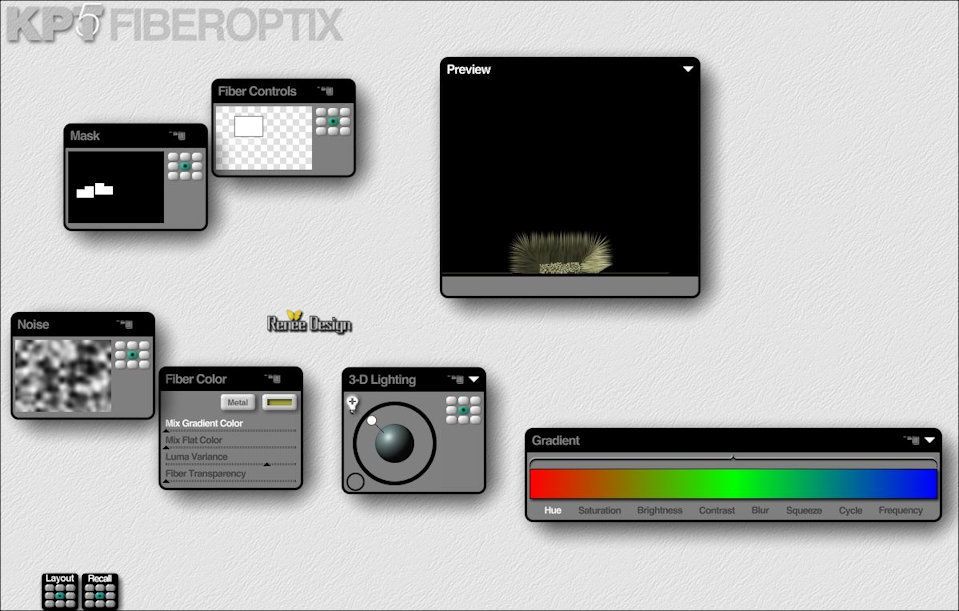
44. Effects
–Plugins - KPT 5- Fiber Optix with the default settings
(
If your filter does not give the same result
-The effect is included with the material" png image '' and paste into selection)
Selections- Deselect All
45. Effects
– 3D Effects –Drop Shadow use settings below -Color #ffffff
46. Open the tube ‘’ Renee_tube_automne’’
- Image
Resize to 495 pixels high
- Image
Mirror(CTRL+B)
- Edit/ Copy-Back to your work -Edit - Paste as new layer on your working image
- With the Move Tool, move it to the bottom left corner
47. Layer Palette -Double click on this layer and set the Blendmode to " luminance-(Legacy)"
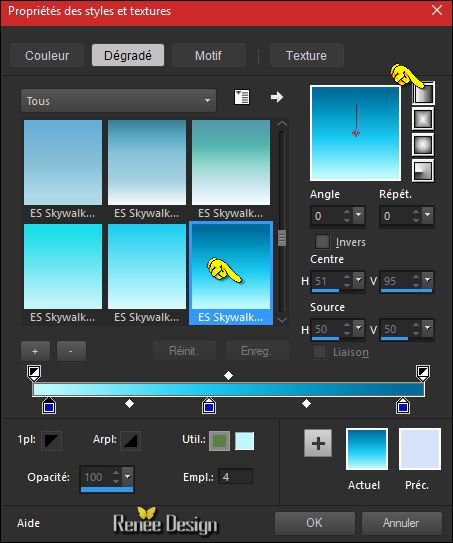
-Color-Palette ;
Change foreground material into gradient and select ‘’ ES Skywalker
33 »Style-linear with these settings
48.Layers- New Raster Layer
49.
Selections –load/save selection –load selection from disc and select my selection: ‘’Pluie_automne_2’’
Pot of Paint: Change the opacity of the color at 60%
-Activate Flood Fill Tool and fill the selection with the gradient
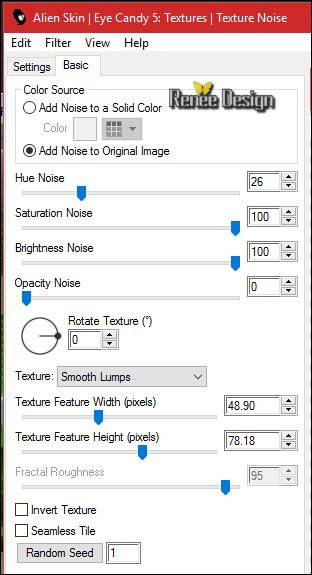
50. Effects
–Plugins – EyeCandy 5 Texture/ Texture Noise -tab Settings/User settings choose my Preset
‘’ Renee_TextureNoise_pluie_automne.f1s’’
Selections- Deselect All
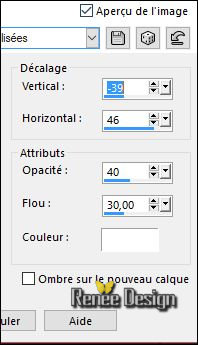
51. Effects – 3D Effects –Drop Shadow with these settings 10/10/18/6 black
52. Open the tube Renee_tube_pluie_automne_6.pspimage and Renee_tube_pluie_automne_7.pspimage
- Edit/ Copy-Back to your work -Edit - Paste as new layer on your working image
- and move what you like
53. Image - Add borders-Symmetric checked: 1 pixel #19110f
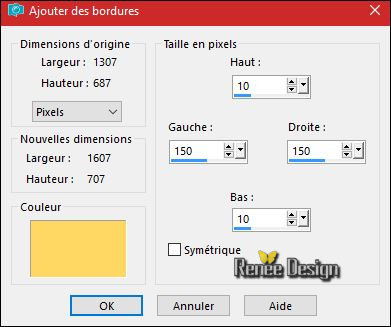
54.
Selections- Select All
55. Image - Add borders-Symmetric NOT checked with these settings-Color #ffd55d
56. Effects – 3D Effects –Drop Shadow with these settings 3/3/45/6 black
57.
Selections- Invert
-
Promote selection to Layer
Keep Selected
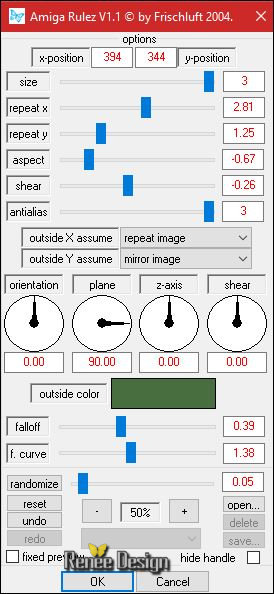
58. Effects
–Plugins – Frischluft- Amiga Rulez –use settings below -color #486d3e
- Color Palette- Set your foreground color to #ffd55d - Set your background color to #a28a72
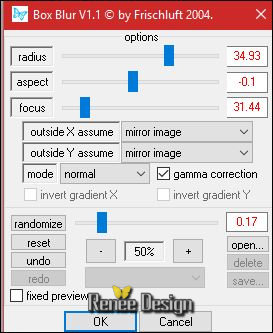
59. Effects
–Plugins – Frischluft- Box Blur use settings below
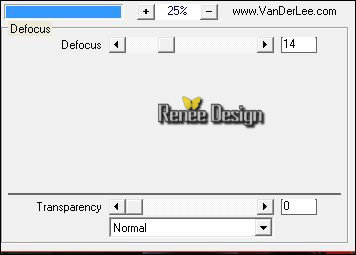
60. Effects
–Plugins – Vanderlee – Unplugged X –
defocus
Selections- Deselect All
61. Open the tube ‘’ Renee_tube_pluie_automne_8’’
Edit/ Copy-Back to your work -Edit - Paste as new layer on your working image
- With the Move Tool, Place the top left
62. Open the tube ‘’ Renee_tube_pluie_automne_7’’
Edit/ Copy-Back to your work -Edit - Paste as new layer on your working image
- Move Tool / Place the top right
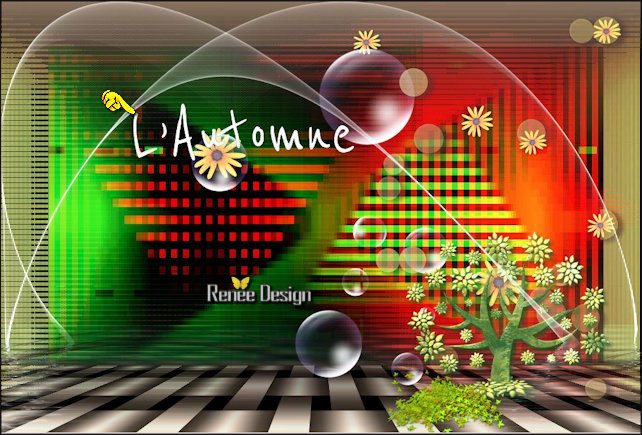
63.Open the
tube ‘’ titre_pluie_automne’’
- Edit/ Copy-Back to your work -Edit - Paste as new layer on your working image
With the Move Tool, Place the top left
64. Image - Add borders-Symmetric checked: 1 pixel #ffd55d
Image
Resize to 999 pixels width
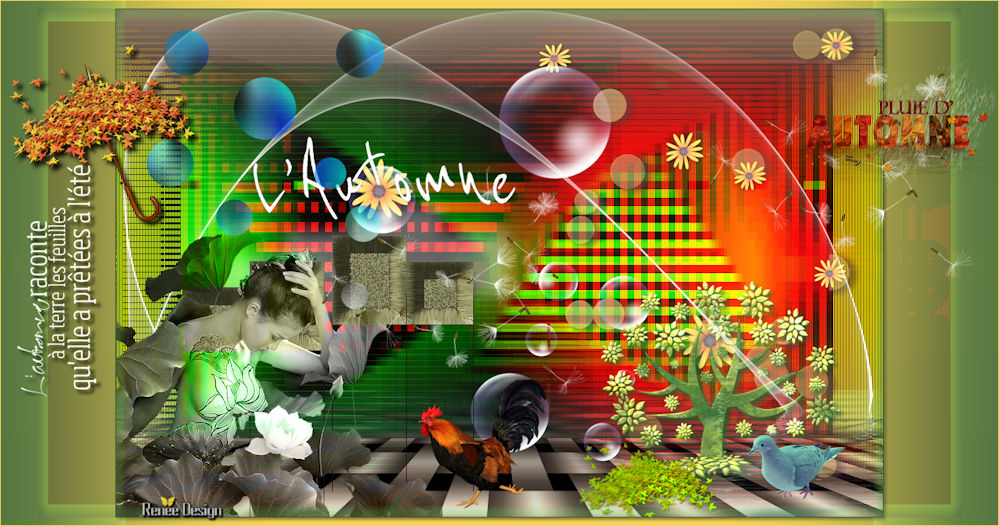
Save as JPG
I hope you enjoyed this lesson
Renée
This lesson was written by Renée
20/08/2016
Edited and Update
2016
*
Any resemblance with an existing lesson is a coincidence
* Do not forget to thank the people who work with us and for us I have appointed the tubeurs and translators
Thanks Renée *
*
| 

 Translations


 If a plugin supplied appears with this icon it must necessarily be imported into Unlimited

 All rights reserved