|
Let's start the lesson.
Pow- Wow-Pop ART
-
Preparation
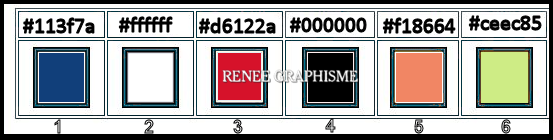
- Material Properties: Set your foreground color to color #113f7a=1 – Set your background color to color #ffffff= 2
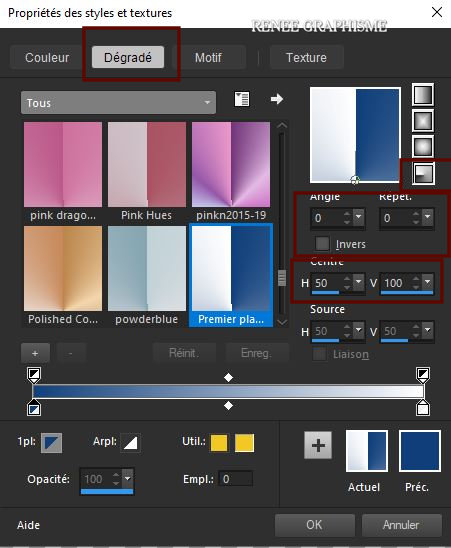
- Set your Foregroundcolor to foreground-background radial gradient configured like this
1. File: Open a new transparent Image of 1005 x 670
2. Flood Fill Tool
 –
Fill the layer with the gradient –
Fill the layer with the gradient
3.
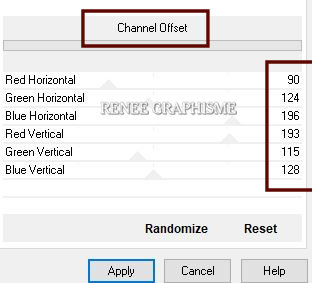
Effects -Plugins - Unlimited 2.0 - Alf's Power
Toys - Channel Offset use the settings below
4. Effects -Plugins -Unlimited 2.0
- Alf's Power
Toys -Tangent Waves..with these settings: 165 / 118
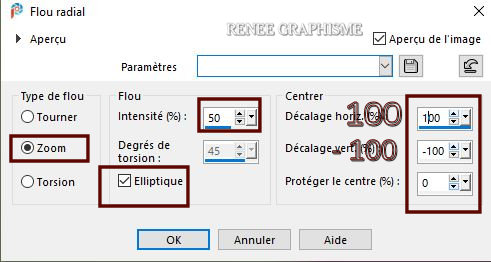
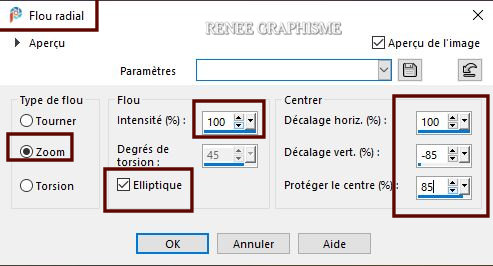
5. Adjust- Blur-Radial Blur use the settings below
6. Effects-Edge Effects- Enhance More
7. Layers- New Raster Layer
8.
Selections –load/save selection –load selection from disc and select my selection: ‘’Pow-
Wow-Art 1’’
- Material Properties: Set your foreground color to color #d6122a=3
9. Flood Fill Tool
–
Fill the selection with the foreground color #d6122a=3
Selections- Deselect All
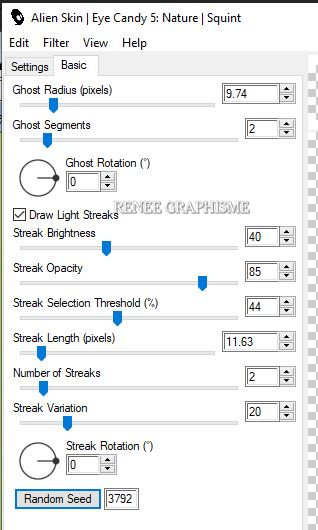
10. Effects- Plugins – Alien skin EyeCandy 5 Nature- Squint –Tab- Settings- User Settings and select my file-–Preset :
Renee_Squint-POPART
Or manual settings as shown in the example below
11. Layers- New Raster Layer
12. Flood Fill Tool
-
fill the layer with the background color #ffffff=2
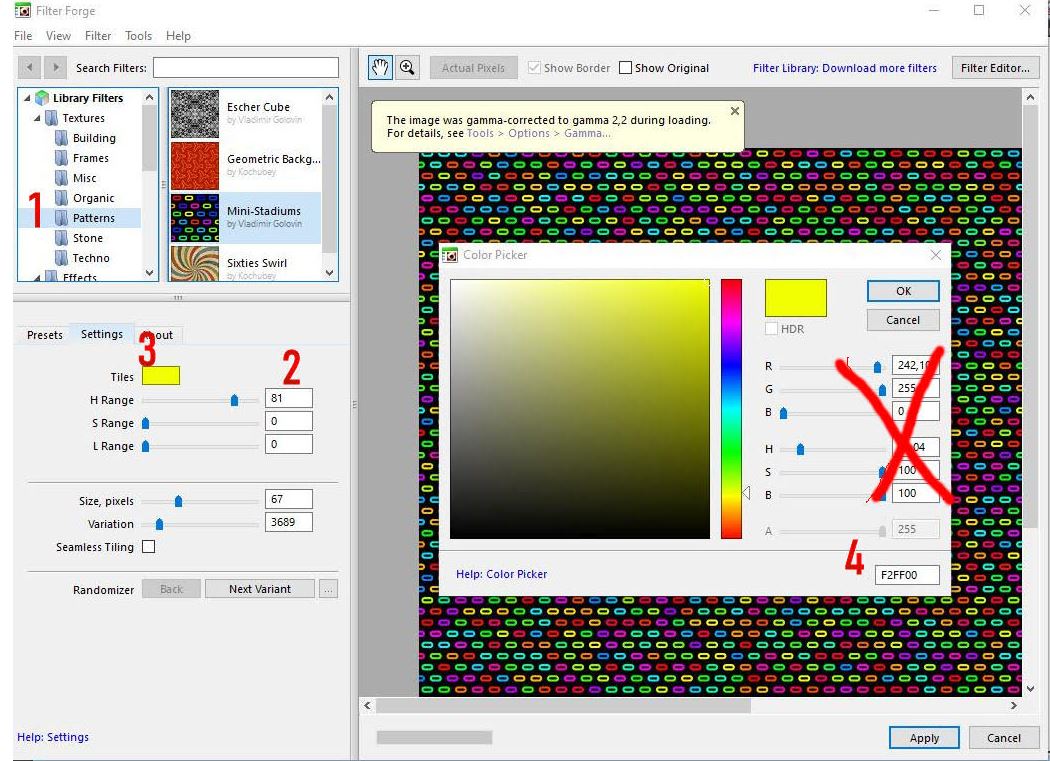
13. Effects – Plugins- Filter Forge
Explanation !!!
Click Pattern on the left
Then first set the settings correctly (important)
Left click on "Tiles" with the color,
a window opens
At the bottom right, set the color to # f2ff00
Don't look at these settings there !!!
Then OK and apply

14. Selections –load/save selection –load selection from disc and select my selection: ‘’Pow-
Wow-Art 2’’
15. Selections - Invert
DELETE
Selections- Deselect All
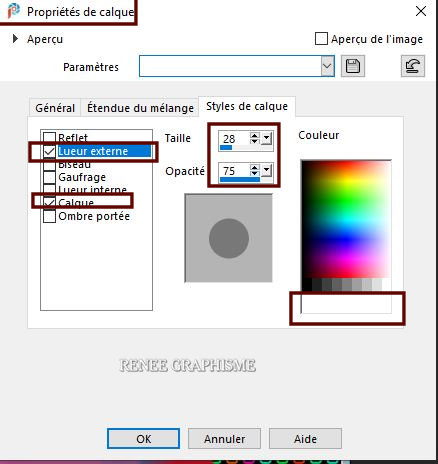
16. Layer Styles click here to open the menu click on the small blue logo

Or-Layers- Layers- Properties-Layer Styles use the settings below -Color White
17. Open the tube ‘’ReneeTUBE-Pow- Wow-Pop ART- 0’’ -Edit - Copy- Activate your work -Edit - Paste as a new layer
18.Pick Tool (K)
Enter these parameters for the X: and Y: positions on the Toolbar
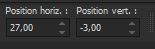 27 / -3
Press ( M ) to close the Pick Tool
19. Layers- New Raster Layer
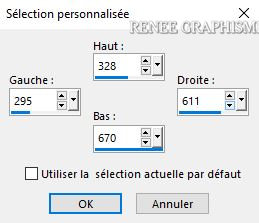
20. Activate Selection Tool -Custom Selection (S) -Rectangle with these settings

21.Open the tube
‘’ReneeTUBE-Pow- Wow-Pop ART- 1’’ -Edit - Copy- Activate your work -Edit - Paste into Selection
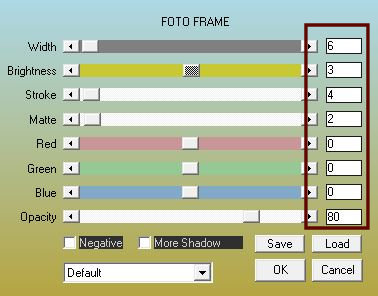
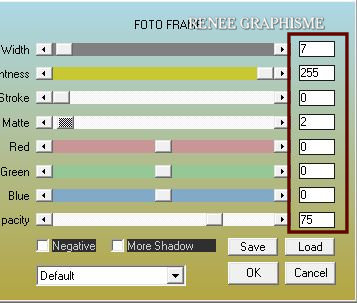
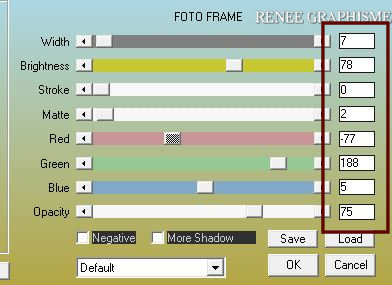
22. Effects – Plugins– AAA Frame
– Foto Frame use the settings below
Selections- Deselect All
23. Open the tube ‘’Mon tube deco partie 1.png’’ -Edit - Copy- Activate your work -Edit - Paste as a new layer
-Or Decorate with tubes of your choice
Attention the tubes of the texts of this first part must be Horizontal Mirror because for Andromeda effect which will come later the text will be read correctly
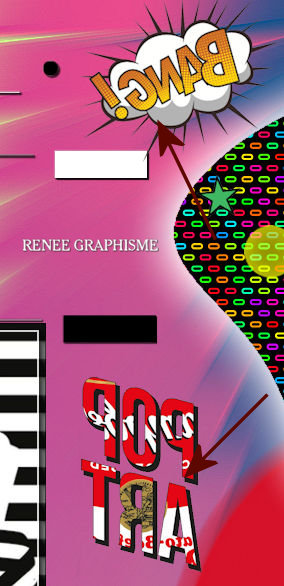
24. Layers- Merge- Merge Visible – Rename POP partie 1
Put the image aside for now, we will need it later
SECOND PART
25. File: Open a new Image of 1150 x 740
Pixels BLACK
26. Layers-New Raster Layer
27. Selections -Select-All
28.
Open the tube ‘’Pow-
Wow-Pop ART-image fond 2.’’ -Edit - Copy- Activate your work -Edit - Paste into Selection
Selections- Deselect All
29. Adjust- Blur-Radial Blur use the settings below
30. Layers-Properties-Change the Blend Mode to " Darken " and Lower the Opacity to 65%
Or the Blend Mode to " Normal " and Lower the Opacity to 30 %
(You can decide if you like how your work looks) Colors must be visible
31. Layers- Merge- Merge Down
32. Effects – Edge Effects -Enhance
- Repeat: Effects – Edge Effects -Enhance
33.
Effects -Plugins- Unlimited 2.0
– Two moon - Quilt... 153/170
34. Layers- New Raster Layers
35. Activate Selection Tool -Custom Selection (S) -Rectangle with these settings

- Material Properties: Set your foreground color to color #000000=4 – Set your background color to color #ffffff=2
36. Flood Fill Tool
- Fill the selection with the foreground color #000000=4
37. Effects – Plugins– AAA Frame – Foto Frame use the settings below
Selections- Deselect All
38. Effects - Plugins- Unlimited 2.0
- &<Bkg Designer sf10 I>- Cruncher 9/ 9
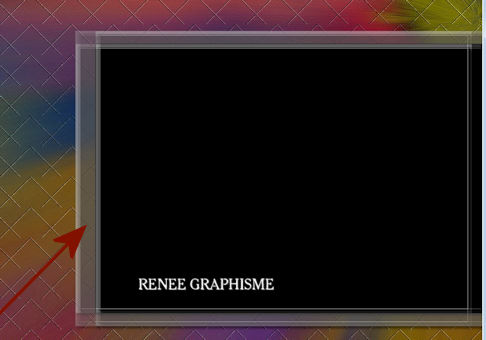 (
If it is too dark, reduce the layer opacity as shown in the screen above) (
If it is too dark, reduce the layer opacity as shown in the screen above)
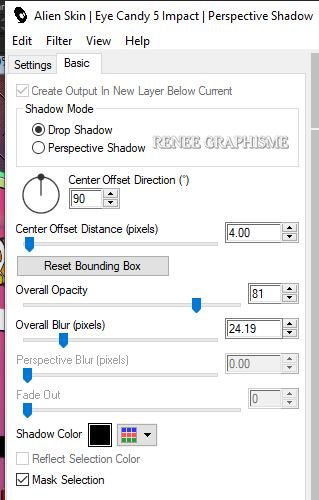
39. Effects – Plugins – Alien Skin Eye candy 5
Impact – Perspective shadow- Select-Drop shadow Low
- Material Properties: Set your foreground color to color #d6122a=3 – Set your background color to color #000000=4
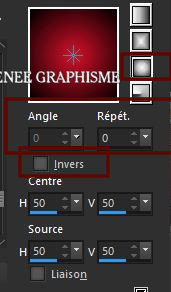
40. Set your Foregroundcolor to foreground-background sunburst gradient configured like this
41. Layers- New Raster Layer
42. Selections –load/save selection –load selection from disc and select my selection: ‘’Pow-
Wow-Art 3’’
43. Flood Fill Tool
–
Fill the selection with the gradient
44. Adjust- Blur- Gaussian Blur: Radius 45
Selections- Deselect All
45. Effects – Plugins – Alien
skin EyeCandy 5 Impact- Perspective shadow-Tab- Settings- User/Settings and select my file preset :
Renee_Shadow-POPART
46.
Layers- New Raster Layer
47. Selections –load/save selection –load selection from disc and select my selection: ‘’Pow-
Wow-Art 4’’
48. Material Properties: Set your foreground color to color #ffffff=2
Flood Fill Tool
- Fill the selection with the foreground color #ffffff=2
Selections- Deselect All
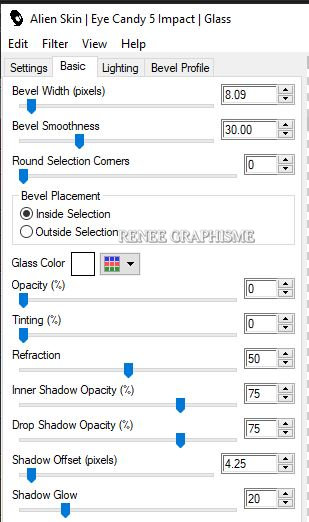
49. Effects -Plugins – Alien Skin
EyeCandy 5 Impact – Glass use the settings below
50.Effects- 3 D Effects- Drop Shadow with these settings: 10/ - 3/ 85
/ 22 Color Black
51. Layers- New Raster Layer
52.
Selections –load/save selection –load selection from disc and select my selection: ‘’Pow-
Wow-Art 5’’
53. Flood Fill Tool
-
Fill the selection with the foreground color #ffffff=2
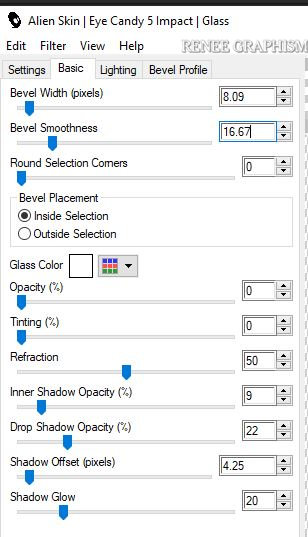
54. Repeat - Effects -Plugins-Alien Skin EyeCandy -
Glass- But change the settings !!
55. Effects- 3 D Effects- Drop Shadow with the same settings
If you want to write your own text
Renée choose the "Cambria" font. The font is included in the material.
Selections- Deselect All
56.
Open the tube ‘’textes pour tuto Pop art’’ - Edit - Copy- Activate your work -Edit - Paste as a new layer
57.
Pick Tool (K)
Enter these parameters for the X: and Y: positions on the Toolbar
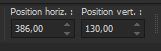 386 / 130
Press ( M ) to close the Pick Tool
- Layer palette – Make Raster 3 active
58. Layers- New Raster Layer
59. Selections –load/save selection –load selection from disc and select my selection: ‘’Pow-
Wow-Art 6'’
60. Material Properties: Set your foreground color to color #f18664=5
Flood Fill Tool
–
Fill the selection with the foreground color #f18664=5
Selections- Deselect All
61. Effects
-Plugins- Unlimited 2.0
- VM Extravaganza -
Transmission... 26 /0 106
62. Lower the Opacity to 53%.
63. Effects – Distortion Effects-Vent :
Wind Strength=100 -Wind direction= Right
- Repeat once with the same settings
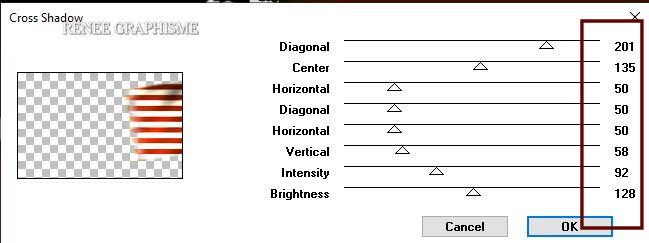
64. Effects – Plugins – Graphic
plus – Cross Shadow use the settings below
65. Open the tube ‘’ Renee_TUBES_POP_ART_femme’’- Edit - Copy- Activate your work -Edit - Paste as a new layer
Pick Tool (K)
Enter these parameters for the X: and Y: positions on the Toolbar
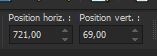 721 / 69
- Your work and Layer Palette look like this now-You should have this result

- Activate the Top of the Layer Palette
66. Open the tuben Pop 1 /Po 2 and Pop 3 - Edit - Copy- Activate your work -Edit - Paste as a new layer
Or use the tubes from the folder (reserves tubes) Or other tubes to your liking (Resize the tube if necessary)
- Place the decorative elements individually according to your taste
- Activate the bottom layer in the Layer Palette= Raster 1
67. Layers- Duplicate
68. Effects – Distortion Effects –
Polar Coordinates / Polar to Rectangular
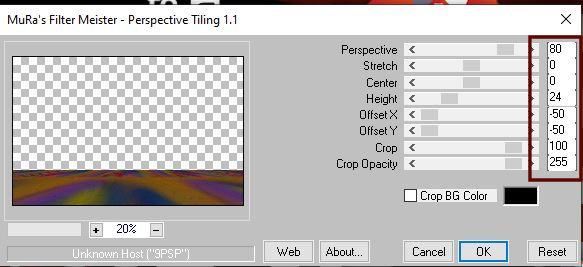
69. Effects – Plugins – Mura’s
Meister – Perspective Tiling use the settings below
70. Effects – Plugins– Graphic
plus - Cross Shadow with the same settings
71. Activate your Magic Wand-Feather 28
- Click in the part on top
72. DELETE
10 times
Selections- Deselect All
73. Layers- Merge- Merge Visible
74. Activate your minimized image of point 24 (POP partie 1) On this picture !!
75. Image - Add borders-Symmetric checked 2
Pixels Color Black
76. Image - Add borders-Symmetric checked 20
Pixels Color #ceec85=6
77. Effects – Plugins - AAA Frame
-Foto frame use the settings below
78. Edit - Copy !!!! - Activate your work (original) -Edit - Paste as a new layer
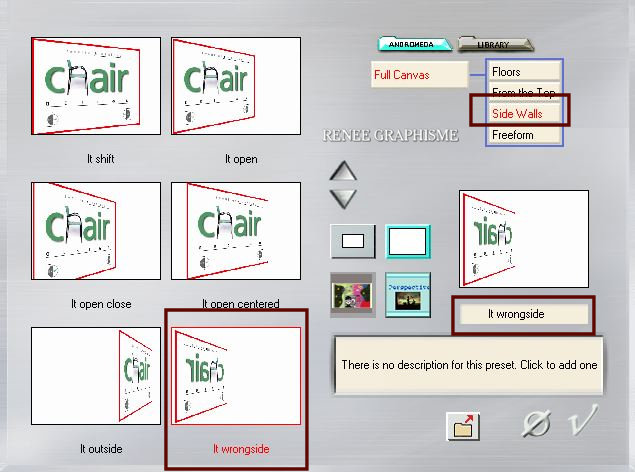
79. Effects – Plugins -
Andromeda - Perspective use the settings below
80. Objects - Align -Left
81. Effects – Plugins – Alien
Skin Eyecandy 5 Impact – Perspective Shadowuse the settings below
82. Open the tube ‘’ Tube- Renee- OH_POPART’ -Edit - Copy- Activate your work -Edit - Paste as a new layer
- Place against the bottom edge
83.
Image - Add borders-Symmetric checked 1
Pixel Color Black
Image - Add borders-Symmetric checked 40 Pixels
Color White
Image - Add borders-Symmetric checked 1 Pixel
Color BLack
Image - Add borders-Symmetric checked 20 pixels
Color White
84. Activate Text Tool - Renée choose Font ‘’Capacitor’
(The font is included in the material) use the settings below -With a Color or a Gradient (step 40) at your choice
Apply your Text Tool on your tag and write: Pow-Wow-Pop ART

85.Effects- 3 D Effects- Drop Shadow with these settings: 1/1/100/1
Color Black
- Activate your Move Tool (M) move it in the right place (see finished image )
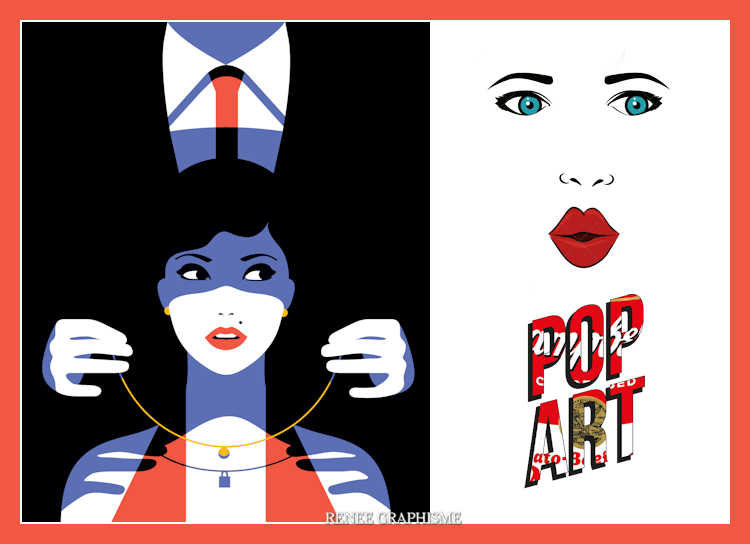
86. Layers- Merge- Merge All (flatten)
87. Image - Resize to 1005 Pixels width
Save as JPG
I hope you enjoyed this lesson
Renée
This lesson was written by Renée 25-09-2020
Edited and Update
2020
*
Any resemblance with an existing lesson is a coincidence
*
Do not forget to thank the people who work with us and for us I have appointed the tubeurs and translators
Thanks
*
|

 Translations