|
Let's start the lesson.
-
Preparation
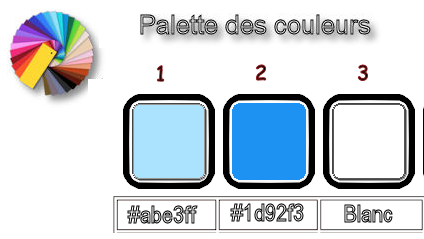
- Material Properties: Set your foreground color to #abe3ff= Nr1 - Set your background color to # 1d92f3 = Nr 2
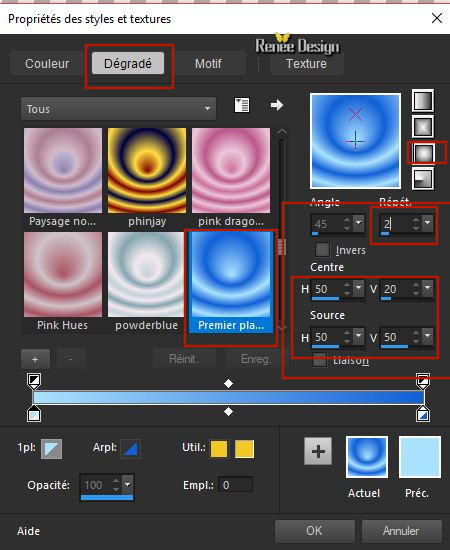
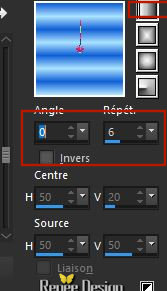
- Properties foreground:Prepare a sunburst gradient configured like this.
1. File: Open a new transparent Image 1105 x 695 pixels
2.
Activate Flood Fill Tool
 – Flood Fill the Layer with this gradient
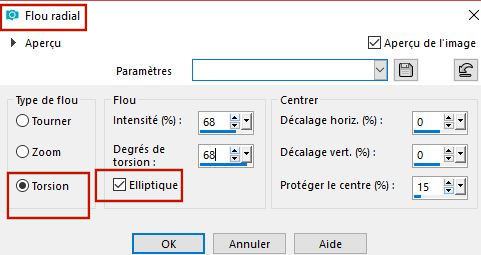
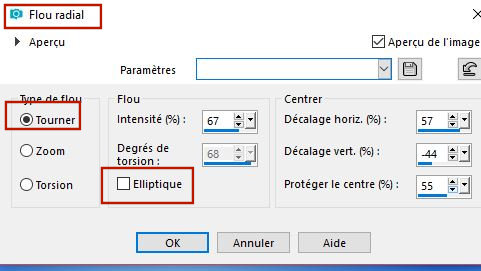
3. Adjust- Blur-Radial Blur use the settings below
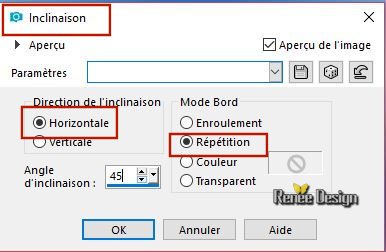
4.Effects- Geometric Effects -Skew with these settings
Material of the foreground: change your sunburst gradient into a linear gradient
configured like this
5. Layers- New Raster Layer
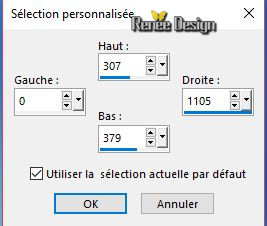
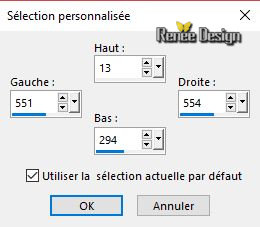
6. Activate Selection Tool -Custom Selection (S) -Rectangle with these settings
7.
Activate Flood Fill Tool
–
Flood Fill the selection with the gradient
Selections- Deselect All
8. Effects –Plugins – Toadies – What are you: 0/29
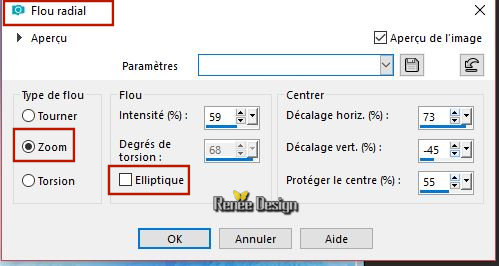
9. Adjust- Blur-Radial Blur use the settings below
10. Layers-Properties-Set the Blend Mode to " Hard Light "
11. Layers- Duplicate
12. Image - Mirror - Mirror Horizontal (Image - Mirror in older versions of PSP)
13. Layers- Merge- Merge Down
14. Effects- Image Effects- Offset with these settings : H = 0 and V = - 85
15. Activate the tube ‘’ SCORESBYSUND_Image1’’
- Edit - Copy- Activate your work -Edit - Paste as a new layer
16. Objects - Align- Top
17. Activate the tube ‘’ SCORESBYSUND_Image2.pspimage’’
- Edit - Copy- Activate your work -Edit - Paste as a new layer
18. Effects- Image Effects- Offset with these settings : H =38 and V = 74
19. Layers- New Raster Layer
- Properties Foreground: Set the FG-Color to #ffffff
20.
Selections –load/save selection –load selection from disc and select my selection: ‘’
SCORESBYSUND_1’’
21.
Activate Flood Fill Tool
–
Flood Fill the selection with #ffffff ( two clicks )
Selections- Deselect All
22. Activate the tube ‘’ SCORESBYSUND_Image3.pspimage’’
(the size of the tube is correct)
- Edit - Copy- Activate your work -Edit - Paste as a new layer
23. Objects – Align -Bottom
24. Layers- Duplicate
25. Layers- Merge - Merge Down
26. Activate the tube ‘’ SCORESBYSUND_Image4.pspimage’’
- Edit - Copy- Activate your work -Edit - Paste as a new layer (do not move it is in the right place )
27. Adjust- Blur-Radial Blur use the settings below
28. Effects - Plugins- Unlimited 2.0-ICNETFILTERS - Render- Color Clouds: 217
29. Effects- Edge Effects- Enhance
30. Activate the tube ‘’ SCORESBYSUND-ville’’
- Edit - Copy- Activate your work -Edit - Paste as a new layer
31. Effects- Image Effects- Offset with these settings : H = 0 and V = 137
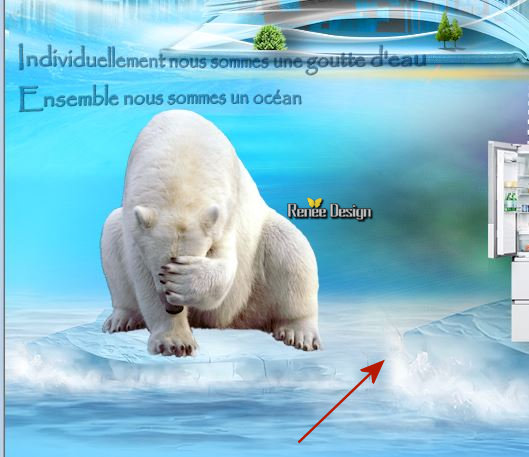
32. Activate the tube ‘’ SCORESBYSUND-livre-ouvert’’
- Edit - Copy- Activate your work -Edit - Paste as a new layer
-Move as shown in the example below

- Set the Opacity of this layer to 91%
33. Layers- New Raster Layer
34. Activate Selection Tool -Custom Selection (S) -Rectangle with these settings
35. Activate Flood Fill Tool Flood Fill the selection with #ffffff
Selections- Deselect All
36. Effects –Plugins– Eyecandy 5 –Impact – Black light -Tab-Settings- User Settings and select my Preset ‘’ SCORESBYSUND-BL’’
37. Effects-Distortion Effects-Wind/Winddirection From right -Windstrength 50 %
38. Layers- New Raster Layer
39.
Selections –load/save selection –load selection from disc and select my selection: ‘’
SCORESBYSUND_2’’
40.
Activate Flood Fill Tool
–Flood Fill the selection with #ffffff ( two clicks )
Selections- Deselect All
41. Layers-Properties-Set the Blend Mode to " Hard Light "
42. Activate the tube ‘’ SCORESBYSUND-ville_Bleue.pspimage’’
- Edit - Copy- Activate your work -Edit - Paste as a new layer
- Activate your Move Tool (M) move it in the right place (see finished image )
43. Layers- Arrange - Move Down (placed under the open book =raster 9 )
- To replace the top of the layer-palette
44. Activate the tube ‘’ SCORESBYSUND_Arbres’’
- Activate raster 1 of the tube
45.Edit - Copy- Activate your work -Edit - Paste as a new layer
-Activate your Move Tool (M) move it in the right place (see finished image )
- Attention !! Layers- Merge Merge Group !!!!
46. Effects- 3 D-Effects- Drop Shadow with these settings : 2/14/80/35 black
47. Layers- New Raster Layer
48.
Selections –load/save selection –load selection from disc and select my selection: ‘’
SCORESBYSUND_3’’
49.
Activate Flood Fill Tool
–Flood Fill the selection with #ffffff
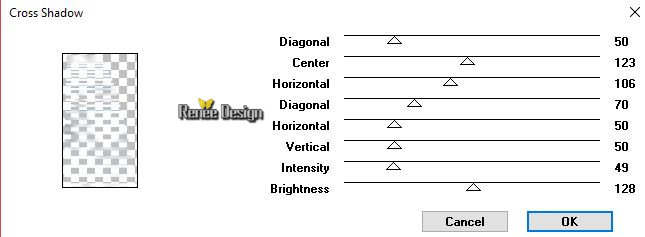
50. Effects – Plugins – Graphic plus - Cross shadow use the settings below
Selections- Deselect All
51. Effects- 3 D-Effects- Drop Shadow with these settings : 1/1/100/1 black
52. Activate the tube ‘’ SCORESBYSUND-Horloge’’
- Edit - Copy- Activate your work -Edit - Paste as a new layer
-Activate your Move Tool (M) place the tube at the top
- Activate the bottom of the layer-palette= Raster 1
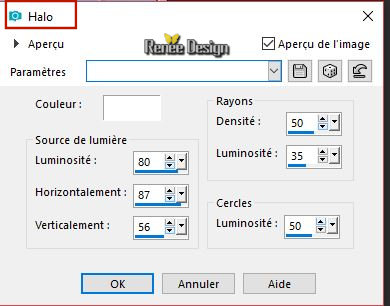
53. Effects- Illumination Effects-Sunburst use the settings below
- To replace the top of the layer-palette
54. Activate the tube ‘’SCORESBYSUND-texte’’
- Edit - Copy- Activate your work -Edit - Paste as a new layer
-Activate your Move Tool (M) place the tube to the left side
55. Activate the tube ‘’ SCORESBYSUND-pingouin’’
- Edit - Copy- Activate your work -Edit - Paste as a new layer
-Activate your Move Tool (M) place the tube to the bottom right corner
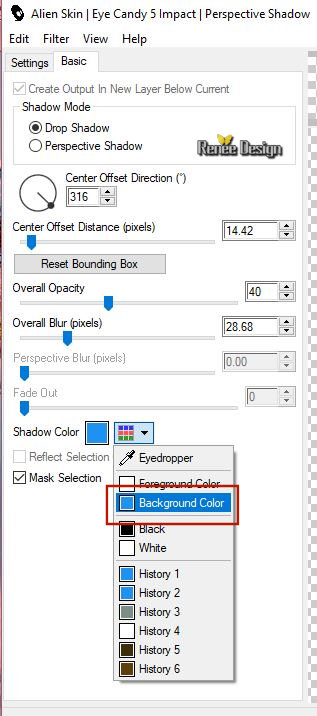
56. Effects – Plugins – Eye Candy 5 Impact – Perspective Shadow with these settings- BG-Color
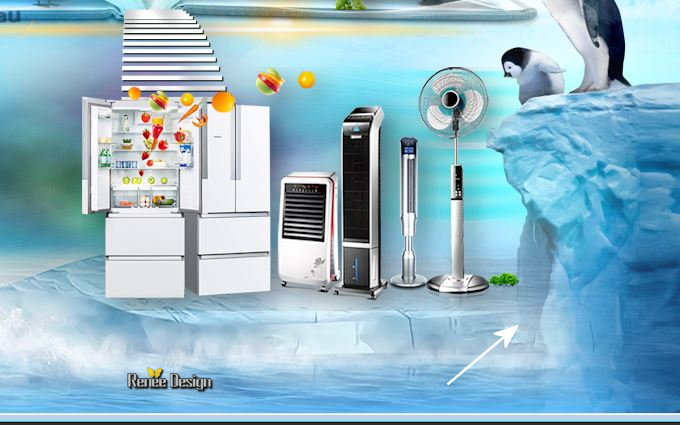
57. Activate the tube ‘’ SCORESBYSUND-electromenager’’
- Edit - Copy- Activate your work -Edit - Paste as a new layer
- Move as shown in the example below
58. Activate the tube ‘’ SCORESBYSUND-ohoh’’
- Edit - Copy- Activate your work -Edit - Paste as a new layer
-Move as shown in the example below
59. Activate the tube ‘’ SCORESBYSUND-glacons’’
- Edit - Copy- Activate your work -Edit - Paste as a new layer and move
60. Layers- New Raster Layer
61.
Activate Flood Fill Tool
–
Opacity 50% - Flood Fill the layer with #ffffff
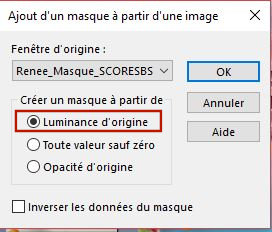
62. Layers- New Mask Layer -From Image and select mask
- Layers- Merge Merge Group
63. Effects- Edge Effects- Enhance
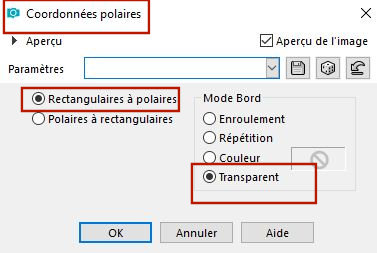
64. Effects- Distortions Effects-Polar Coordinates-Rectangular to Polar-Transparent
65. Layers-Properties-Set the Blend Mode to " Luminance "
66. Activate the tube ‘’ SCORESBYSUND-petits pingouins’’
- Edit - Copy- Activate your work -Edit - Paste as a new layer
- Place on the stairs
67. View - Toolbars - Script checked !! in your psp
Put the script in your script folder –restricted script from PSP
Activate toolbar Script, choose my file in the list ‘’Ocean ‘’
 click the little blue arrow and let the script run
Or manual settings as below
-1 pixel color #abe3ff = Nr.1
-10 pixels #ffffff
-2 pixels color #1d92f3 = Nr. 2
-45 pixels #ffffff
68. Activate the "titre"-Edit - Copy- Activate your work -Edit - Paste as a new layer and move
69. Layers- Merge- Merge All (flatten)
70. Image -Resize to 1005 Pixels width.
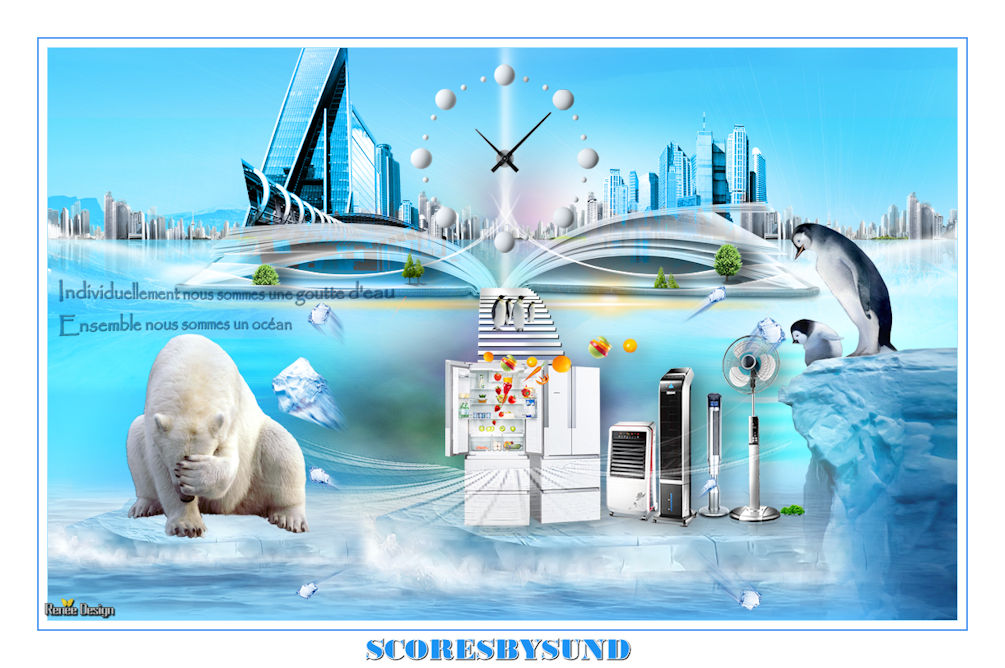
Save as JPG

I hope you enjoyed this lesson
Renée
This lesson was written by Renée 25 July 2018
Edited and Update
2018
*
Any resemblance with an existing lesson is a coincidence
*
Do not forget to thank the people who work with us and for us I have appointed the tubeurs and translators
Thanks
|

 Translations


 If a plugin supplied appears with this icon it must necessarily be imported into Unlimited *