|
Let's start the lesson
Sérénité
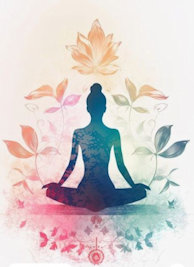
- Preparation
-Material Properties: Set your Foreground color to color #427e65=color 1–Set your Background color to color #040a06= 2

-
Replace your Foreground color with a Foreground/Background Radial Gradient configured like this
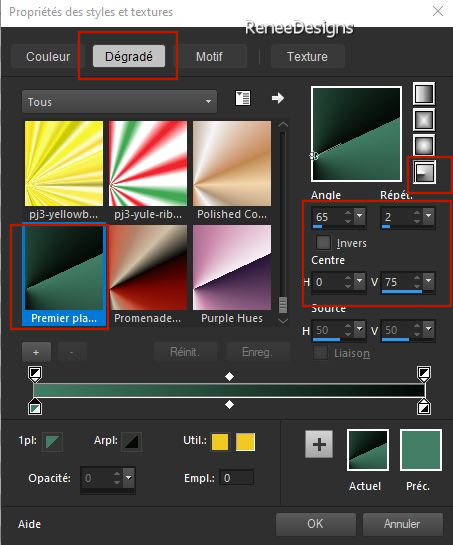
1.
File-Open a New Transparent Image in this size : 1050 x 750 Pixels– Raster 1
2. Flood Fill Tool
 –
Fill the layer with the Gradient –
Fill the layer with the Gradient
3.
Effects- Plugins - Filters in Unlimited 2.0 -
Filter Factory Gallery N – Circulator...using the default settings
4.
Layers – Duplicate
5.
Effects- Image Effects- Seamless Tiling using the default settings
6.
Effects- Plugins - AP[Lines] Lines -
Silverlining use the settings below
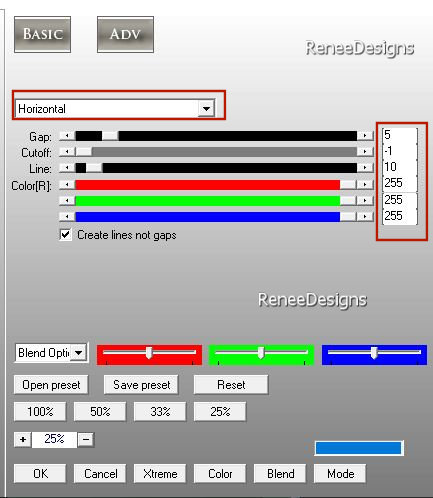
7.
Effects- Plugins - Filters in Unlimited 2.0 - Mock
– Windo using the default settings
- Activate the bottom of the Layer Palette (Raster 1)
8.
Layers- Arrange-Bring to Top
9.
Effects- Plugins - Filters in Unlimited 2.- Filter
Factory Gallery N – Yage: 19/194
10.
Effects- Used Defined Filter – Emboss 4 using the default settings
11.
Layers-Properties-Set the Blend Mode to " Luminance " -Reduce the opacity of this layer to
37%
- Activate the bottom of the Layer Palette (Copy of Raster 1)
12.
Effects – Plugins - Mirror Rave – Quadrant Flip
using the default settings
- Activate the top of the Layer Palette
-
Replace your Foreground color with a Foreground/Background Sunburst Gradient configured like this
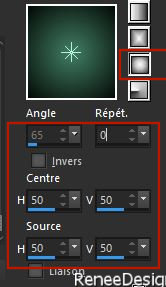
13.
Layers- New Raster Layer
14.
Flood Fill Tool
 –
Fill the layer with the Gradient –
Fill the layer with the Gradient
15.
Effects- Plugins - Filters in Unlimited 2.0 -
ICNET-Filters - Buttons & Frames - Rectangular Button with these settings:
100/117/40 - Outline checked
16.
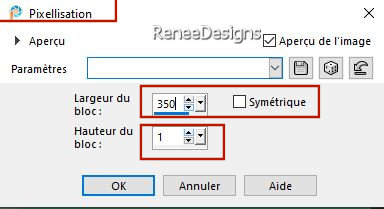
Effects –Distortion Effects– Pixelate use the settings below
17.
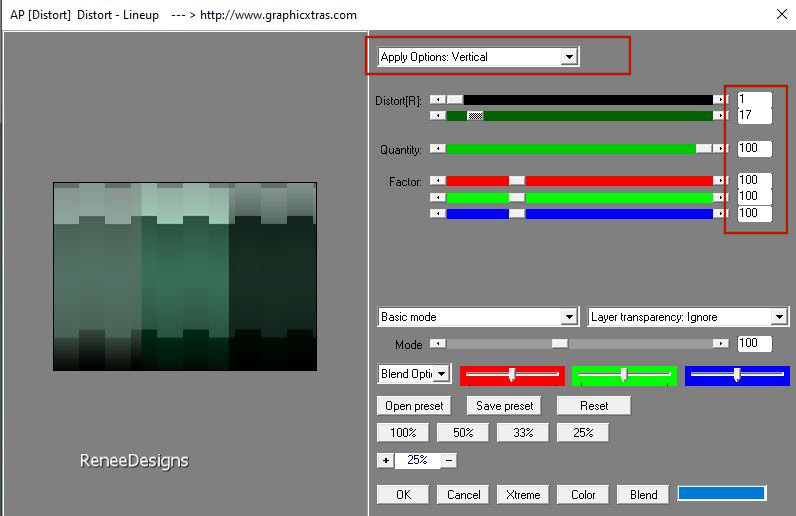
Effects- Plugins – AP [Distort] – Lineup use the settings below
18.
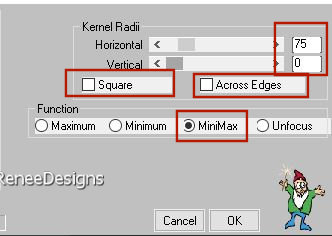
Effects – Plugins – FilterMeister – FM Sample :Min
I Max use the settings below
19.
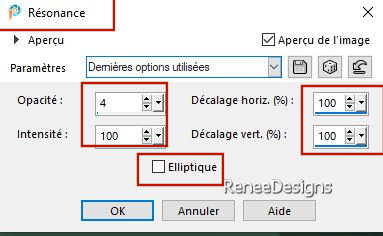
Effects- Reflection Effects -Feedback use the settings below
20.
Effects-Edge Effects-Enhance More
21.
Effects – Reflection Effects – Rotating Mirror using the default settings
22.
Effects – Plugins – Mura’s Meister – Perspective
Tiling use the settings below
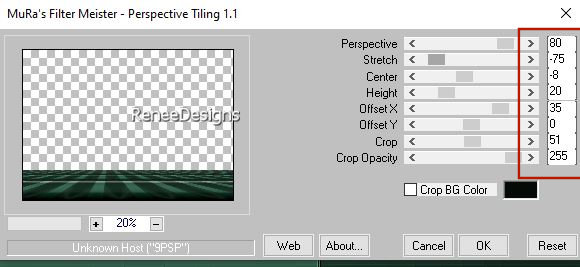
23.
Activate your Magic Wand – Feather 20 – Click in the upper empty area
 4 times

24.
Layers- New Raster Layer
25.
Selections –load/save selection –load selection from disc and select my selection: – ‘’Serenite-1’’
26.
Effects- 3D- Effects- Drop Shadow with these settings: 0/0/100/55 Color Black

27.
Effects- Image Effects- Seamless Tiling using the default settings
28.
Effects- Geometric Effects– Skew use the settings below
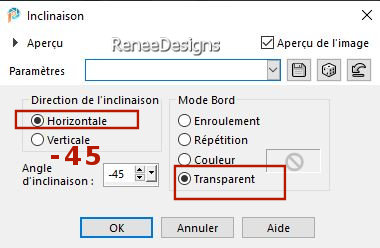
29.
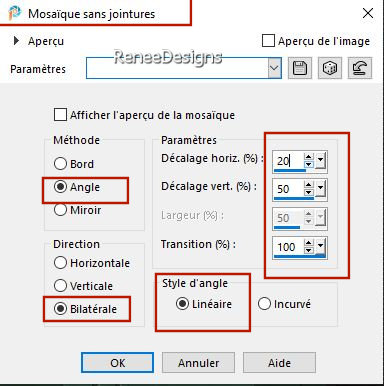
Effects- Image Effects- Seamless Tiling use the settings below
30.
Layers – Duplicate
31.
Image - Mirror - Mirror Horizontal (Image - Mirror in older versions of PSP)
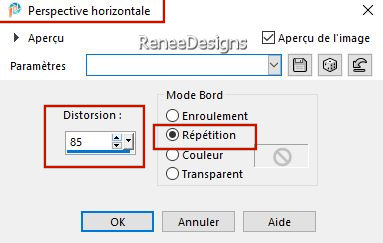
32.Effects- Geometric Effects – Perspective Horizontal use the settings below
-
Layers- Merge- Merge Down
33.
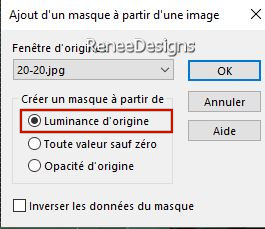
Layers- New Mask Layer-From Image and select Mask:- Masques 20/20
-
Layers- Merge- Merge Group
34.
Layers-Properties-Set the Blend Mode to " Hard Light "
35.
Open the tube ‘’Renee-Serenite-Image-1’’ - Edit - Copy- Activate your work -Edit - Paste as new layer
36.
Objects – Align - Left
37.
Layers- Duplicate
38.
Effects- Plugins - Filters in Unlimited 2.0 - &<Bkg
Kaleidoscope>- @Mirrored & Scaled
39.
Effects- Plugins - Filters in Unlimited 2.0 - &<Bkg
Kaleidoscope>-4 QFlip UpperL
40.
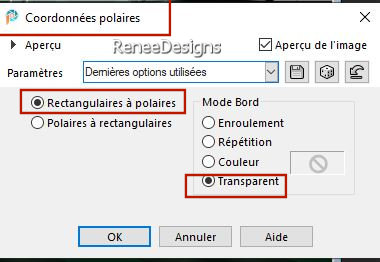
Effects-Distortion Effects-Polar Coordinates-Rectangular to Polar
41.
Image - Mirror - Mirror vertical ( Image - Flip in older versions of PSP)
42.
Selections –load/save selection –load selection from disc and select my selection: – ‘’Serenite-2’’


43.
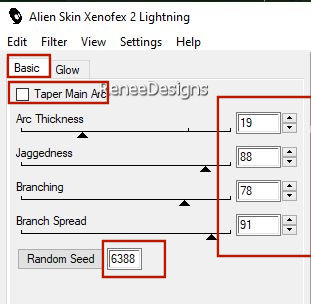
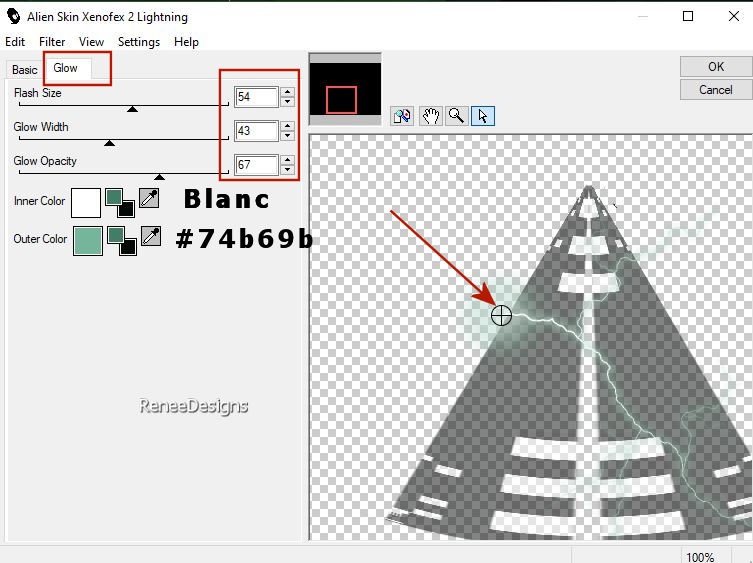
Effects –Plugins – Alien Skin – Xenofex 2-
Lightning use the settings below - Colors White and #75b59c
Tip: use your mouse to drag the circle to the right place
44.
Layers- Arrange- Move Down
- Activate the bottom of the layer palette – Copy of Raster 1
45.
Selections –load/save selection –load selection from disc and select my selection: – ‘’Serenite-3’’
46.
Selections – Promote Selection to Layer
47.
Layers- Arrange-Bring to Top
48.
Adjust- Blur-Gaussian Blur-Radius 50%
49.
Open the tube ‘’Serenite-paysage-2’’ (or another of your choice) -Edit - Copy- Activate your work -Edit - Paste into Selection

50.
Effects- Plugins – FM Tile Tools – Saturation
Emboss using the default settings
51.
Layers- Arrange- Move Down
- Activate the top of the layer palette( Raster 3)
52.
Effects- 3D- Effects- Drop Shadow with these settings:10/10/65/12 Color Black
53.
Layers- New Raster Layer
54.
Effects – Plugins– Dragon Fly – Sinedots II-
Preset :SERENITE
Place the preset 'SERENITE'' in the folder where your filter is in "Dragon Fly "SinedotII"
Click Open -find the preset ''SERENITE'' in the Dragon Fly filter folder !!!!!!!
OK
Or put in the settings manually
if problem -effect is
in the tube folder
file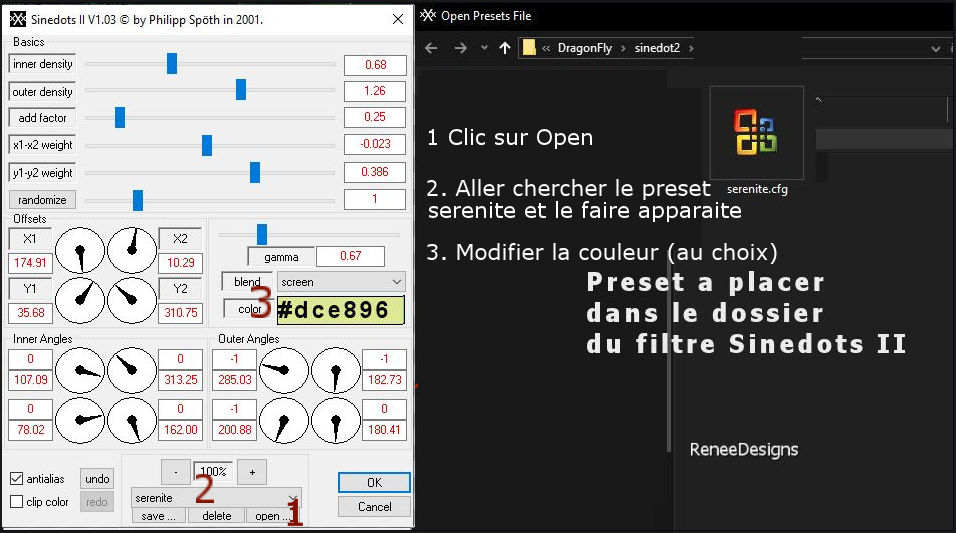
55.
Open the tube ‘’ Renee-TUBES-Avril-2024-12’’
-Activate ''Serenite-tuto'' of the tube (do not close, we need it soon)
–
Edit - Copy- Activate your work -Edit - Paste as new layer
56.
Pick Tool: (K) on your keyboard -Enter these parameters on the toolbar
 405
/ 47 405
/ 47
-
Press ( M ) to close the tool
57.
Layers- Arrange- Move Down
- Activate the top of the layer palette
58.
Layers- New Raster Layer
59.
Selections –load/save selection –load selection from disc and select my selection: – ‘’Serenite-4’’
60.
Flood Fill Tool
 -
Fill the selection with the Foreground color #427e65= 1 -
Fill the selection with the Foreground color #427e65= 1

61.
Effects- Plugins - Alien Skin EyeCandy 5 –
Impact – Glass – Clear using the default settings
-
Properties Foreground : Set your Foreground color to color #ffffff=4
62.
Activate Pen Tool – Line Style – ‘’Corel_13_020.PspStyledLine’’-
Size 6

-
Press your Shift button and draw a straight line (see example below)
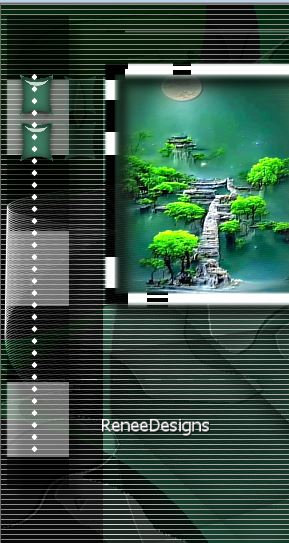
-
Convert vector to raster layer
- Activate Raster 6 in the layer palette
63. Layers – Duplicate– Put it in the right place (see finished image )(adjust your line placement if necessary)
-Activate the top of the layer palette
64.
Layers - Merge down 2 times
65.
Open the tube ‘’
Texte SERENITE’’ -Edit - Copy- Activate your work -Edit - Paste as new layer
Put it in the right place (see finished image )
66. Open the tube
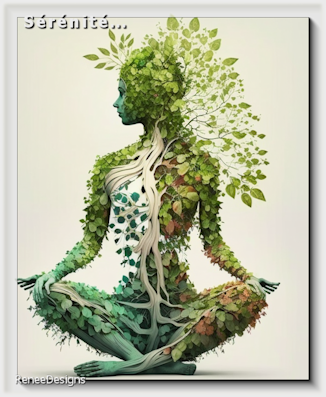
‘’Renee-Serenite-Image-2.’’ -Edit - Copy- Activate your work -Edit - Paste as new layer
67.
Pick Tool: (K) on your keyboard -Enter these parameters on the toolbar
 776 / 19
-
Press ( M ) to close the tool
- Open the tube of the character you are using for your creation (Point 55).
‘’Renee-TUBES-Avril-2024-12 ‘’
68.
Select this small piece from the tube
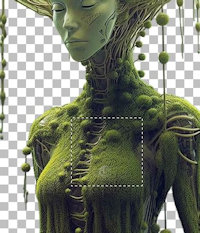
-
Edit - Copy- Activate your work -Edit - Paste as new IMAGE - Save this pattern as ‘’Motif-Serenite’’
69
Layers- New Raster Layer
70.
Selections –load/save selection –load selection from disc and select my selection: – ‘’Serenite-5’’
-
Material Properties- Open Foreground on Pattern - Locate your ''Motif-Serenité''
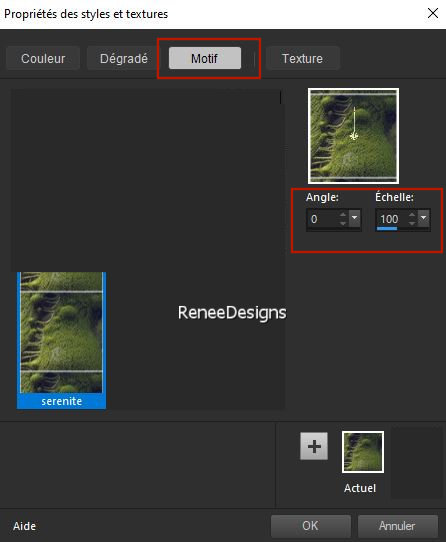
71.
Flood Fill Tool: Fill the selection with the pattern
72.
Effects- Used Defined Filter – Emboss 3 using the default settings
73.
Effects- 3D- Effects- Drop Shadow with these settings: 10/ -10 /65 /25 Color Black

- Activate the layer underneath( the white frames)
74.
Effects- Plugins - Filters in Unlimited 2.0 -
ICNET-Filters –Video – Interlace use the settings below
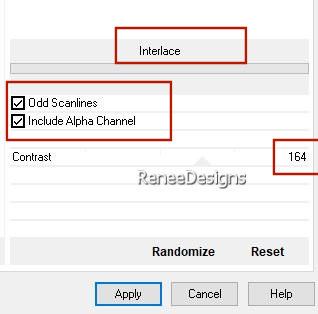
75.
Effects- 3D- Effects- Drop Shadow with these settings: 10/
-10 /65 /25 Color Black
76.
Activate the tube ‘’ Renee-TUBES-Avril-2024-11.’’
-
Image Resize 85 %
-
Edit - Copy- Activate your work -Edit - Paste as new layer
-
Move to the right side ( see finished image)
77.
Layers - Arrange -Move Down- Place above Raster 1
78.
Layers-Properties-Reduce the opacity of this layer to 57%
79.
Image - Add Borders-Symmetric checked: 1 Pixel -Color #cdd4dc=3
-
Image - Add Borders-Symmetric checked: 10 Pixels -Color #ffffff=4
-
Image - Add Borders-Symmetric checked: 5 Pixels -Color #040a06=2
-
Image - Add Borders-Symmetric checked: 40 Pixels -Color #ffffff=4
80.
Paste the author's watermark on your work and your own watermark
81.
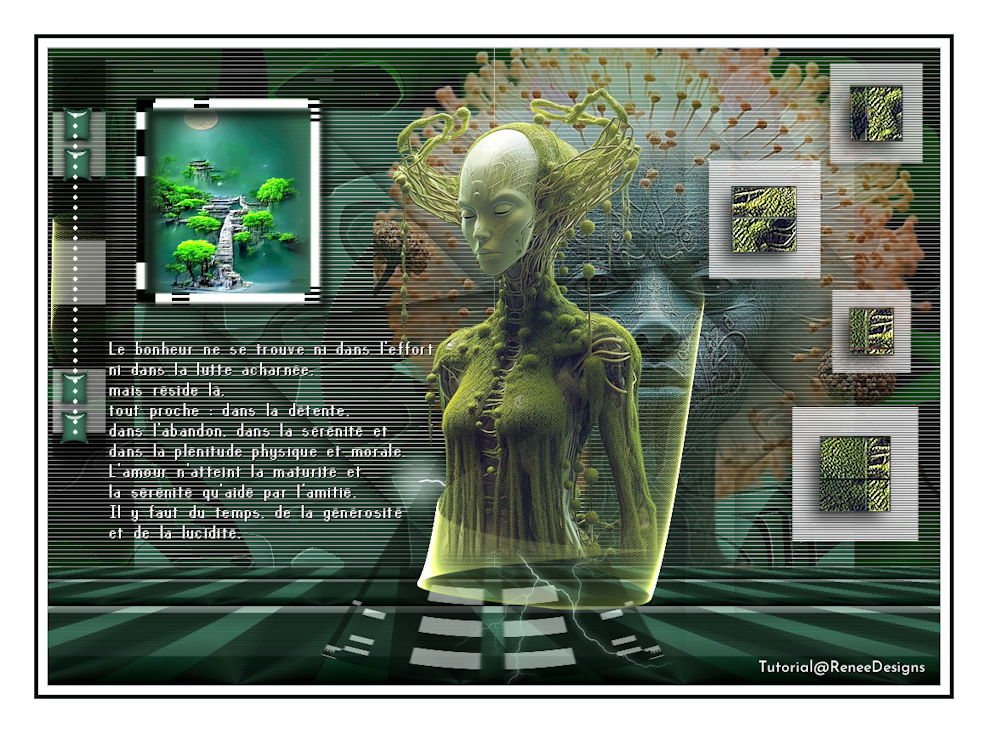
Layers- Merge- Merge All ( flatten)
82.
Image - Resize - to 90% - Resize all layers- checked
Save as JPG
I hope you enjoyed this lesson
Renée
This lesson was written by Renée 12/02/2024
Edited and Update
in 2024
*
*
Any resemblance with an existing lesson is a coincidence
* Do not forget to thank the people who work with us and for us - I have appointed the tubeurs and translators
Thanks
|
 Translations


